Crochet Cat Face Baby Headband Pattern with floral trim
The Adorable Crochet Cat Face Baby Headband Pattern turns a simple stitched strip into a playful kitten-inspired accessory. Pointed ears, a stitched nose, and delicate whiskers give the piece instant charm. Parents and gift-makers alike keep coming back to this design for its quick build and undeniable cuteness.
Baby headbands rarely combine speed with genuine character, but this cat design manages both. A basic band forms the base, while pointed ears and pink details bring the face to life without complicated shaping. As a piece of crochet animal headwear, it photographs beautifully for baby milestone shoots or seasonal gifting. Because it also works as a handmade baby accessory for shops, sellers often keep several colorways in rotation.
What Is This Pattern?
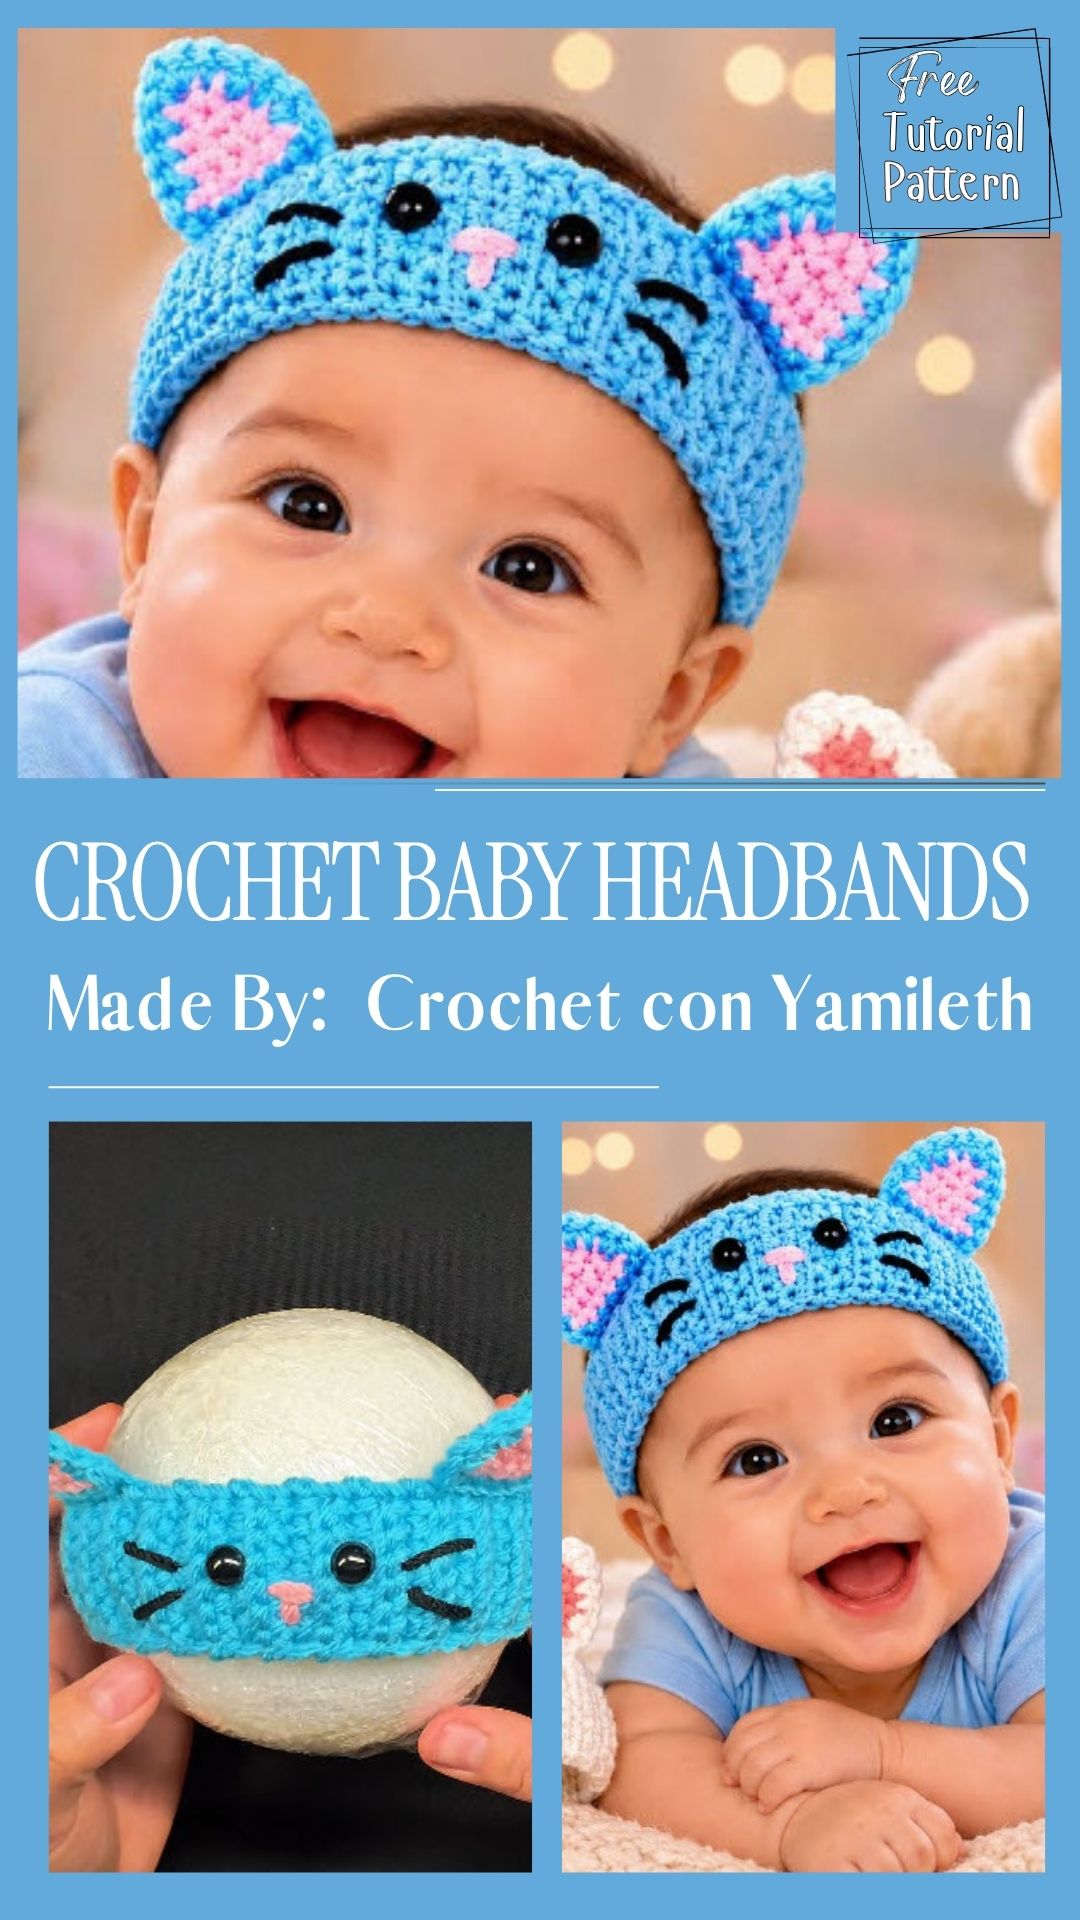
The Crochet Cat Headband Pattern creates a soft, stretchy band shaped to sit comfortably across a baby’s forehead. Two pointed ears attach along the top edge, each lined with a contrasting pink center. A small stitched nose, simple eyes, and whisker lines complete the kitten face. Meanwhile, the band itself stays flat and lightweight, so it never feels bulky against delicate skin. Overall, the design reads as cheerful rather than costume-like, which keeps it wearable well beyond a single photo session.
What Do You Need to Make It?
A short supply list covers the entire build:
- Worsted-weight yarn in the main headband color
- Small amounts of pink yarn for the ear centers and nose
- Black yarn or embroidery thread for the eyes and whiskers
- A crochet hook sized to the chosen yarn weight
- A yarn needle for seaming and embroidery details
- Small scissors
Since the piece uses minimal yardage, leftover scraps from other baby projects often work perfectly here.
What Skills Does It Require?
This Crochet Cat Headband Pattern relies on beginner-level techniques throughout. Single crochet, basic seaming, and simple embroidery make up the bulk of the process. Consequently, anyone comfortable holding a hook and threading a yarn needle can follow along confidently. Attaching the pointed ears and stitching the face details introduce a small amount of precision work, though neither step demands advanced experience. Most crocheters pick up the technique within their first attempt.
How Long Does It Take?
Most makers finish this headband in under two hours. Because the band itself works up quickly in a simple stitch pattern, the bulk of the time goes toward the ears and face details. Embroidering the whiskers and nose often takes the most patience, since small, even stitches matter for a clean look. Beginners should budget closer to two hours, while experienced crocheters may finish in significantly less time.
What’s the Process Like?
The steps below follow the exact build shown in the reference photos.
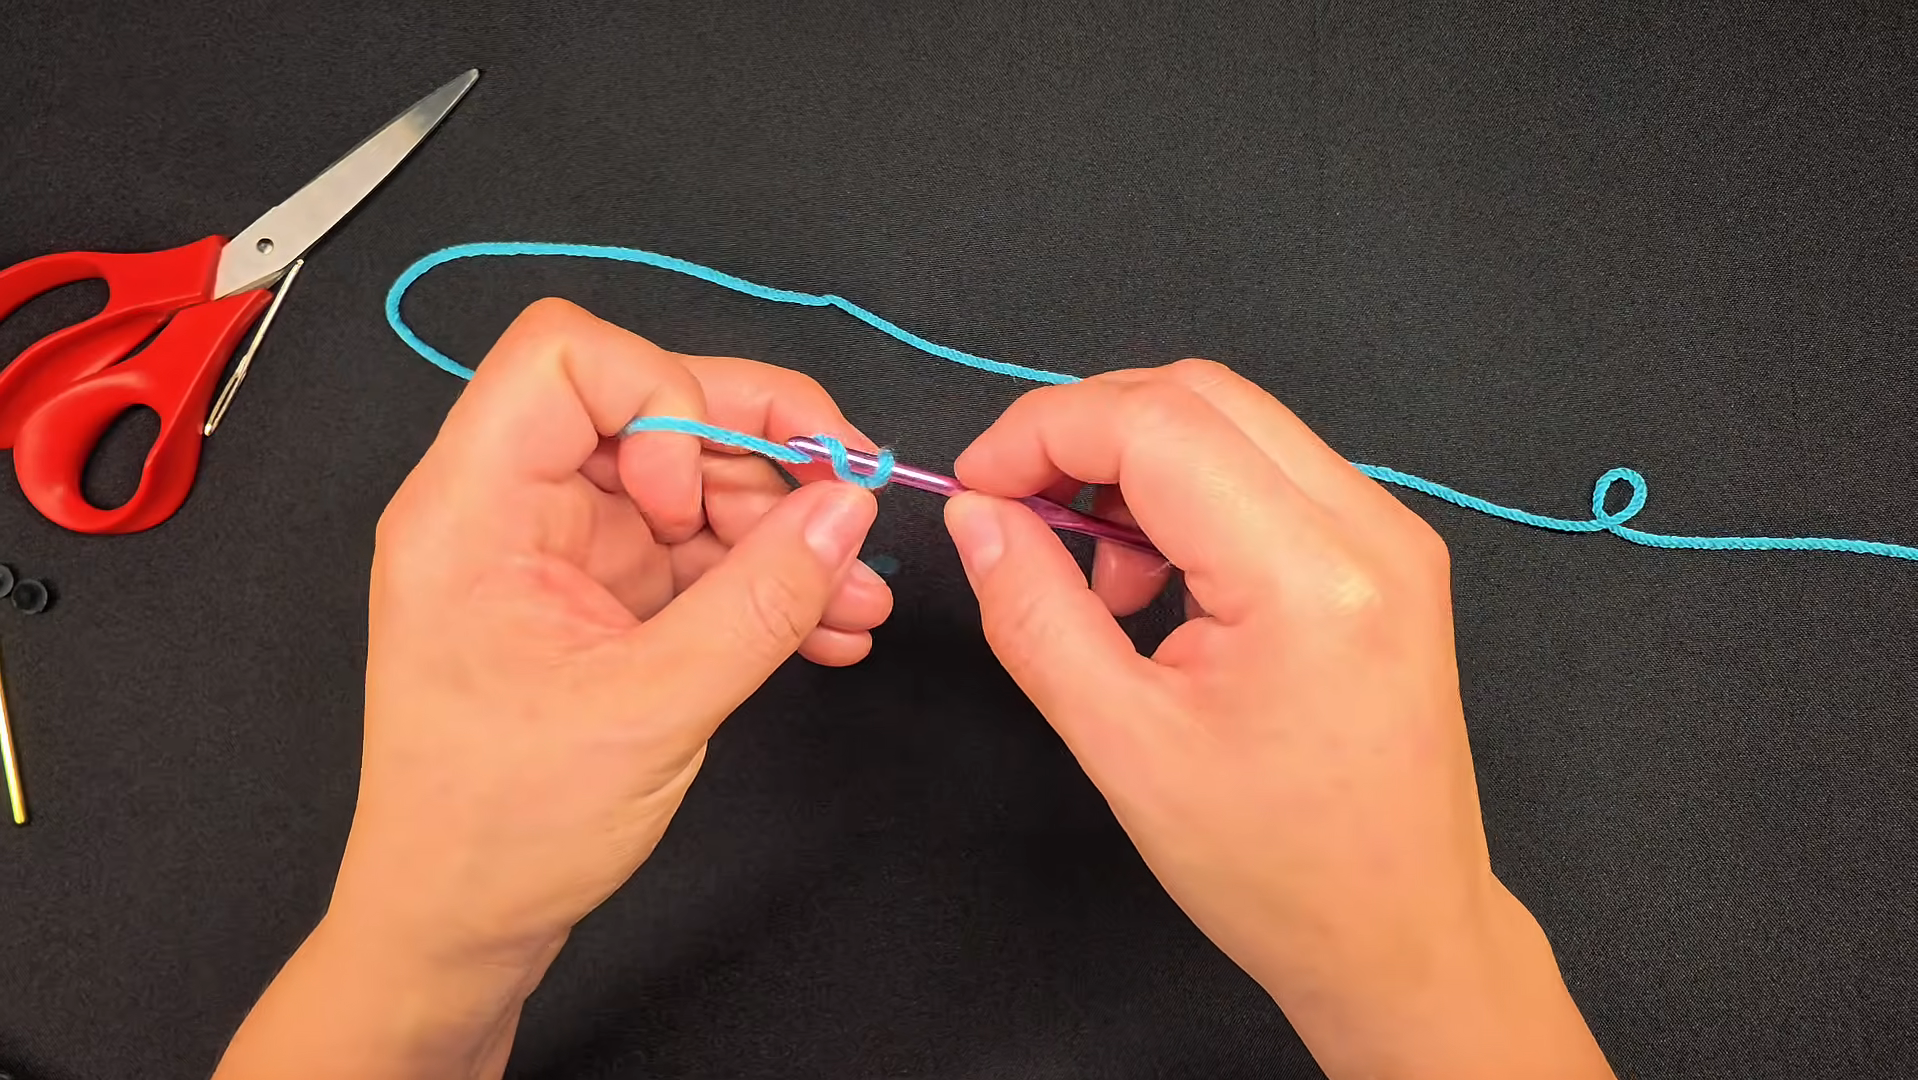
Step 1: Start with the slip knot on the hook.
Begin by making a slip knot with the main yarn color, then place it onto the hook. Hold the yarn between the fingers for tension, keeping the working loop snug but not tight.
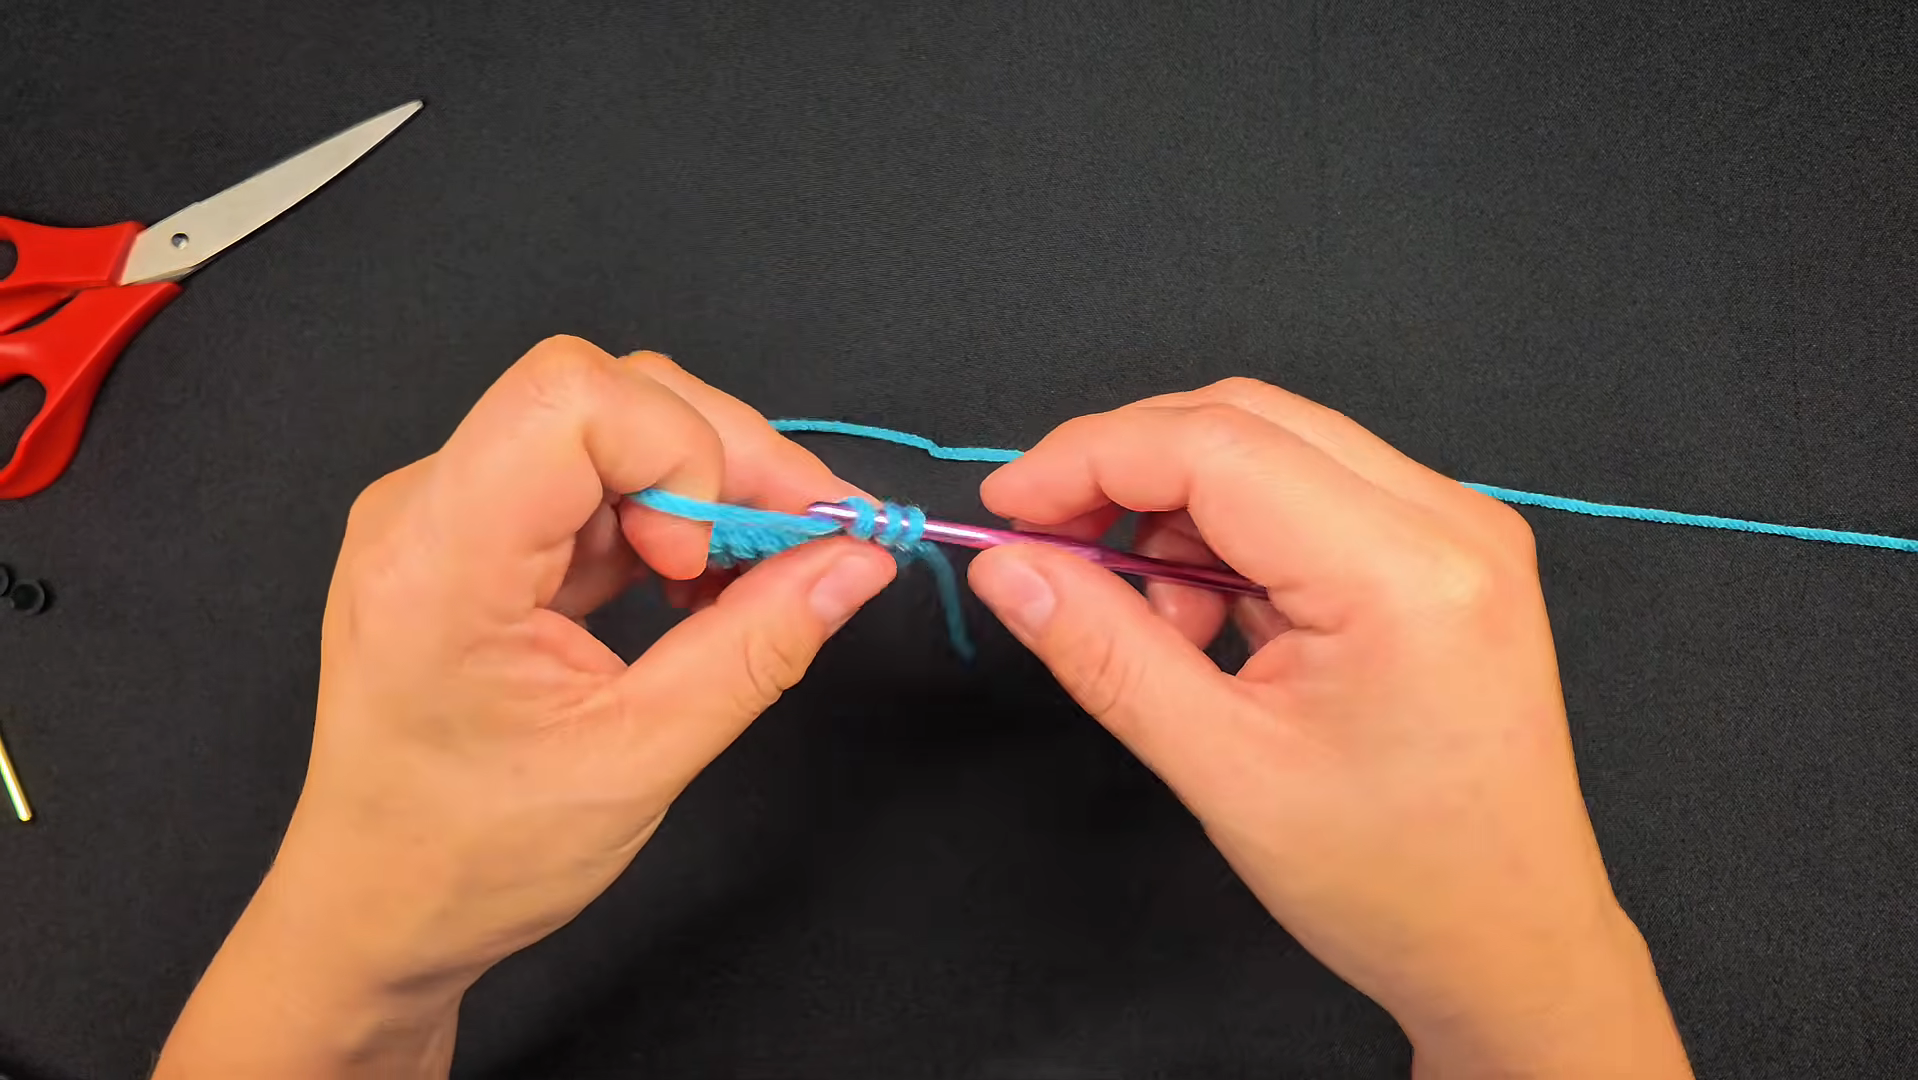
Step 2: Work the first stitches into the foundation.
Once the slip knot sits ready, pull the yarn through to form the opening stitches of the band. At this stage, the fabric stays small, showing just a few loops gathered near the hook.
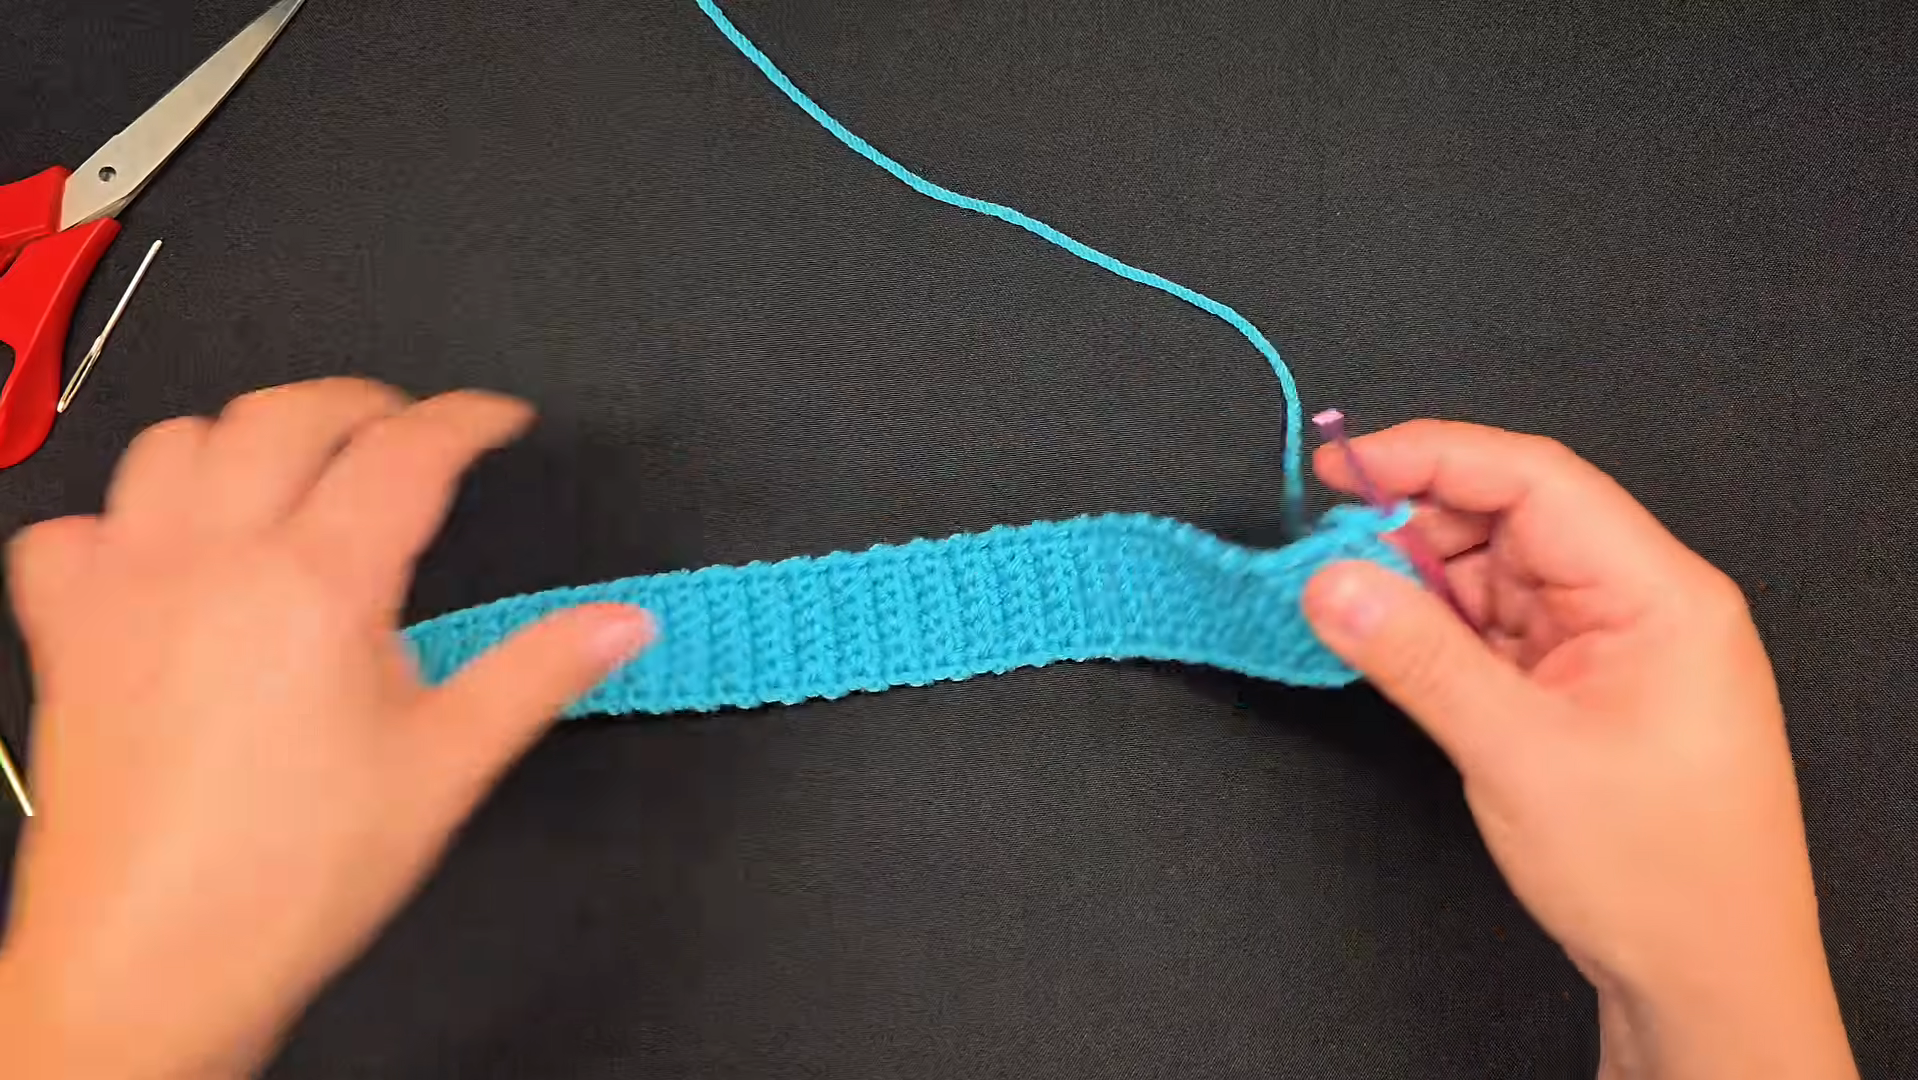
Step 3: Continue working rows until the band forms a full strip.
Keep repeating the stitch pattern until the fabric grows into a long, even strip. The finished band should show a smooth, ribbed texture running its full length, ready to be shaped into the headband.
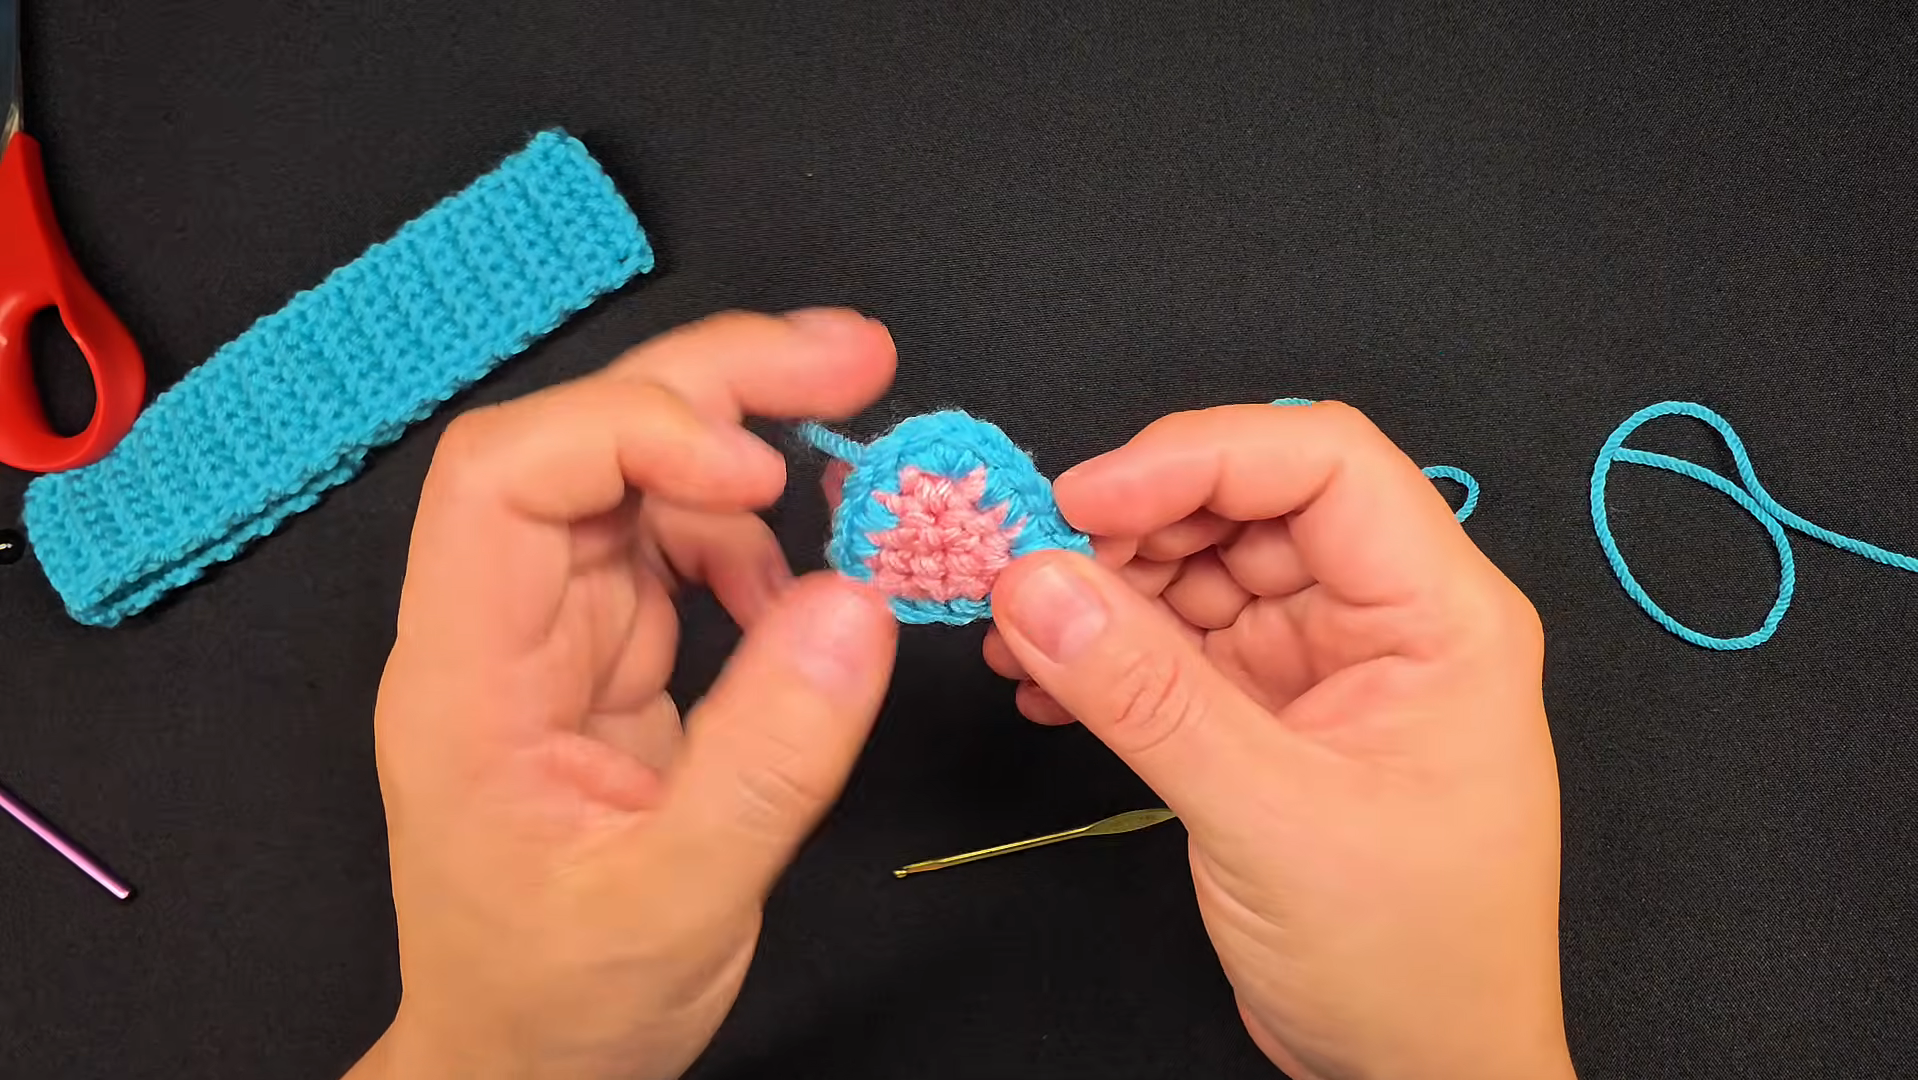
Step 4: Attach the pointed ear piece with the pink center detail.
Join a small triangular ear piece to the top edge of the band, with the contrasting pink section centered inside. Secure the seam firmly so each ear stands upright rather than folding flat against the band.
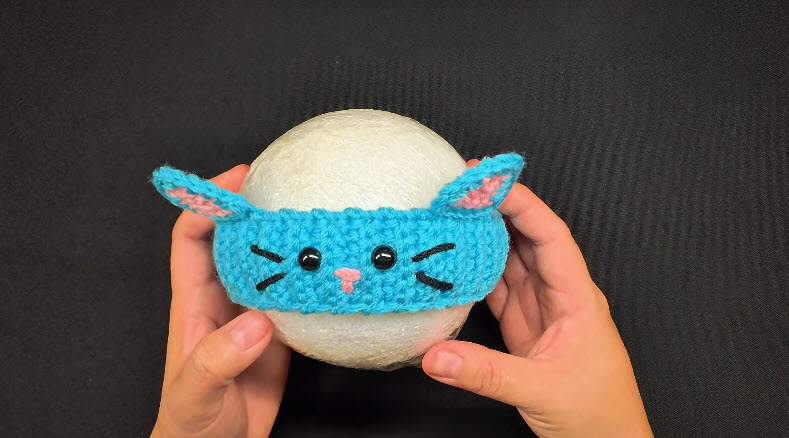
Step 5: Add the finishing face details and complete the headband.
Once both ears are attached, stitch on the eyes, nose, and whisker lines to finish the kitten face. The completed piece should sit comfortably across the forehead, with the pointed ears framing the top and the face centered at the front.
What Usually Goes Wrong?
A handful of issues tend to show up during this project:
- Uneven tension in the band, creating a wavy rather than flat strip
- Ears sewn on crooked or angled unevenly
- Whisker embroidery pulled too tight, puckering the fabric
- Band measured too short or too long for a comfortable fit
Because the details sit so close together, small mistakes tend to stand out more on this piece than on larger projects.
How Can Mistakes Be Avoided?
Measuring the band against the intended head size before finishing helps prevent sizing surprises later. Additionally, pinning the ears in place before stitching allows for adjustments without unpicking finished seams. Working the embroidery slowly, with consistent tension, keeps the whiskers and nose looking neat rather than uneven. Finally, counting stitches across each row of the band helps catch tension issues early in the process.
What Can This Piece Be Used For?
Beyond everyday wear, this headband suits themed photo sessions, seasonal gifting, and baby shower presents. Sellers often pair it with matching cat-themed booties or blankets to build a coordinated gift set. It also works nicely as a keepsake piece, since the small scale makes it easy to store long after a baby has outgrown it. Some crafters even display the finished piece on a small stand for shop photography.
Is It a Good Project for Beginners?
The Crochet Cat Headband Pattern ranks among the more approachable baby accessory projects available. Because the stitch count stays low and the shaping stays minimal, new crocheters rarely feel overwhelmed by the band itself. That said, the embroidery details benefit from a little patience and a steady hand. Overall, beginners willing to practice basic stitching should find the project manageable from start to finish.
What Makes It Worth Trying?
Few baby accessories combine speed, charm, and function as neatly as this design does. The simple band construction keeps the project quick, while the ear and face details add personality without extra complexity. Since the finished piece works for multiple occasions, it earns repeated use rather than sitting in a drawer. For crafters building a baby gift rotation, this headband deserves a permanent spot in the queue.
Why Are People Making This Right Now?
Animal-themed baby accessories have surged in popularity as parents look for accessories that feel both practical and photogenic. Social platforms have amplified the trend further, with short-form videos showcasing baby headband transformations gaining wide attention.
- The compact size suits crafters with limited crafting time
- Baby-themed content performs exceptionally well on visual platforms
- Character-inspired accessories offer a trendy, gift-ready finishing touch
FAQ
Can this headband be resized for older babies or toddlers?
Yes, adjusting the foundation row length allows the band to fit a wider range of head sizes comfortably.
What yarn weight works best for this pattern?
Worsted-weight yarn produces a soft, sturdy band that holds its shape without feeling stiff against the skin.
Do the ears need extra stuffing to stand upright?
Typically, a firm crochet tension holds the ears upright without stuffing, though light stuffing can add extra structure.
Can the face details be changed to a different animal design?
Some crocheters swap the ear shape and whisker placement to adapt the same base pattern into other animal faces.
Final Thoughts
The Adorable Crochet Baby Headbands Pattern delivers a fast, charming project with a genuinely polished result. Its simple construction suits beginners, while its face details keep experienced crocheters engaged too. Whether the goal is a single keepsake or a full gift set, this headband earns its place in any baby-accessory collection.