Free Crochet Baby Turtle Amigurumi Pattern for Kids
Bright colors and a chubby little shell make this crochet baby turtle amigurumi steal hearts in an instant. Featuring an apple-shaped shell, this tiny turtle blends garden charm with playful appeal. This project is special for kids, turtle lovers, and amigurumi enthusiasts alike, while its simple structure and cute look make it a delightful handmade companion.
Made using medium-weight cotton or acrylic yarn, this Crochet Baby Turtle Amigurumi comes together by joining simple pieces into an adorable little turtle shape. A domed shell, round body, tiny legs, tail, and smiling face give it a distinctive, charming look. Each piece is worked in the round and lightly stuffed, then assembled into a soft, palm-sized toy that makes a beautiful handmade creation for kids, turtle lovers, and amigurumi enthusiasts alike.
Beginners will love how forgiving this pattern is. Basic stitches, minimal shaping, and clear round counts make the whole project approachable, even for a first-ever amigurumi attempt.
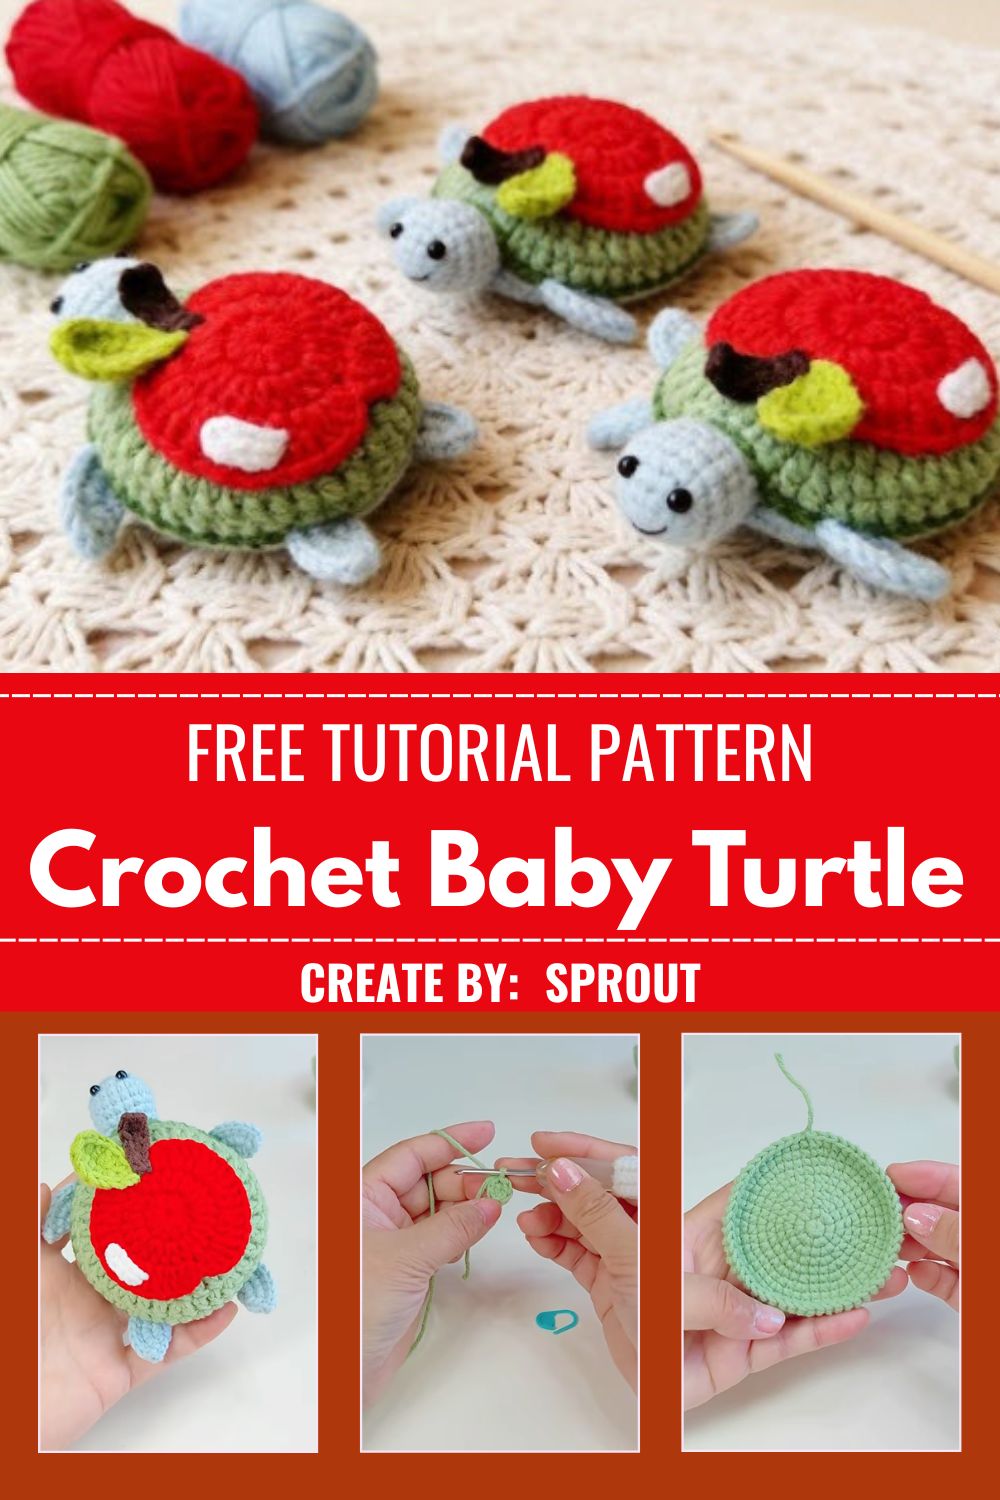
A Cute Little Character Worth Making
Baby turtles have a special way of melting hearts, and this apple-shell version takes the sweetness up a notch. Soft pastel blue for the head and legs pairs beautifully with a juicy red shell, a green leaf, and a tiny brown stem, giving the whole piece a fresh, fruity personality kids adore instantly.
Skill Level
Beginner-friendly, low pressure, and quick to finish. This pattern only uses single crochet, simple increases, and decreases, so anyone comfortable holding a hook and counting stitches can complete it. No fancy stitch combinations, no tricky shaping, just steady rounds and a bit of patience for a rewarding finished plush.
Materials and Supplies List
Gathering supplies before starting keeps the whole project smooth and stress-free.
Yarn Colors
- Light blue (head, legs, and tail)
- Sage or apple green (shell base and leaf)
- Bright red (shell top, apple shape)
- Small amount of brown (stem)
- Tiny scrap of white (bite mark detail)
Tools and Extras
- 3.0mm–3.5mm crochet hook (adjust to match yarn weight)
- 6mm or 8mm black safety eyes
- Polyester fiberfill stuffing
- Yarn needle for sewing pieces together
- Sharp fabric scissors
- Locking stitch marker
- Optional keychain ring or bag clip for accessory use
Crochet Techniques Used
- Magic ring (adjustable ring start)
- Single crochet (sc)
- Increase (inc) and decrease (dec / invisible decrease)
- Sewing and seaming pieces together with a yarn needle
- Working in continuous spiral rounds
Assembly Process
Pin the head onto the front of the body first, checking placement before sewing to keep the turtle balanced. Sew all four legs evenly around the body edges, matching left and right sides so the turtle sits flat. Attach the tail at the back center point. Once the base body is complete, place the apple-shaped shell piece on top and stitch around the entire edge, tucking the seam neatly underneath.
Step-by-Step Crochet Pattern Instructions
Starting the Magic Ring
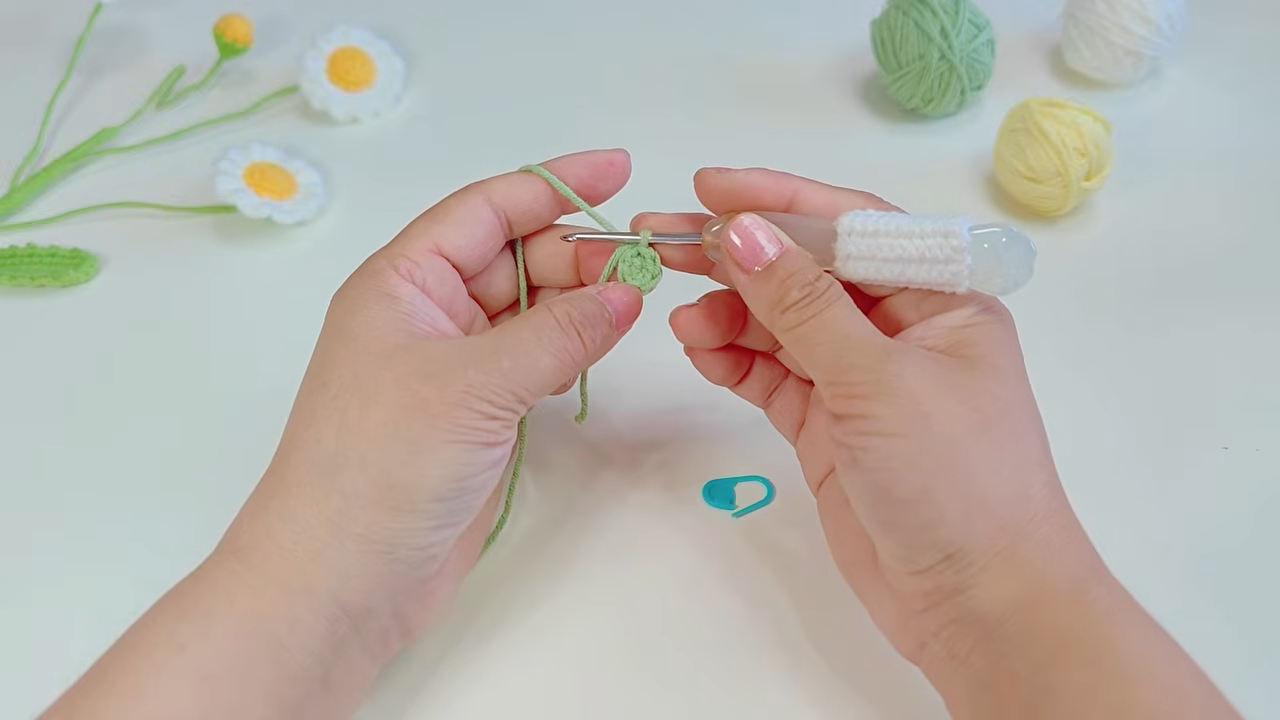
Every piece of this turtle begins the same way, right here. Wrap the yarn around two fingers to form a loop, insert the hook, and pull up a stitch. This adjustable magic ring closes tightly later, leaving no visible gap or hole at the very center of the piece.
Building the Shell Base
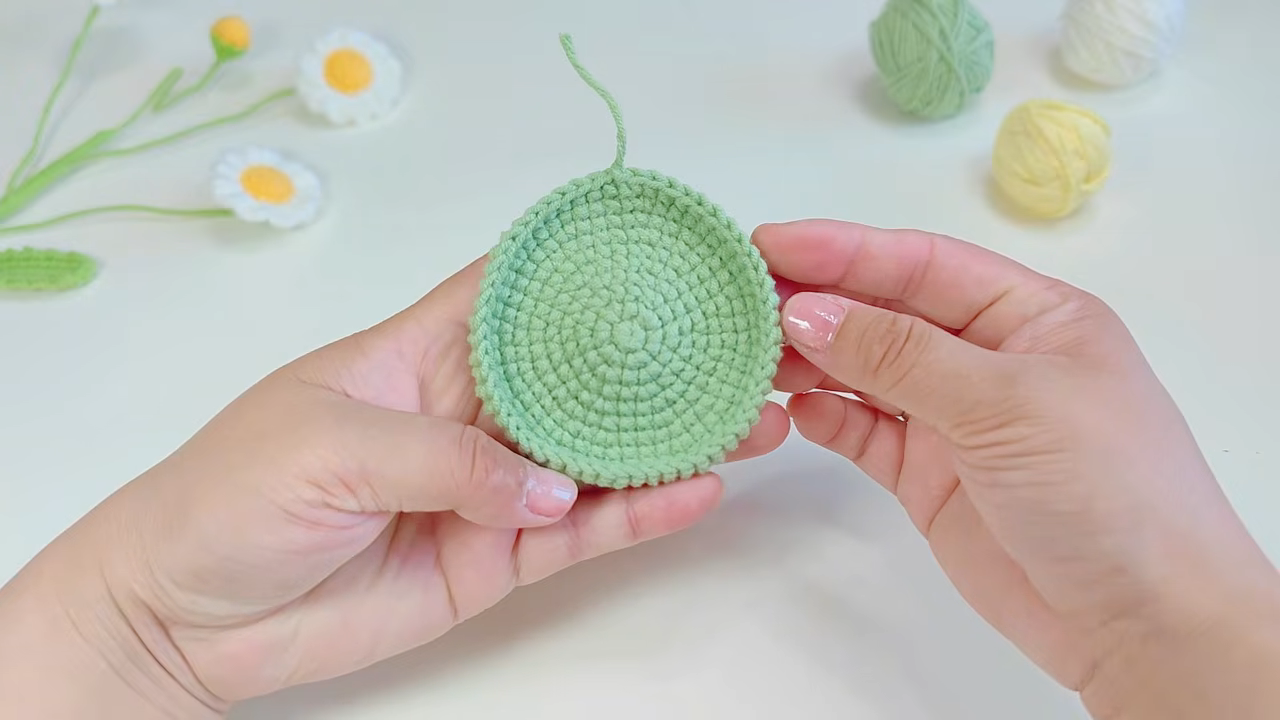
After the magic ring closes, single crochet stitches increase steadily round by round to form this flat, sage green circle. Notice the smooth spiral pattern with no visible seam line. This flat disc becomes the bottom base of the turtle shell before the sides begin curving upward.
Shaping the Turtle Body
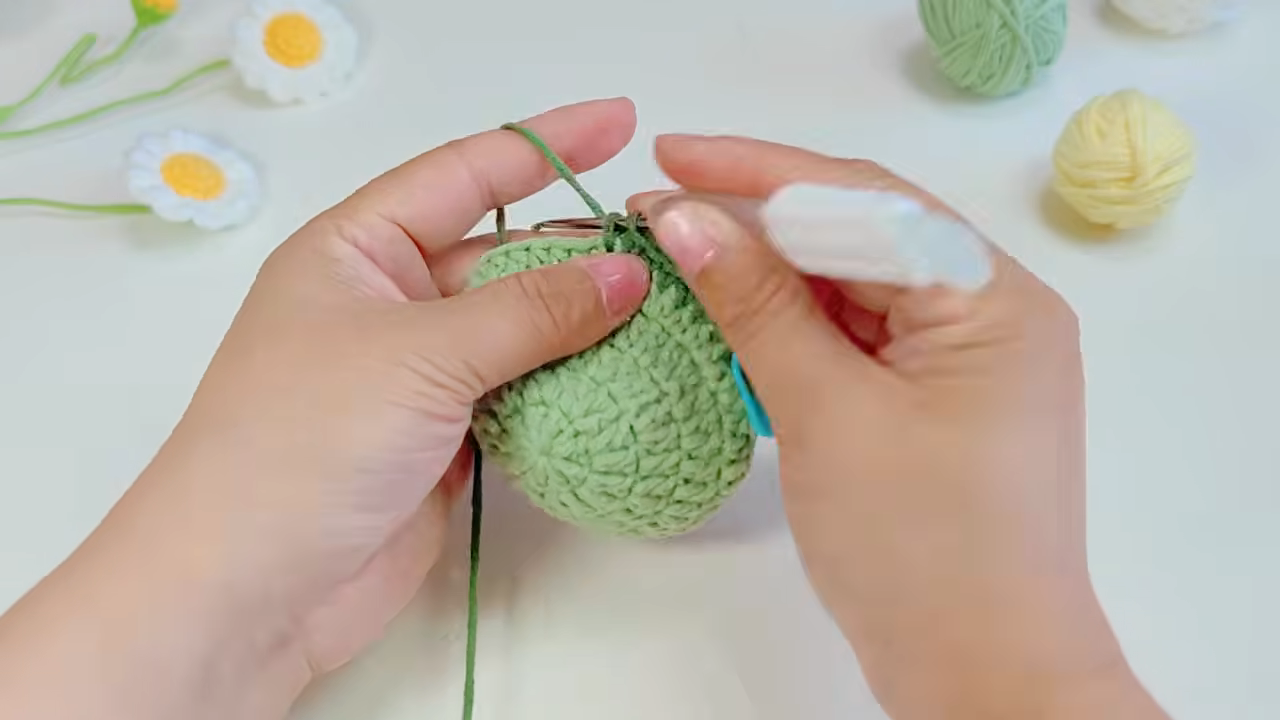
Once the flat base reaches its full width, stitches continue in even rounds without further increasing, causing the piece to curve naturally into a dome. A stitch marker keeps track of round starts throughout this stage. Light stuffing gets added gradually as the rounded body shape builds height.
Adding the Apple Shell Details
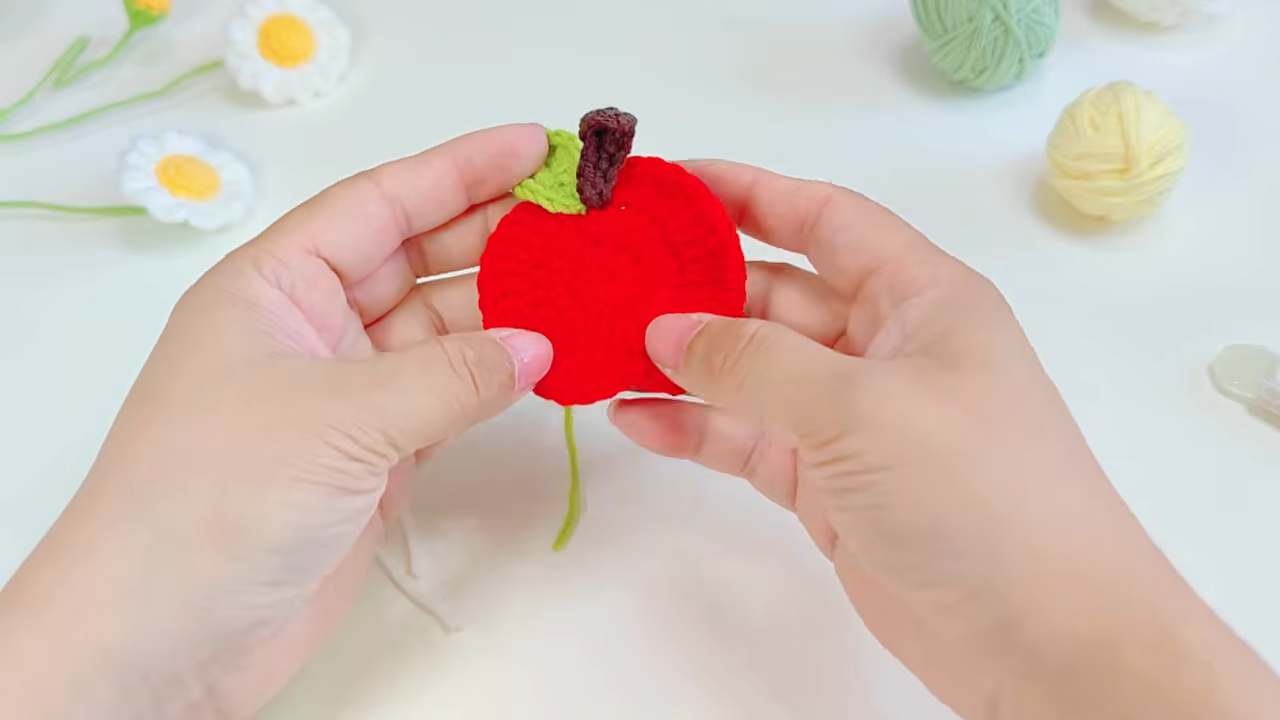
The bright red shell top gets finished off here with a tiny green leaf and a short brown stem stitched on separately. These small details transform a plain circle into a recognizable apple shape. A loose yarn tail remains for sewing this piece onto the turtle body later.
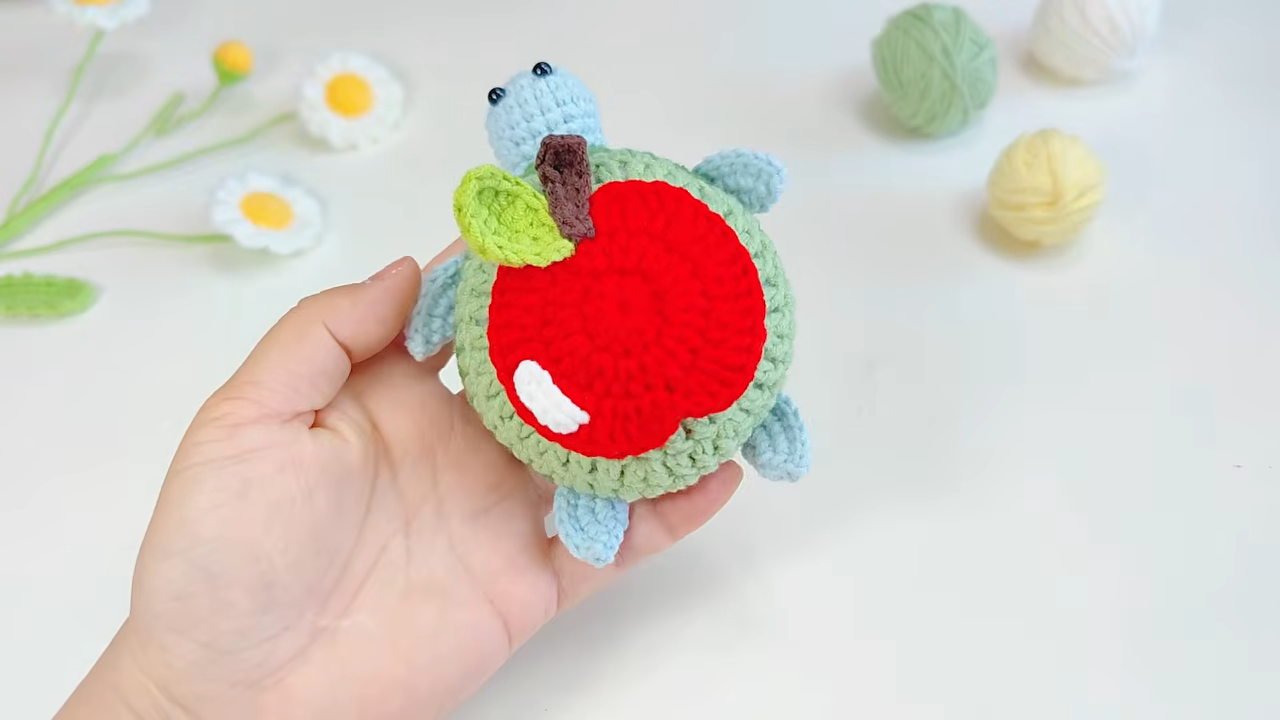
Your Finished Apple Baby Turtle
All pieces come together in this final result: the smiling light blue head, four short legs, a tiny tail, and the apple-shaped shell sewn neatly on top. This palm-sized plush stands sturdy on a flat surface, ready as a handmade gift or a cheerful shelf decoration for kids.
Finishing Touches
Weave in every loose yarn end using a needle, pulling gently through several stitches for a secure, invisible finish. Fluff the stuffing lightly through the seams if any flat spots appear. Give the finished turtle a light shape check from every angle, adjusting the legs so it sits sturdy and does not tip over.
Helpful Beginner Tips
- Keep stitches tight and close together, since loose amigurumi stitches let stuffing show through the fabric
- Use a stitch marker on round one every single time, moving it up as rounds progress, to avoid losing track of where a round starts
- Stuff a little at a time throughout the project rather than cramming it all in at the end, for a firmer, rounder finish
- Count stitches after every round for the first few projects until counting becomes second nature
Design Customization Ideas
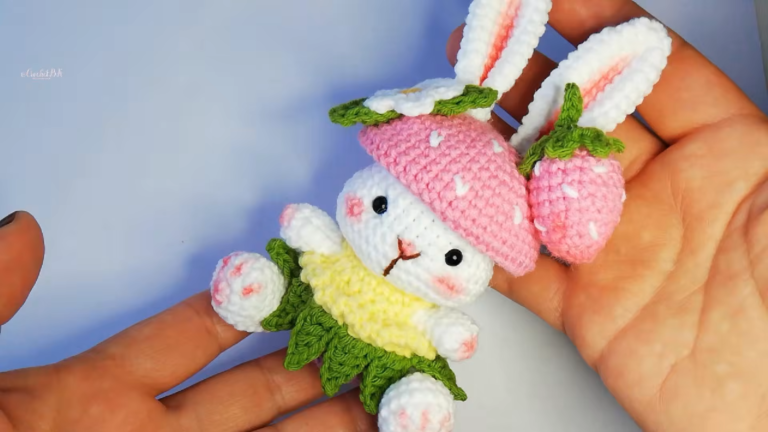
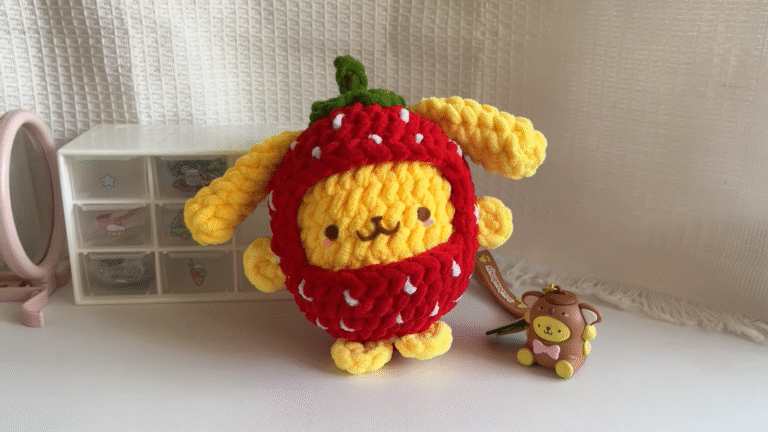
- Swap the apple shell for other fruit shapes like a strawberry or watermelon for a fun themed set
- Try pastel or neon yarn combinations for a completely different personality on the same base pattern
- Add a small crochet flower, bow, or tiny hat as a cute accessory on the head
- Crochet a mini version using thinner yarn and a smaller hook for keychains or bag charms
- Mix and match shell colors to make a whole turtle family in one afternoon
Frequently Asked Questions
What is the best yarn for amigurumi?
Cotton yarn gives amigurumi projects a crisp stitch definition and holds shape well, while acrylic yarn stays budget-friendly and comes in a huge range of colors. Either option works fine for this pattern, though cotton tends to produce a slightly firmer, cleaner-looking finish.
How do I make a crochet plush firm?
Firmness comes from two things working together: tight stitch tension and generous stuffing added gradually. Stuffing in small amounts as each piece grows, rather than stuffing all at once at the end, prevents lumps and keeps the shape rounded and solid.
How long does this project take?
A confident beginner can finish this baby turtle in around two to three hours, spread across a couple of sittings. Experienced crocheters familiar with amigurumi basics often complete the whole project in under two hours.
Wrap Up and Give It a Try
Grab a hook, pick out a few favorite colors, and let this Crochet Baby Turtle Amigurumi come to life one round at a time. Real talk, few projects feel as rewarding as watching a flat circle turn into a smiling, huggable plush. Share the finished turtle with a photo tag, save this pattern for later, and try a whole family of color variations next.