Crochet Big-Eyed Monster Bag Pattern for Fashion Appeal
Quirky accessories have taken over the fashion scene, and this crochet big-eyed monster bag fits right into that trend. Bold eyes, a fuzzy little body, and a playful personality make it stand out on any shoulder strap. Crafters who enjoy amigurumi with a wearable twist will fall for this project instantly. Anyone searching for a gift that feels handmade, funny, and genuinely fashionable should give this pattern a try.
Big-eyed monster bags blend two crochet worlds: soft amigurumi charm and everyday practicality. Instead of sitting on a shelf, this monster gets carried around, photographed, and admired by strangers on the street. Oversized safety eyes give it that signature “monster” look, while a rounded body shape keeps the silhouette soft and huggable rather than scary.
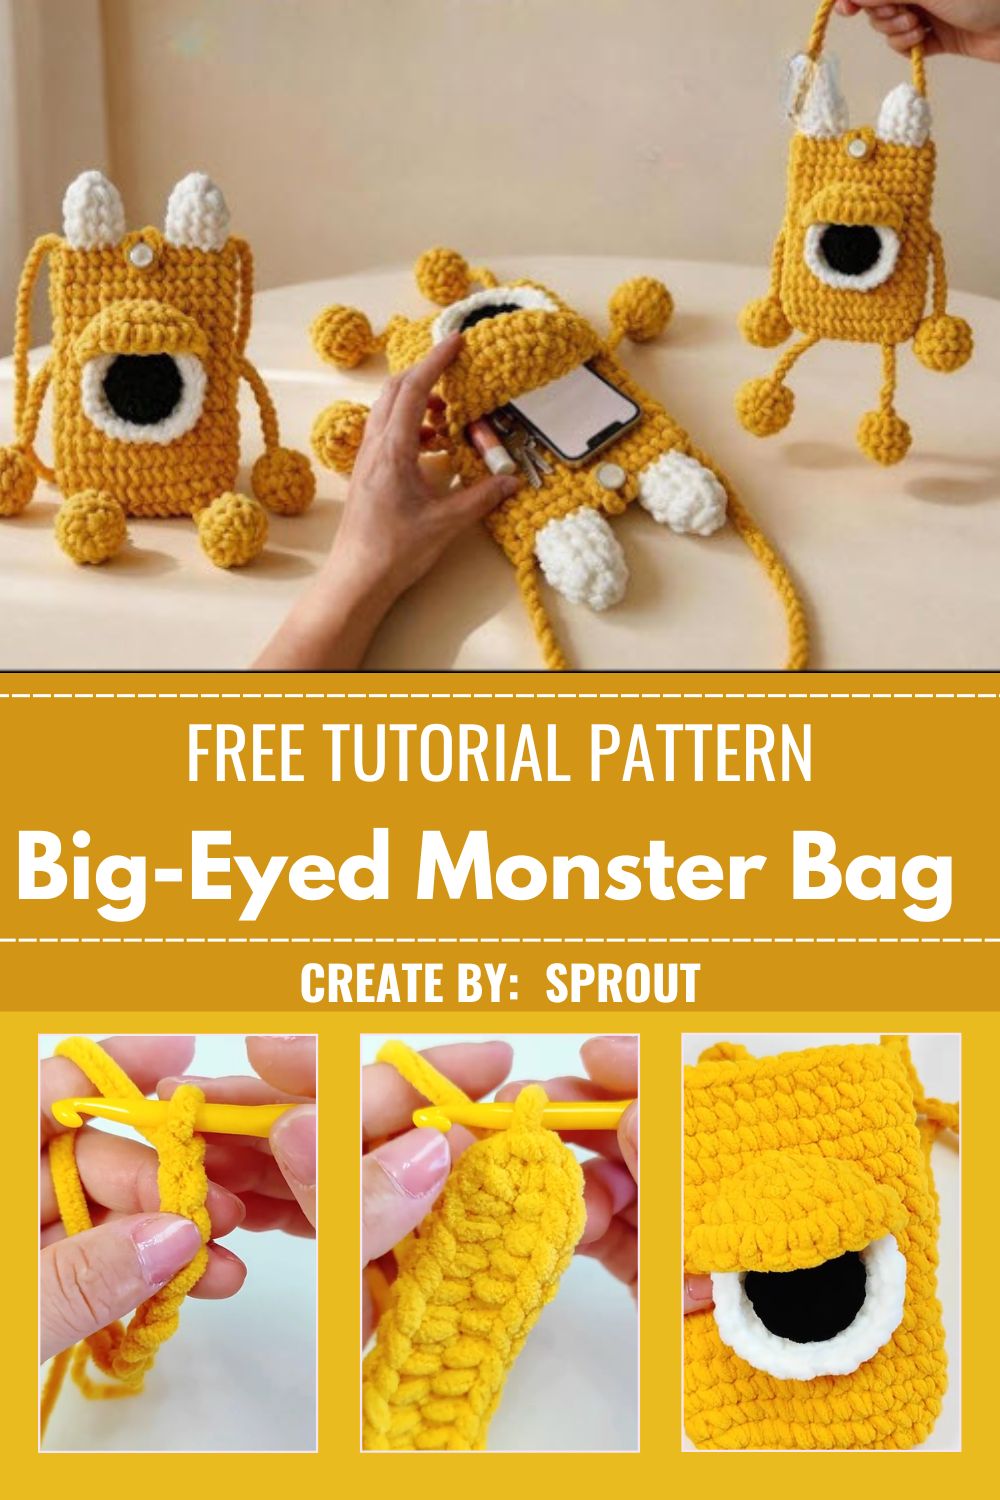
Difficulty-wise, this pattern sits comfortably in intermediate territory. Basic amigurumi stitches carry most of the work, though shaping the bag opening and attaching a sturdy strap does require a bit of patience. Once the pieces come together, though, the payoff is a one-of-a-kind accessory that people will ask about constantly.
Project Details
- Skill Level: Intermediate (beginner-friendly with amigurumi basics)
- Finished Size: Approximately 20 cm wide x 22 cm tall, excluding the strap
- Estimated Time Required: 6–9 hours, spread across a few crafting sessions
- Recommended Yarn Weight: Worsted weight (Category 4) cotton or acrylic blend
- Crochet Hook Size: 4.0mm (G/6) hook, adjustable based on gauge
Materials Needed
- Worsted weight yarn in your chosen monster color (green, purple, or teal work beautifully)
- Contrast yarn for the eye whites and pupils
- Small amount of black yarn for pupil detailing
- A 4.0mm crochet hook
- Two 25mm safety eyes, or embroidered alternatives for a child-safe finish
- Polyester fiberfill stuffing
- Tapestry needle for sewing pieces together
- Stitch markers to track rounds
- Sharp scissors
- Optional: bouclé or furry yarn for horns, a fabric lining, or a magnetic snap closure
Crochet Stitches & Techniques
Several core amigurumi techniques bring this monster bag to life:
- Magic Ring – forms a tight, gap-free starting point for the body
- Chain Stitch (ch) – used for the strap foundation
- Slip Stitch (sl st) – joins rounds and closes gaps neatly
- Single Crochet (sc) – the main stitch throughout the body and bag opening
- Increase (inc) – widens the body as it grows
- Invisible Decrease (invdec) – shapes the bag opening smoothly
- Color Changes – switches yarn cleanly for the eyes and horns
- Fastening Off – secures finished pieces before weaving in ends
- Sewing Pieces Together – attaches eyes, horns, and the strap to the finished bag
Pattern Instructions
Assembling the Strap
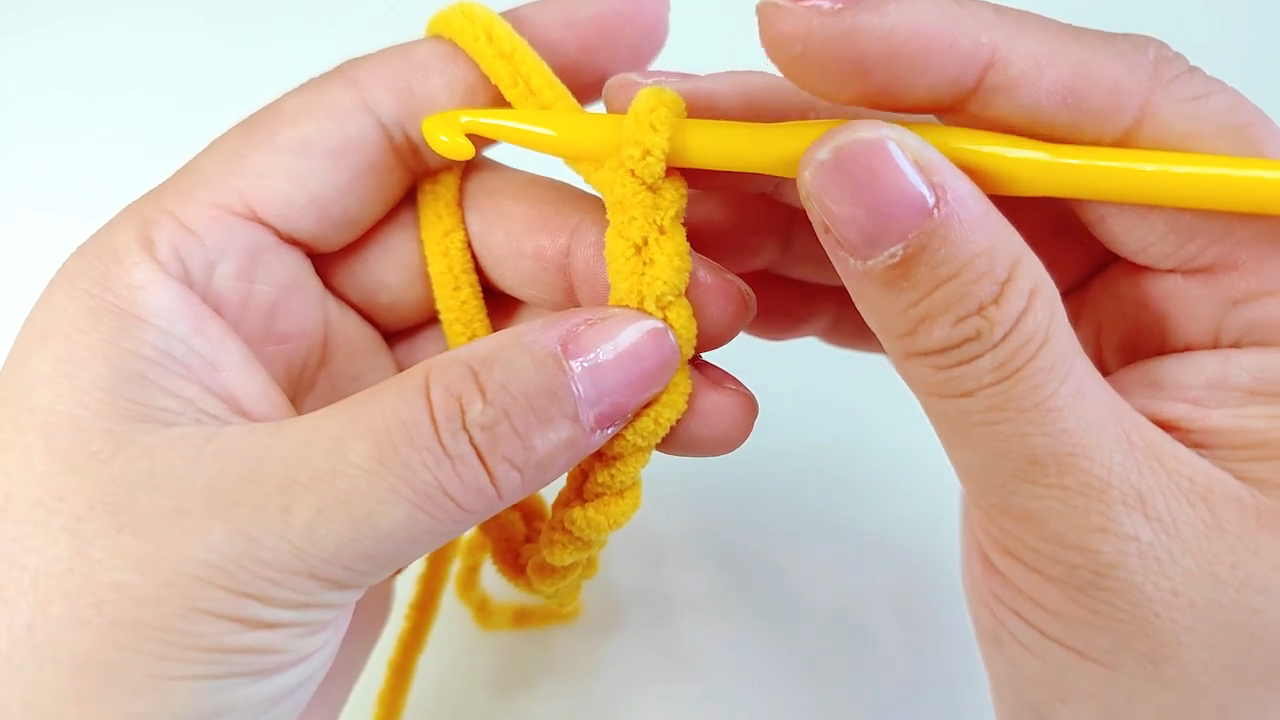
A long chain, doubled back and single crocheted along both sides, forms a sturdy strap capable of holding everyday essentials. Adjustable length works well here shoulder bags typically need 100–120 cm of strap, though crossbody styles may require more. Reinforcing the strap ends where they attach to the bag prevents stretching over time.
Creating the Main Body
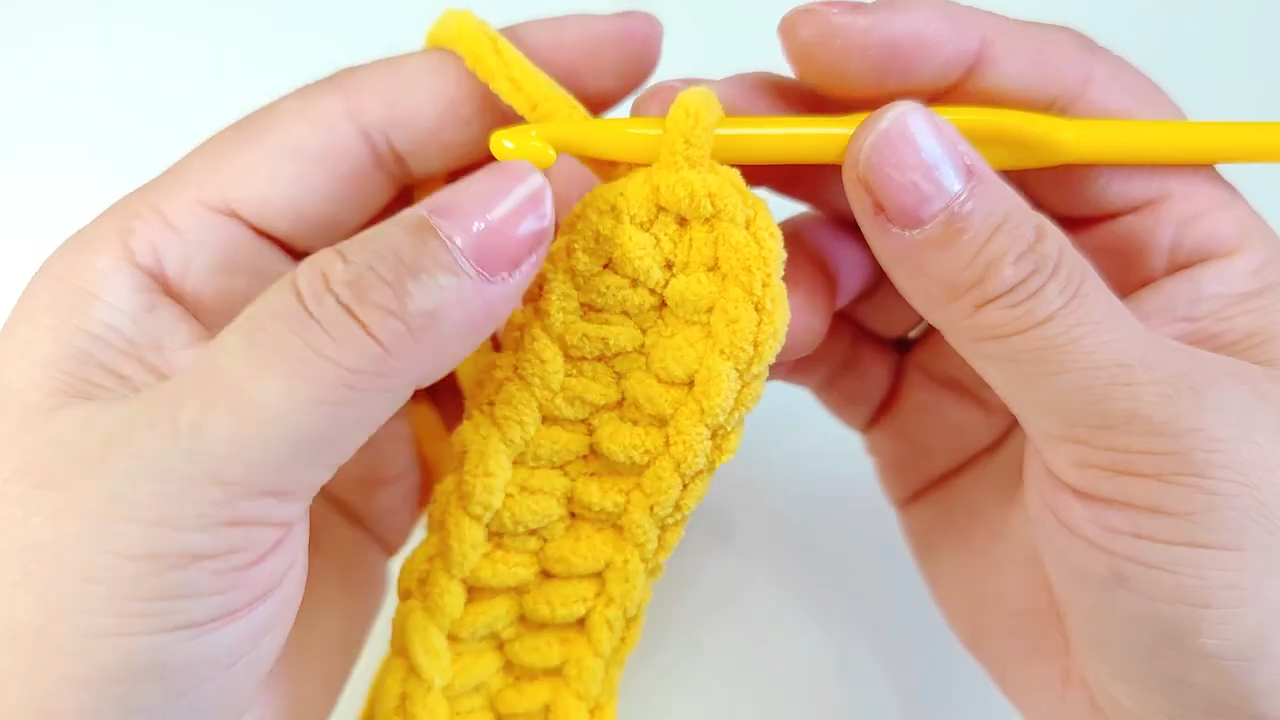
Start with a magic ring and work six single crochets into it, pulling the loop closed tightly. Each following round increases the stitch count evenly around, spiraling outward until the circle reaches roughly 12 cm across. Marking the beginning of each round makes counting far easier once the piece grows large.
Shaping the Bag Opening
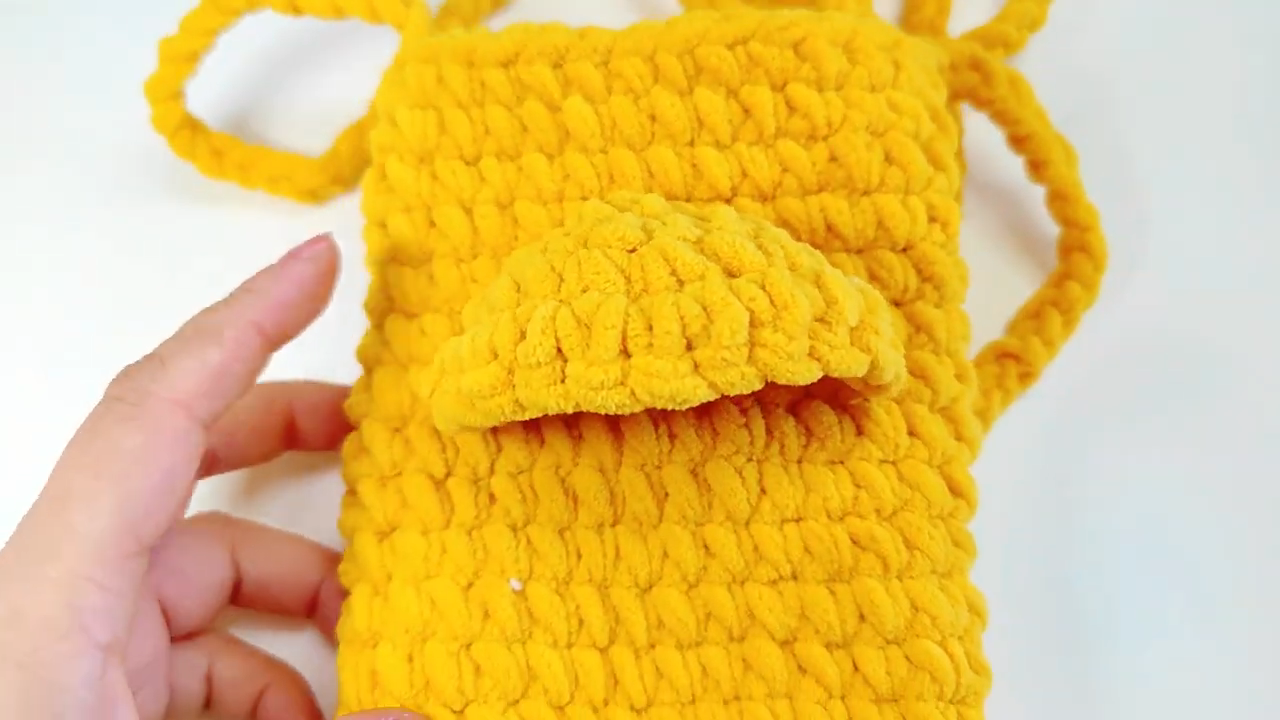
Somewhere around round 14, stitching switches from increasing to working even rows without adding stitches. This transition builds the straight sides of the bag rather than a continued sphere shape. Continue straight rounds until the body reaches the desired height, then finish with a round of slip stitches around the opening for a clean, finished edge.
Making the Big Eyes
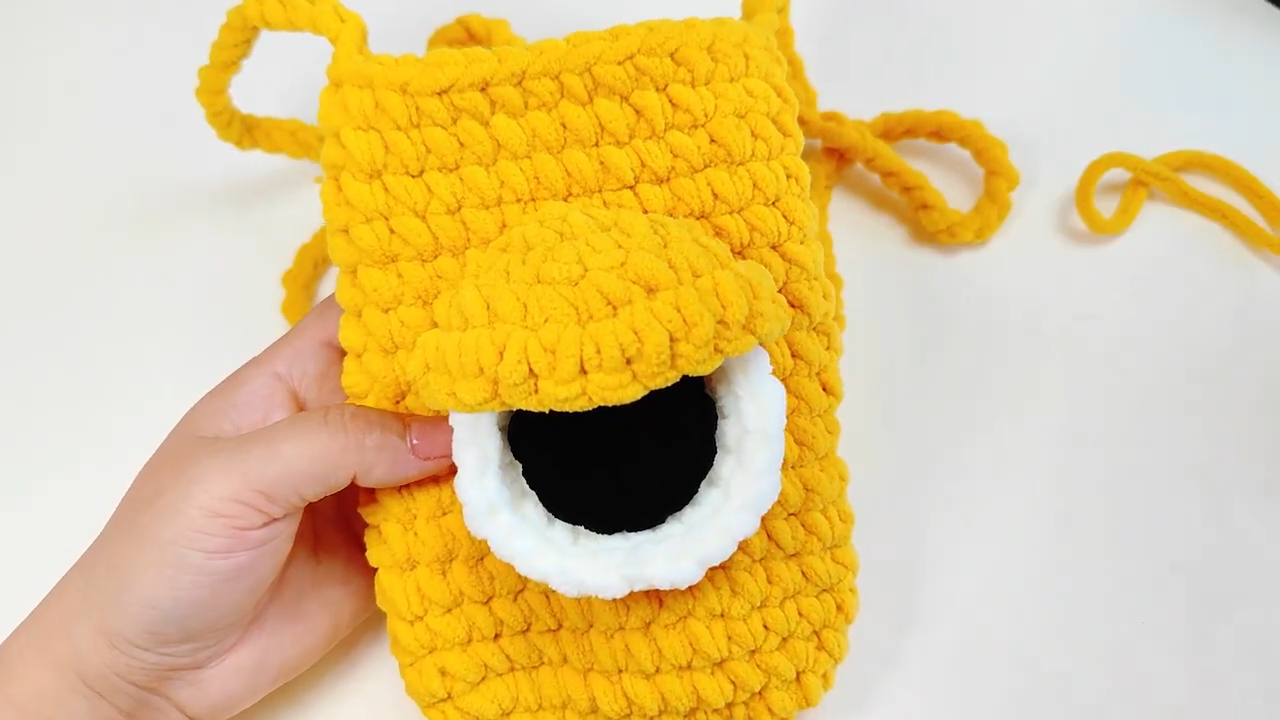
Two oversized circles, crocheted flat in white or cream yarn, form the whites of the eyes. Six to eight rounds of increases usually produce a disc around 6–7 cm wide, matching the exaggerated cartoon look this pattern is known for. Smaller black circles, stitched or embroidered on top, become the pupils, and safety eyes can be layered in for extra dimension if desired.
Crocheting the Horns
Two or three small horn shapes, worked as tapering cones in a contrasting color, add character to the top of the bag. Stuffing each horn lightly before sewing helps them stand upright rather than flopping over. Bouclé yarn creates a fun textured effect here, if a fuzzier monster look feels right for the design.
Facial Features and Final Details
Positioning the eyes slightly off-center rather than perfectly symmetrical often gives the monster more personality and charm. Small stitched eyebrows or a felt mouth can be added for extra expression, though many crafters prefer the clean, simple look of eyes alone. Horns typically sit just above and between the eyes, angled slightly outward.
Joining All Pieces
Pinning every element in place before sewing prevents lopsided placement once glue or thread locks things down. Eyes get sewn first, followed by horns, and finally the strap, which should attach to both sides of the bag opening for even weight distribution. A whip stitch along the seam keeps everything secure through regular use.
Final Assembly
Once every piece sits in place, weaving in remaining yarn ends tidies up the interior of the bag. Fluffing the stuffing evenly through the body without overstuffing the opening keeps the shape rounded rather than lumpy. A quick steam or light misting can help stubborn stitches relax into a smoother finished surface.
Tips for Success
- Count stitches at the end of every round to catch mistakes early, before they compound
- Stitch markers save enormous frustration once rounds climb past twenty stitches
- Stuff the body gradually rather than all at once, checking shape as you go
- Weave yarn ends through several stitches, not just a knot, for lasting durability
- Block the finished bag lightly if the sides look uneven after stuffing
Personalization Ideas
- Swap the main color for pastel shades to create a softer, less spooky monster
- Add a zipper closure instead of an open top for a more secure bag
- Try three eyes instead of two for an extra-quirky variation
- Crochet a mini version as a keychain or bag charm
- Turn the pattern into a seasonal Halloween piece with orange and black yarn
- Line the interior with fabric for extra structure and a polished finish
Common Mistakes to Avoid
Skipping stitch markers ranks among the most common errors beginners make with this pattern, since spiral rounds become nearly impossible to track without one. Overstuffing the bag opening is another frequent issue, often leaving the mouth of the bag too tight to close properly. Rushing the eye placement before pinning everything in place can also lead to a lopsided, uneven face that’s tricky to fix after sewing.
Frequently Asked Questions
Can this bag actually hold items, or is it purely decorative?
Yes, the finished bag comfortably holds small essentials like a phone, keys, and lip balm, though heavier items may need a fabric lining for extra support.
What yarn works best for beginners attempting this Crochet Big-Eyed Monster Bag pattern?
Cotton yarn holds its shape well and is easier to control than slippery acrylic, making it a solid choice for anyone newer to amigurumi.
Are safety eyes necessary, or can they be embroidered instead?
Embroidered eyes work perfectly well and are recommended for bags intended for young children, since safety eyes can occasionally be pulled loose.
How long does the strap need to be for crossbody wear?
Most crossbody styles require 120–140 cm of strap length, though trying it on with a tape measure beforehand avoids guesswork.
Can this pattern be made without safety eyes at all?
Absolutely, felt circles or embroidered details create the same big-eyed look without any small parts, which some crafters prefer for safety reasons.
Is this Crochet Big-Eyed Monster Bag project suitable for someone who has never made amigurumi before?
Basic amigurumi experience helps significantly, though a motivated beginner comfortable with single crochet and increases can manage this pattern with patience.
What’s the best way to clean the finished bag?
Spot cleaning with a damp cloth works best, since full washing can affect stuffing distribution and shape retention over time.
Conclusion
This crochet big-eyed monster bag pattern proves that amigurumi and fashion accessories can absolutely coexist. Between the oversized eyes, playful horns, and sturdy strap, every stitch adds personality to a bag that’s impossible to ignore. Grab a hook, pick a bold color, and give this pattern a try then share the finished monster with the crochet community for some well-deserved compliments.