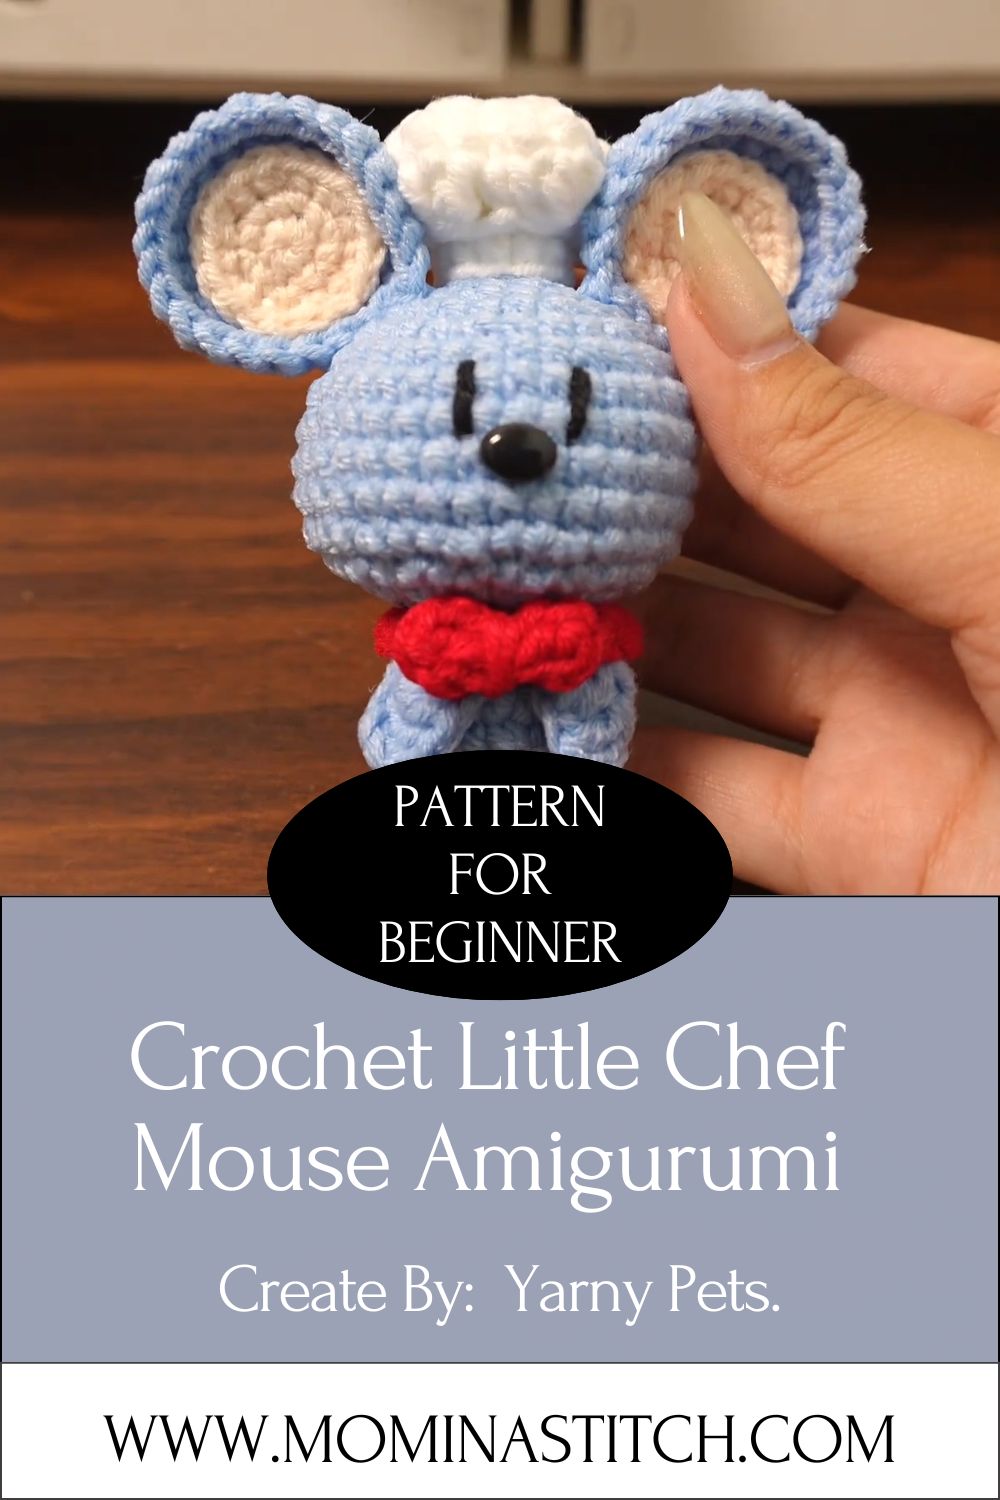
Free Crochet Little Chef Mouse Amigurumi Pattern
A tiny mouse, tied up in a little apron with a rolling pin in hand, looking every bit the busy baker in its own miniature bakery. That’s exactly what makes this Crochet Little Chef Mouse Pattern so special. With its charming personality, adorable little details, and handmade beauty, this amigurumi project isn’t just fun to make it instantly steals hearts on any shelf or as a gift.
This crochet pattern turns simple yarn into a charming little chef mouse with round ears, a pointed nose, and a tiny apron. It works as a shelf decoration, a keychain, or a handmade gift for a friend who loves baking. The finished mouse measures roughly four inches tall, made using basic amigurumi crochet techniques. Trust me, this project builds confidence fast because every part uses the same core stitches, just in different combinations. It’s a satisfying weekend crochet tutorial for anyone chasing that handmade crochet ideas Sitch.

Skill Level: Beginner to Intermediate
This pattern suits confident beginners who already know single crochet and basic increases. A few small parts, like the apron and ears, add light intermediate practice. No advanced stitches appear anywhere in this project.
Materials and Supplies List
Gather these supplies before starting your easy crochet project:
Yarn Colors
- Light gray or beige (main mouse body)
- White or cream (belly and inner ears)
- Soft pink (apron and nose accent)
- Small scraps of yellow or brown (rolling pin and chef hat, optional)
Tools and Extras
- Crochet hook size 2.75mm (C-2), or match your yarn weight
- Safety eyes, 6mm black, or embroidery thread for beginners avoiding small parts
- Polyester fiberfill stuffing
- Yarn needle for sewing pieces together
- Sharp scissors
- Stitch markers for tracking rounds
- Keychain ring or clasp, optional, for turning your mouse into a bag charm
Crochet Techniques Used in This Pattern
This little chef mouse relies on four core amigurumi crochet techniques:
- Magic ring – starts each round piece with a tight, gap-free center
- Single crochet (sc) – builds the main fabric of the body and head
- Increase and decrease – shapes rounds into curves for ears, cheeks, and paws
- Sewing parts together – joins the head, body, ears, and apron into one finished piece
No joke, mastering these four skills unlocks hundreds of other amigurumi patterns down the road.
Step-by-Step Crochet Pattern Instructions
Creating the Head
- Start with a magic ring and work 6 single crochet stitches into it.
- Increase every stitch on round 2 for 12 stitches total.
- Alternate one increase, one regular stitch on round 3 for 18 stitches.
- Continue increasing gradually every other round until the head reaches 30 stitches.
- Work several rounds even, without increasing, to build head height.
- Begin decreasing gradually, mirroring the increase pattern, until the opening is small.
- Stuff firmly before closing the final rounds.
Making the Body
- Begin the body the same way as the head, with a magic ring and 6 single crochet stitches.
- Increase steadily until the body reaches around 24 to 27 stitches, depending on desired width.
- Work several even rounds to form the torso shape.
- Decrease gradually near the top to taper the neck opening.
- Stuff the body before joining it to the head.
Ears, Tail, and Chef Accessories
- Ears: Crochet two small flat circles using light gray yarn, then add a smaller white circle for the inner ear. Sew both layers together before attaching to the head.
- Tail: Chain a long strand, then single crochet back along the chain to form a thin, curved tail. Attach it to the lower back of the body.
- Chef hat: Crochet a small white circle, increase to a comfortable head size, then work a few even rounds upward without increasing to form the puffy hat shape.
- Rolling pin: Crochet a small tube around a toothpick or skewer, then add tiny round ends for a realistic touch.
Facial Details
Place safety eyes a few rounds up from the nose area, spacing them evenly apart. Embroider a small triangle or V-shape nose using pink or brown thread. Add short whisker stitches on each side using embroidery floss. Light pink cheek blush, added with a bit of yarn or fabric marker, gives the mouse extra charm.
Assembly Process
- Sew the head onto the body using a whip stitch, tucking in loose ends.
- Attach both ears near the top of the head, angled slightly outward.
- Sew the tail onto the lower back of the body.
- Fit the chef hat onto the head and stitch it in place.
- Tie or sew a small pink apron piece around the body front.
- Attach the rolling pin to one paw using a few small stitches.
Finishing Touches
Trim any loose yarn ends close to the body. Fluff the stuffing gently through the fabric to smooth lumps. Attach a keychain ring at the top of the head if turning this mouse into a bag charm.
Helpful Beginner Tips for Amigurumi Success
Amigurumi rewards patience more than speed. These tips make the process smoother:
- Keep stitches tight. Loose stitches let stuffing peek through, so use a hook one size smaller than the yarn label suggests.
- Use stitch markers. Amigurumi rounds spiral continuously, so a marker prevents losing track of where each round starts.
- Stuff a little at a time. Adding small amounts of fiberfill throughout, rather than stuffing everything at the end, keeps the shape even and avoids lumps.
- Count stitches often. A quick stitch count after each round catches mistakes early, saving frustration later.
Real talk, these small habits separate a lumpy amigurumi from a smooth, professional-looking one.
Design Customization Ideas
This pattern welcomes plenty of creative freedom:
- Different colors: Swap gray for brown, white, or even pastel shades for a softer look.
- Cute accessories: Add a tiny chef spoon, a mini cupcake, or a name-embroidered apron.
- Mini size variations: Use thinner yarn and a smaller hook to create a miniature keychain version, perfect for gift bags or party favors.
Low-key, these small tweaks make every finished mouse one of a kind.
Frequently Asked Questions
What is the best yarn for amigurumi?
Cotton or acrylic worsted weight yarn works best for amigurumi. Both hold stitch definition well and prevent stuffing from showing through the fabric.
How do I make my crochet plush firm?
Use a smaller hook than recommended for the yarn weight, keep tension tight, and stuff generously in small amounts as you go.
How long does this project take?
Most beginners finish this little chef mouse in three to five hours, spread across a few relaxed crochet sessions.
Wrap Up and Start Crocheting
This free crochet Little Chef Mouse pattern proves that a handful of basic stitches can turn into something genuinely adorable. Grab your hook, pick a cozy yarn color, and give this beginner crochet project a try today.