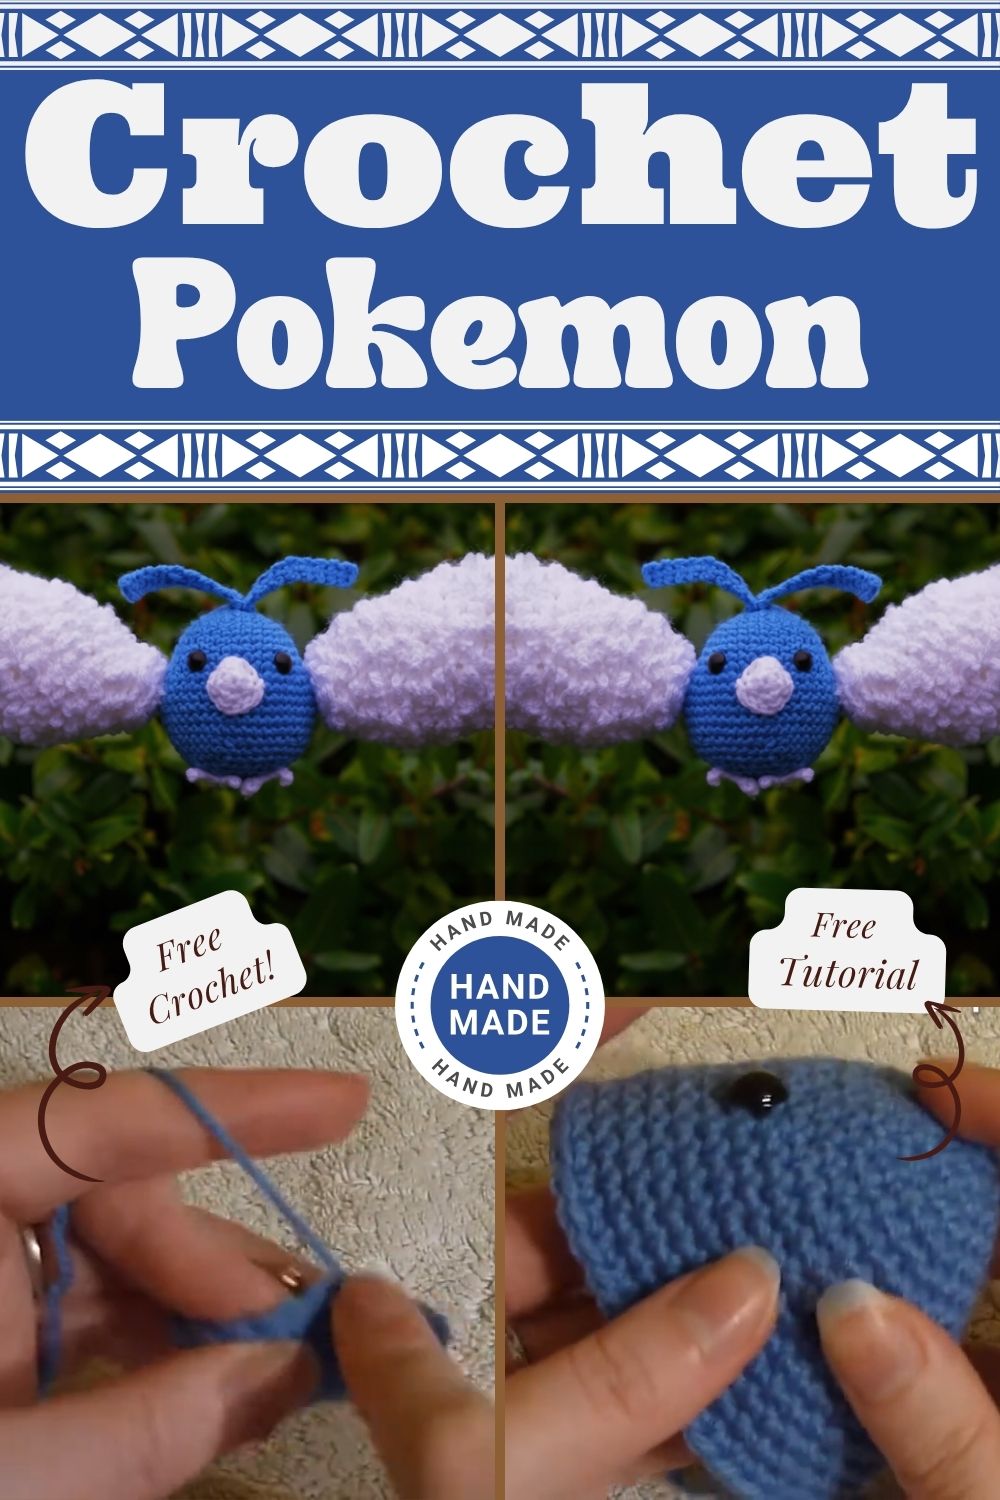
Stunning Crochet Swablu Pokemon Amigurumi Pattern for Playful Home Decor
If you love Pokémon and crochet, this adorable Swablu amigurumi could become your new favorite project. Crochet Swablu Pokemon Amigurumi is a fluffy cotton bird Pokémon known for its cloud-like wings and gentle personality. It’s often seen perched on heads like a cute little hat! Crocheting one yourself brings a charming and unique touch to your home. You can display it on a shelf, keep it on your desk, or turn it into a keychain. This tiny character adds joy and cuteness wherever it goes.
Why Crochet a Swablu Amigurumi?
Swablu’s soft blue body and fluffy white “cotton” wings make it one of the most endearing Pokémon. Fans adore its innocent look and sky-blue palette. Moreover, crocheting it allows you to capture that playful spirit in a handmade keepsake. Amigurumi Pokémon projects are hugely popular because they are portable, giftable, and endlessly customizable. In addition, this particular project works beautifully as home decor, a baby shower gift, or even a relaxing stress-relieving craft session.
Project Overview and Skill Level
This Swablu crochet amigurumi stands about 4-6 inches tall, depending on your yarn and hook size. It features a round body, a head with fluffy accents, wings, tail, and tiny feet. Furthermore, you’ll work in continuous rounds (spiral) using basic increases and decreases for shaping.
Skill Level: Beginner to Intermediate. If you know the magic ring and single crochet, you’re ready! Additionally, the tutorial breaks everything down simply, keeping clear photos and step-by-step guidance in mind.
Materials and Supplies You’ll Need
Gathering the right supplies makes the entire process smooth and enjoyable. Here’s everything you’ll need for one Swablu:
Yarn Colors:
- Light blue (main body and head) – about 50-70g
- White (wings, head fluff, tail) – about 30-40g
- Small amount of black or dark gray for eyes/eyebrows (or use safety eyes)
- Optional: Yellow for a shiny Swablu variation
Other Supplies:
- Crochet Hook: 3.5mm (E/4) or 4mm hook – adjust for tighter stitches
- Safety Eyes: 8-10mm pair (or embroider for younger kids)
- Stuffing: Polyester fiberfill
- Yarn Needle, Scissors, and Stitch Markers
- Optional: Keychain ring, fabric glue, or accessories
In short, choose soft worsted-weight yarn for the best squishy texture. Acrylic or cotton blends work wonderfully and wash easily.
Crochet Techniques Used
You’ll only need these core amigurumi techniques:
- Magic ring (MR)
- Single crochet (sc)
- Increase (inc)
- Decrease (dec)
- Slip stitch, chain, and sewing parts together
Fortunately, no advanced stitches are required — just patience and consistent tension.
Step-by-Step Crochet Pattern Instructions
Head Creation The head forms the fluffy top of Swablu. First, start with white yarn for the cotton fluff:
- Round 1: Magic ring, 6 sc (6)
- Round 2: Inc in each stitch (12)
- Round 3: (1 sc, inc) repeat (18) … (and so on)
After completing the head, add extra white loops or surface crochet for that signature fluffy cloud look on top.
Body Making Next, Swablu’s body is a simple oval shape. Start with blue yarn and follow the rounds…
Once the body is stuffed firmly, it should feel cuddly and nicely rounded.
Wings, Tail, and Head Fluff For the wings (make 2 in white), chain 8 and work increases to create a fan-like shape. Similarly, make the tail a bit smaller and join three feather-like pieces. Finally, crochet small white chains or loops on the head for the cotton-ball accents.
Facial Details After that, attach safety eyes between rounds 6-8, embroider a tiny smile or beak, and add small white eyebrows for extra expression.
Assembly Process Now comes the exciting part — assembly. Sew the head to the body securely, position the wings on the sides, attach the tail at the back, and add the feet at the bottom. Take your time with this step because good sewing makes the difference between “cute” and “professional-looking.”
Finishing Touches Lastly, brush the white parts lightly for extra fluffiness. You can also add a keychain or a small ribbon around the neck. At this point, your Swablu is ready to perch anywhere!
Helpful Beginner Tips for Crochet Pokemon Amigurumi
First and foremost, maintain tight stitches so the stuffing doesn’t show through. Additionally, always use stitch markers and stuff gradually. Moreover, work in good lighting and take breaks to avoid hand strain. Above all, consistent tension will give you a polished finish.
Design Customization Ideas Furthermore, you can make your Swablu truly unique. For example, try a shiny yellow version, add tiny accessories, or change the yarn weight for different sizes. The possibilities are endless!
FAQ Section Many beginners ask: What is the best yarn for amigurumi? Soft acrylic yarns like Red Heart or Stylecraft are ideal because they hold shape well and are budget-friendly.
Another common question is how to make the plush firm. The answer is tight stitches, a smaller hook, and gradual stuffing.
Common Mistakes to Avoid
Even experienced crocheters sometimes make small errors. Here are the most common mistakes and how to avoid them:
- Loose Tension: Many beginners crochet too loosely, causing stuffing to show. Always keep your stitches tight and go down one hook size if needed.
- Forgetting Stitch Markers: Without markers, it’s easy to lose your place in spiral rounds. Always use one at the beginning of each round.
- Overstuffing or Understuffing: Too much stuffing makes the shape distorted, while too little makes it floppy. Add small amounts gradually and shape as you go.
- Wrong Placement of Eyes: Attaching eyes too high or too far apart ruins the cute expression. Count stitches carefully before attaching.
- Weak Sewing: Loose stitches while assembling cause parts to fall off later. Sew multiple times and knot securely.
- Ignoring Yarn Tails: Not leaving long enough tails for sewing leads to frustration. Always leave 15–20 cm tails.
Avoiding these mistakes will help you create a neat and professional-looking Swablu amigurumi.
Creative Customization Ideas FOR ( Crochet Swablu Pokemon Amigurumi )
Make your Swablu truly one-of-a-kind with these fun ideas:
- Color Variations: Try a shiny yellow body with white wings, or make a pastel pink or purple Swablu for a cute fantasy version.
- Mini Size: Use 2.5mm hook and thinner yarn to create a tiny 2–3 inch desk version that fits in your palm.
- Accessories: Add a small crocheted hat, scarf, flower crown, or even a tiny backpack for extra personality.
- Keychain or Bag Charm: Attach a metal ring and lobster clasp to turn your Swablu into a portable buddy.
- Special Effects: Use glittery or fluffy yarn for wings to give a magical, sparkling look.
- Themed Sets: Crochet a whole family – normal Swablu, shiny version, and baby Swablu.
Final Thoughts
Creating your own Crochet Swablu Pokemon Amigurumi is a truly rewarding experience. It beautifully combines your love for Pokémon with the joy of handmade crafts. Whether it’s your first amigurumi or your fiftieth, this pattern is sure to bring smiles every time you look at it.