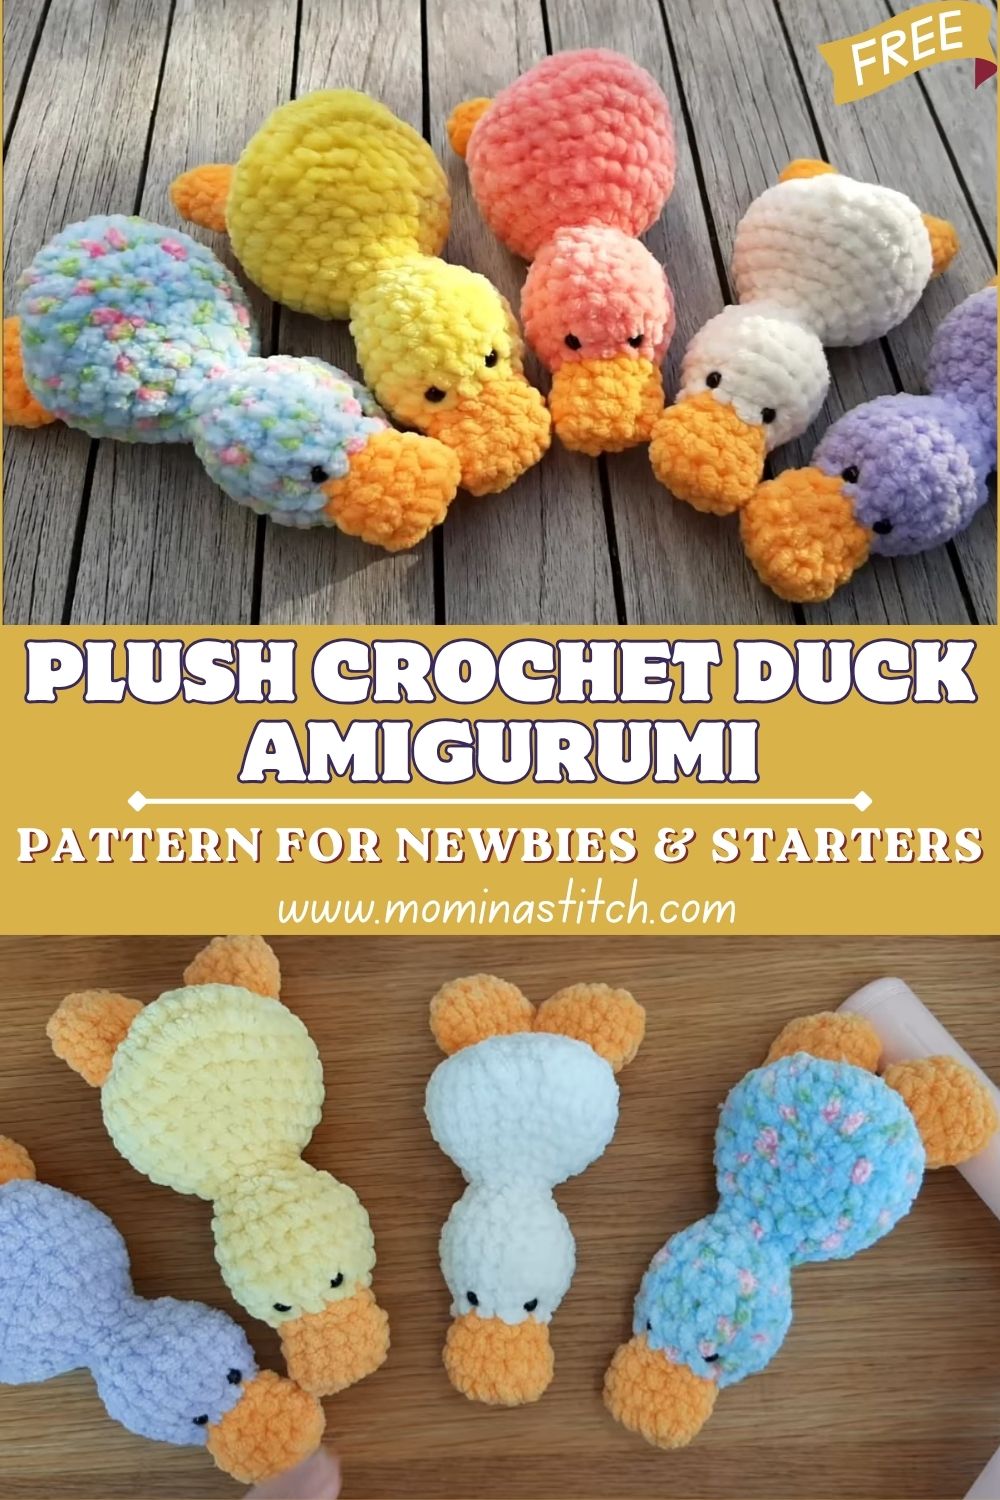
Plush Crochet Duck Amigurumi Pattern For Newbies & Starters
A velvety plush Crochet Duck Amigurumi Pattern brings instant cozy charm, with a long, lying body that looks like it’s peacefully resting. Plush yarn gives it a smooth, cuddle-ready texture and makes every stitch feel gentle.
This plush Crochet Duck Amigurumi pattern stays simple and sweet, with tiny wings, a small tail, and a bright orange beak that stands out. The finished amigurumi duck works beautifully as a beginner-friendly crochet animal and makes a quick, adorable gift or décor piece.
This Crochet Duck Amigurumi is a wonderful project for anyone wanting a quick win without complicated shaping. The stitches stay simple, the parts are small, and the sewing is minimal, so the duck comes together faster than many traditional round amigurumi. Continuous rounds keep the flow easy, and the shape builds naturally as the body lengthens rather than becoming a perfect ball.
The special charm of this duck is the lying, stretched-out body. It looks like a little plush friend resting on its tummy, with small wings on the sides and a tiny tail at the back. Soft plush or velvet yarn makes the duck feel extra cuddly, and the orange beak detail adds that classic duck personality without needing lots of extras. This is the kind of project that feels relaxing from start to finish.
Materials Needed (Exact Measurements)
- Soft plush yarn or velvet yarn (main body colors): 50–80 g (about 70–100 m, depending on thickness)
- Orange yarn (beak and feet): 10–15 g (about 15–25 m)
- Crochet hook: 4.0 mm to 6.0 mm (use 4.5 mm for tighter stitches, 5.5–6 mm for extra plush)
- Safety eyes: 6–8 mm or black yarn for embroidery
- Stuffing (polyfill): about 20–40 g (add as needed)
- Stitch marker: 1
- Tapestry needle: 1
- Scissors: 1 pair
Abbreviations (US Terms)
MR = magic ring
sc = single crochet
inc = increase (2 sc in the same stitch)
dec = decrease (single crochet decrease)
sl st = slip stitch
ch = chain
rep = repeat
FO = fasten off
Skill Level
Beginner level. This duck uses basic amigurumi shaping with simple stitches such as single crochet, increases, and decreases, worked in continuous rounds. Counting stitches and maintaining even tension are the main skills needed.
Finished Size
Small-to-medium plush size, about 5–8 inches long. Size changes depending on yarn thickness, hook size, and how firmly the stuffing is packed.
Time Planning
Total time estimate: 1.5 to 3 hours (depending on experience and yarn type)
- Body: 60–120 minutes
- Beak: 10–15 minutes
- Wings: 15–25 minutes
- Assembly: 15–30 minutes
Important Notes Before Starting
- Use a stitch marker to mark the first stitch of each round so the body stays neat and the shape does not twist.
- Count stitches at the end of every round, especially during increases and decreases, so the duck stays oval and balanced.
- Keep tension even. Plush yarn can hide stitches, so go slow and feel for each stitch with your fingertips.
- Stuff slowly as the body grows. Adding a little at a time helps keep the duck smooth and prevents lumps.
- Aim for an elongated oval, not a ball. Spreading increases across rounds and crocheting longer even sections creates that lying shape.
Step-by-Step Pattern
Start with the main body using a magic ring, crocheting in continuous rounds. The goal is a long, lying body that appears slightly flattened at the bottom and rounded at the top. Plush yarn naturally makes it squishy, so gentle shaping and steady stitch counts do the heavy lifting.
Begin by making Round 1 into the MR with 6 sc, then pull tight. In Round 2, work around to create a soft base. After that, increase gradually over the next few rounds to widen the piece, but avoid making it too round. A helpful approach is to increase evenly and stop once the body is wide enough to look like a little oval pillow rather than a circle.
Next, continue crocheting even rounds with sc only. This is where the lying duck shape really forms. The longer this section is, the longer the duck will look. Keep checking the shape in your hands. The sides should look gently curved, and the body should feel like a small plush loaf.
Then, start stuffing gradually. Add a small pinch of polyfill, push it into the ends, and smooth it with your fingers. Keep the stuffing soft but supportive. An overstuffed duck can look too round, so build the shape slowly and stop often to check. The goal is cuddly and slightly flattened, like a tiny resting duck.
After that, begin decreasing toward the back end. Use dec spaced evenly around the round to taper the body smoothly. Continue decreasing until the opening is small enough to close nicely. Add a final bit of stuffing right before closing, especially near the tail end, to keep the body in shape.
Finally, close the body by working the last decreases and pulling the yarn through to finish. FO, leaving a short tail for closing any remaining gap. The main body should now look like a long plush shape ready for details.
Then create the beak using orange yarn. Make a small, rounded beak that sits neatly on the front of the duck. Start with aana MR, crochet a few single crochets, then add one gentle-increase round to make it a tiny puff. Crochet one even round to give it a little height, then F eaving a tail for sewing. Lightly stuff the beak, or leave it unstuffed for a flatter look, depending on the desired style, to make small wings. The wings should be simple and quick, like little curved petals. Crochet a small piece that is wider at one end and slightly tapered at the other. A beginner-friendly way is to start with a small chain, work single crochets along it, then add a second row with a few increases to create a soft curve. FO and leave a tail for attaching. Make two wings the same size.
After that, create a tiny tail. This can be as simple as a small bump at the back made with a few stitches, or a tiny separate piece shaped like a mini nub. Keep it small, so it matches the simple style and does not add extra sewing stress.
Then add the face. Place safety eyes or embroider small eyes with black yarn. A simple face looks extra cute on this duck because the long body already brings personality. Eyes look sweet when placed slightly above the beak line, with a few stitches of space between them. For plush yarn, it helps to gently part the fibers so placement is clear before finalizing.
Finally, sew the beak onto the front. Stitch around the edges carefully, pulling snug but not tight enough to distort the plush fabric. Weave in ends securely.
Assembly
Attach the wings evenly on both sides of the body. A nice placement is around the upper-middle of the duck,, o the wings look like they rest naturally against the sides. Pin them first using scrap yarn or stitch markers.
Attach the beak at the correct front position. The beak looks best centered and slightly lower on the face, so the duck appears relaxed and sleepy.
Check symmetry before final fixing. Step back and look at the duck from the front and top. Adjust eyes, beak, and wings until everything feels balanced, then sew firmly and weave in ends.
Finishing Touches
Adjust the stuffing evenly by gently pressing and smoothing the body with your hands. Focus on the front and back ends so the duck keeps an even, plush look.
Shape the duck properly by flattening the bottom slightly and rounding the top. Plush yarn makes shaping easy, and a little squeezing helps the duck settle into that lying pose.
Hide all yarn ends neatly by weaving tails inside the body and trimming close. For plush yarn, weave a little extra since the fibers are slippery.
Beginner Tips
- Use a smaller hook than the yarn label suggests so the stuffing does not show through the gaps.
- Feel the stitches rather than relying solely on sight when using plush yarn, especially around increases and decreases.
- Move the stitch marker immediately after the first stitch each round, so rounds do not drift.
- Stuff with small pieces of polyfill instead of large clumps to prevent lumps.
- Take quick shape checks often. A gentle squeeze and smooth can fix small uneven spots early.
Common Mistakes to Avoid
- Loose stitches: This can make stuffing peek through, especially with bright polyfill under light yarn.
- Uneven stuffing: Lumpy filling can make the duck look bumpy instead of smooth and plush.
- Incorrect shape (too round instead of oval): Too many increases or too short an even section can turn the body into a ball.
- Misplaced eyes or beak: Even a one-stitch difference can change the expression, so pin and preview before attaching.
Variations
- Different colors: Try a pastel duck (mint, baby pink, lavender) or a classic yellow duck with an orange beak. Cream and beige also look extra cozy.
- Add a keychain ring: Make a smaller version, stitch a tiny loop on top, and add hardware for a bag charm.
- Make mini or jumbo version: Use thinner yarn for a mini duck or chunky blanket yarn for a big cuddle plush.
- Add a scarf or accessories: A tiny scarf, bow, or mini hat can turn the duck into a seasonal gift or a cute desk buddy.
Conclusion
Soft, simple, and full of charm, this Crochet Duck Amigurumi is the kind of project that feels comforting from the very first round. The lying body shape makes it extra huggable, and the tiny details keep it beginner-friendly while still looking adorable. Grab plush yarn, take the shaping slowly, and enjoy watching a sweet little duck come to life stitch by stitch.