Plush Crochet Rabbit Amigurumi Pattern Step by Step Idea For beginners
A tiny amigurumi bunny is one of those projects that instantly makes a crochet basket feel happier. Not only does this crochet rabbit work up quickly, but it also looks adorable sitting on a shelf, tucked into an Easter basket, or given as a gift with a little bow.
Even better, this mini crochet bunny pattern is beginner-friendly and uses simple shaping, soft plush yarn, and minimal sewing. So, the finished bunny looks polished, while the process stays calm and fun.
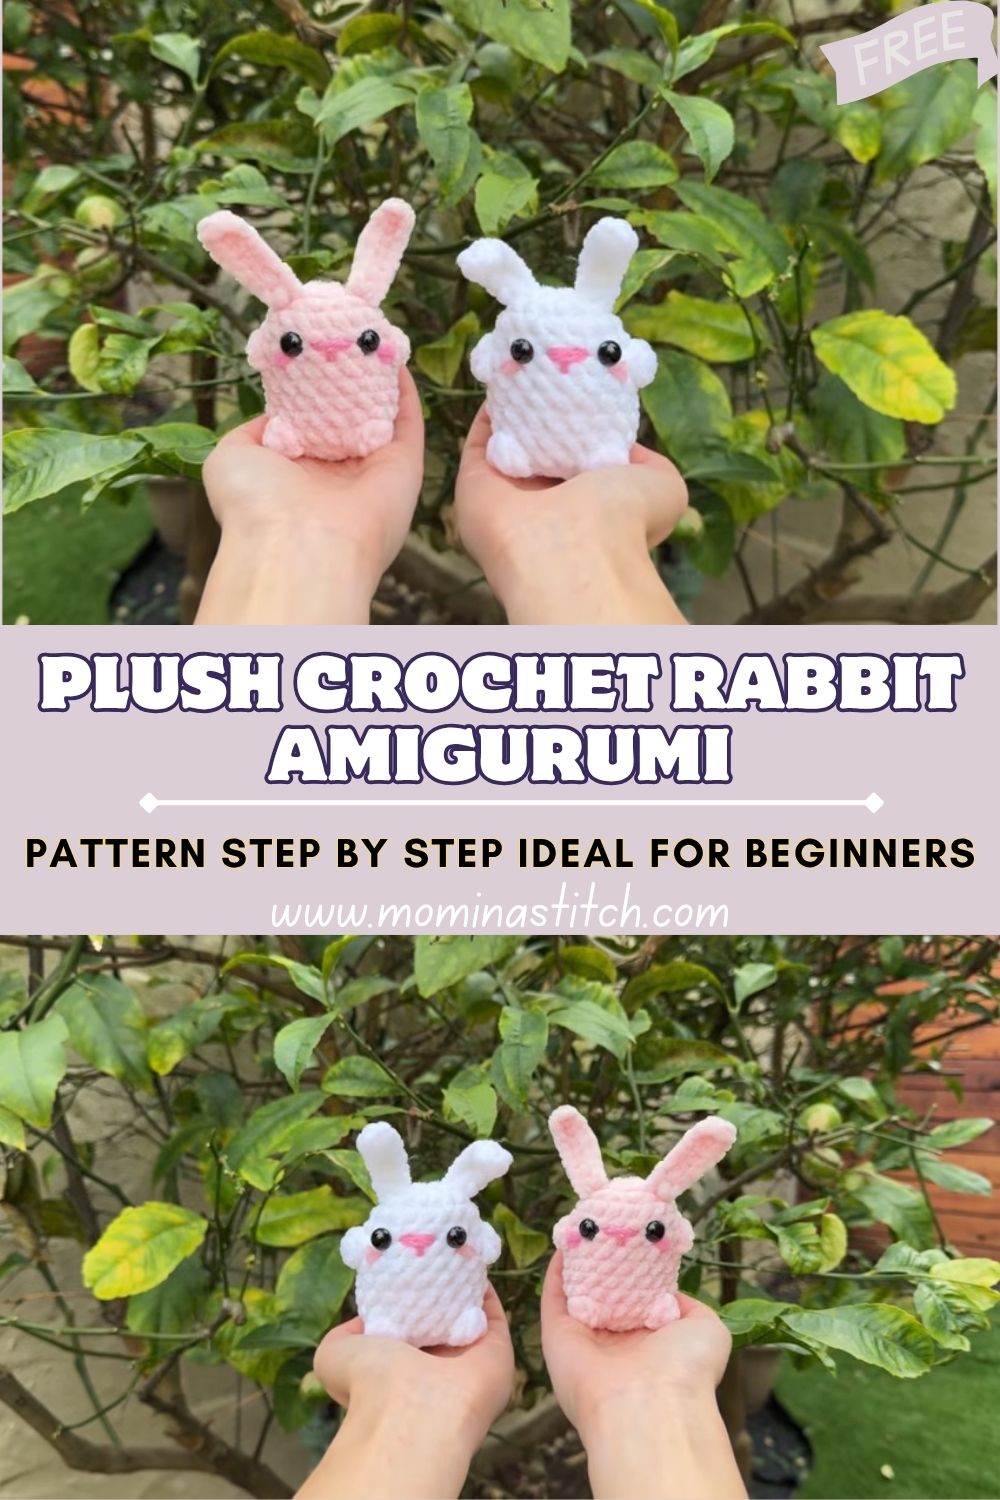
Meanwhile, mini crochet animals have been trending for a very sweet reason: they are fast, portable, and unbelievably giftable. Bunnies, especially, keep popping up everywhere because they look cute in every color, they match springtime vibes, and their long ears make them instantly recognizable.
This bunny pattern is a great starter project because the body and head are formed from a single simple shape, the limbs are created with easy “pop-out” stitches, and the face details are small but beginner-safe. After that, a pair of soft ears gets added with very little sewing (or even a knot-on method), which keeps things stress-free.
Basic stitches used include: single crochet, increase, decrease, half double crochet, chain, slip stitch, and bobble stitch.
Important Notes Before Starting
- Use a tight stitch tension, especially with plush yarn, so stuffing does not peek through later.
- Count rounds carefully and place a stitch marker in the first stitch of each round to stay on track.
- Safety eyes should be inserted before final closure, as the opening becomes too small afterward.
- Bobble stitches should be gently pushed outward from the inside so that the arms, feet, and tail “pop” nicely.
- If stitch placement looks slightly off, adjusting by 1 stitch (before a bobble) can quickly re-center details.
Skill Level
This is an easy/beginner amigurumi project. It uses basic crochet stitches and a simple bobble technique to create cute limbs. Additionally, the shaping is repetitive and forgiving, which makes it great for first-time plush makers.
Materials Needed
- Yarn (Body): Super bulky weight #6 plush/velvet yarn, about 35–50 g (roughly 30–60 m, depending on fluff and tension)
- Yarn (Nose details): Worsted weight #4 yarn, 1–2 g (or embroidery floss)
- Crochet hook: 5.0 mm (use 4.5 mm if stitches feel too loose)
- Safety eyes: 10 mm (or 8 mm for a smaller face)
- Stuffing: Polyester fiberfill, about 10–15 g
- Yarn needle: 1 blunt tapestry needle
- Stitch marker: 1 removable marker (or a scrap of yarn)
- Scissors
- Optional: Keychain ring + small jump ring (if turning the bunny into a bag charm)
Abbreviations
- ch = chain
- sc = single crochet
- hdc = half double crochet
- dc = double crochet
- inc = increase (2 sc in the same stitch)
- dec = decrease (invisible decrease recommended)
- sl st = slip stitch
- st(s) = stitch(es)
- rnd = round
- Bbl = bobble stitch (explained below)
Making Time (Overview)
Total time: 45–90 minutes, depending on yarn type and comfort with bobble stitches.
Step-by-Step Instructions
1) Body (Main Shape) – 3 Steps (Approx. 25–35 minutes)
This bunny is made in continuous rounds, creating a smooth plush tube that gradually shapes into a rounded head and body.
Step 1: Start at the top and grow the circle
- Rnd 1: 6 sc in a magic ring (or ch 2 method), (6 sts)
- Rnd 2: inc in each st around, (12 sts)
- Rnd 3: (1 sc, inc) repeat 6 times, (18 sts)
Step 2: Build height for a round head
4. Rnd 4–5: sc around, (18 sts) for 2 rounds
Step 3: Add arms, then continue the body
5. Rnd 6: 4 sc, Bbl, 8 sc, Bbl, 4 sc, (18 sts)
- Rnd 7–10: sc around for 4 rounds, (18 sts)
Bobble Stitch (Bbl)
A plush bobble is made by working multiple partial double crochets into the same stitch, then closing them together. For this bunny, use a 5-dc bobble: work 5 incomplete dc into the same stitch (leaving loops on the hook), then yarn over and pull through all loops to close.
2) Head (Joined, Not Separate) (Approx. 10–15 minutes)
- Rnd 11: 1 sc, Bbl (tail), 5 sc, Bbl (foot), 4 sc, Bbl (foot), 5 sc, (18 sts)
Stuff the bunny now:
Add polyfill gradually. First, fill the head firmly so it stays round. Next, fill the body a little lighter so the bunny can sit without rolling.
- Rnd 12: (1 sc, dec) repeat 6 times, (12 sts)
- Rnd 13: dec around 6 times, (6 sts)
- sl st to next st, fasten off, leaving a long tail.
- Thread tail through the front loops of the final 6 stitches, pull tight to close, then weave in securely.
3) Ears (Long, Soft Bunny Ears) (Approx. 10–15 minutes)
Make 2 ears:
- Ch 8
- Starting in 2nd ch from hook: 1 hdc, then hdc in next 5 chains (6 hdc total)
- sc in the last chain
- Fasten off with a long tail
Shaping tip:
After that, pinch the base of the ear slightly to encourage a natural bend. Meanwhile, if a more “floppy” ear is desired, use a slightly larger hook for the ears only.
4) Arms & Legs (Integrated) (Approx. 2–3 minutes)
No separate arms or legs are needed because the bobble stitches create them directly on the body. As a result, the bunny stays beginner-friendly and quick.
5) Tail (Fluffy Bobble) (Approx. 1–2 minutes)
The tail is already created as the first bobble in Round 11. After that, double-check that it sits centered on the back.
6) Accessories / Details (Optional) (Approx. 5–10 minutes)
- Blush cheeks (embroidered): Two soft stitches under each eye
- Tiny bow: Small rectangle, cinch the center, tie around the neck
- Mini heart patch: Felt or crochet applique on belly
7) Face & Assembly (Approx. 15–25 minutes)
1: Place safety eyes evenly
- Insert eyes between Rnds 5 and 6
- Keep about 4 stitches apart
2: Embroider the nose and mouth
- Center the nose between the eyes
- Add a small horizontal stitch, then a tiny vertical stitch below
3: Attach ears with minimal sewing
- Pin ears first for symmetry
- Sew or knot the base securely, then weave ends deep inside
Special Features
- Soft plush texture
- Cute upright bunny ears
- Minimal sewing
- Tiny and adorable size
Sizing Tips
Thicker yarn and a bigger hook create a larger bunny. Meanwhile, thinner yarn and a smaller hook make a smaller, firmer bunny. Additionally, tighter tension helps plush yarn look cleaner and keeps stuffing hidden.
Finishing Tips
- Use invisible decreases for smooth shaping
- Secure knots twice, then weave ends through multiple stitches
- Stuff gradually and shape with fingers
- Finally, trim ends only after weaving securely
Common Mistakes to Avoid
- Loose stitches
- Overstuffing
- Uneven facial placement
- Incorrect ear positioning
- Weak assembly
Variations & Customization Ideas
- Colors: white, beige, blush pink, lavender, mint, pastel tones
- Add a scarf, bow, or tiny flower
- Change ear length
- Turn it into a keychain or desk toy
Tutor Suggestions
First, practice the bobble stitch on scrap yarn. Next, count stitches after each round. Meanwhile, place eyes with good lighting for symmetry. After that, shape the plush firmly with gentle stuffing. Finally, enjoy experimenting each bunny gets cuter with practice.
Conclusion FOR ( Crochet Rabbit Amigurumi Pattern )
This amigurumi bunny is a quick, cozy project with a soft plush feel and a sweet face that comes together fast. After the first one is finished, trying new colors, ear lengths, and tiny accessories becomes the fun part—so every crochet rabbit can look a little different.