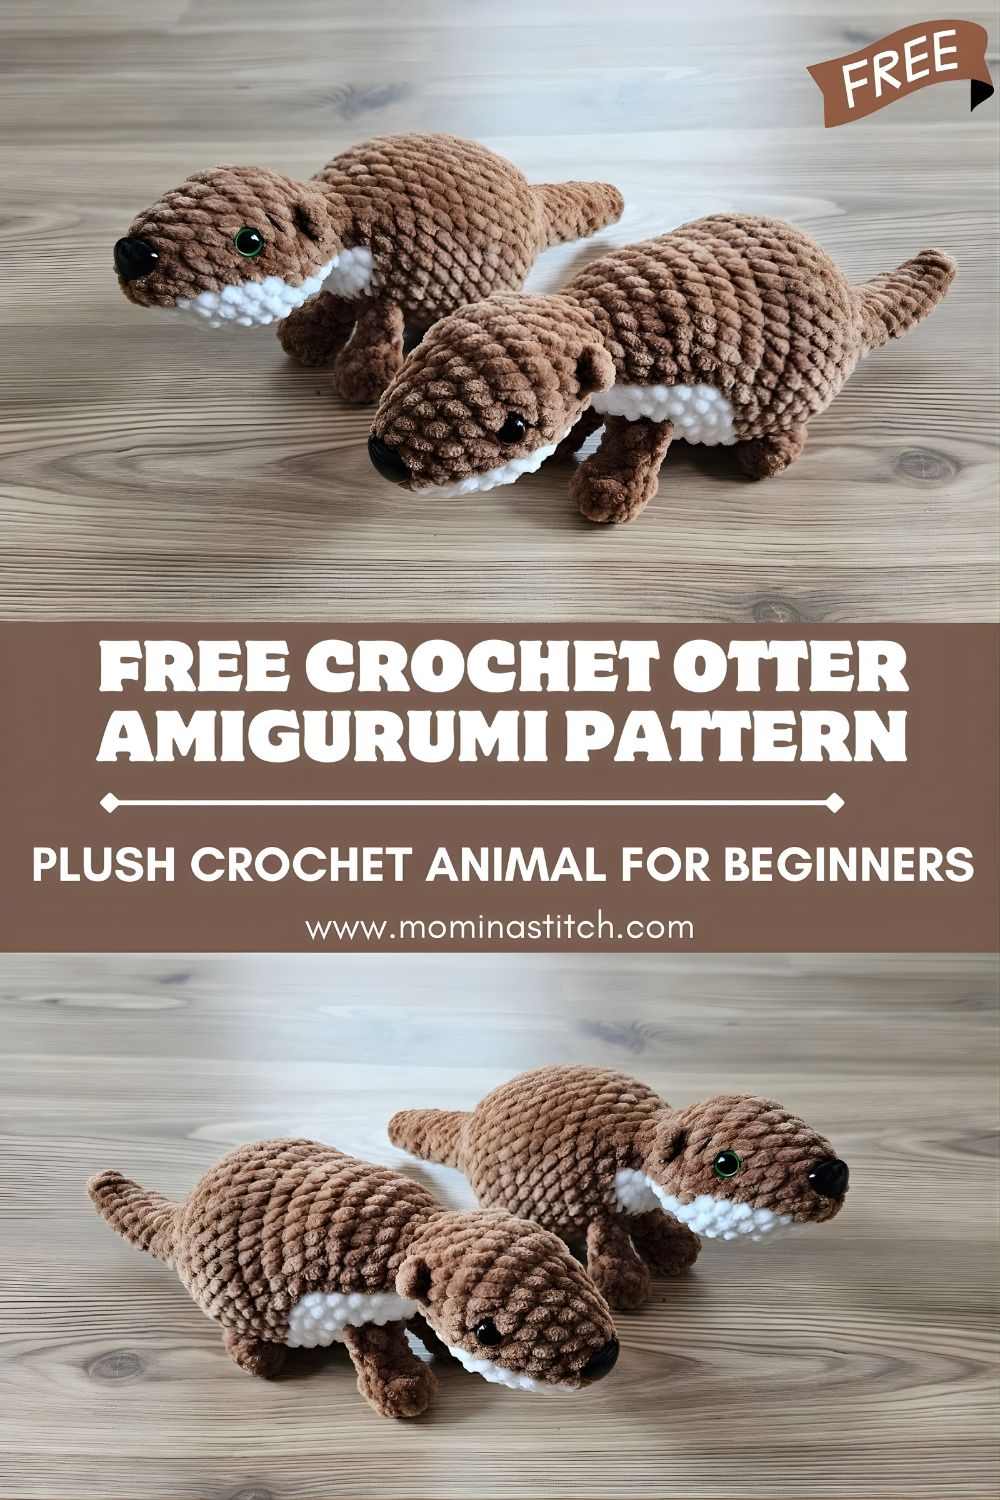
Free Crochet Otter Amigurumi Pattern – Plush Crochet Animal for Beginners
This crochet otter amigurumi pattern is a soft, cuddly project that’s perfect for anyone who loves plush yarn and cute crochet animals. If you’re looking for a beginner-friendly plush crochet toy that works up quickly and makes an adorable handmade gift, this little otter is a must-try.
The crochet otter in the tutorial has a sweet, rounded look made with soft brown plush/chenille yarn, a white belly, tiny legs, and a chunky, huggable body. Its round head, shiny safety eyes, and a small black nose give it that classic “kawaii plush” charm. Otter amigurumi toys are popular because they’re cute, comforting, and easy to personalize. This project is great for beginners ready to learn plush crochet basics like tight stitches, simple shaping, and clean assembly.
Materials Needed
- Brown plush or chenille yarn
- White yarn (for belly)
- Crochet hook (4 mm – 6 mm recommended)
- Black safety eyes (size depends on yarn; typically 10–14 mm for plush)
- Black safety nose or black embroidery thread
- Fiberfill stuffing
- Yarn needle
- Stitch marker
- Scissors
Optional: pins for positioning pieces, a small amount of felt for optional details.
Crochet Abbreviations
- MR – Magic Ring
- sc – Single Crochet
- inc – Increase (2 sc in same st)
- dec – Decrease (sc2tog; invisible decrease recommended)
- sl st – Slip Stitch
- ch – Chain
- st – Stitch
- BLO – Back Loop Only
Step-by-Step Crochet Pattern
Notes Before You Start
- Work in continuous rounds (do not join unless stated).
- Plush yarn can hide stitches—use a stitch marker every round.
- Counts in parentheses ( ) show the stitch total for the round.
Head & Body (Worked as One Piece)
Using brown plush yarn:
Round 1: Start with MR, 6 sc in magic ring (6)
Round 2: inc in each st (12)
Round 3: (sc, inc) repeat around (18)
Round 4: (2 sc, inc) repeat around (24)
Rounds 5–10: sc around (24)
Add Safety Eyes + Nose
- Place safety eyes between Rounds 7–8, about 6–8 stitches apart (adjust for your preferred expression).
- Add a safety nose centered below the eyes, or embroider a small triangle nose later.
Round 11: (2 sc, dec) repeat around (18)
Round 12: (sc, dec) repeat around (12)
Stuff Firmly
Stuff the head/body evenly, focusing on a smooth, rounded shape. Add stuffing a little at a time so it doesn’t get lumpy.
Round 13: dec around (6)
Fasten off, close the opening, and weave in the end.
Belly Patch (White)
Using white yarn (smooth yarn works well for contrast):
Simple Oval Belly Patch (easy method)
- Ch 6
- In the 2nd ch from hook: sc 4, 3 sc in last ch
- Continue on the other side of the chain: sc 3, 2 sc in last ch (oval formed)
Now work in small rounds around the oval:
- Round 2: inc, sc 3, inc x3, sc 3, inc x2
Fasten off,f leaving a long tail.
Attach Belly Patch
Pin the belly patch to the front of the otter body and sew around the edges neatly. Slight stretching is okay—plush yarn can be forgiving.
Tip: If you prefer a more “patch-like” belly (as in plush toys), you can also crochet short rows of sc into a rounded rectangle and sew it on. Both options look great.
Legs (Make 4)
Using brown plush yarn:
Round 1: MR with 6 sc (6)
Rounds 2–3: sc around (6)
Fasten off,ff leaving a sewing tail.
Lightly stuff each leg (just a pinch of fiberfill) so they stay rounded.
Attach Legs (Underside)
Sew two legs toward the front underside and two toward the back underside so the otter can sit nicely. Keep them evenly spaced for balance.
Tail
Using brown plush yarn:
Round 1: MR with 6 sc (6)
Rounds 2–5: sc around (6)
Fasten,o leaving a tail for sewing.
Sew the tail centered on the lower back area of the body.
Ears (Make 2)
Using brown plush yarn:
Round 1: MR with 5 sc (5)
Round 2: inc around (10)
Sl st to finish. Fasten off, leaving a sewing tail.
Flatten each ear slightly and sew to the top sides of the head area (symmetrical placement).
Assembly Instructions
- Insert safety eyes and nose (best done before final closing; if embroidering, do it after stuffing).
- Sew the belly patch onto the front center of the body.
- Attach ears to the top sides of the head area.
- Attach legs to the underside (2 front, 2 back), checking that the otter sits evenly.
- Sew the tail to the lower back area.
- Final shaping: Gently squish and roll the plush to distribute stuffing and create a cute, rounded “plushie” look.
Optional face detail: Add a short embroidered mouth line under the nose using black thread.
Beginner Crochet Tips
- Plush yarn works best with a slightly larger hook (4–6 mm) so you can find stitches more easily.
- Use a stitch marker every round—plush yarn hides the stitch tops.
- Stuff gradually for smooth shaping; small amounts prevent lumps.
- Sew pieces securely with multiple passes—plushies get handled and hugged a lot.
- Keep stitches tight (or size down your hook if needed) so stuffing doesn’t peek through.
Creative Uses for This Crochet Otter
- Handmade kids toy (embroider eyes instead of safety eyes for very young children)
- Baby shower gift
- Nursery decoration (pair it with other sea animals)
- Crochet market item (plushies sell well and look eye-catching)
- Cute desk companion or stress buddy
Conclusion
This crochet otter amigurumi plush toy is a cozy, beginner-friendly project that’s simple to assemble and incredibly satisfying to finish—especially in soft plush yarn. Once you make one, it’s hard to stop: try different shades of brown, add a speckled belly, or size up with thicker yarn for an even bigger cuddle buddy. Have fun experimenting, and don’t forget to share your otter plush when it’s finished!
Create a cute crochet otter amigurumi pattern plush with this easy, beginner-friendly tutorial. Perfect for handmade toys, gifts, nursery decor, and crochet lovers who adore soft plush animals.