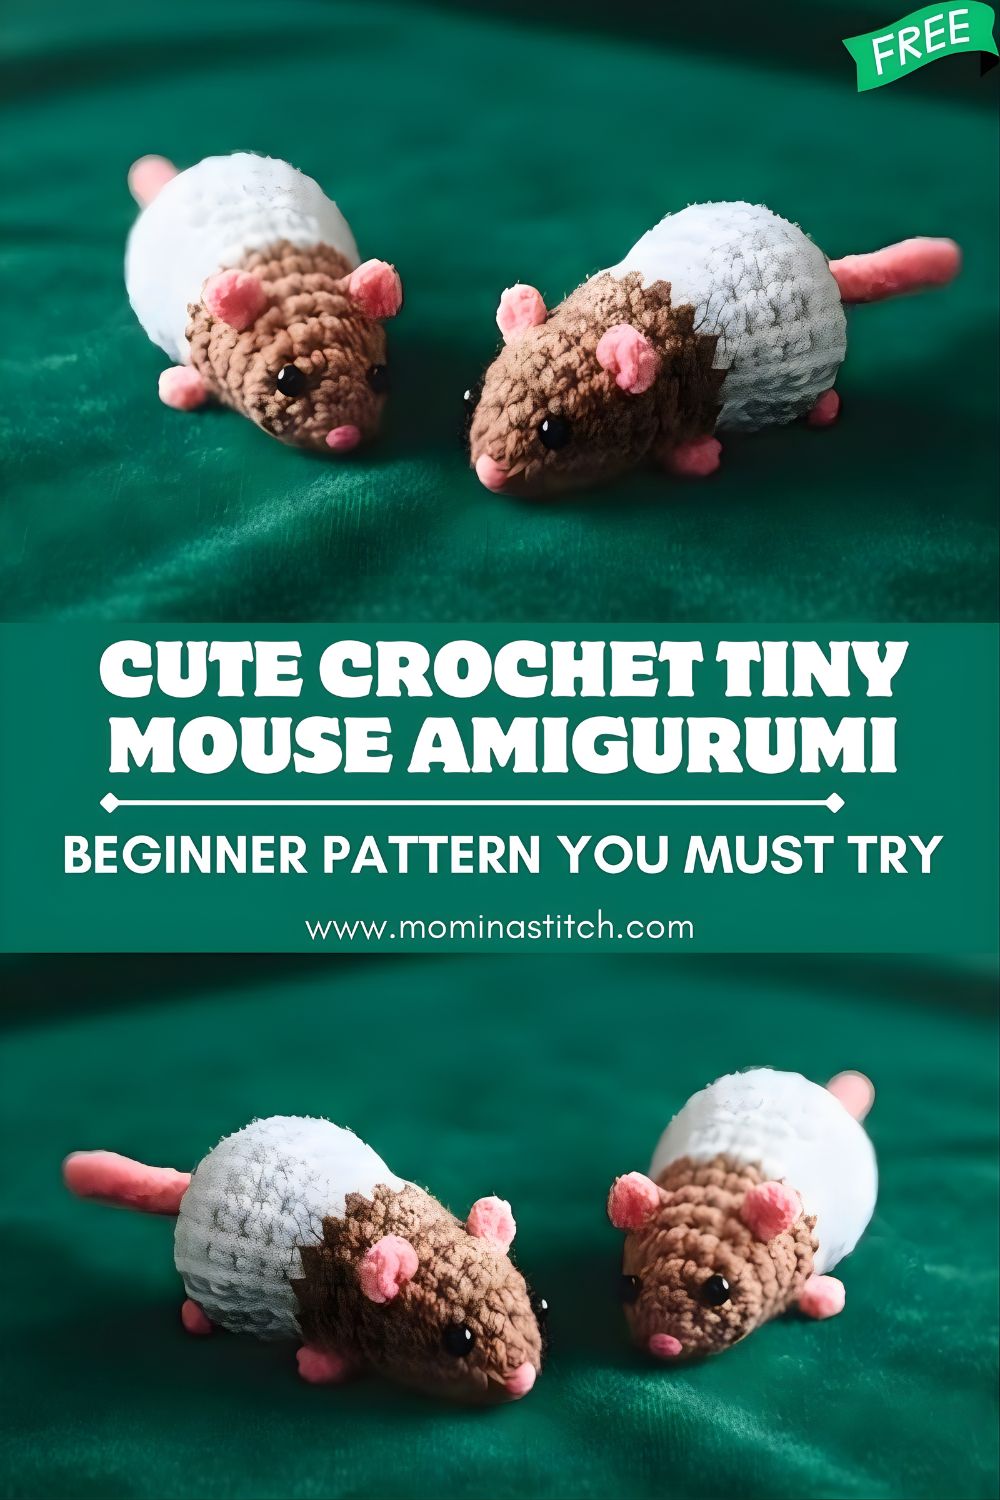
Cute Crochet Tiny Mouse Amigurumi Beginner Pattern You Must Try
This crochet mouse amigurumi is a tiny, adorable project that’s perfect for anyone who loves mini crochet animals, beginner amigurumi patterns, and quick makes. With its brown head, white body, pink ears, and pink tail (just like the mice in the Crochet Tiny Mouse Amigurumi), this little DIY crochet toy can be used as a desk decoration, a keychain/bag charm, or a small handmade gift.
Cute crochet animal projects, especially a crochet mouse,e are popular because they’re fast to finish, easy to customize, and make thoughtful handmade gifts. This amigurumi mouse pattern is best for beginners to confident beginners (and also relaxing for intermediates). You’ll learn the basics of shaping, neat color changes, eye placement, stuffing, and simple assembly.
Finished Size
Using DK/light worsted yarn with a 2.5–3 mm crochet hook, your finished crochet mouse will be approximately 3–4 in (8–10 cm) long, plus a 2–3 in (5–7 cm) tail. Size varies based on yarn thickness and tension.
Materials Needed
- Yarn colors:
- Brown (head)
- White (body)
- Pink (ears + tail)
- Crochet hook: 2.5–3 mm
- Safety eyes: 5–6 mm black
- Fiberfill stuffing
- Yarn needle (tapestry needle)
- Stitch marker (or scrap yarn)
- Scissors
Optional: embroidery floss for nose/whiskers, keychain ring + jump ring, blush/pastel chalk.
Crochet Abbreviations
- MR – Magic Ring
- sc – Single Crochet
- inc – Increase (2 sc in the same st)
- dec – Decrease (sc2tog; invisible decrease recommended)
- sl st – Slip Stitch
- ch – Chain
- st – Stitch
Notes:
- Work in continuous rounds (do not join unless stated).
- Place a stitch marker in the first stitch of each round.
- Stitch counts are in ( ).
Crochet Mouse Amigurumi Pattern (Step-by-Step)
Overview of the Build
This mouse is crocheted in a simple, beginner-friendly way:
- The head (brown) is a rounded ball shape.
- Body (white) continues from the head with a clean color change and a gentle oval finish.
- Ears (pink) are small circles sewn onto the head.
- Tail (pink) is a chain-based tail sewn to the back.
Note: Your scrape returned “Error transcribing YouTube,” so I can’t quote the exact stitch counts from the video. The pattern below is an original, tutorial-style version designed to match the mouse in your image (brown head, white body, pink ears/tail).
Head (Brown)
Round 1: 6 sc in MR (6)
Round 2: inc in each st (12)
Round 3: (1 sc, inc) repeat x6 (18)
Round 4: (2 sc, inc) repeat x6 (24)
Round 5: (3 sc, inc) repeat x6 (30)
Rounds 6–8: sc around (30)
Safety eye placement
Insert safety eyes between Rounds 7 and 8, about 6–7 stitches apart.
- For a “cuter” look: 5–6 stitches apart.
- For a more realistic look: 7–8 stitches apart.
Secure the backs firmly.
Round 9: (3 sc, dec) repeat x6 (24)
Round 10: (2 sc, dec) repeat x6 (18)
At the end of Round 10, your head should look nicely rounded with a small opening leading into the body.
Body (White)
Where to change yarn color
Change to white on the last stitch of Round 10:
- Start the final sc of the round, and on the last yarn-over (pull through 2 loops), switch to white to complete the stitch cleanly.
Round 11 (white): (1 sc, dec) repeat x6 (12)
Round 12: sc around (12)
Round 13: (1 sc, inc) repeat x6 (18)
Round 14: (2 sc, inc) repeat x6 (24)
Rounds 15–17: sc around (24)
When to start stuffing
Start stuffing around Round 15.
- Add small pieces of fiberfill and push them into the curves.
- Keep the neck area (between head and body) firm but not stretched.
Stuff more, shaping the body into a smooth oval.
Add a final bit of stuffing firm, but not so much that the stitches gap.
How to close the body
Fasten off, leaving a long tail.
- Thread the yarn needle and weave through the front loops of the last 6 stitches.
- Pull tight to close.
- Weave in the end securely.
Mouse Ears Pattern (Pink) — Make 2
These simple circular ears match the small, realistic look in the photo.
Round 1: 6 sc in MR (6)
Round 2: inc in each st (12)
Round 3: sc around (12)
Sl st to finish. Fasten off, leaving a long tail for sewing.
Optional shaping: Fold the ear slightly and add 1–2 stitches at the base when sewing so it sits more naturally on the head.
Mouse Tail Pattern (Pink)
You can crochet a simple curly or straight tail.
Option A (Curly tail like a cord)
- Ch 22–30 (adjust length)
- Starting inthe 2nd ch from the hook: sl st in each ch across
Fasten off, leaving a long sewing tail.
Option B (Straight tail, slightly thicker)
- Ch 18–26
- Starting inthe 2nd ch from the hook: sc across
Fasten off, leaving a long sewing tail.
Assembly Instructions
1) Attach ears
- Pin ears on the sides/top of the head, around Rounds 5–7.
- Check symmetry from the front (both height and angle).
- Sew each ear securely around the base using the long tail.
2) Attachthe tail
- Position the tail at the back of the body, centered near the closed end.
- Sew through several stitches so it’s strong (important if used as a keychain).
- Weave in the tail end inside the body.
3) Shape the mouse
- Roll the mouse gently between your palms to even out stuffing.
- If the head feels floppy, add a tiny bit more stuffing near the neck area.
- Optional: embroider a small pink nose and add whiskers with thin thread.
Customization Ideas
- Try different yarn colors: gray + cream for a classic mouse, tan + white for a field mouse, or pastel colors for a kawaii style.
- Turn it into a keychain: sew a small yarn loop between the ears and attach a keyring.
- Make larger versions: use thicker yarn (worsted or chenille) and a larger hook (3.5–5 mm). Keep the same stitch counts for a bigger mouse, or add an extra increase round for an even rounder head/body.
- Add details: a tiny felt cheese, embroidered eyebrows, or a little scarf.
Beginner Crochet Tips
- Use a stitch marker every round. Continuous rounds are easy to lose track of—marking your first stitch keeps everything clean.
- Keep stitches tight for amigurumi. A smaller hook helps prevent stuffing from showing through gaps.
- Use invisible decreases if possible—they make the shape smoother and more professional.
- Stuff gradually. Add small pieces, shape as you go, and avoid overstuffing (which stretches stitches).
- Count often. In small projects, one extra stitch can change the shape noticeably.
Conclusion
This tiny crochet mouse amigurumi is a must-try if you love quick, cute projects that look impressive but stay beginner-friendly. Make a pair like the image (brown head, white body, pink details), then experiment with colors and sizes to create a whole little mouse family. If you try this amigurumi mouse pattern, share your finished mice and tag your project photos—handmade minis are always worth showing off!