Free Crochet Monster Pattern With a Third Eye
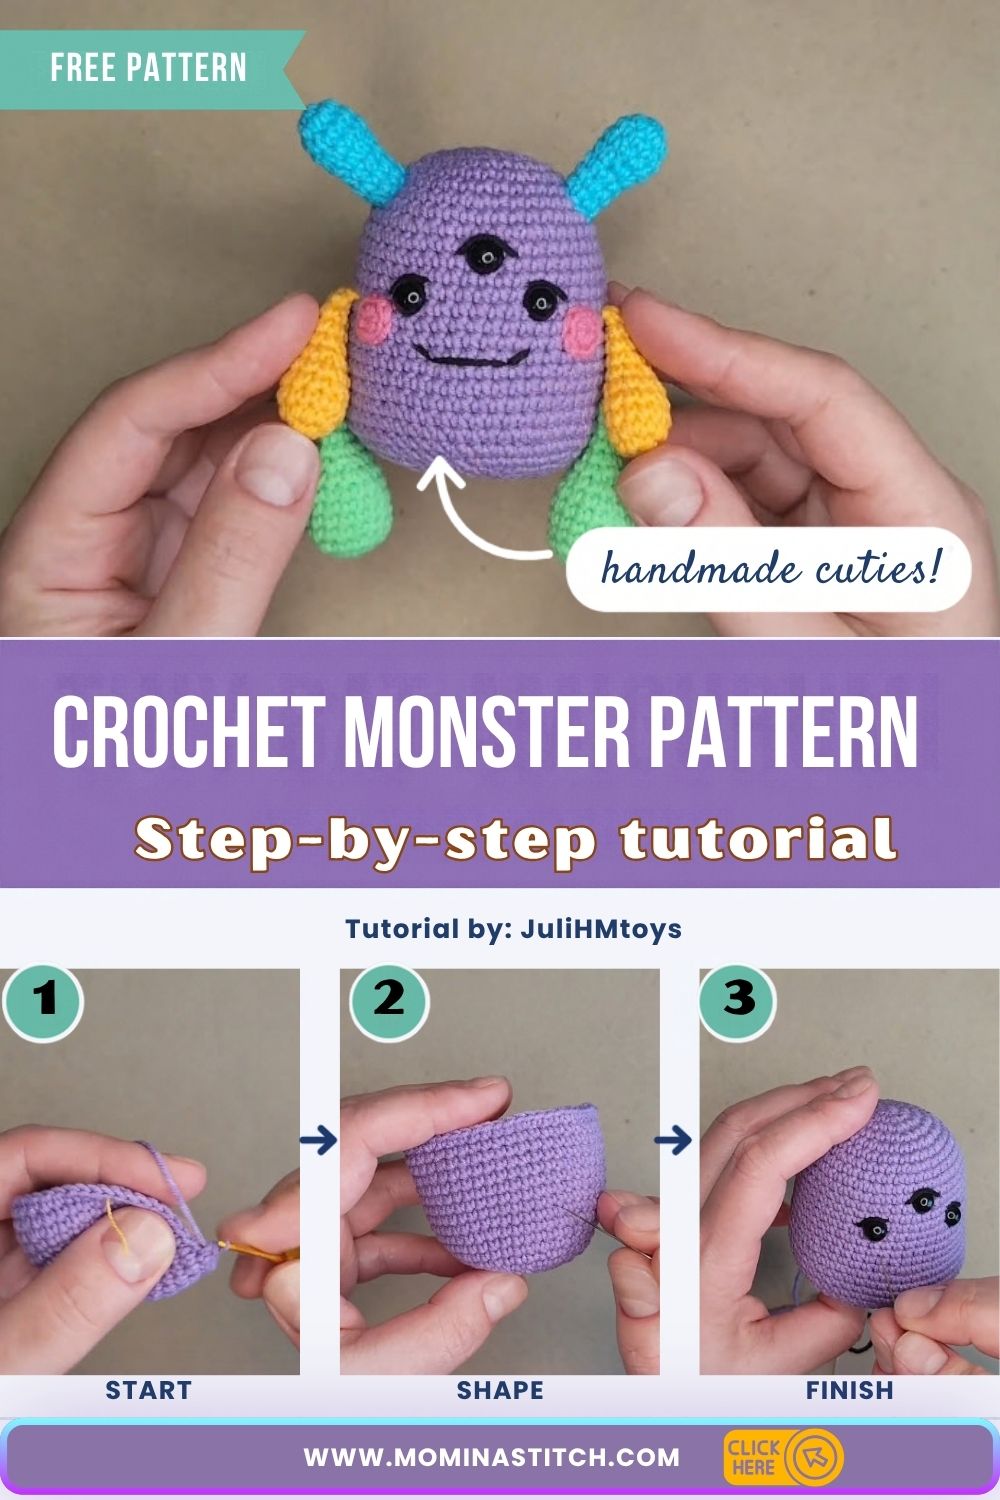
Three black safety eyes sit in a neat triangle on a round purple face, and the Free Crochet Monster Pattern With a Third Eye takes you through every stage of making him. Yellow arms, green legs, and pink cheeks also give the crochet monster plenty of character.
He works well as a shelf buddy, and he also makes a fun Halloween treat or a gift for a child. The head starts as a small circle at the crown, then grows down into a deep cup. Because you set the eyes before closing the body, the backs stay hidden inside. What makes the free crochet monster pattern special is its simple one-piece body paired with a playful face. Below, you’ll find full steps for the body, the amigurumi monster limbs, and the face of your three-eyed crochet toy.
Free Crochet Monster Pattern Overview
The free crochet monster pattern builds the head and belly together as one round body. Made with DK (light) cotton yarn and a 3 mm hook, the finished monster stands about 4 inches tall. All instructions also use US crochet terms.
First of all, you begin at the crown with a small flat circle. Then the circle grows until the sides can turn straight down. When the belly rounds are done, the three safety eyes go in.
Then you decrease, stuff, and close the base. The yellow arms and green legs are sewn on afterward. Finally, pink cheeks, black lash lines, and a stitched smile complete the face.
Time Box
- Body: the longest stage, since it covers the crown, sides, eyes, and closing
- Arms and legs: quick, because each piece is small
- Face and assembly: slower, careful work, especially for the cheeks, lashes, and smile
- Total: about 4 to 5 hours overall
Materials for the Free Crochet Monster Pattern
Before you start, gather everything the free crochet monster pattern calls for, so the stitching goes smoothly.
- DK (light) cotton yarn in purple for the body
- DK cotton yarn in yellow for the arms, green for the legs, and pink for the cheeks
- Black yarn for the lashes and smile
- 3 mm crochet hook
- 3 black safety eyes (10 mm for the top eye)
- Bright scrap yarn or a stitch marker
- Fiberfill stuffing
- Yarn needle and sewing pins
Abbreviations (US Terms)
- MR – magic ring
- sc – single crochet
- inc – increase (2 sc in the same stitch)
- dec – decrease (sc two stitches together)
- sl st – slip stitch
- st(s) – stitch(es)
- Rnd – round
Also, the number in brackets at the end of each round is your stitch count.
Free Crochet Monster Pattern Instructions Step by Step
Work every piece of the free crochet monster pattern in a continuous spiral instead of joining the rounds. Then move your marker up at the start of each new round.
Step 1: Start the Crown With a Magic Ring
Pick up the purple DK cotton and the 3 mm hook. If you plan to use another brand, the Craft Yarn Council yarn weight chart will also help you match the weight.
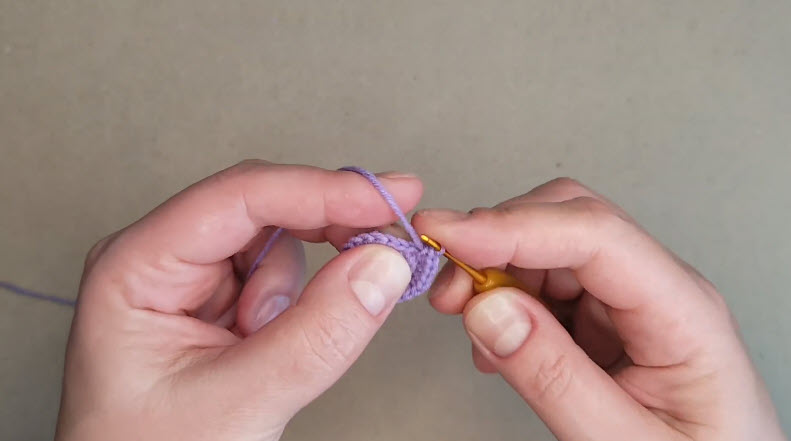
Make a magic ring and work Rnd 1 into it. Then pull the tail snug to close the center before you continue.
- Rnd 1: 6 sc in MR (6)
- Rnd 2: inc in each st around (12)
- Rnd 3: (sc, inc) x6 (18)
- Rnd 4: (2 sc, inc) x6 (24)
Stitch check: the center hole should be fully closed, and the circle should lie flat. However, a cup shape at such an early stage usually means an increase was skipped.
Step 2: Grow the Flat Circle
Keep adding 6 stitches in every round. Meanwhile, shift where each increase falls by a stitch or two, so the crown stays round instead of turning into a hexagon.
- Rnd 5: (3 sc, inc) x6 (30)
- Rnd 6: (4 sc, inc) x6 (36)
- Rnd 7: (5 sc, inc) x6 (42)
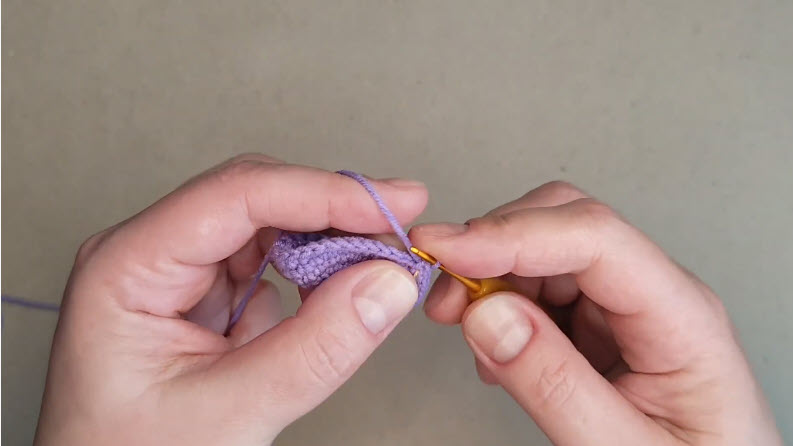
The edge may curl in your hand, especially as the circle gets bigger. Still, lay it on the table now and then to confirm it sits flat. Then work the last increase round.
- Rnd 8: (6 sc, inc) x6 (48)
Step 3: Work the Sides Without Increases
Before moving on, count once more to confirm 48 stitches. From here, work 1 sc in each stitch around, so the piece soon bends down into a deep cup.
- Rnds 9–16: sc in each st around (48)
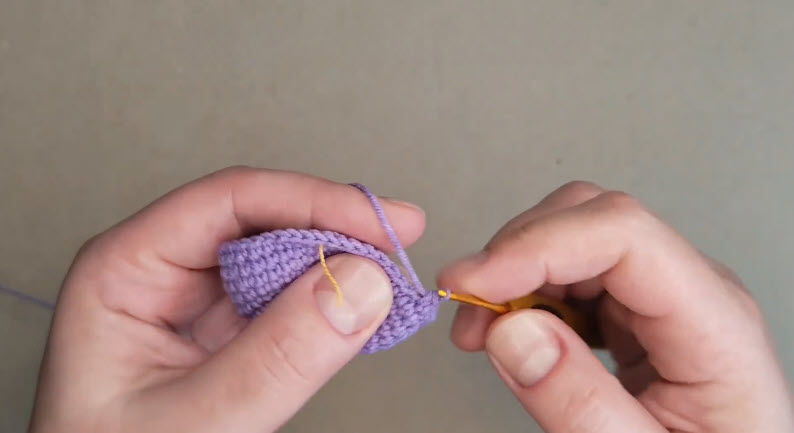
In the photo, a strand of yellow scrap yarn marks the first stitch of each round. It also gets carried up the work as you go.
Step 4: Work the Belly and Set the Three Eyes
Then keep working even rounds to build the belly.
- Rnds 17–24: sc in each st around (48)
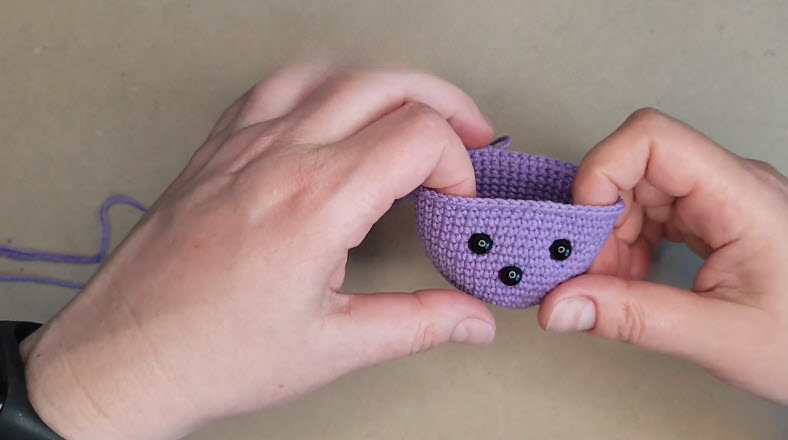
By now, the cup should hold straight walls on its own. Hold it with the round crown facing down, because from that angle the single eye sits closer to the crown. As a result, it ends up as the third eye on top.
- Place the 10 mm top eye between Rnds 12 and 13.
- Then set the lower pair between Rnds 16 and 17, with 8 stitches between them.
- Before inserting any eyes, push a pin or needle into each spot to test the position.
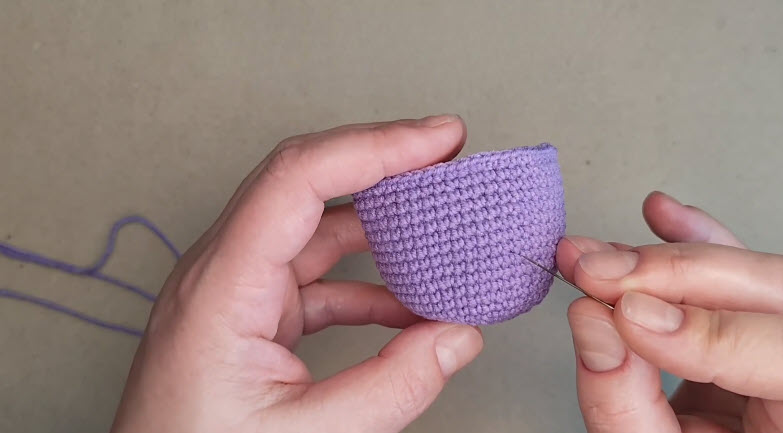
Check the triangle from the front before you snap on the backs, because once the washers lock, the eyes are very hard to move.
Pro tip: Push the posts through first, then turn the monster crown-up before locking anything. The face reads very differently right side up, so small spacing problems are easier to spot.
Step 5: Decrease, Stuff, and Close the Body
When the eyes are locked in place, start shaping the base.
- Rnd 25: (6 sc, dec) x6 (42)
- Rnd 26: (5 sc, dec) x6 (36)
- Rnd 27: (4 sc, dec) x6 (30)
- Rnd 28: (3 sc, dec) x6 (24)
Then stuff firmly after Rnd 28. Pay extra attention to the crown, because it shapes the whole head. Also, add small amounts at a time and press them into the curve.
- Rnd 29: (2 sc, dec) x6 (18)
- Rnd 30: (sc, dec) x6 (12)
- Rnd 31: dec x6 (6)
Finally, fasten off and weave the tail through the front loops of the last round. Then pull it closed and hide the end inside the body.
Step 6: Crochet the Monster Arms and Legs
The arms and legs both look like soft teardrops, so they share the same basic shape. First of all, make 2 arms in yellow yarn, starting at the rounded tip.
- Rnd 1: 6 sc in MR (6)
- Rnd 2: inc x6 (12)
- Rnds 3–5: sc around (12)
- Rnd 6: (2 sc, dec) x3 (9)
- Rnds 7–10: sc around (9)
Put a little stuffing in the tip only, so the open end stays flat and easy to sew. Then fasten off with a long tail.
The 2 legs are made the same way in green, but a little fuller.
- Rnd 1: 6 sc in MR (6)
- Rnd 2: inc x6 (12)
- Rnd 3: (sc, inc) x6 (18)
- Rnds 4–8: sc around (18)
- Rnd 9: (sc, dec) x6 (12)
- Rnds 10–11: sc around (12)
Stuff each leg firmly, then fasten off with a long tail.
Step 7: Add the Face and Sew Everything On
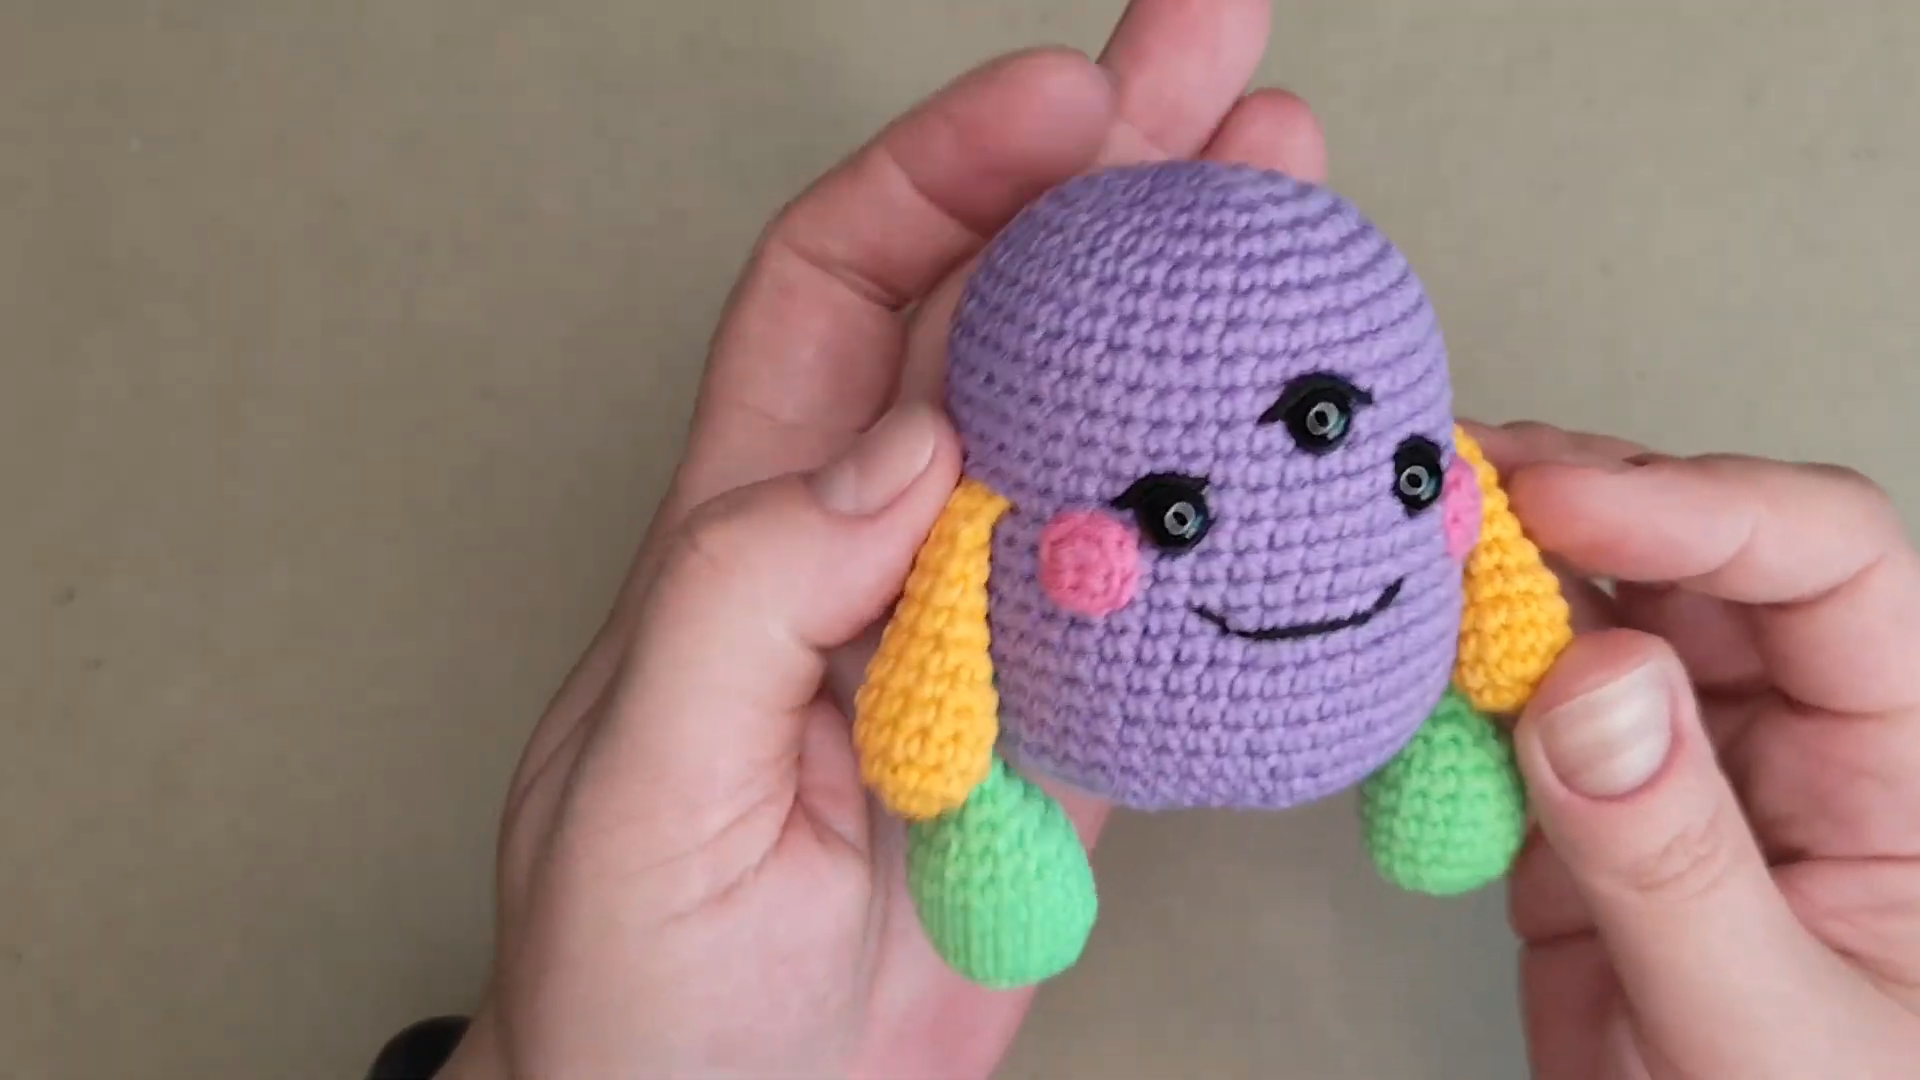
Start with 2 pink cheeks. For each one, work 6 sc in MR, then inc x6 (12). Sl st to close, and then sew each cheek just outside one of the lower eyes.
Also stitch a short lash line above each eye with black yarn. Then backstitch a wide, gentle smile below the lower pair, and keep each stitch relaxed so the face doesn’t pucker.
Pin the arms to the sides at about cheek level. Meanwhile, pin the legs at the base so the monster sits upright. When you’re happy with the placement, sew each limb on with its long tail and bury the ends inside.
Common Mistakes in the Free Crochet Monster Pattern
- Stacked increases. Putting every increase in the same spot turns the crown into a hexagon, so shift them a stitch or two each round.
- A lost marker. Without one, you can’t tell where a round begins. Instead, use a bright scrap yarn like the one in the photos.
- Lower eyes set too close together. The face then looks cramped. Keep the 8-stitch gap, and also leave room for a cheek between each lower eye and the side.
- Locking the eyes too early. Snapping on the washers before checking the triangle from the front often leaves the face crooked.
- A soft crown. Too little stuffing lets the top sag, so add small bits at a time and press them into the curve.
- A tight mouth. Pulling the smile hard puckers the face. Instead, keep each backstitch relaxed and flat.
Ways to Personalize the Free Crochet Monster Pattern
Change the Eye Count
For a cyclops, center a single eye. Alternatively, skip the top eye and keep only the lower pair for a classic look. The body instructions still stay the same.
Try a New Body Color
Teal, orange, or soft gray all pair well with bright limbs. You could also make a few in different shades and line them up on a shelf.
Mix Up the Limbs and Cheeks
Make the arms and legs one color for a calmer look, or give each limb its own shade for a louder, patchwork feel. For more ideas on expressive faces, the kawaii monster amigurumi pattern is also worth a look.
Bonus: Make Your Crochet Monster Safe for Little Kids
Safety eyes aren’t a good choice for babies under three, so stitch each eye with black yarn in a tight satin stitch instead.
Also, leave off the loose lash stitches on any toy that might end up in a mouth. Sew each limb on with several passes of yarn, then give it a firm tug to test it.
Finally, choose a cotton yarn that can handle a warm wash. In addition, bury every tail deep in the stuffing so small fingers can’t pull it out.
Bonus: Washing and Care Tips
Hand washing is the gentlest option for a stuffed toy, especially one with safety eyes. Swish the monster in lukewarm water with a little mild soap, then rinse well.
Afterward, roll him in a towel and press out the water instead of wringing, because wringing can pull the body out of shape. Finally, let him air dry away from direct heat, and turn him now and then so the stuffing dries all the way through.
FAQs About the Free Crochet Monster Pattern
Is the free crochet monster pattern good for beginners?
Mostly, yes, because the free crochet monster pattern uses only sc, inc, and dec for the body. The face details, however, take a bit more patience.
How long does the free crochet monster pattern take?
Plan on about 4 to 5 hours. The body takes the longest, while the limbs go quickly.
Can I adapt the free crochet monster pattern for one or two eyes?
Yes. Center a single eye for a cyclops, or skip the top eye for a classic pair. Since the eyes don’t affect the body, those instructions stay the same.
Why does my crown look pointy?
A pointy crown usually comes from a missed increase in the early rounds. A loose magic ring can also cause it, so cinch the ring tight before starting Rnd 2.
How tall is the finished monster?
When made with DK cotton and a 3 mm hook, he stands about 4 inches tall.
Ready for Monster Number Two?
Once the third eye is in and the smile is stitched, your purple friend has a face all his own. For the next one, simply change the body color or eye count, because the free crochet monster pattern stays the same underneath. Then keep going until you have a small crew. If you’d like a different creature, the worry monster amigurumi pattern and the crochet goblin amigurumi also make good companions for him.