Cozy Crochet Wall-Hanging Basket Pattern for Instant Style
Soft yarn, beautiful texture, and warm sunlight come together to highlight a charming Cozy Crochet Wall-Hanging Basket Pattern, which adds a relaxed boho touch when hung on the wall. Its garter texture beautifully catches the light, while the simple construction makes it a quick and satisfying project. It’s a lovely choice for beginners, gift makers, and anyone who loves fresh handmade décor.
Somewhere between a knit swatch and a crochet finish, the piece takes shape as a sturdy rectangular panel worked in garter texture, then folded and stitched into a shallow pouch. A hook picks up loops along the raw edge, tidies the border, and gives the fabric enough structure to hold its form once it’s hung on a wall or a hook by the door.
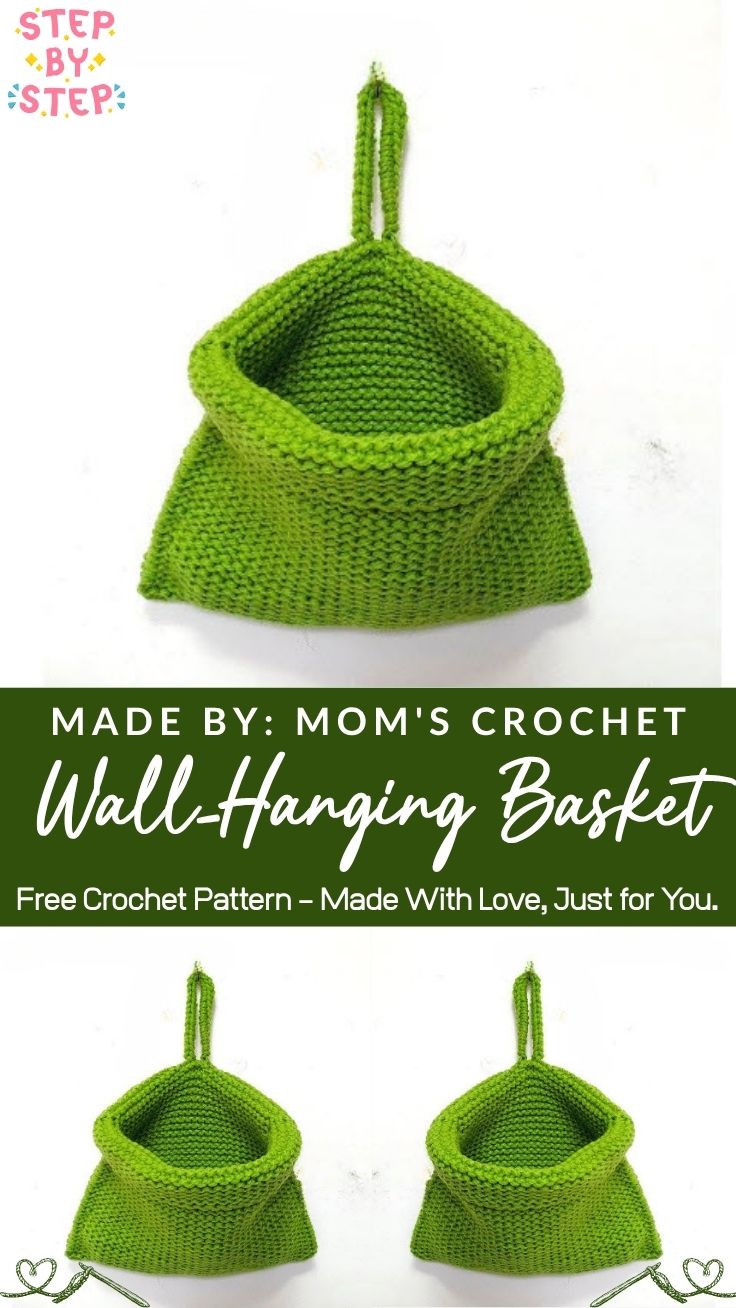
Charm comes from the simplicity of it. Two knitting needles and a Crochet Wall-Hanging Basket hook trade off duties, ridges stack into a thick, cushiony fabric, and a twisted cord finishes the top so the basket dangles at just the right height. Skill level sits comfortably in beginner-to-easy territory, making the project a smart pick for anyone still building confidence with hooks and needles alike.
Project Details
- Time Box: 20 minutes prep (yarn winding, gauge swatch) + 2.5–3 hours stitching + 25 minutes finishing (seaming, hanging loop, weaving ends)
- Finished Size: Roughly 8 inches wide x 9 inches tall x 3 inches deep once seamed and shaped
- Recommended Yarn Weight: Worsted weight (medium, category 4) cotton-acrylic blend for structure
- Crochet Hook Size: 5.0mm (H-8) for edging and seaming
- Knitting Needle Size: 5.0mm double-pointed or straight needles for the base panel
Materials Needed
- Worsted weight yarn in a fresh green shade (or any color of choice)
- 5.0mm crochet hook
- A pair of 5.0mm double-pointed or straight knitting needles
- Tapestry needle for weaving ends and seaming
- Scissors
- Stitch markers (optional, handy for tracking row counts)
- Small wooden dowel or decorative ring (optional, for extra hanging flair)
Crochet & Knitting Techniques Used
- Cast On (foundation loops on the needle)
- Garter Stitch (knit every row for a ridged, sturdy fabric)
- Picking Up Stitches with a Crochet Hook
- Single Crochet
- Slip Stitch
- Fastening Off
- Sewing Pieces Together
- Twisted Cord (for the hanging loop)
Pattern Instructions
Casting On the Base
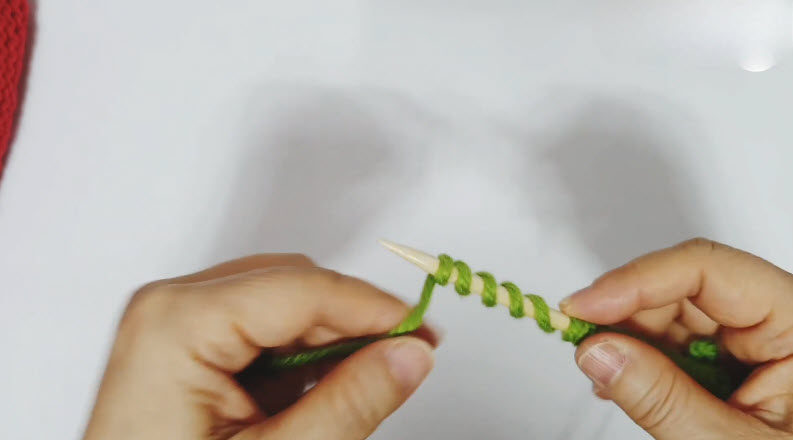
Start by looping the green yarn onto a wooden double-pointed needle, building up a neat row of stitches along its length. Keep tension relaxed but even; loose loops sag out of shape, while overly tight ones fight the needle tip on the next row. Cast on 24 stitches for the size listed above, adjusting up or down in multiples of two for a wider or narrower basket.
Pro Tip: Rest the needle tip against a fingertip while casting on rather than gripping the yarn tail too firmly; it keeps every loop the same size without you having to think about it.
Knitting the Garter Panel
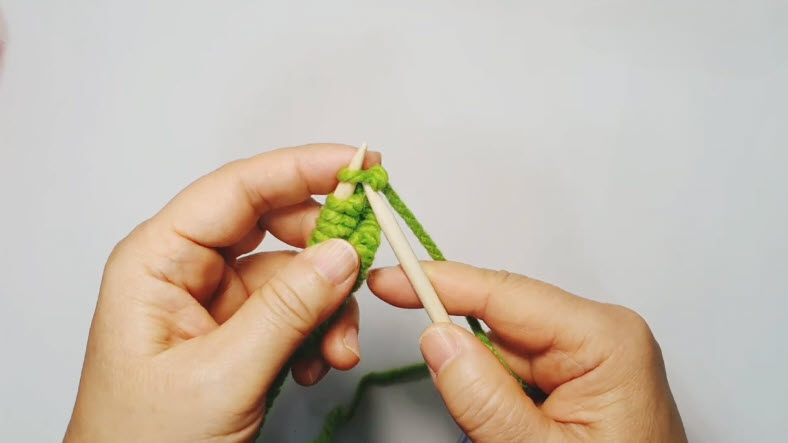
Bring a second needle in alongside the first, angling both into a gentle peak as the working yarn threads between them. Knit every row across all 24 stitches, turning at the end of each row and knitting back the other way, which is what builds that thick, ridged garter texture instead of a smooth stockinette surface. Continue until the panel measures about 16 inches long, since that length folds in half to create the front and back of the basket in one continuous piece.
Ridges should stack visibly and evenly as rows accumulate a helpful sign the tension has stayed consistent throughout. Stopping to count rows every inch or so, rather than only at the very end, catches uneven spots early enough to fix them.
Adding the Crochet Edge
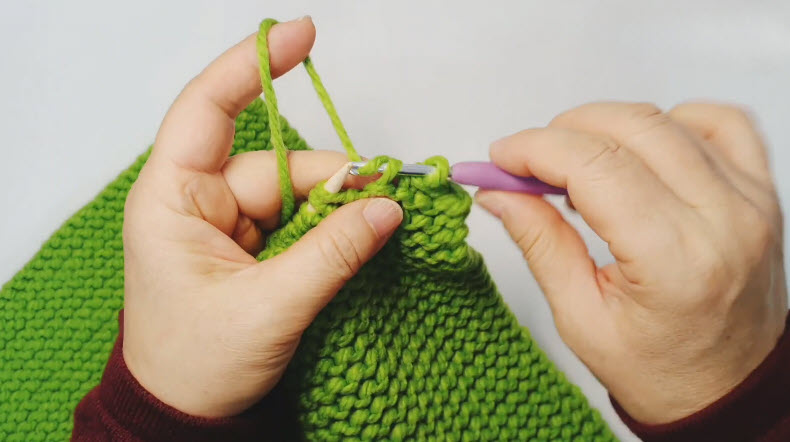
Once the panel reaches full length, set the knitting needles aside and pick up a crochet hook instead. Slide the hook into the edge stitches along one short end of the folded panel, drawing a loop of yarn through to begin an edging round. Single crochet steadily along the folded edge, working one stitch into each garter ridge and keeping the fabric flat rather than letting it pucker or flare. That crochet border firms up the rim of the basket and gives the opening a clean, finished look that plain knitting alone won’t produce.
Slip stitch into the first stitch of the round to close it off neatly, then continue with a second pass if extra rim stability feels needed for a floppier yarn.
Shaping and Seaming the Basket
Fold the long panel in half so the cast-on edge meets the fastened-off edge, forming a pouch shape with the fold as the base of the basket. Pin or hold the side edges together and whipstitch up each side with the tapestry needle, matching ridge to ridge for an even seam. Corners get a few extra reinforcing stitches, since that’s where the basket takes the most pull once it’s holding yarn, plants, or trinkets.
Turning the piece right-side out afterward reveals the finished shape, and a light shaping by hand-pressing the base flat and rounding the top opening helps the basket sit properly once hung.
Weaving in the Ends
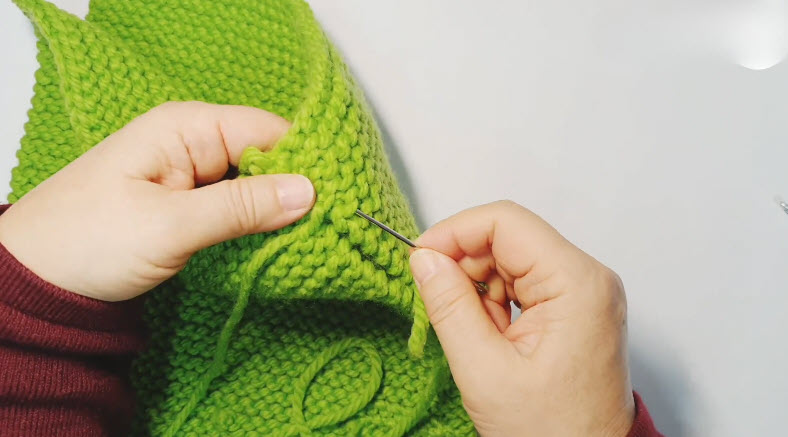
Threading every loose yarn tail onto the tapestry needle comes next, guiding each one through several stitches on the wrong side of the fabric before trimming. Working the needle in a zigzag path rather than a straight line locks the tail in place far more securely, so it won’t work loose with regular use. Snip tails close to the fabric once woven, leaving no stray fuzz poking through on the right side.
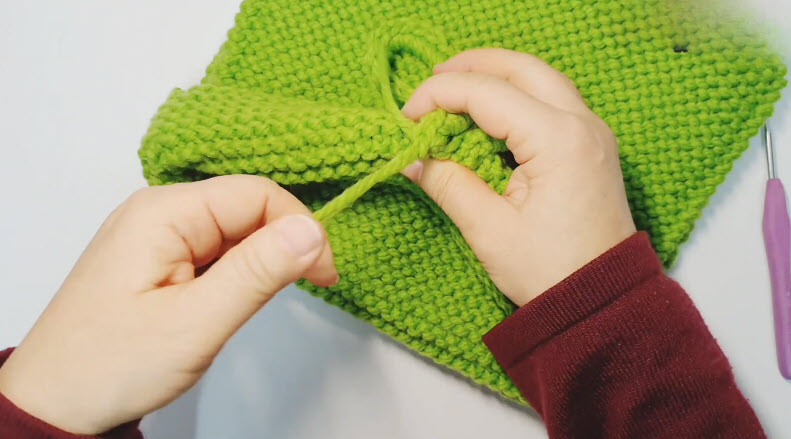
Making the Hanging Loop
Cut two long strands of yarn, roughly three times the desired loop length. Twist them together tightly until the strand starts to kink back on itself.
Fold the twisted length in half. It should naturally spring into a neat corded loop. Secure the loop to the top corners of the basket with a few firm stitches.
Add a few extra whipstitches at each anchor point. This keeps the loop from shifting under the basket’s weight once it is loaded and hanging.
Final Assembly
Checking every seam and the hanging loop under gentle tension confirms everything holds before the basket goes up on display. Fluffing the garter ridges by hand and giving the whole piece a light steam or gentle press smooths out any stray unevenness from the stitching process.
Tips for Success
- Keep every knit row snug but not tight, since garter fabric shows tension mistakes clearly
- Count stitches at the start of each row to catch accidental increases early
- Mark row 8 and row 16 with stitch markers for a quick length reference
- Stuff corners of the seam allowance lightly if extra structure feels necessary
- Hide yarn ends by weaving diagonally through several stitches, never in a straight line
- Steam-block the finished basket for a crisp, gallery-ready finish
Personalization Ideas
Try a Two-Tone Panel
Swap yarn colors halfway through the garter panel for a bold striped basket that stands out on a plain wall.
Add a Tassel Trim
Stitch a small row of tassels along the bottom fold for extra texture and movement.
Go Mini for Plant Cuttings
Cast on fewer stitches and shorten the panel for a petite version perfect for holding small succulents or dried flowers.
Dress It Up for the Season
Swap in cream and berry-red yarn around the holidays, or soft pastels for a spring refresh.
Turn It Into a Gift Basket
Line the inside with a small fabric scrap and fill with treats for an easy handmade present.
Common Mistakes to Avoid
Skipping row counts early on can cause an off-center or lopsided panel by the halfway mark. A quick tally every few rows can save a lot of frustration later.
Crocheting the edge too tightly can pucker the rim. Working too loosely can leave it floppy. Testing the tension on a small swatch first helps you find the right balance.
Rushing the seaming step can result in gaps at the corners. These areas need the most strength, so take your time when joining them.
Frequently Asked Questions
Can the basket be made without knitting needles?
Yes swap the garter panel for a crocheted rectangle worked in single or half double crochet rows instead, then follow the same folding and seaming steps.
What yarn weight works best for a sturdy basket?
Worsted weight cotton or a cotton-acrylic blend holds shape best, since thinner yarns tend to droop once the basket is loaded.
How long does the whole project usually take?
Most crafters finish in a few relaxed evenings, roughly three hours of active stitching plus finishing time.
Does the Crochet Wall-Hanging Basket need to be lined?
Lining is optional, though a thin fabric liner helps if small or loose items will be stored inside.
Can the size be adjusted easily?
Casting on more or fewer stitches and knitting a longer or shorter panel adjusts the width and height without changing the technique.
What is the best way to hang the finished basket?
A small wall hook, nail, or decorative peg works well, with the twisted cord loop slipping right over it.
Is the Crochet Wall-Hanging Basket suitable for complete beginners?
Yes knit and single crochet stitches, plus basic seaming, are the only skills required, making it a friendly first project.
Conclusion
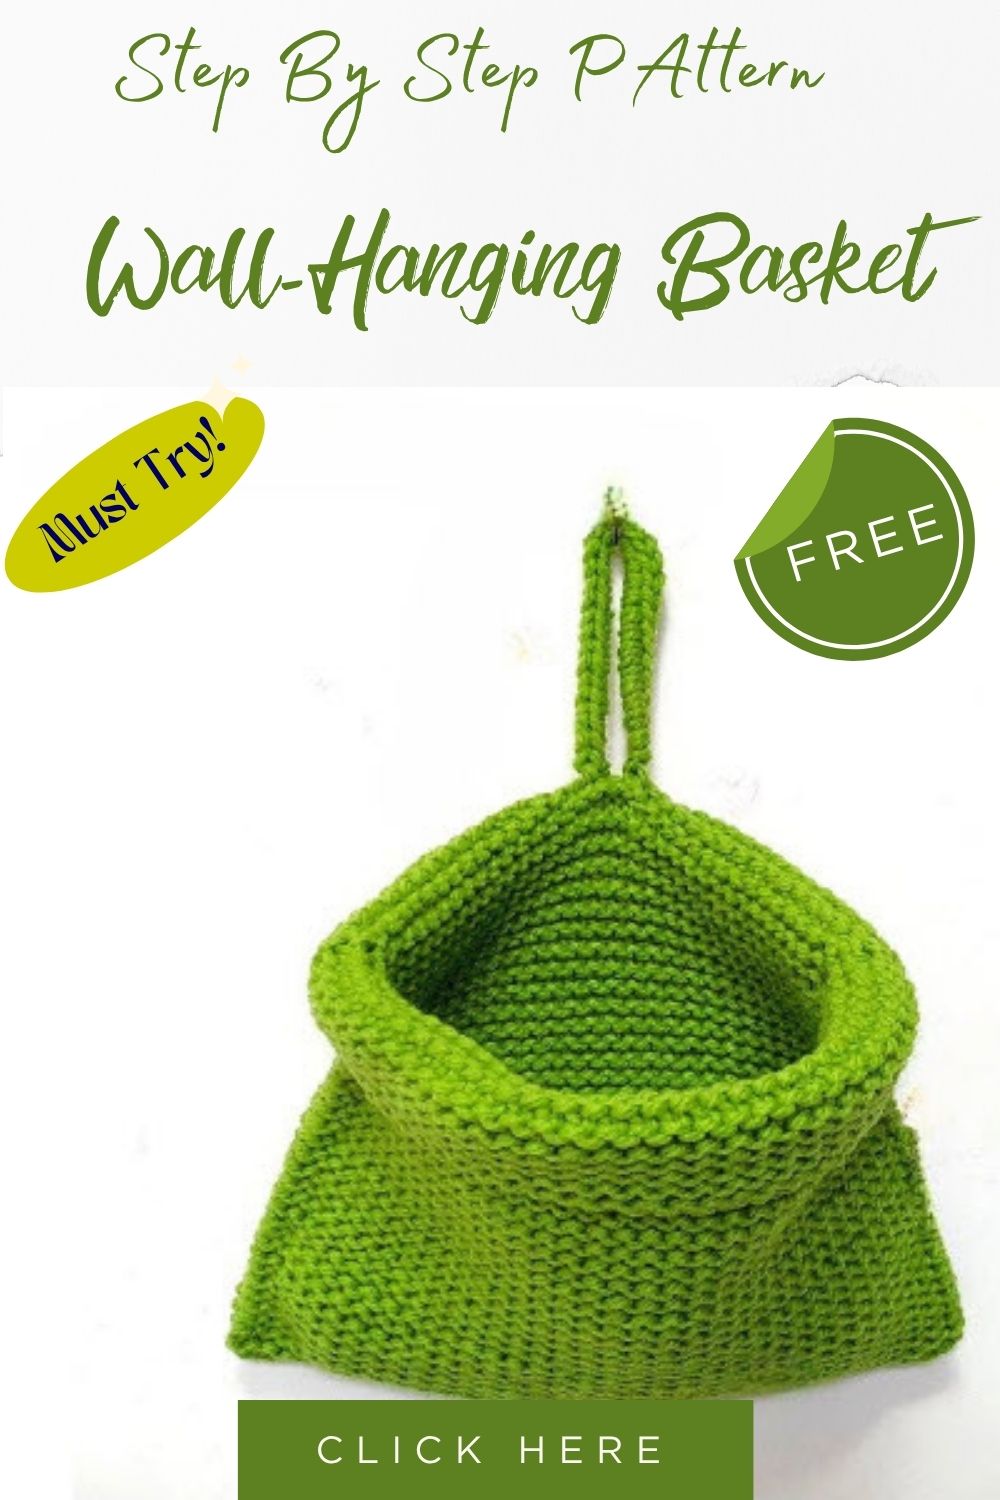
Few projects deliver so much cozy charm with so little technical fuss. The Crochet Wall-Hanging Basket proves that stitches don’t need to be complicated to look polished. Grab a skein of yarn and give the pattern a try. It works well as a weekend project or a slow-stitch evening activity. With a little patience, the finished piece can instantly warm up any wall. Sharing the finished basket with fellow crafters can spread that cozy spirit. It also makes a thoughtful gift for a friend who loves handmade decor.