Crochet Blouse Chinese-inspired Pattern with traditional collar
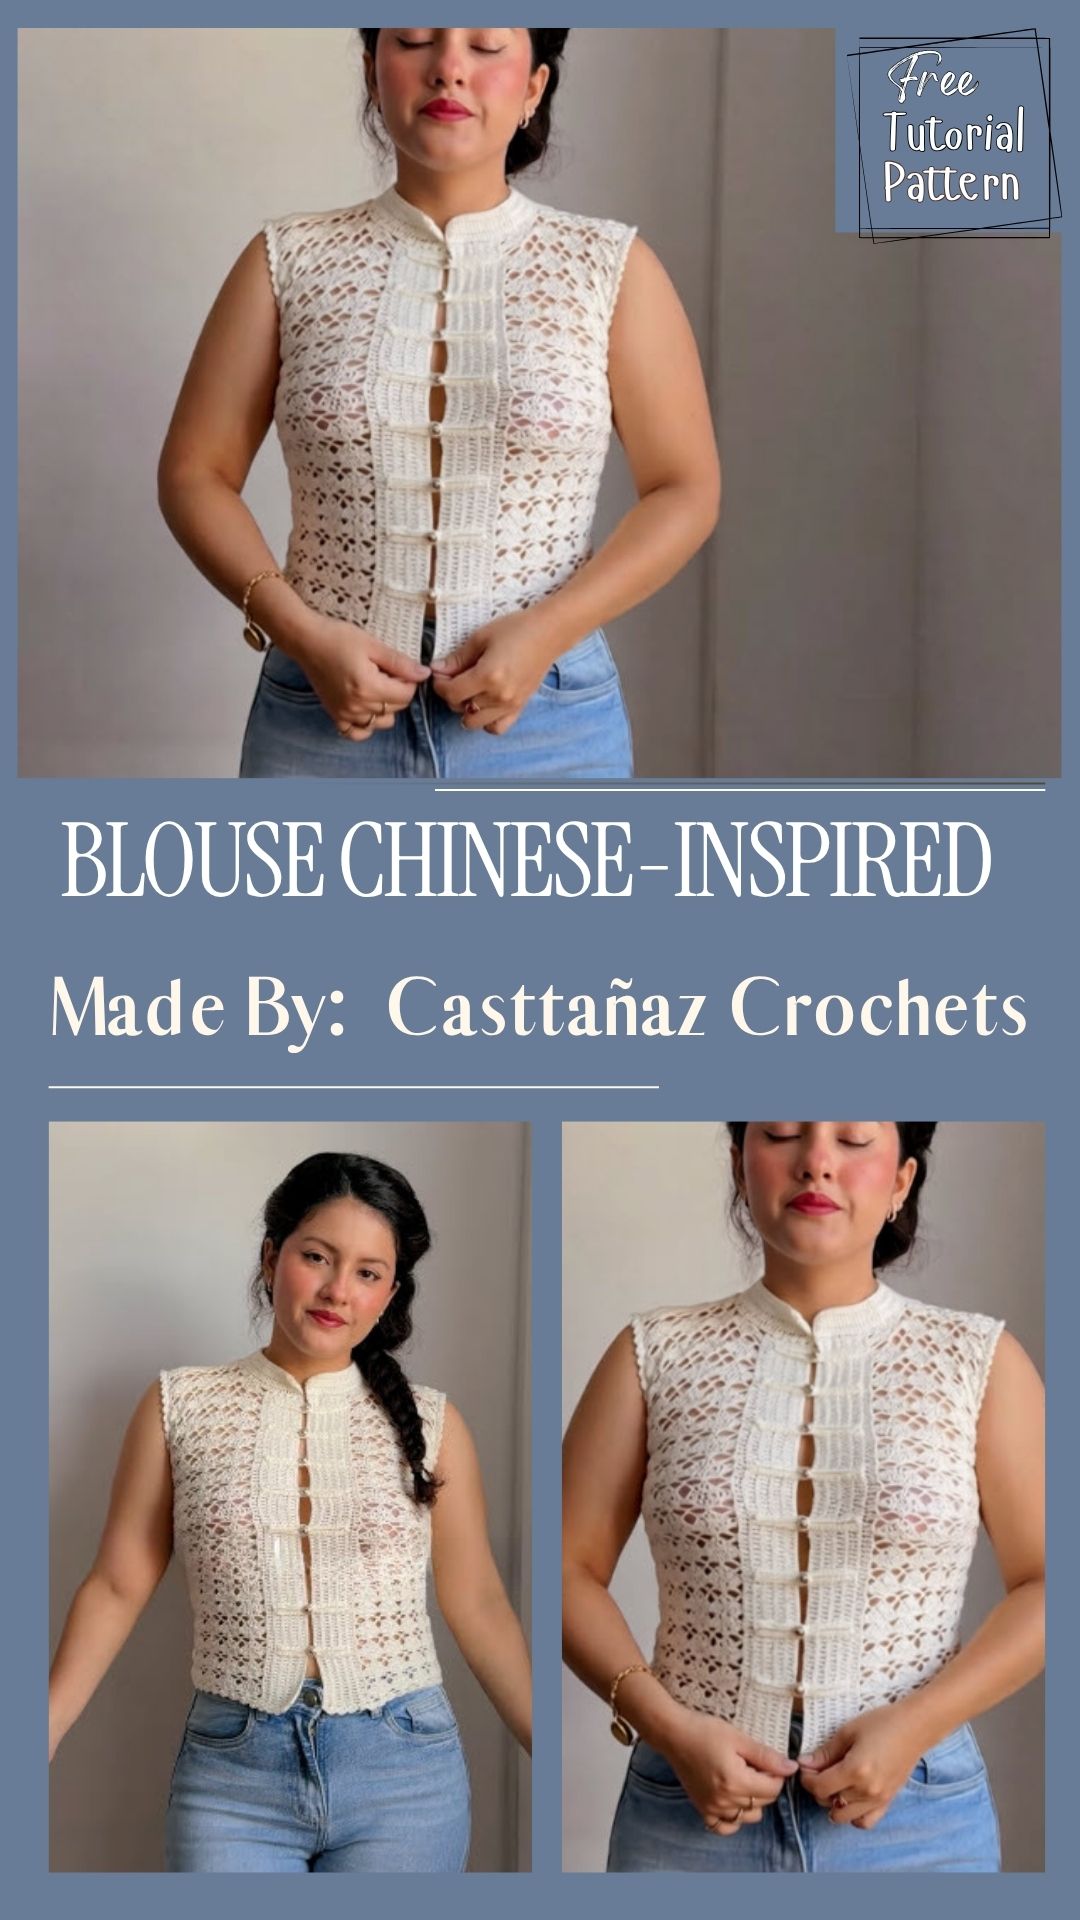
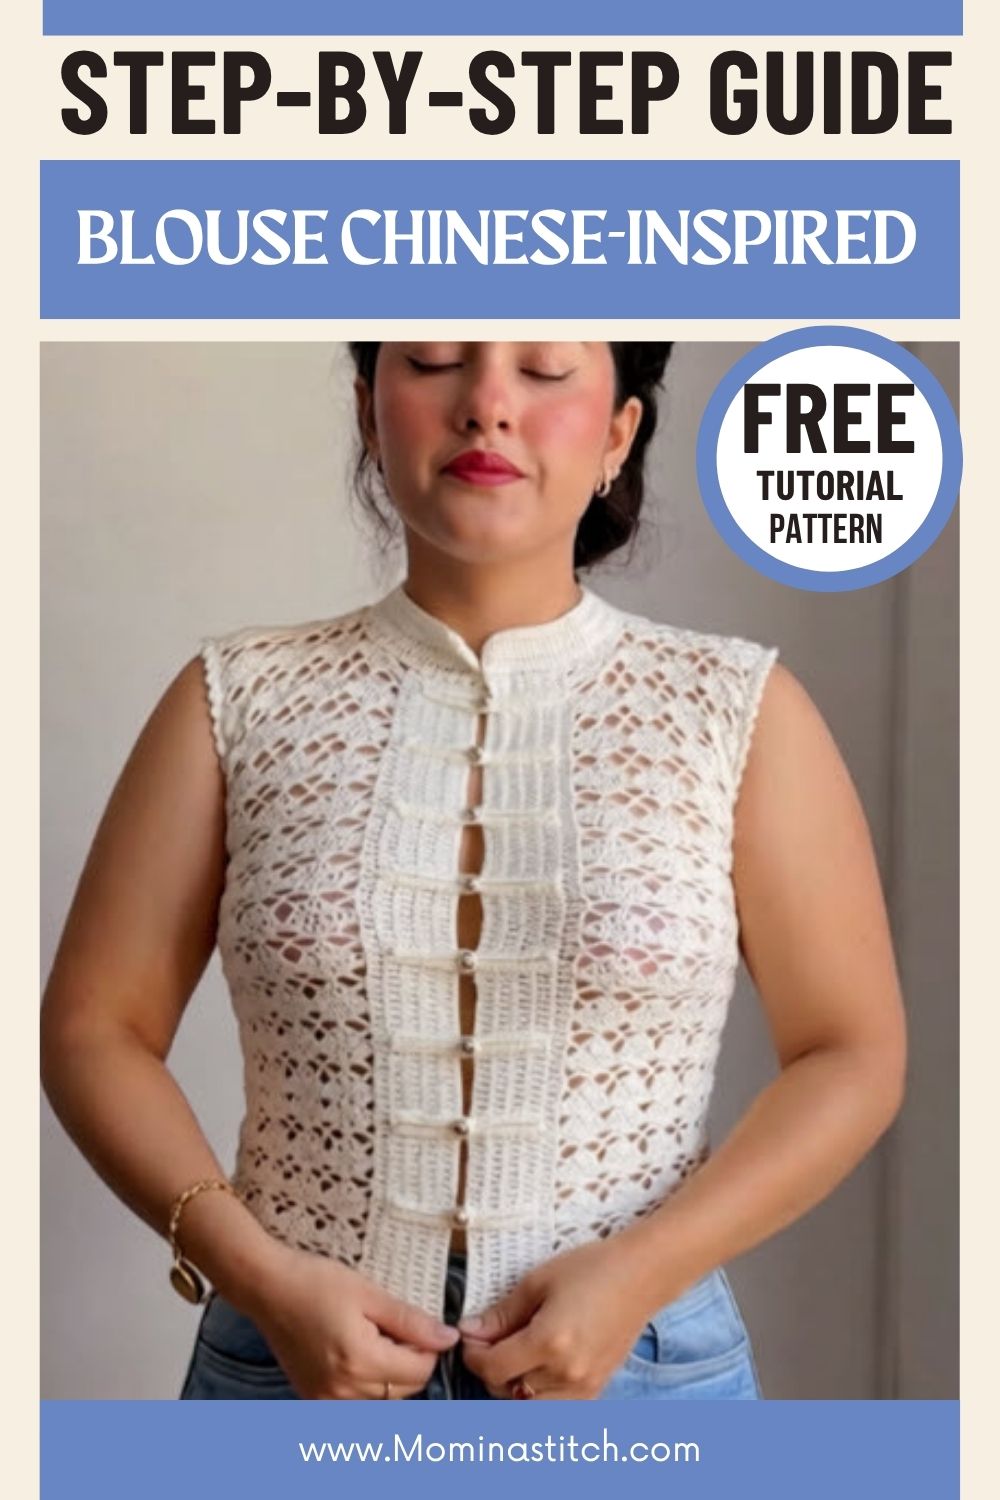
A beautiful blend of traditional style and modern crochet is what sets this Crochet Blouse Chinese-Inspired Pattern apart. A delicate lace foundation, soft shell stitches, and a scalloped hem come together to form an airy, fitted, sleeveless silhouette, while a traditional collar gives it a distinctive, charming finish.
The design works well as a lightweight layering top or a standalone summer blouse, and its lace panels give the fabric a delicate, breathable structure. Many crafters treat it as a lace shell-stitch top because the stitch pattern forms small fan-like clusters across the surface. Others describe it as an openwork crochet vest, thanks to its sleeveless cut and airy mesh. Beyond style, the pattern serves a practical purpose: it provides a cool, adjustable garment for warm-weather wear, and the flat-worked panels adapt easily to different collar or neckline finishes.
What You’ll Need
- Worsted or DK weight cotton yarn (cream or ivory suits the design especially well)
- A crochet hook sized to match the yarn, typically 4.0–4.5mm
- Yarn needle for weaving in ends
- Stitch markers to track pattern repeats
- Scissors
Skills You’ll Use
The project relies on a handful of core techniques. Chain stitches form the foundation row, and slip stitches join rounds neatly. Shell stitches build the signature fan texture, while clusters add structure between the shells. Basic shaping narrows the armholes, and a simple seam joins the two body panels together at the end.
What You’ll Learn
- Shell Stitch Lace Technique
- Panel Shaping for Armholes
- Scalloped Edge Finishing
Time Needed
Prep takes roughly 15 minutes to select yarn and chain the foundation row. Stitching the two body panels typically runs 6–9 hours, depending on gauge and size. Finishing, including seaming and edging, adds another hour or so.
Step-by-Step Process
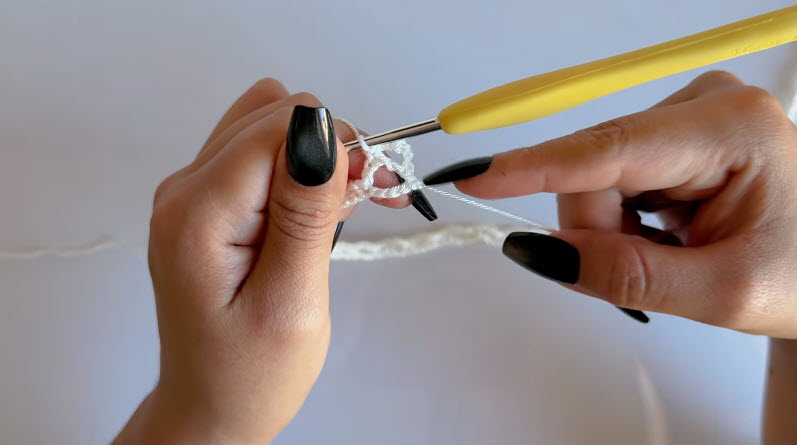
Step 1: Set the Foundation Loop
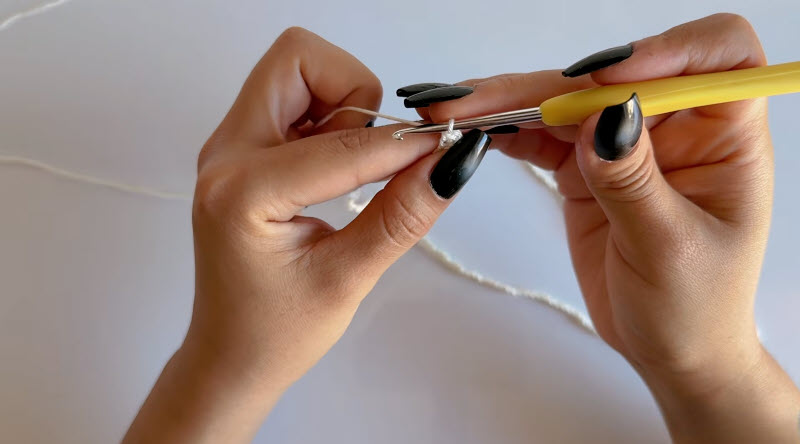
Start with a slip knot and hold the working yarn between the fingers so tension stays even. A crochet hook draws the yarn through to form the first loop on the chain. That opening step anchors the entire Chinese-inspired crochet blouse panel.
Step 2: Build the First Shell Cluster
Insert the hook into the base chain and work a small cluster of stitches to form the opening shell. Keeping the loops loose helps the lace lie flat rather than curl, and this first cluster sets the spacing for every row afterward.
Step 3: Repeat the Shell Pattern Across the Row
Shell clusters continue evenly across the foundation, with consistent gaps left between each group. As the row grows wider, the fan-like texture behind this Chinese-inspired crochet blouse becomes clearly visible.
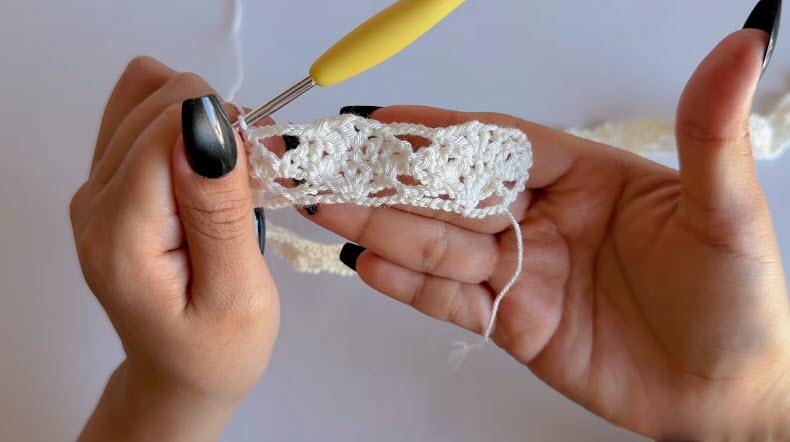
Step 4: Close the Row and Build Height
Additional rows stack shell over shell, gradually building the lace block into a solid rectangle of fabric. Turning consistently after each row keeps tension even, which matters most across wide lace sections.
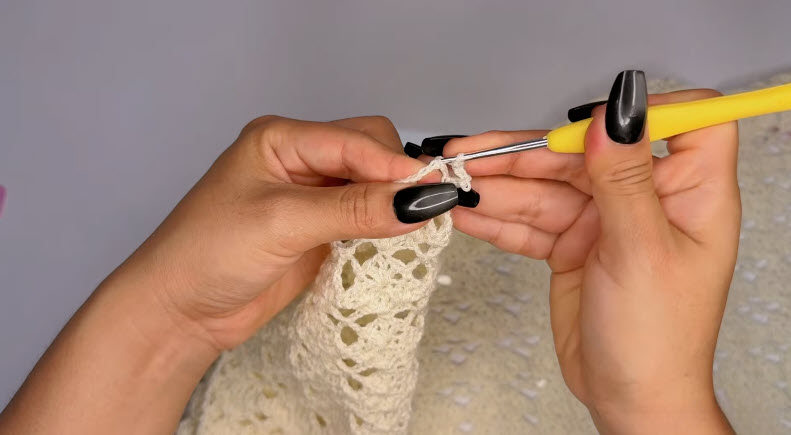
Step 5: Complete and Lay the Panels Flat
Once both panels reach the desired length, fasten off and weave in loose ends. Laying the pieces flat, matching armhole curves and scalloped hems, prepares them for joining at the shoulders and sides.
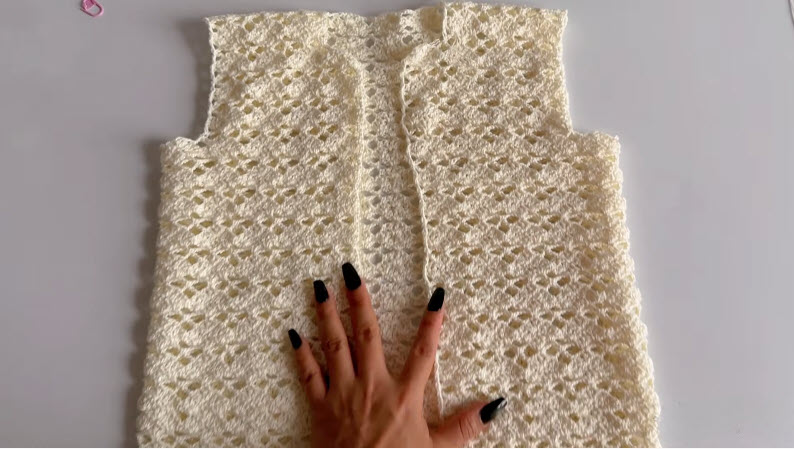
Pro-Tip: Count the shells at the end of every row before turning; a missed cluster early on throws off spacing for the whole panel.
Where People Go Wrong
Many beginners pull shell stitches too tight, flattening the lace texture instead of letting it fan open. Others skip counting stitches at the row’s end, so a panel slowly narrows or widens without anyone noticing. A third common issue involves uneven tension between the two panels, which then complicates seaming later on.
How to Fix Common Issues
When shells look flat, loosening the hook grip and working stitches around a finger restores consistent sizing. If a panel narrows unexpectedly, counting stitches every few rows against the pattern repeat catches the drift early. For tension mismatches, blocking both panels to matching measurements before seaming evens out minor differences.
Finishing and Assembly Tips
Yarn ends should get woven in securely along a stitch line so they stay hidden from the right side. Because the silhouette draws on traditional garment shapes, a simple stand-up collar can attach at the neckline using rounds worked in half double crochet. Light steam-blocking afterward helps the shells sit open and smooths out any curling edges.
Creative Projects You Can Make With This Pattern
The same shell-stitch panel scales down nicely for smaller accessories. Crafters often shrink the repeat to fasten a lace trim onto tote bags. The scalloped edging alone works well to secure a decorative border along the brim of sun hats. Smaller swatches of the stitch also tuck neatly into hair clips for a matching set.
Ways to Style or Display It
The finished blouse pairs naturally with high-waisted trousers or a simple slip skirt underneath, since the lace panels let a contrasting color peek through. Layering it over a fitted tank adds coverage while keeping the airy silhouette visible. On a hanger or dress form, the scalloped hem and collar detail display particularly well as a statement piece.
Who This Pattern Is Great For
The project suits crafters who already feel comfortable with basic stitches and want practice reading lace repeats. It also appeals to anyone drawn to traditional silhouettes reimagined in crochet, plus warm-climate crafters who appreciate a breathable, lightweight structure.
Smart Variations to Try
Switching to fingering-weight yarn produces a finer, more delicate lace effect, while a chunkier weight builds a bolder fabric faster. Deep jewel tones such as emerald or burgundy echo traditional silk garments, whereas soft pastels give the piece a modern, airy feel. Adjusting panel width and chain length easily resizes the blouse for a closer or more relaxed fit.
Why It’s Popular Right Now
Lace-inspired silhouettes with cultural design roots have gained steady attention among crochet crafters lately, and this Chinese-inspired crochet blouse fits neatly into that trend.
- The traditional collar detail feels distinctive compared to typical crochet tops
- The shell-stitch texture photographs well for social sharing
- The breathable structure suits year-round wear in warmer regions
FAQ
What yarn weight works best for this pattern?
A DK or worsted weight cotton yarn gives the shells enough structure to hold their shape without feeling heavy.
Can this pattern be made sleeveless or with sleeves?
The base pattern shapes a sleeveless silhouette, though simple sleeve panels can attach separately at the armhole edge.
How does the traditional collar get added?
A short stand-up collar worked in half double crochet rounds joins easily once the main Chinese-inspired crochet blouse panels are seamed together.
The Bottom Line
Altogether, the Chinese-inspired crochet blouse combines a classic silhouette with an approachable stitch pattern, making it a rewarding project for intermediate crafters. Once the shell technique feels familiar, the same panel structure opens the door to matching accessories and future variations.