Trendy Crochet Summer Top Pattern for Warm Days
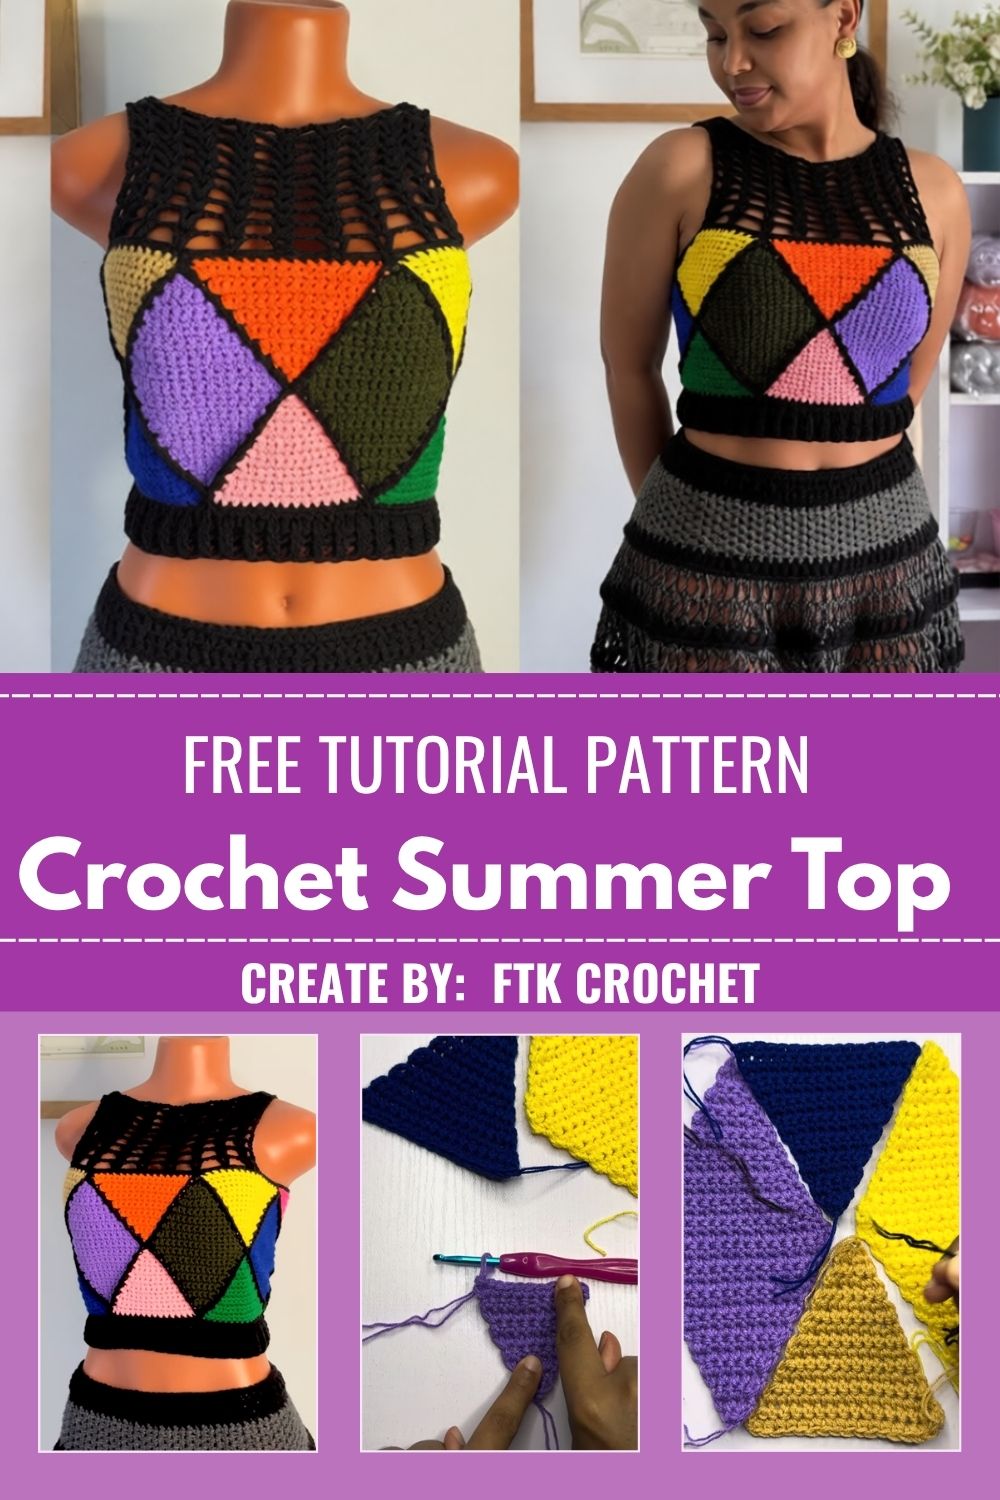
Bright triangle motifs in bold, sunny colors lock together edge to edge to form the eye-catching fabric behind the Trendy Crochet Summer Top Pattern for Warm Days, and every panel starts from nothing more than a simple point. Grab a few contrasting yarns, because a statement piece awaits.
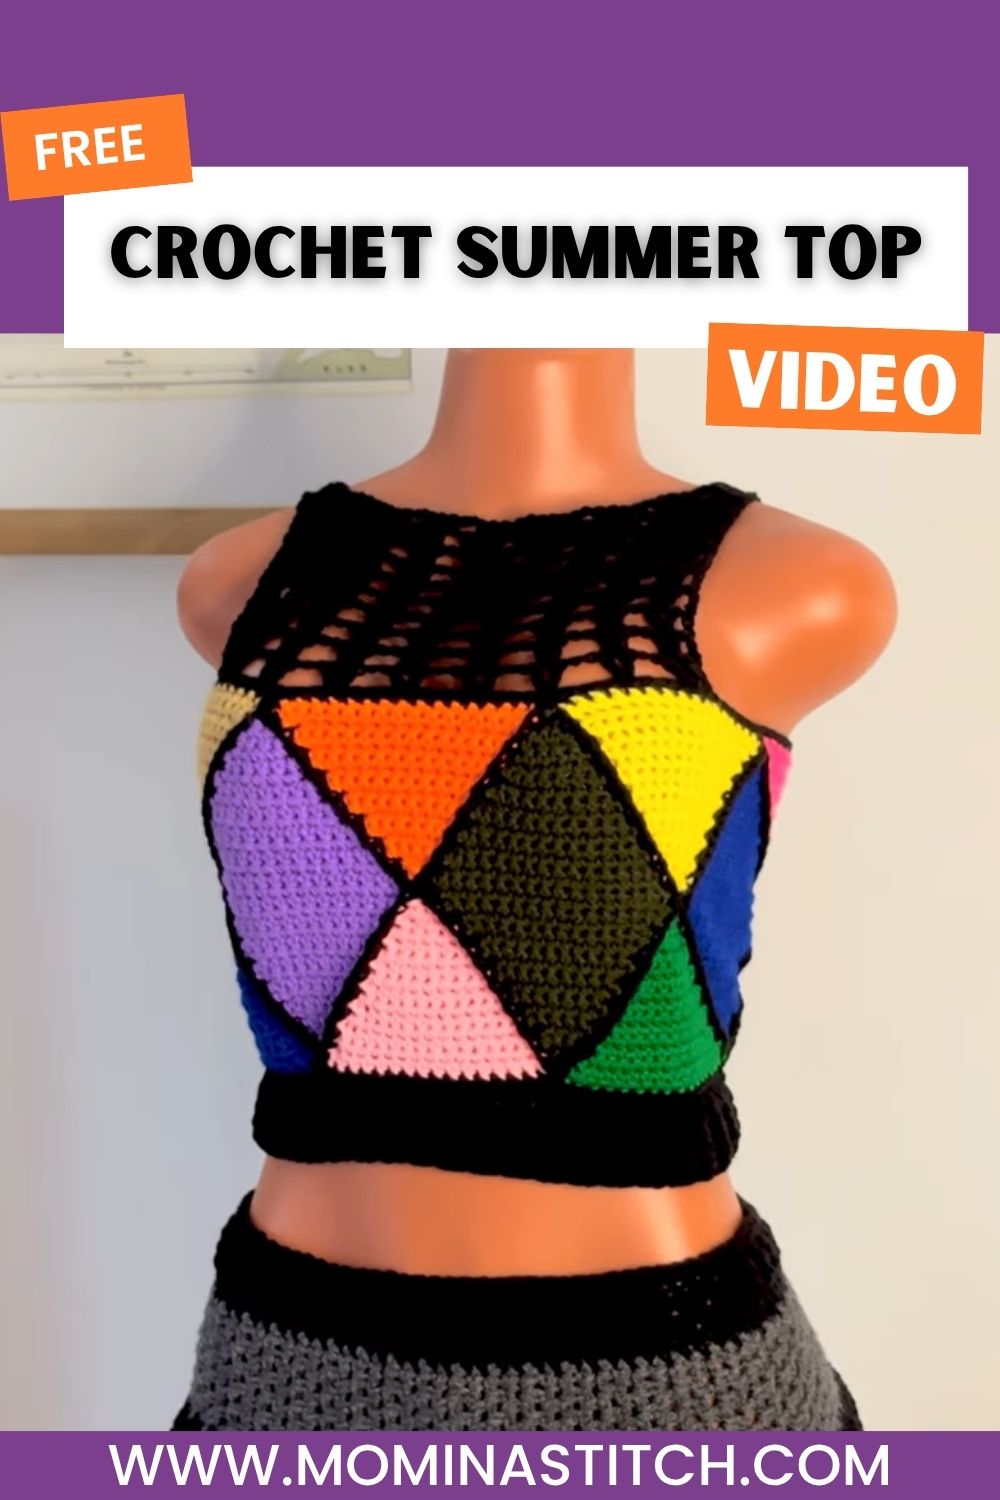
Rather than working one continuous garment, this summer top builds from individual crocheted triangles joined together with a contrasting color, creating a striking patchwork effect without any complicated shaping. Designed specifically for warm-weather layering, the crochet patchwork top stays lightweight and breathable while letting every leftover yarn scrap find a purpose in the final design.
Project Details
- Time Box: Prep 15 minutes, Stitching 8–12 hours (across multiple sessions), Finishing 45–60 minutes
- Sizing: Adjustable by adding or removing triangle rows; sample shown fits a small-to-medium frame
- Recommended Yarn Weight: Worsted weight (Medium, #4), multiple colors
- Crochet Hook Size: 4.0mm (G/6)
Materials Needed
- Worsted weight yarn in 8–10 assorted colors (small quantities of each work well)
- Black or dark contrasting yarn for joining seams
- 4.0mm crochet hook
- Tapestry needle
- Stitch markers
- Scissors
- Measuring tape (for fitting checks along the way)
Crochet Stitches & Techniques
- Chain Stitch
- Single Crochet
- Increase
- Slip Stitch
- Surface Slip Stitch Join (for connecting motifs)
- Color Changes
- Fastening Off
- Weaving in Ends Neatly
Joining technique carries real weight in the patchwork top, so practicing a clean surface slip stitch seam on a couple of scrap triangles first pays off later.
Pattern Instructions
Creating the Triangle Motifs
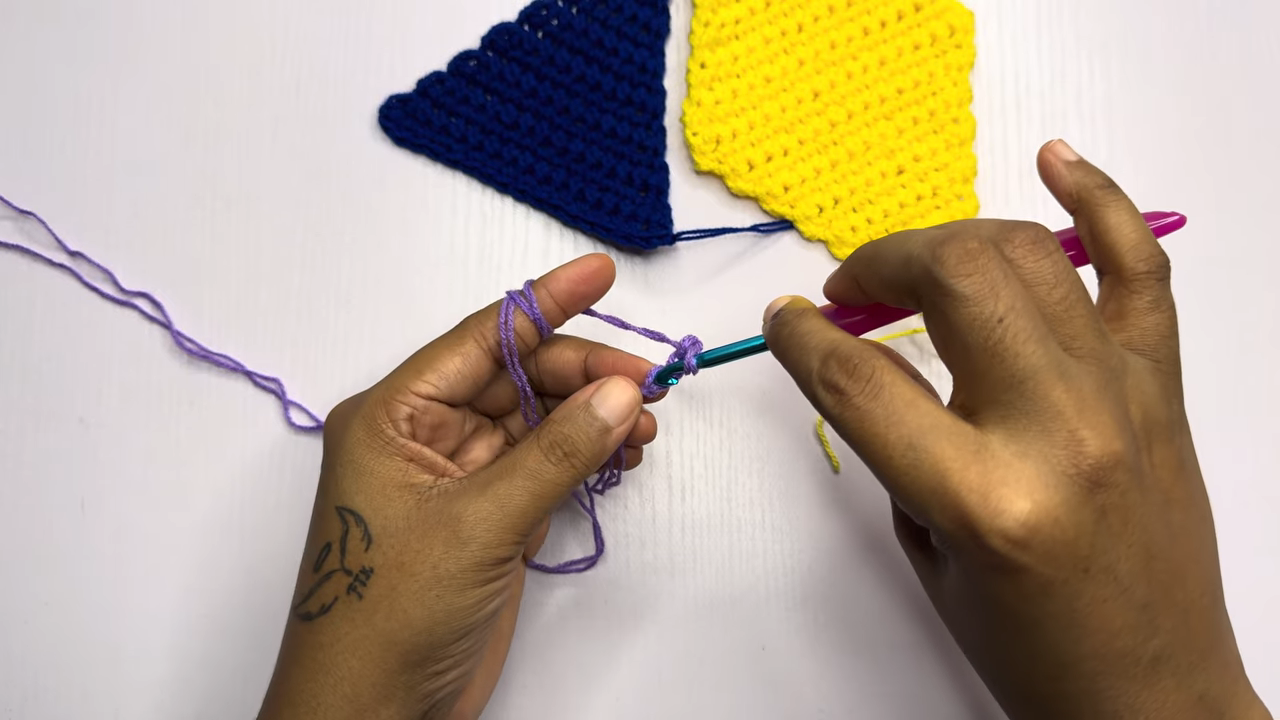
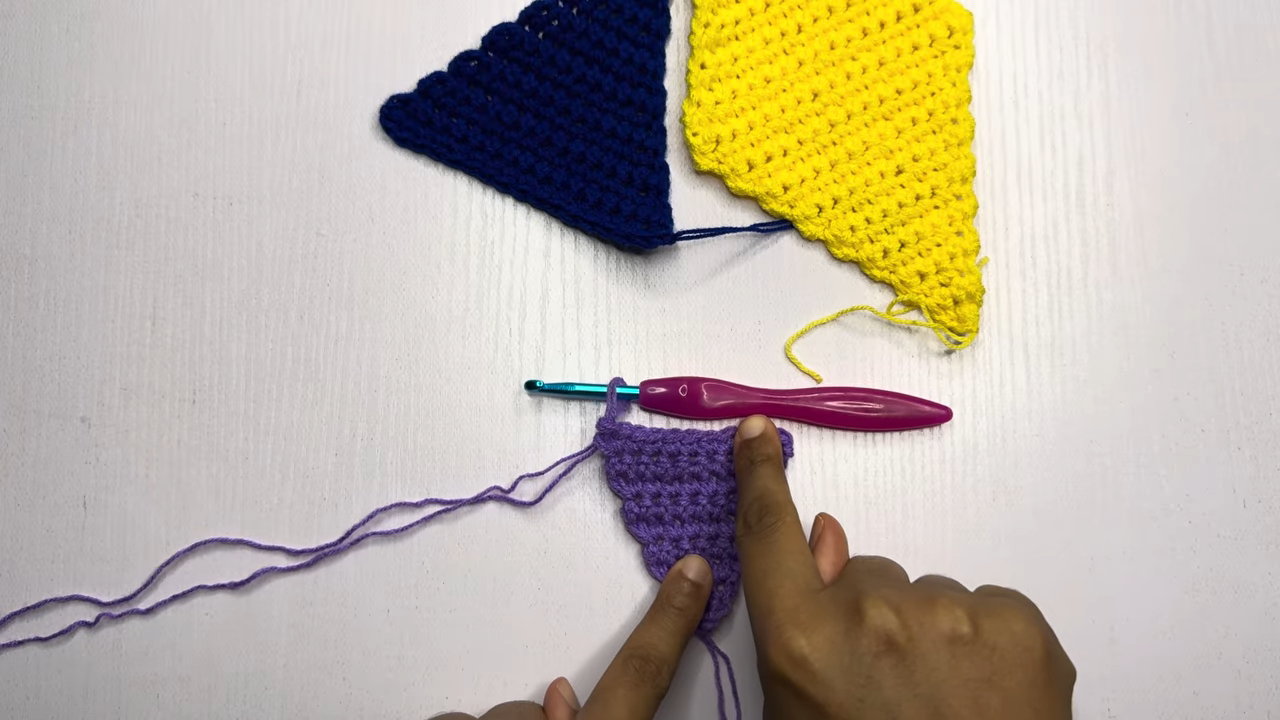
Chain a small foundation row and work single crochet across, increasing one stitch at each end of every following row until the triangle reaches the desired width. Fasten off each motif with a long tail left over for joining, then repeat in a new color for every additional triangle needed.
Adding the Scalloped Edge
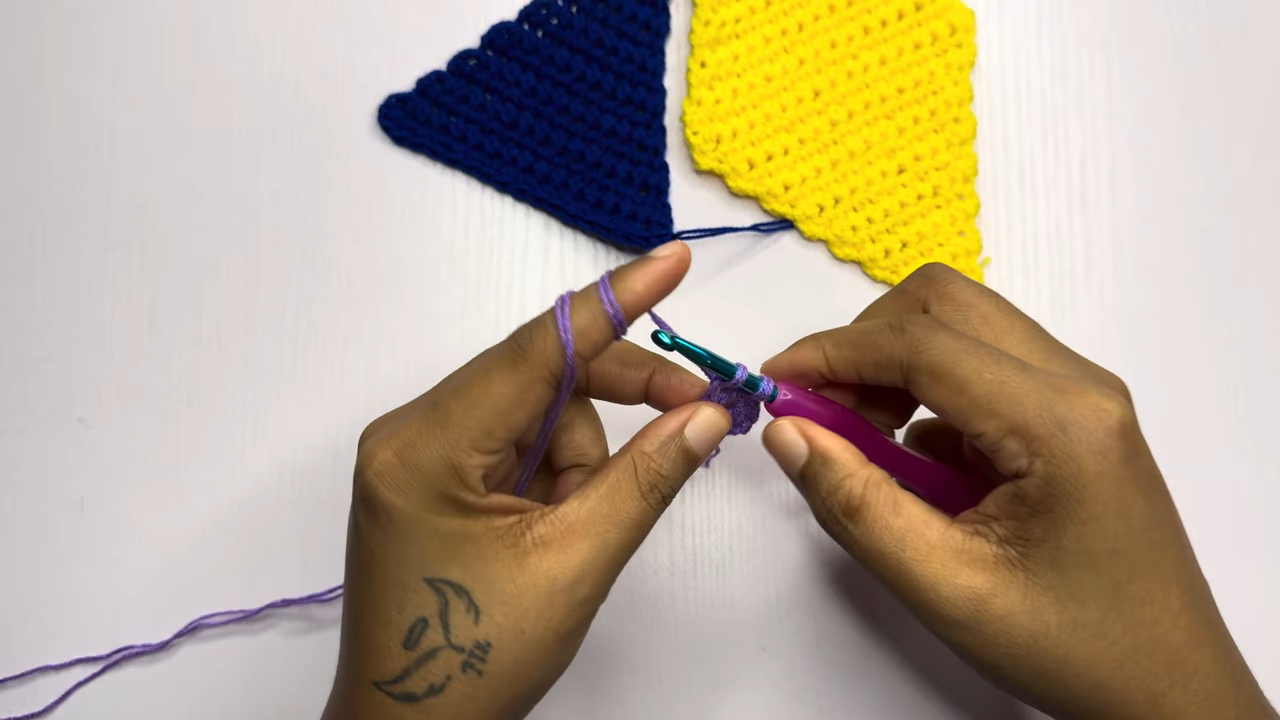
Work a round of small scallop stitches around the outer edge of each triangle once the base shape sits complete, giving every motif a soft, decorative border before joining begins. Keep tension relaxed here so the scallops sit flat rather than curling inward.
Joining Motifs into Diamonds
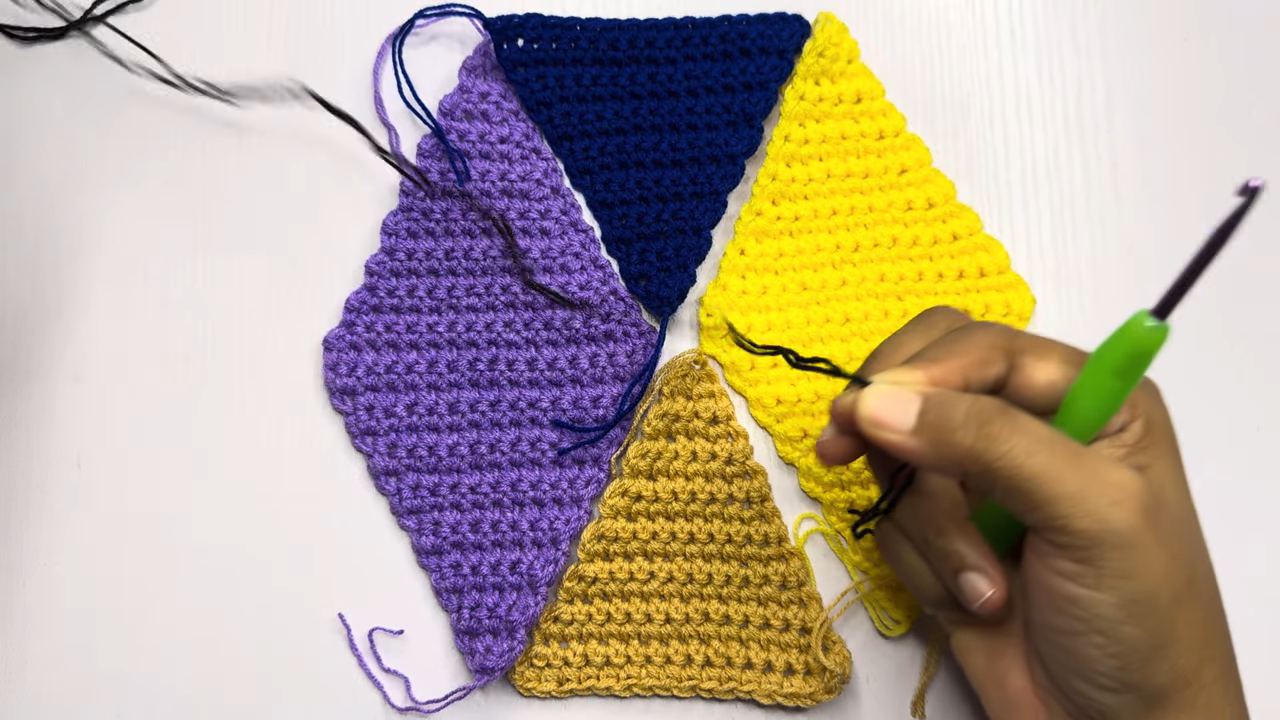
Lay two triangles point to point and join along the shared edge using a contrasting yarn and a surface slip stitch, working through both layers evenly to form a diamond shape. Repeat across a full row, checking that seams stay straight and consistent before moving forward.
Joining Diamond Rows into Panels
Connect finished diamond rows using the same contrasting join, building up front and back panels row by row until the fabric reaches the desired length and width. Lay pieces flat periodically to check the overall shape matches against a well-fitting top for reference.
Shaping the Neckline and Armholes
Skip joining seams at planned intervals along the top edge to leave openings for the neckline and each armhole, then reinforce those gaps with a round of single crochet for a clean finish. Adjust opening width gradually and try the piece on as shaping progresses.
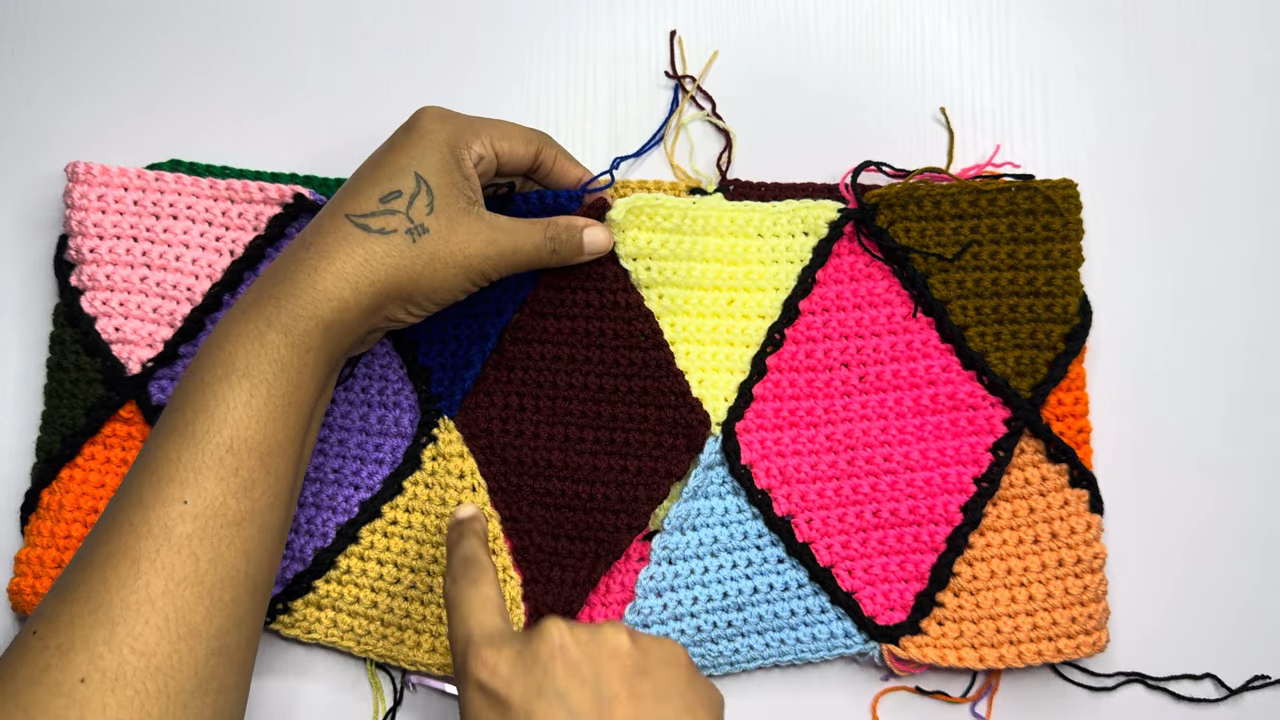
Joining Front and Back Panels
Line up the front and back panels at the shoulders and sides, then join using the same surface slip stitch method to keep the seam style consistent throughout the entire top. Leave the desired side slits or gaps open if a more relaxed, breezy fit feels appealing.
Final Assembly
Weave in every remaining yarn tail securely once all panels join completely, checking the inside seams for any loose ends that might catch or unravel. Block the finished top lightly by lying flat until the shape settles evenly.
Common Mistakes to Avoid
Uneven motif sizing causes more fitting headaches than almost anything else, so measuring each triangle against the first completed one before moving forward keeps the whole project consistent. Skipping a dry layout of all pieces before joining often leads to mismatched color placement, so arranging every motif on a flat surface first helps catch pattern issues early. Tight, rushed join seams tend to pucker the fabric, so keeping the surface slip stitch relaxed and evenly spaced makes a noticeable difference in how the finished top hangs.
Uses & Benefits
A patchwork crochet top brings genuine wardrobe versatility, pairing easily with high-waisted shorts, flowy skirts, or simple jeans for a laid-back summer look. Scrap yarn also finally gets real purpose here, turning leftover skeins from past projects into a completely original, wearable piece. Handmade patchwork pieces carry a boutique feel too, often costing far less in materials than a similar store-bought design while looking distinctly more personal.
Helpful Beginner Tips
- Keep a running count of triangles needed before starting to avoid running short
- Lay all motifs out flat before joining to plan color placement
- Practice the surface slip stitch join on scrap pieces first
- Try the piece on periodically while shaping the neckline and armholes
- Block finished panels before final assembly for a smoother overall fit
Assembly
Arrange front and back panels side by side, matching diamond rows carefully before pinning shoulder and side seams in place. Join slowly with the contrasting yarn, checking fit at each stage rather than waiting until the entire top comes together.
Personalization Ideas
Try a Monochrome Palette
Work every triangle in varying shades of a single color for a more subtle, tonal patchwork effect.
Add Fringe or Tassels
Attach small fringe pieces along the bottom hem for extra boho-inspired movement and texture.
Adjust the Neckline Shape
Widen or narrow the shoulder opening gradually while shaping to create a scoop, square, or halter-style neckline.
Make a Matching Bag
Crochet a few extra triangles in the same palette to assemble a coordinating small bag or pouch.
Extend Into a Dress
Continue adding diamond rows below the hip line for a longer, dress-length version of the same design.
Why This Patchwork Top Is Trending This Season
Scrap-yarn and patchwork crochet keep gaining traction across social feeds, appealing to crafters who want sustainable, low-waste projects with genuinely striking results. Bold color-blocked garments also fit neatly into the wider boho-revival trend currently shaping summer fashion, making a handmade triangle-motif top feel both current and unique.
Frequently Asked Questions
How many triangle motifs does a full top usually need?
Most adult sizes require between 30 and 50 individual triangles, depending on panel length and width.
Can leftover yarn scraps really work for this project?
Yes, the pattern practically depends on assorted small yarn amounts, making it ideal for stash-busting.
What’s the easiest way to keep triangles the same size?
Counting rows carefully and measuring against the first completed motif keeps every piece consistent.
Does the joining color need to stay the same throughout?
No, though a single consistent join color like black creates a cleaner, more unified overall look.
Can this pattern scale up for a plus-size fit?
Absolutely, adding extra diamond rows to the width and length adjusts sizing easily at any stage.
Is this Crochet Summer Top project beginner-friendly overall?
The triangles themselves suit beginners well, though the joining and shaping stages ask for a bit more patience.
How long does the full top typically take to finish?
Most crocheters spread the project across several sessions, totaling roughly ten to twelve hours of work.
Conclusion
Pick a handful of favorite colors and give the crochet patchwork summer top pattern a try this season. Every triangle adds character, and the finished piece delivers a genuinely wearable, one-of-a-kind result. Share a photo once the last seam joins, and enjoy a breezy new addition to warm-weather wardrobes.