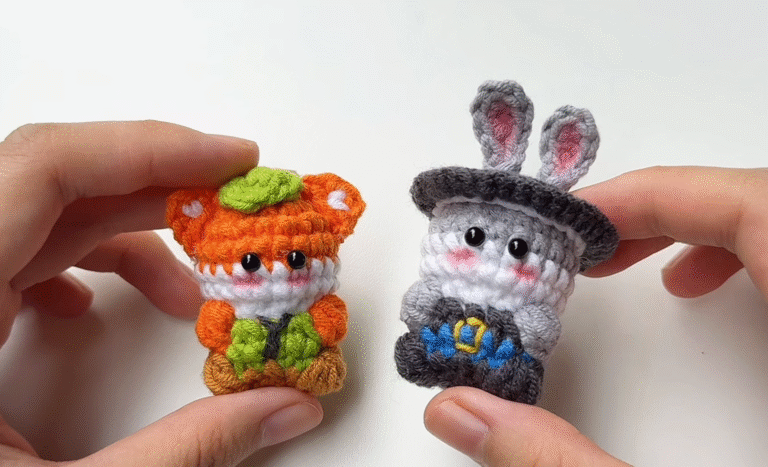
Genuine Crochet Mrs. Potato Head Fun and Adorable Amigurumi Pattern for Apprentices
A pocket-sized character can make any set of keys feel more special. This crochet Mrs. Potato Head project is a cheerful, nostalgic make that turns simple yarn into a playful little companion.
Even better, this beginner-friendly crochet Mrs. Potato Head pattern is designed for quick success. With a rounded potato body, tiny shoes, and a sweet bow, this Mrs. Potato Head amigurumi becomes an adorable keychain, gift topper, or bag charm.
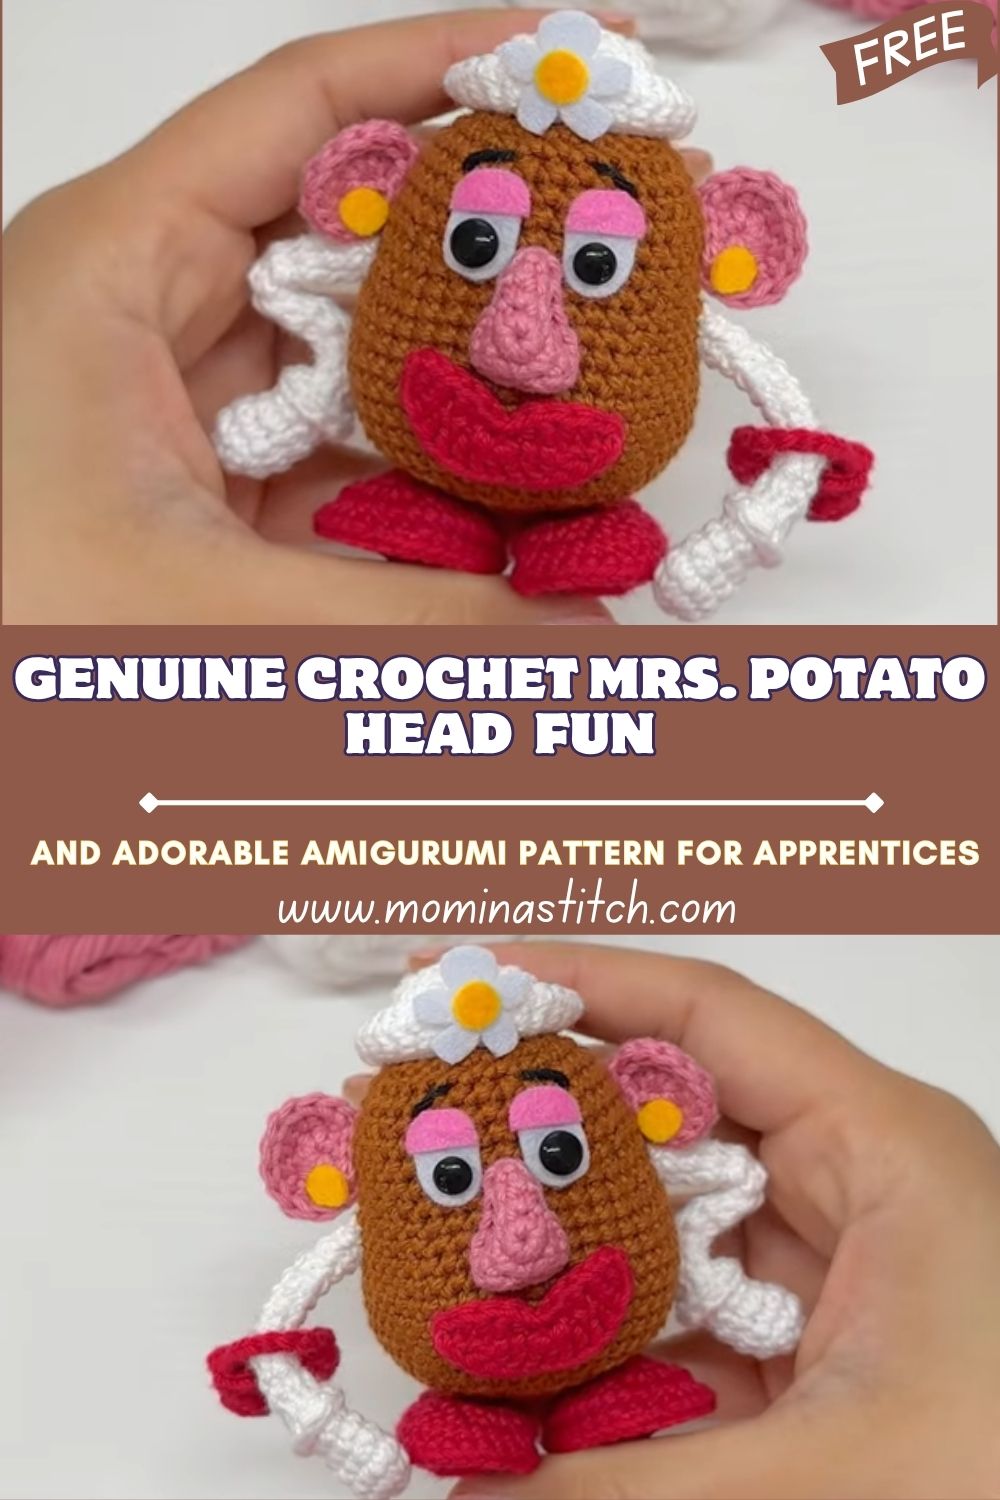
Meanwhile, crochet Mrs. Potato Head keychains are especially fun because they invite creativity. The face pieces can be arranged in different ways so that each character can look a little different. In addition, accessories like shoes, lips, and bows make the project feel playful rather than complicated.
Most importantly, this crochet Mrs. Potato Head pattern is perfect for beginners because it uses one main body shape and several small add-ons. First, the potato body works up quickly. Next, the facial parts are simple circles and ovals. Finally, assembly teaches basic placement and sewing skills without feeling overwhelming.
What You’ll Need
Gather these supplies for one keychain-sized Mrs. Potato Head:
- Yarn (DK #3 or Worsted #4, smooth acrylic or cotton blend):
- Brown/tan (body): 20–25 g
- White (eyes + arms): 5–8 g
- Pink (nose or cheeks): 2–3 g
- Red or dark pink (mouth/lips): 2–3 g
- Black (shoes + eyebrows): 5 g
- Yellow (ears or small details): 2 g
- Optional: light pink for blush: 1 g
- Crochet hook: 2.5 mm (DK) or 3.0 mm (worsted, tight tension)
- Safety eyes: 6 mm (1 pair)
- Stuffing (polyfill): 10–15 g
- Yarn needle: 1
- Stitch marker: 1
- Keychain ring: 20–25 mm split ring or clasp + jump ring
- Scissors
Skill Level
Beginner (basic amigurumi in the round)
Making Time (Overview)
Total estimated time: 1.5–2.5 hours for one crochet Mrs. Potato Head keychain, depending on sewing speed.
Step-by-Step Instructions
Stitches & Notes (Quick and Helpful)
- sc = single crochet
- inc = 2 sc in the same stitch
- dec = single crochet decrease (invisible decrease recommended)
- Work in continuous rounds, marking the first stitch of each round.
- For keychains, keep stitches tight so stuffing does not show.
Body (Main Shape)
1) Crochet the Potato Body
This body is a rounded oval shape with a slightly taller “potato” look.
Making time: 25–40 minutes
- R1: Magic ring, 6 sc (6)
- R2: inc around (12)
- R3: (1 sc, inc) around (18)
- R4: (2 sc, inc) around (24)
- R5: (3 sc, inc) around (30)
- R6: (4 sc, inc) around (36)
- R7–R11: sc around (36)
- R12: (4 sc, dec) around (30)
- R13: (3 sc, dec) around (24)
- R14: (2 sc, dec) around (18)
- R15: (1 sc, dec) around (12)
- Stuff firmly, shaping it into a potato-like oval.
- R16: dec around (6)
- Fasten off, leave a tail, and close the opening neatly.
Next tip: If the body looks too round, add one extra plain round (sc around) before the decrease rounds. As a result, the potato becomes slightly taller.
2) Add the Limbs (Arms + Legs/Base)
Small limbs keep the character cute without adding bulk.
Making time: 20–30 minutes
Arms (make 2, white yarn)
- R1: Magic ring, 6 sc (6)
- R2–R4: sc around (6)
- Lightly stuff the hand end only.
- Flatten the top and seal through both layers to close.
- Leave a sewing tail.
Legs (make 2, brown or black, depending on preference)
- R1: Magic ring, 6 sc (6)
- R2: (1 sc, inc) around (9)
- R3–R4: sc around (9)
- Flatten and close the top, leaving a tail.
Meanwhile, if sturdy legs are preferred, add a little stuffing to the foot end before closing.
3) Attach the Facial Features (Nose, Mouth, Ears)
The face is where Mrs. Potato Head becomes instantly recognizable.
Making time: 25–35 minutes
Nose (pink, make 1)
- R1: Magic ring, 6 sc (6)
- R2: (1 sc, inc) around (9)
- R3: sc around (9)
- Fasten off, leave tail, and lightly stuff.
Mouth/Lips (red or dark pink, make 1)
- Ch 7
- Next, starting in the 2nd ch from the hook: sc 5
- After that, in the last stitch: 3 sc to round the end
- Then, continue on the other side of the chain: sc 4
- Fasten off and leave a tail for sewing.
Later, a simple embroidery line inside the mouth can add extra expression.
Ears (yellow or tan, make 2)
- R1: Magic ring, 5 sc (5)
- R2: inc around (10)
- R3: sc around (10)
- Fasten off, leave tail.
Additional Parts
Clothing & Accessories
4) Crochet the Shoes (black, make 2)
These tiny shoes anchor the keychain and add contrast.
Making time: 15–20 minutes
- R1: Magic ring, 6 sc (6)
- R2: inc around (12)
- R3: sc around (12)
- R4: (2 sc, dec) around (9)
- R5: sc around (9)
- Stuff lightly, then flatten the top and close. Leave tail.
Next step: Sew each shoe to the lower front of the potato body, spaced evenly.
5) Crochet the Bow (bright pink, red, or any fun color)
A bow is the quickest way to give the character a “Mrs.” look.
Making time: 8–12 minutes
- Ch 18
- First, sc in 2nd ch from hook and across (17)
- Next, ch 1, turn, sc across (17)
- Fasten off, leaving a long tail.
- Then, pinch the center and wrap the yarn around the middle 6–8 times.
- Finally, knot securely and leave a tail for sewing.
Eyes and Facial Details
6) Eye Whites (optional, white yarn, make 2)
Safety eyes can be used on their own, but eye whites add a cartoon look.
Making time: 8–12 minutes
- R1: Magic ring, 6 sc (6)
- R2: inc around (12)
- Fasten off, leave tail.
After that, insert safety eyes through the center of each white circle, then place them on the face.
Face & Assembly
7) Attach the Safety Eyes, Embroider the Smile, and Assemble
Assembly is easier when everything is placed first, then sewn.
Making time: 25–40 minutes
Numbered Assembly Steps
- Plan the face first. Place the eyes, nose, and mouth on the body without sewing. Next, adjust until the expression looks playful and balanced.
- Attach eyes.
- If using eye whites: sew the white circles onto the face first.
- After that, insert the 6 mm safety eyes through the whites and the body, then secure the backs inside.
- Sew the nose centered slightly below the eyes.
- Add the mouth below the nose, slightly curved for a friendly look.
- Sew the ears on the sides, level with the eyes or slightly higher.
- Attach arms to the sides of the body, slightly below eye level.
- Attach legs/shoes at the bottom front so the character “stands” visually.
- Embroider details with black yarn:
- eyebrows (small curves above the eyes)
- a simple smile line if desired
- Add rosy cheeks with pink yarn or blush stitches.
- Sew the bow near the top of the head area, a little off-center for charm.
Beginner-Friendly Assembly Tips
- First, use pins or scrap yarn to “tack” parts in place. As a result, symmetry becomes much easier.
- Next, sew with small, neat whip stitches. Then, pull snugly but not so tight that the shape puckers.
- Finally, weave in every tail in at least three directions to prevent pieces from loosening on a keychain.
Keychain Attachment (Secure and Simple)
- Thread the yarn through the top center of the body.
- Next, pass through 2–3 stitches at the crown to reinforce.
- After that, tie onto a jump ring or directly onto the keychain ring using double knots.
- Finally, hide the yarn tail inside the body and trim.
Special Features
- Texture: A soft, plush potato body that feels squishy yet holds its shape.
- Expression: Big eyes, a sweet smile, and rosy cheeks create a cute, cartoon-like personality.
- Size: Small enough for a keychain, yet detailed enough to display on a shelf or desk.
Sizing Tips
Yarn weight and hook size change the finished look:
- Smaller keychain: use sport/fingering yarn with a 2.0–2.25 mm hook. As a result, the character becomes mini and delicate.
- Standard keychain: DK yarn with a 2.5 mm hook gives clean stitches and strong structure.
- Plush charm: worsted yarn with a 3.0–3.5 mm hook makes it bigger; however, tighter tension is still important to avoid gaps.
Meanwhile, stuffing also matters: firmer stuffing makes a rounder potato, while lighter stuffing gives a softer, squishier shape.
Finishing Tips
- Neat stitching: keep tension even, and downsize the hook if holes appear.
- Secure knots: double-knot, then weave ends through the body before trimming.
- Balanced stuffing: add small amounts, then shape with fingers before closing.
- Clean finishing: align decreases smoothly and close the final hole with a tight cinch.
- Durability check: tug gently on arms, shoes, and bow to confirm everything is secure.
Common Mistakes to Avoid
- Loose stitches: stuffing will show, especially on the face and near decreases.
- Incorrect feature placement: eyes set too high or too wide can change the character’s expression dramatically.
- Skipping stitch markers: rounds drift, and shaping becomes uneven later.
- Overstuffing: the body can stretch and look lumpy instead of potato-smooth.
- Weak sewing: keychains are handled often, so extra-reinforcement stitches matter.
Variations & Customization Ideas
- Change the accessories: add a tiny scarf, a mini purse, or a little flower instead of a bow.
- Try different shoes: boots, sneakers, or brightly colored flats for a fun twist.
- Play with expressions: adjust eyebrow angles, add freckles, or stitch a wink for personality.
- Size options: create micro versions for zipper pulls or larger versions for shelf plushies.
- Color experiments: use a lighter tan body, or add speckles with surface embroidery for a “real potato” look.
Tutor Suggestions
- First, focus on one clean body shape, because a smooth base makes every detail look better.
- Next, practice invisible decreases on scrap yarn; afterward, the potato body looks much neater.
- Meanwhile, count stitches gently and often, since small pieces grow quickly in amigurumi.
- Later, experiment with feature placement before sewing, because that is the easiest way to build confidence.
- Finally, keep going even if the first attempt feels imperfect—each new character teaches something useful.
Conclusion
This crochet Mrs. Potato Head amigurumi is a quick, nostalgic project that turns simple stitches into a playful keychain full of personality. With an easy potato body, tiny accessories, and beginner-friendly assembly, the finished charm feels both handmade and memorable. Next, try changing the bow, adding different shoes, or stitching a new expression, and then explore even more character-inspired amigurumi for a fun crochet collection.