Delightful Crochet Shorts Skirt Summer Pattern
Discover the Delightful Crochet Simple Shorts Skirt Summer Pattern, a breezy, beginner-friendly make blending flirty skirt flair with comfy shorts ease. Lightweight, beach-ready, customizable, and quick to crochet, it’s perfect for vacation wardrobes, market stalls, and chic weekend wear.
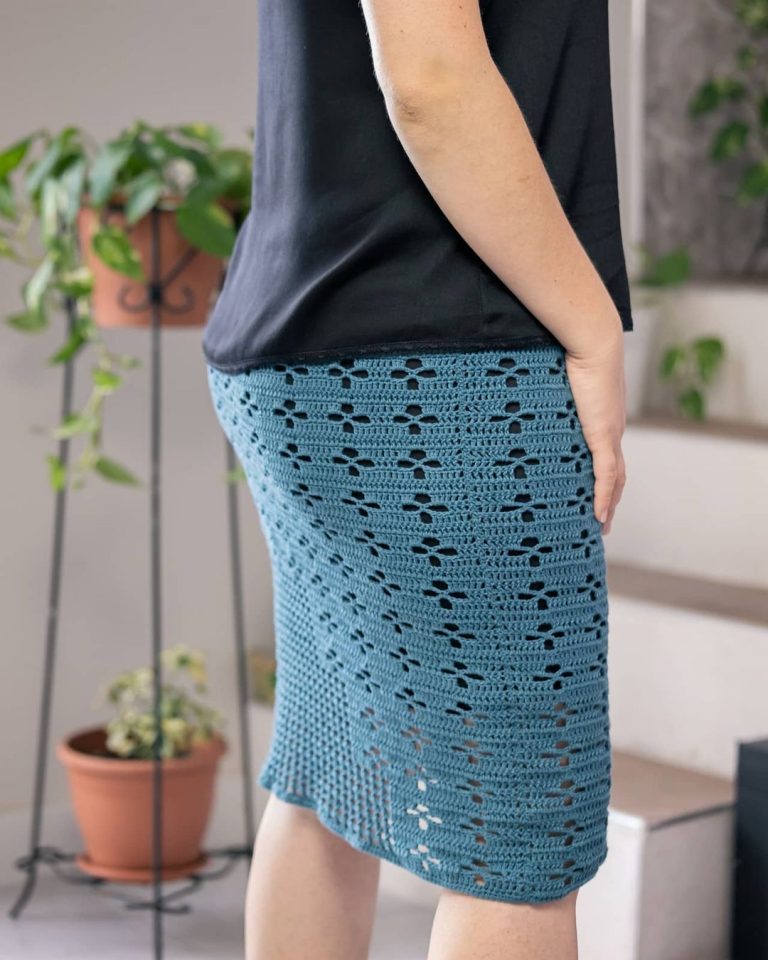
Create your new warm-weather staple: the Delightful Crochet Simple Shorts Skirt Summer Pattern. This breezy, beginner-friendly design blends the flirty sway of a skirt with the comfort of lightweight shorts.

Whether you’re beach-bound or market-hopping, the easy fit, adjustable waist, and size-flexible notes make it a quick, stash-friendly project. Choose cotton or bamboo yarn for a cool feel, play with color-block accents, and finish fast with minimal seaming. With this summer crochet pattern, you’ll have a chic crochet shorts skirt that dresses up or down in minutes.
- Beach cover-up over swimwear
- Festival-ready outfit with a crop top and sandals
- Every day casual with a tee and sneakers
Delightful Crochet Simple Shorts Skirt Summer Pattern
Warm days call for breezy makes, and this delightful crochet simple shorts skirt summer pattern, aka the easy skor,t is your go-to. Because it blends the flirt of a skirt with the comfort of shorts, it wears beautifully from beach strolls to brunch dates. Moreover, it is beginner-friendly, stash-savvy, and endlessly customizable. Furthermore, you can work it made-to-measure so it hugs at the waist, skims the hips, and moves with you. Consequently, you will enjoy a quick, satisfying project that looks boutique-ready and feels vacation-light.
Note: The link above is included for convenience; however, the written pattern below is original and designed to be clear, complete, and beginner-friendly.
What You’ll Make
Essentially, you will create a high-waist elastic-casing skort with a soft shorts layer underneath and a graceful skirt overlay attached at the waistband. Additionally, you will work top-down for easy try-ons and simple adjustments. As a result, you can customize length, flare, and fit without guesswork.
Skill Level
Confident beginner (comfortable with chains, single crochet, half double crochet, double crochet, and working in the round)
Estimated Total Time
6–9 hours depending on size and experience
Materials and Exact Measurements
Because fit is everything, please measure before you start and keep a tape measure handy.
- Yarn: DK/Light Worsted (Category 3) cotton or cotton-bamboo blend for breathable drape
- XS: 350–450 yd (320–410 m)
- S: 450–550 yd (410–500 m)
- M: 550–650 yd (500–595 m)
- L: 650–750 yd (595–685 m)
- XL: 750–900 yd (685–825 m)
- 2XL: 900–1050 yd (825–960 m)
- 3XL: 1050–1200 yd (960–1100 m)
- Additionally, add 100–200 yd (90–180 m) if you prefer a longer skirt overlay
- Hooks:
- 4.0 mm (G-6) for waistband ribbing
- 4.5 mm (US 7) or 5.0 mm (H-8) for body (choose the one that meets gauge)
- Elastic: 1 inch (2.5 cm) wide; cut length = your waist measurement minus 2 inches (5 cm)
- Safety pin for threading elastic
- Tapestry needle and scissors
- Stitch markers (6–10)
- Measuring tape
- Optional drawstring: 40–60 inches (100–150 cm) crocheted chain or cord
Measurements to Take
Because everybody is unique, write these down:
- Natural waist: measure where you want the waistband to sit.
- High hip: 3–4 in (7.5–10 cm) below the waist.
- Full hip: the widest point.
- Skirt length: from waistband to desired hem.
- Rise depth: from the front waist, between legs, to the back waist (for comfortable shorts).
- Inseam: from crotch to desired shorts length (usually 2–4 in/5–10 cm for a skort).
Gauge (After Blocking)
Because gauge determines fit, swatch first.
- 16 double crochet (dc) stitches x 10 rows = 4 in x 4 in (10 x 10 cm) using 5.0 mm hook
- Alternatively, 14 half double crochet (hdc) stitches x 11 rows = 4 in x 4 in (10 x 10 cm)
- If your swatch is too small, then go up a hook size; if too large, then go down.
Abbreviations (US Terms)
- ch = chain
- sl st = slip stitch
- sc = single crochet
- hdc = half double crochet
- dc = double crochet
- BLO = back loop only
- FLO = front loop only
- st(s) = stitch(es)
- rep = repeat
- inc = increase (2 sts in same st)
- sk = skip
Construction Overview
First, you will crochet a stretchy ribbed waistband that forms a neat casing for elastic. Next, you will pick up stitches along the lower edge to work a gentle yoke to the hips. Then, you will separate the shorts and complete both legs. Finally, you will attach the skirt overlay at the waistband and work downward for a swingy drape. Consequently, you get a neat finish, secure fit, and beautiful movement.
Pattern Notes
- Because this is made-to-measure, you can follow the math in parentheses to keep sizing accurate.
- Additionally, always join rounds with a sl st and ch up as indicated unless otherwise noted.
- Moreover, try it on frequently to confirm ease at the waist and hips.
- Consequently, your stitch count will depend on your measurements and gauge.
Step-by-Step Instructions
- Swatch and Plan (Making time: 30–45 minutes)
- First, crochet a 6 x 6 in (15 x 15 cm) swatch in dc using the 5.0 mm hook.
- Next, wash and lay flat to dry or steam lightly, then measure stitches per inch.
- Then, record stitches per inch (spi) and rows per inch (rpi); you will use these numbers shortly.
- Consequently, you will be able to calculate how many stitches to increase for your hips.
- Ribbed Waistband Casing (Making time: 45–60 minutes)
- First, with a 4.0 mm hook, ch 9 for a 1.75 in (4.5 cm) tall waistband (or ch 11 for 2.25 in/5.5 cm).
- Next, row 1: sc in second ch from hook and across (8 or 10 sc). Ch 1, turn.
- Then, rows 2–until length equals waist minus 1 in (2.5 cm): BLO sc across, ch 1, turn.
- Additionally, wrap the ribbing around your waist to confirm a snug stretch; add or remove rows as needed.
- Next, join the short edges with sl sts through both layers to form a loop; do not twist.
- Then, rotate the loop so the raw edge is at the top; switch to the 5.0 mm hook (or your gauge hook).
- Next, round 1 pickup: ch 1, sc evenly around the raw edge, working 1 sc per rib row; sl st to join. Place a marker at the join.
- Consequently, ensure your stitch count is a multiple of 4 for tidier increases (add or subtract 1–2 sts if needed).
- Build the Yoke to the Hips (Making time: 60–90 minutes)
- First, measure your full hip and add 1–2 inches (2.5–5 cm) ease.
- Next, target stitch count at hips = hip-with-ease x stitches-per-inch (from your swatch). Round to the nearest multiple of 4.
- Then, round 2: ch 2 (counts as hdc), hdc in each st around, sl st to join.
- Additionally, round 3 (increase): ch 2, [hdc in next 3 sts, 2 hdc in next st] rep around, sl st to join. Mark every 4th increase with a stitch marker to keep spacing even.
- Next, rounds 4–6: hdc in each st; try on after round 4. If the yoke feels tight, then add another increase round, placing 6–8 increases evenly.
- Then, continue hdc rounds until the yoke length reaches high-hip depth (usually 3–4 in/7.5–10 cm from the waistband pickup).
- Consequently, your stitch count should now be close to your hip target. If not, then add one more increase round to reach it.
- Shape to Crotch Depth and Divide for Shorts (Making time: 30–45 minutes)
- First, measure fromthe waistband to the crotch depth while wearing the yoke; note the distance.
- Next, continue hdc rounds without increasing until you reach that length (typically 7–9 in/18–23 cm from waistband).
- Then, count total stitches and divide by 2; place markers at the front and back centers.
- Additionally, to avoid a tight inseam, add 2–8 chains at the center front and back to form a small gusset; join to the opposite marker.
- Next, you now have two leg openings. Place markers to keep track.
- Work Leg 1 (Right or Left) (Making time: 60–90 minutes)
- First, join yarn at inner thigh marker; ch 2; hdc around the first leg opening, distributing stitches evenly across gusset chains.
- Next, rounds 2–4: hdc in each st; sl st to join. Try it on to confirm comfort.
- Then, for a gentle taper, work 1 decrease round now or later: [hdc in next 9 sts, hdc2tog] around (optional).
- Additionally, continue until inseam measures 2–4 in (5–10 cm) or your preferred shorts length.
- Finally, finish with one round of sc for a clean hem; fasten off.
- Work Leg 2 (Making time: 60–90 minutes)
- First, join yarn at the inner thigh of the second leg; ch 2; mirror the stitch count from leg 1.
- Next, keep rounds and any decreases identical for symmetry.
- Then, work until the extra length matches leg 1 exactly; finish with one round of sc; fasten off.
- Consequently, you now have neat, comfy shorts ready beneath the skirt overlay.
- Insert Elastic and Optional Drawstring (Making time: 10–15 minutes)
- First, cut elastic to waist minus 2 inches (5 cm); overlap ends by 0.5–1 in (1–2.5 cm).
- Next, attach a safety pin and thread through the waistband casing channel between rib layers if you left one; if not, then weave under the pickup round inside the rib’s top edge.
- Then, stitch the elastic ends securely and evenly distribute the gathers.
- Additionally, for a drawstring, choose a cord 40–60 in (100–150 cm), thread through the same path, and tie at the center front.
- Consequently, your waistband will feel secure but flexible.
- Skirt Overlay: Attach and Work Down (Making time: 90–120 minutes)
- First, turn the garment inside out; locate the inner front loop (FLO) of the pickup round at the waistband.
- Next, join yarn to any FLO stitch; ch 2.
- Then, round 1: dc in each FLO around; sl st to join. This attaches the skirt layer neatly at the waistband.
- Additionally, round 2 (increase): ch 2, [dc in next 5 sts, 2 dc in next st] rep around for a subtle flare. Mark increases positions.
- Next, round 3: dc in each st; try on and check drape.
- Then, rounds 4–8: alternate one increase round ([dc in next 7, 2 dc in next] around) with one plain round, adjusting spacing for your desired flare.
- Additionally, if you prefer a breezier look, work [dc, ch 1, sk 1] mesh for 2–3 rounds at mid-thigh; resume dc afterward.
- Next, continue until skirt length reaches your chosen measurement (commonly 12–15 in/30–38 cm from waistband for a mini-to-mid-thigh skort).
- Finally, the options:
- Simple: one round sc, fasten off.
- Picot: [sc, ch 3, sl st in same st, sk next st] repeat around.
- Shell: [sk 1, 5 dc in next st, sk 1, sc in next] repeat around.
- Consequently, the overlay will swish and move beautifully without bulk.
- Finishing and Blocking (Making time: 20–30 minutes)
- First, weave in all ends neatly with a tapestry needle.
- Next, lightly block: either steam or soak and lay flat to dry, shaping the skirt to an even hem.
- Then, check elastic comfort and adjust gathers if needed.
- Finally, admire your work and take that sunny-day twirl.
Timing Breakdown (At a Glance)
- Swatch and plan: 30–45 min
- Waistband casing: 45–60 min
- Yoke to hips: 60–90 min
- Divide for shorts: 30–45 min
- Leg 1: 60–90 min
- Leg 2: 60–90 min
- Elastic/drawstring: 10–15 min
- Skirt overlay: 90–120 min
- Finishing/blocking: 20–30 min
Fit Math Made Easy (Optional)
Because some crafters prefer exact counts, use this quick formula:
- Determine stitches per inch (spi) from your dc swatch.
- Target hip stitches = (full hip + 1–2 in ease) x spi, rounded to a multiple of 4.
- Starting pickup around the waistband = roughly 80–90% of hip stitches; increase evenly to reach the target over 3–5 rounds.
- Crotch ease: add a small chain bridge (2–8 chains) when dividing for legs if you need more room.
- Leg taper: decrease 6–10 stitches across the leg length if you want a slimmer fit.
Example (Size M):
- Hip 40 in + 1.5 in ease = 41.5 in
- spi 4 (dc) → 41.5 x 4 ≈ 166, round to 168
- Pickup 144, increase 24 sts over 4 rounds to reach 168 by the time you hit full hip.
Basic Tips for Best Results
- Moreover, swatch honestly and block it; it will save time later.
- Additionally, place markers for increased points so spacing stays even.
- Furthermore, try on at these checkpoints: after yoke round 4, right before leg divide, after first leg’s fourth round, and at skirt mid-length.
- Consequently, your fit will remain on track without ripping back.
- Additionally, use a soft, plant-based yarn for breathable comfort; cotton-bamboo blends drape beautifully.
- Moreover, keep your turning chain consistent (ch 2 for hdc, ch 2 for dc here) to avoid laddering at joins.
- Finally, for invisibility, slip stitch into the first true stitch, then start the next round in the next stitch (rather than chaining in place).
Common Mistakes and How to Avoid Them
- Gauge skipping: Often, the skort ends up too tight or loose. Instead, swatch and adjust hook size first.
- Twisted join at waistband pickup: Always lay the ribbed loop flat before joining and check twice. Consequently, the skirt overlay will hang straight.
- Uneven increases: Clustering all increaseonat one side causes a lopsided flare. Alternatively, place increases at four or six evenly spaced points.
- Too-tight chain bridge at crotch: This restricts movement. Instead, add 2–8 chains and test squat comfort.
- Inconsistent leg stitch counts: Count and match both legs, or place a marker every 20 stitches as a checkpoint.
- Heavy yarn choice: Aran cotton drapes heavily and may sag. Therefore, stick to DK for an airy wearable result.
Variations to Personalize Your Skort
- High-waist vintage: Increase waistband height to 2.5–3 in (6–7.5 cm) by starting with a taller rib (ch 13–15).
- Flirty ruffle: Work two final rounds as [2 dc in each st] for a soft ruffle at the skirt hem.
- Eyelet stripes: Every fourth round of the skirt, work [dc, ch 1, sk 1] for that breezy eyelet look.
- Color-block charm: Change colors at the yoke, leg hems, or every 4–6 rounds in the skirt.
- Maxi overlay: Extend the skirt to knee or midi length; consequently, add 150–300 yd (140–275 m) of yarn.
- Picot prettiness: Finish leg hems with picots for a delicate, feminine finish.
- Drawstring-only waist: Skip elastic and add a sturdy i-cord; however, expect slightly more give during wear.
- Pockets add-on: Work two small sc rectangles and stitch them under the skirt overlay at the hips.
Care and Wear
- Gently hand wash or machine wash on cold, delicate setting inside a mesh bag.
- Lay flat to dry to preserve shape and drape.
- Lightly steam if needed to refresh the hem.
- Store folded rather than hung to avoid stretching.
Troubleshooting Fit
- Waist too loose: Shorten the elastic by 0.5–1 in (1–2.5 cm) and re-stitch the overlap.
- Hips too snug: Add one increase round near the top of the skirt; because the overlay begins at the waistband, it will hide a subtle adjustment.
- Shorts riding up: Add length to the inseam by 0.5–1 in (1–2.5 cm); additionally, loosen the crotch chain bridge by 2 chains.
- Skirt hem uneven: Block flat and steam lightly; moreover, check that your starting join at the waistband wasn’t twisted.
Quick Style Ideas
- Beach cover-up with a bikini top and slides.
- Festival-ready with a crop top, belt bag, and ankle boots.
- Weekend casual with a slouchy tee and sneakers.
SEO-Friendly Highlights
- Easy crochet skort pattern for summer
- Beginner-friendly crochet shorts skirt with elastic waistband
- Lightweight cotton DK yarn for breathable warm-weather wear
- Made-to-measure crochet pattern with adjustable length and flare
Recap and Call to Action For (Crochet Shorts Skirt Pattern)
Ultimately, this delightful, simple, crochet shorts skirt summer pattern is a sunny-day staple you will reach for again and again. Moreover, the made-to-measure approach means you can craft a flawless fit without fuss. Additionally, the airy yarn, comfy shorts, and fluttery overlay deliver style plus practicality. Consequently, you can crochet one for vacation, one for market days, and one in a neutral for everyday wear. Finally, grab your cotton yarn, pick your palette, and start your skort today because effortless summer style is just a few joyful stitches away.