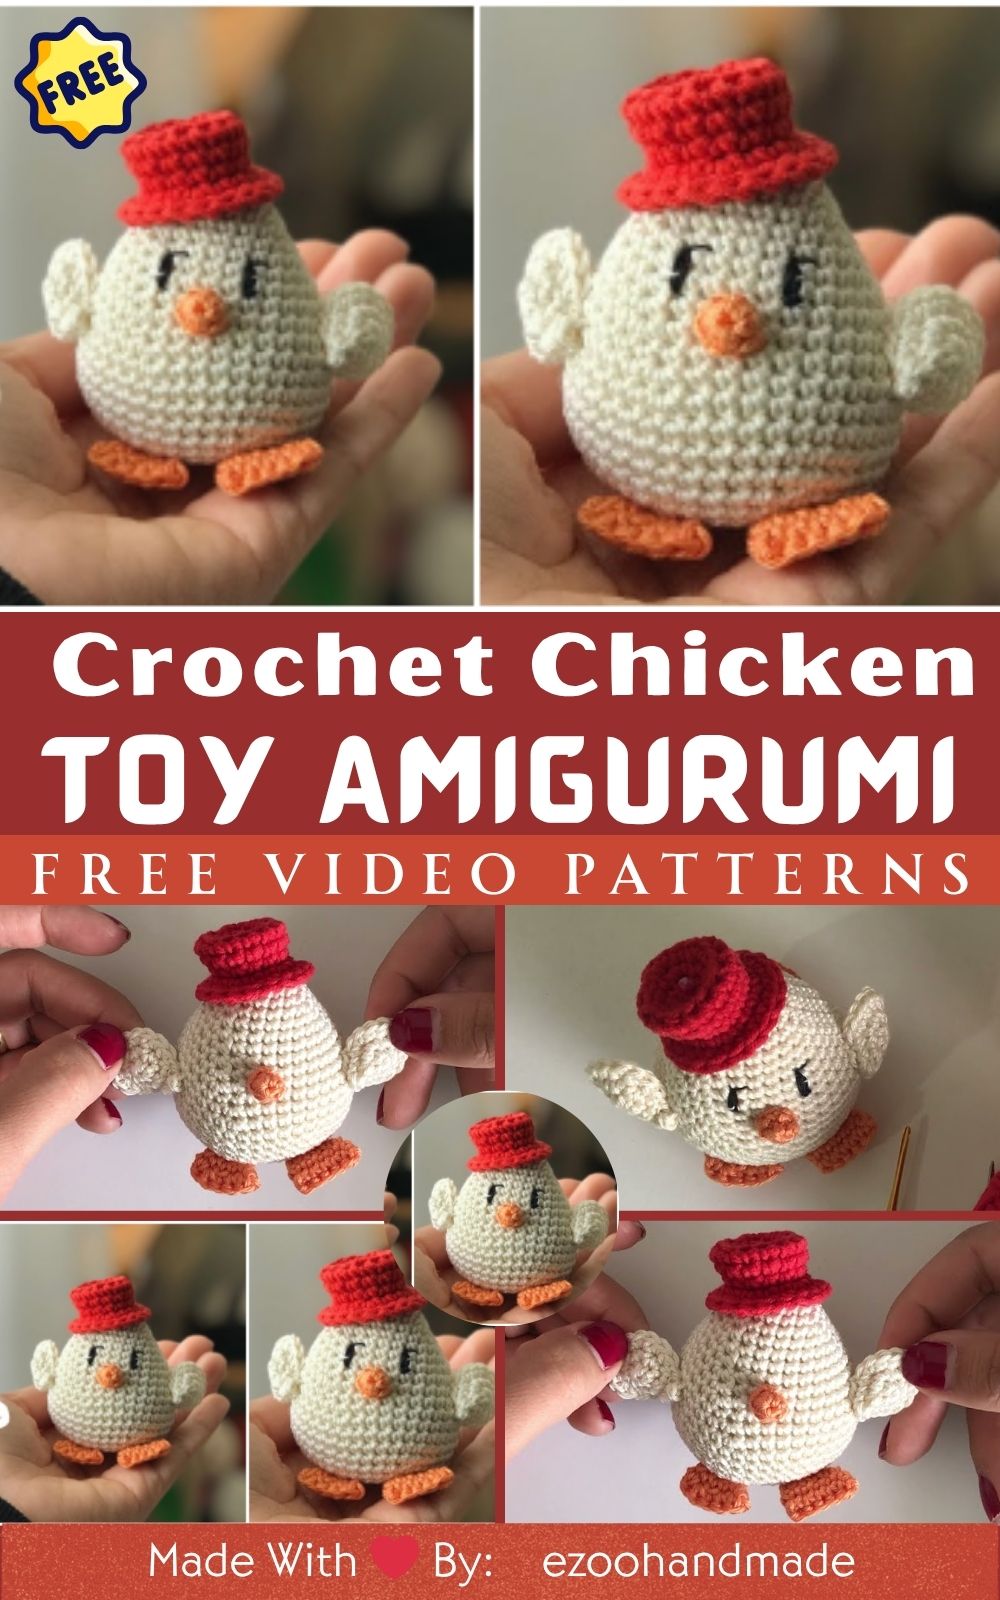
Crochet Chicken Toy Amigurumi Pattern for All Ages
There’s something truly magical about transforming a simple ball of yarn into a soft, loveable creation. The slow rhythm of crochet stitches, the feel of the yarn running through your fingers, and the moment you see your handmade piece come to life — it’s pure creative satisfaction. Each stitch tells a story, weaving imagination into something tangible, warm, and filled with heart.
Among the endless possibilities of crochet, few projects capture the same charm and delight as a Crochet Chicken Toy Amigurumi. With its plump little body, round cheeks, and playful personality, this handmade chicken is more than just a toy — it’s a small bundle of happiness. Perfect as a gift, a décor piece, or a desk companion, this amigurumi brings smiles wherever it lands.
This crochet chicken project is suitable for both beginners and advanced crocheters. It balances simplicity and creativity beautifully offering an approachable pattern for newcomers while still giving experienced makers room to play with details, colors, and textures. Whether you’re learning new stitches or perfecting your amigurumi shaping, this project guarantees hours of relaxing fun.
Crocheting has a beautiful rhythm one that calms the mind, centers the heart, and fills your hands with purpose. The Crochet Chicken Toy Amigurumi embodies that meditative, slow-craft spirit. It’s a wonderful project to unwind with after a busy day or to create thoughtful handmade gifts for friends, family, or even yourself.
Materials & Tools
To create your Crochet Chicken Toy Amigurumi, you will need the following materials and tools:
-
Yarn: Choose a soft, medium-weight yarn (worsted or DK) in your desired colors. Consider using a combination of yellow, orange, and white for a classic chicken look.
-
Hook Size: A 3.5mm (E) or 4mm (G) crochet hook is suitable for creating tight stitches.
-
Stuffing: Use polyester fiberfill or cotton stuffing to give your chicken shape and softness.
-
Safety Eyes: 6mm or 8mm safety eyes add personality to your amigurumi.
-
Scissors: For cutting yarn and trimming ends.
-
Tapestry Needle: Utilize it for weaving in ends and sewing pieces together.
-
Stitch Markers: Essential for keeping track of rounds and ensuring even stitching.
Choosing Your Yarn
When selecting yarn, consider the texture, weight, and color. A softer yarn will make your amigurumi cuddly, while vibrant colors can add character. Experiment with different color combinations to make your chicken toy truly unique and eye-catching.
Step-by-Step Crochet Instructions
Creating your Crochet Chicken Toy Amigurumi is an enjoyable process that involves several key steps. Follow this detailed tutorial to bring your chicken to life:
1. Making the Head
-
Begin with a magic ring: Create a magic ring and crochet 6 single crochets (sc) into the ring. Pull tight to close.
-
Increase rounds: Work 2 sc in each stitch around to double the stitch count, then continue increasing evenly over several rounds until you achieve the desired size for the head.
2. Forming the Neck and Upper Body
-
Decreasing rounds: Once the head is the correct size, start decreasing by working sc2tog (single crochet two together) evenly around.
-
Transition to the body: Maintain consistent decreases to shape the neck, then begin increasing again to start forming the upper part of the body.
3. Building the Main Body
-
Continue increasing: Increase evenly around to expand the body to the desired width.
-
Maintain body shape: Crochet several rounds without increasing to give the body length and shape.
4. Shaping or Attaching the Base
-
Decrease for base: Begin decreasing evenly to close the base of the body, stuffing the piece as you go to maintain shape.
-
Finish closing: Once the base is nearly closed, ensure the stuffing is evenly distributed and finish closing with sc2tog.
5. Creating the Tail or Limbs
-
Tail: Crochet a small fan shape or spikes for the tail, attaching them to the body.
-
Wings and feet: Crochet small oval shapes for wings and simple chains for legs and feet, sewing them securely onto the body.
6. Assembly and Positioning
-
Attach safety eyes: Securely attach safety eyes to the head, ensuring they are evenly positioned.
-
Sew pieces together: Use a tapestry needle to sew all pieces into place, taking care to hide any knots or loose ends.
7. Adding Final Touches and Accessories
-
Comb and beak: Crochet small pieces for the comb and beak, attaching them carefully to the top and front of the head respectively.
-
Optional accessories: Consider adding bows, hats, or scarves for extra personality.
Expert Tips
-
Shaping: Use your fingers to gently shape the stuffing as you go, ensuring a round, even form.
-
Stuffing balance: Avoid overstuffing to prevent distortion; aim for a soft, squeezable texture.
-
Professional finish: Pay attention to tension and stitch spacing for a polished, professional look.
Customization Ideas
Get creative with your Crochet Chicken Toy Amigurumi by trying out these customization ideas:
-
Alternative color schemes: Experiment with pastel, rainbow, or even festive holiday colors.
-
Different yarn types: Try using textured or variegated yarns for a unique effect.
-
Themed versions: Create fantasy-themed chickens with metallic or glittery yarns.
-
Add-ons: Include accessories like tiny hats, scarves, or props to give your chicken added personality.
Advanced Tips & Troubleshooting
Here are some expert tips to take your crocheting skills to the next level and troubleshoot common issues:
-
Invisible decreases: Use invisible decreases to create smooth, seamless transitions.
-
Even stitch tension: Maintain consistent tension to avoid uneven stitching or bulging.
-
Preventing twists: Use stitch markers to keep track of rounds and prevent twisting.
-
Fixing shapes: Adjust stuffing and stitches to correct uneven shapes or bulges.
-
Joining parts: Use the whip stitch or mattress stitch for seamless part attachments.
-
Pattern reading: Familiarize yourself with common pattern abbreviations to follow instructions accurately.
Care Instructions
To ensure your Crochet Chicken Toy Amigurumi remains in great shape, follow these care instructions:
-
Gentle hand wash: Wash with care in lukewarm water using mild detergent.
-
Air dry flat: Lay flat to dry in a well-ventilated area, avoiding direct sunlight.
-
Safe storage: Store in a cool, dry place to prevent damage or discoloration, especially if gifting or displaying.
Display & Gift Ideas
Your completed Crochet Chicken Toy Amigurumi can be used or gifted in a variety of delightful ways:
-
Home décor: Display it as a whimsical piece in your living room or kitchen.
-
Kid’s room accessory: Add charm to a child’s room with this playful companion.
-
Desk companion: Brighten your workspace with this cheerful, handmade item.
-
Holiday ornament: Hang it as a festive decoration during the holiday season.
-
Personalized gift: Offer it as a unique, handmade gift to friends or family, sure to be cherished.
Benefits Section
Engaging in the creation of a Crochet Chicken Toy Amigurumi offers numerous benefits:
-
Relaxation and mindfulness: The repetitive motions of crocheting promote relaxation and focus.
-
Stress relief: Crafting provides a therapeutic escape from daily stressors.
-
Sense of accomplishment: Completing a handmade project brings immense satisfaction and joy.
-
Eco-friendly gifting: Handmade items are sustainable and environmentally friendly gifts.
-
Emotional connection: Creating and gifting handmade art fosters emotional bonds between giver and recipient.
Photography & Social Media Tips
Capture the beauty of your Crochet Chicken Toy Amigurumi with these photography tips:
-
Natural daylight: Use natural light to highlight colors and textures.
-
Props and backgrounds: Incorporate yarn, baskets, or flowers for appealing shots.
-
Close-ups: Focus on details to showcase the intricate stitches and textures.
Conclusion
Embarking on the journey of creating a Crochet Chicken Toy Amigurumi is both rewarding and fulfilling. As you transform simple yarn into a delightful, personality-filled creation, you’ll experience the joy of crafting something meaningful and unique. This project not only allows you to express your creativity but also brings happiness to anyone who receives it. So, pick up your crochet hook and let your imagination take flight—your charming amigurumi awaits!