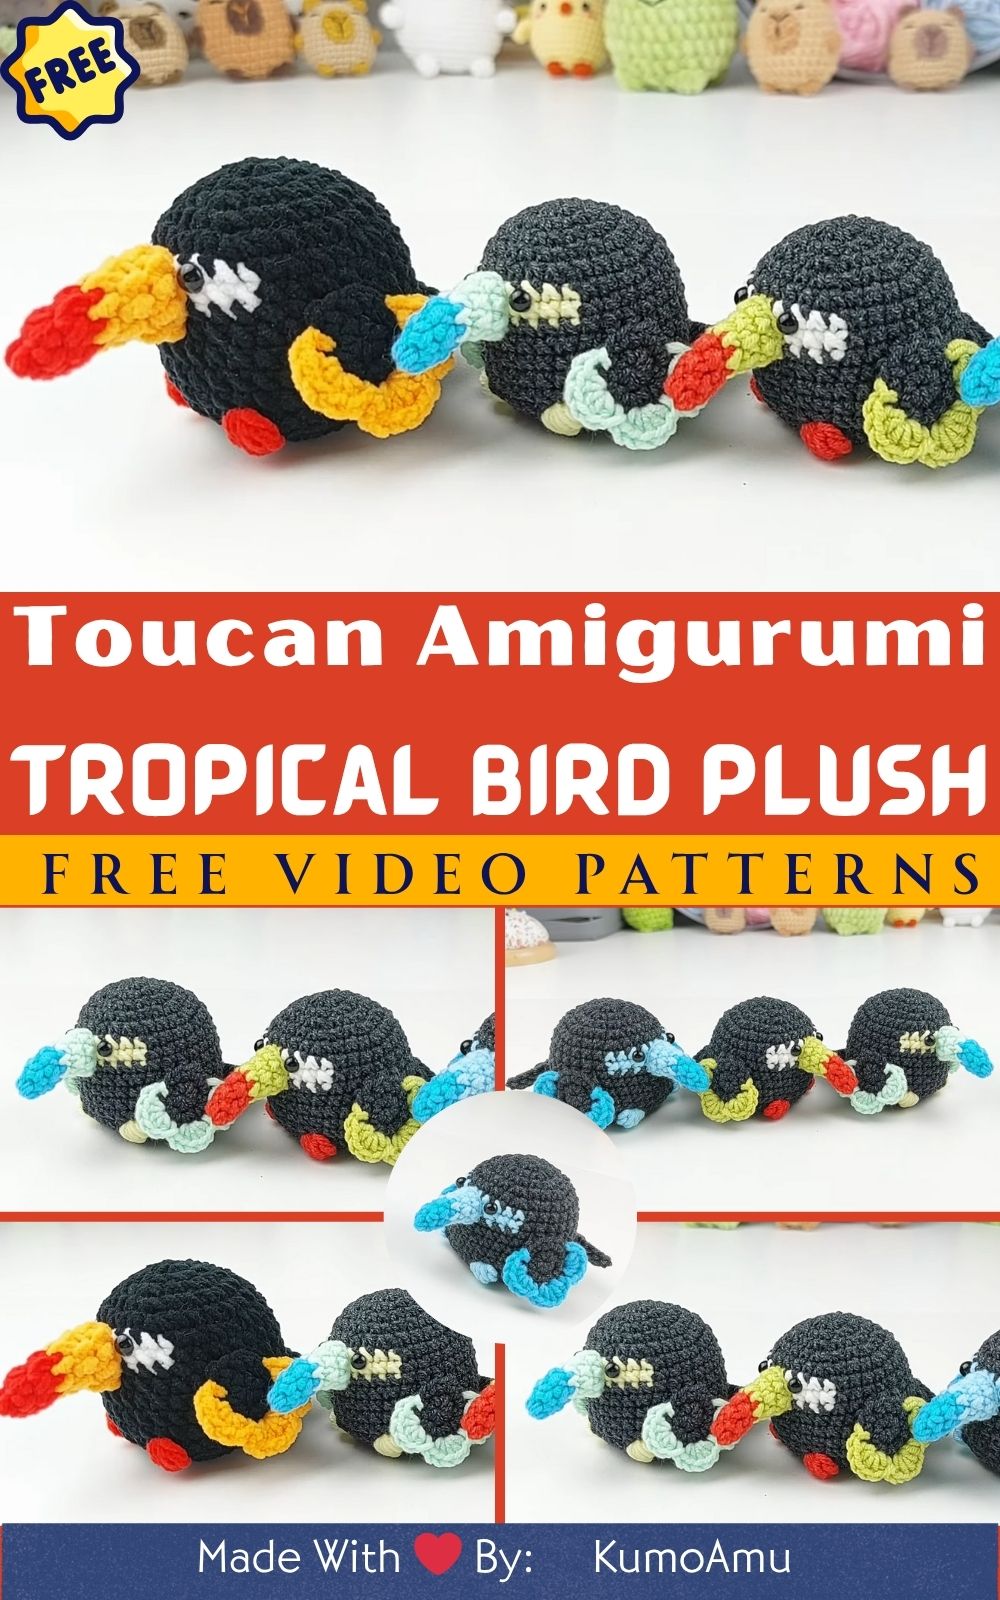
Crochet Toucan Amigurumi Tropical Bird Plush Pattern for Animal Lovers
There’s something magical about taking a strand of yarn and turning it into something real a little creature full of personality, texture, and charm. Crochet Toucan Amigurumi makes it possible to take what starts as imagination and transform it into something you can hold, gift, or display with pride. Whether you’re a seasoned crocheter or someone just beginning their crafting journey, the satisfaction of watching yarn loops turn into a character is like nothing else it’s art, therapy, and joyful creation all at once.
Today’s featured project, the Crochet Toucan Amigurumi Tropical Bird Plush, is a beautiful way to experience crochet’s magic. With its bright colors, oversized beak, and playful design, this toucan plush is not only fun to make but also irresistible to display. Inspired by the stunning designs of toucans in the wild, this amigurumi plush captures everything we love about tropical birds beauty, boldness, and a bit of wild personality.
And here’s the best part: this project is suitable for all skill levels. Beginners will enjoy the simple stitch repetition and basic shaping involved, while advanced crocheters can get creative with details, color blending, and realistic features. Whether you’re practicing stitch consistency or trying out color-changing techniques for the first time, this toucan plush offers fun opportunities for learning and expression.
Beyond technique, crochet is about the experience itself the way the rhythmic motion of your hook calms your thoughts. Working through this pattern allows for slow crafting, thoughtful pauses, and the gentle joy of watching your project come to life. Whether you create this toucan for yourself, as a heartfelt gift, or as a charming décor piece, the result is something made with time, care, and love and that makes it priceless.
3. Materials & Tools Section
Before starting your Crochet Toucan Amigurumi Tropical Bird Plush Pattern, gather the following tools and supplies. Having your materials ready makes your crochet experience smoother and more enjoyable.
Materials Needed:
-
Yarn Weight: Worsted weight (Medium #4) or DK yarn depending on desired size
-
Yarn Colors:
-
Black (main body)
-
White (neck/face patch)
-
Yellow, Orange, and Blue (for beak and accents)
-
Bright blue, green, pink, or any fun tropical shade for personalized details
-
-
Crochet Hook Size: 3.0 mm or 3.5 mm (adjust based on yarn type)
-
Stuffing: Polyester fiberfill for fluff and shape
-
Safety Eyes: 12mm (or embroidered eyes for a baby-friendly toy)
-
Tapestry Needle: For weaving in ends and sewing parts
-
Scissors
-
Stitch Markers: To keep track of rounds and shaping
Yarn Tips:
Choose a smooth acrylic or cotton blend yarn for best stitch definition. Want a super soft finish? Try chenille or velvet yarn but note this can hide some stitch detail. If you’re making a gift for a baby or toddler, use washable, hypoallergenic yarn. Play with color combinations toucans in nature are vividly colored, so you’re free to experiment with rainbow beaks or pastel feathers!
4. Step-by-Step Crochet Instructions
Now it’s time to bring your tropical toucan to life! This step-by-step guide is simplified and designed to walk you through each part, making it beginner-friendly, clear, and engaging.
Note: The tutorial is designed in reference to the YouTube pattern but written originally to fit this article format.
Part 1: Crochet the Head
-
Start with a magic ring using black yarn.
-
Work 6 single crochets (sc) into the ring.
-
Increase each round as follows until you reach 36 stitches.
-
Continue without increases for 5–6 rounds to form the head.
-
Insert safety eyes between rounds 6–7. Leave enough space for the beak.
Expert Tip: Whenever working in the round, place a stitch marker in your first stitch so you don’t lose track.
Part 2: Create the Beak
The toucan’s beak is its most stand-out feature — make it bold!
-
Switch to yellow yarn.
-
Chain 1, then work into a flat oval shape — increase every round until you have about 24 stitches.
-
Switch colors to orange, then blue, to create a beautiful gradient effect.
-
Lightly stuff the beak with fiberfill and fold it toward the face.
-
Sew the beak onto the front of the head using a tapestry needle.
Expert Tip: Don’t overstuff the beak — you want it to keep a nice shape but not stretch the stitches.
Part 3: Form the Neck and Upper Body
-
Continue crocheting down from the head using black yarn.
-
Slowly increase stitches for a few rounds to create the neck and upper torso.
-
Optionally, switch to white yarn and create a “belly patch.”
-
Work on shaping until the torso starts rounding out naturally.
Expert Tip: Crochet tightly when working with lighter colors like white — it shows gaps more easily than black.
Part 4: Build the Main Body
-
Continue from the torso and work several rounds even (without increasing).
-
Begin decreasing gradually to form the lower body or end.
-
Stuff as you go — keeping the toy firm but not overstuffed.
Part 5: Create Tail & Wings
Tail:
-
Use black yarn.
-
Chain 6, sc across, decrease each row to form a pointed triangle.
-
Make 2 or 3 triangles and sew them layered for texture.
Wings:
-
Create mini circles or oblong shapes in black or green yarn.
-
Sew onto the sides of the body — keep them symmetrical!
Part 6: Assembly & Positioning
This part brings every feature together!
-
First, attach the head to the body firmly.
-
Position and sew wings, tail, and any belly patches.
-
Double-check that the toucan stands or sits evenly — adjust stuffing if needed.
Expert Tip: Use long whipstitch seams when sewing limbs or wings to ensure durability.
Part 7: Final Touches
-
Add any embellishments — tiny felt flowers, a bow, or embroidered details for extra personality.
-
Embroider cute cheeks with pink yarn or felt.
-
Use fabric glue for any tiny felt accents.
5. Customization Ideas
Want to make your toucan uniquely yours? Try these ideas!
-
Rainbow Beak: Add 4-5 colors to create a gradient toucan beak.
-
Holiday Edition: Crochet a tiny santa hat or scarf for a festive toucan.
-
Pastel Baby Toy: Use soft pastel yarns for a cute nursery-safe plush.
-
Fluffy Version: Use velvet yarn and larger hook for a chubby toucan pillow.
-
Tropical buddy set: Make a tiny crochet banana, pineapple, or palm leaf to go with your toucan.
6. Advanced Tips & Troubleshooting
Even pros run into challenges — here’s how to troubleshoot!
| Tip | Description |
|---|---|
| Invisible Decreases | Use front-loop-only decrease to avoid bumps. |
| Keep Even Tension | Pause frequently to adjust your grip and keep yarn flow even. |
| Round Twisting | Use a stitch marker and always check your round start. |
| Stuffing Balance | Add stuffing slowly to avoid lumps. Test weight distribution before closing. |
| Seamless Joins | Use mattress stitch or whip stitch — avoid bulky knots where visible. |
| Reading Abbreviations | Check if your pattern uses US terminology (sc = single crochet). |
| Color Changes | Carry unused yarn inside the body or cut and weave ends for a neat finish. |
| Fixing Loose Stitches | Go down one hook size if you see gaps while stuffing. |
| Eye Placement | Always pin before attaching safety eyes permanently to ensure symmetry. |
| Crooked Beak? | Adjust with strategic stitch placement — slight asymmetry adds character! |
7. Care Instructions
To keep your toucan in top shape:
-
Hand wash gently using mild soap
-
Avoid hot water — heat can distort stuffing and fibers
-
Do not wring — press with a clean towel
-
Lay flat to dry
-
Avoid direct sunlight to prevent fading
-
Store in a cool, dry place
-
For long-term display, keep inside a glass cabinet or fabric organizer
8. Display & Gift Ideas
This toucan plush is not just a toy — it’s a heartfelt keepsake!
-
Nursery Decor: Perfect accessory for jungle-themed baby rooms.
-
Desk Mascot: Adds fun and color to your workspace.
-
Shelf Display: Pair with plants or boho decor for a tropical vibe.
-
Holiday Ornament: Add a loop and hang on the tree as crochet art.
-
Gifting Idea: Wrap it with handmade gift tags and present to a friend or loved one who loves animals!
9. Benefits of Making a Crochet Toucan Amigurumi Tropical Bird Plush Pattern
-
Promotes mindfulness with repetitive motion
-
Creates a calm and relaxed state of mind
-
Provides joy and accomplishment when finished
-
Eco-friendly alternative to plastic store-bought toys
-
Creates emotional bonding when gifted or passed down
-
Builds creative confidence and skill advancement
10. Photography & Social Media Tips
Show off your toucan in the best light—literally!
-
Use natural daylight near a window or outdoors
-
Keep the background simple — neutral walls or wooden textures work great
-
Add props like tropical leaves, yarn balls, or a crochet hook
-
Take close-ups of beak, eyes, and wing details
-
Use vertical shots for Pinterest or TikTok
-
Include your workspace for a personal touch
11. Project Summary Table
| Category | Details |
|---|---|
| Skill Level | Beginner – Intermediate |
| Time Estimate | 5–6 hours |
| Size When Made | 10–14 inches (depending on materials) |
| Total Cost | $10–15 (yarn and eyes included) |
12. Conclusion
Whether you’re a beginner or experienced crocheter, this Crochet Toucan Amigurumi Tropical Bird Plush is sure to inspire joy at every stitch. From shaping the head to stitching on the vibrant beak, each step taps into the beauty of handmade craft. There’s a beautiful lifetime quality in creating toys and gifts out of yarn they carry your time and care, becoming memories people can hold.
So grab your hook, pick your favorite colors, and let your imagination soar. Whether this toucan becomes a cherished friend, a heartfelt gift, or a whimsical décor piece, it will always be a reminder of what we can create with patience, creativity, and love.