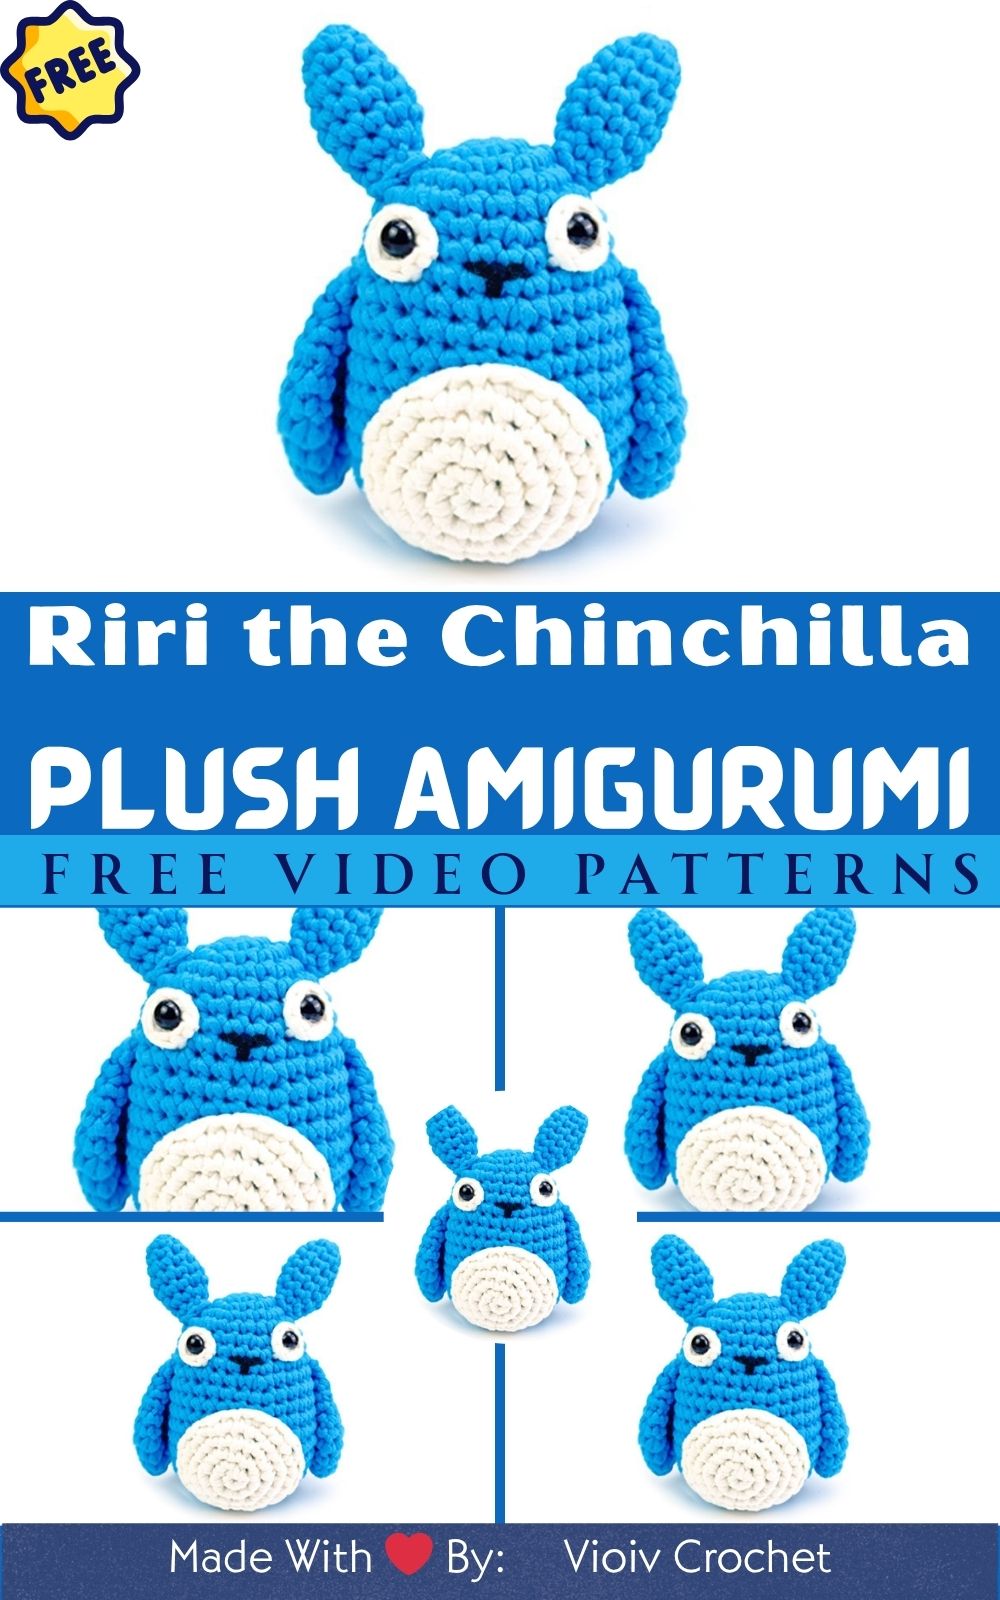
Easy Crochet Riri the Chinchilla Perfect Gift for Pet Lovers
Are you looking for a crochet project that’s equal parts charming, cuddly, and heartfelt? The Easy Crochet Riri the Chinchilla Pattern checks all the boxes especially for animal and pet lovers! Whether you’re a beginner wanting to hone your crochet skills or a seasoned crafter looking for your next cute creation, Riri the Chinchilla is a joy to stitch, stuff, and snuggle.
This article dives deep into the process of creating your own amigurumi chinchilla plush. We’ll talk tools, personalization, tips to avoid mistakes, and more. So grab your hook and yarn, and let’s get stitching!
Meet Riri the Chinchilla
Among the many amigurumi animals you could craft, Riri the Chinchilla stands out with its round, fluffy shape and adorable tiny features. Inspired by the gentle, curious nature of real-life chinchillas, this crochet pattern captures their essence with squishy cheeks, an expressive face, and petite proportions. Designed to evoke that same softness and cuteness, Riri makes an ideal handmade gift for chinchilla lovers, pet enthusiasts, kids, or anyone who loves handmade keepsakes with personality.
There’s something genuinely magical about transforming a simple ball of yarn into a delightful creature or character. The rhythmic, calming nature of crochet not only fills your hands with activity but also fills your heart with joy. Each stitch is like a thread of creativity woven into something tangible, warm, and inspiring a symbol of patience, imagination, and love. Crochet offers us a doorway into a world where creativity becomes soft and squeezable, and in that world of plush and pattern, the sweetest companions are born.
3. Materials & Tools
Here’s what you’ll need to crochet your very own Riri the Chinchilla:
Yarn
-
Weight: Medium or DK (size 3–4), depending on preferred size
-
Color suggestions: Light gray, white, pale pink (for cheeks and inner ears)
-
Choose soft acrylic, cotton, or wool blends for a snuggly finish.
Crochet Hook
-
Size 3.0mm or 3.5mm (adjust depending on yarn weight and stitch tightness)
Additional Supplies
-
Polyester fiber stuffing (to give your chinchilla shape and squish)
-
Safety eyes (6mm–8mm) or black yarn for embroidered eyes
-
Tapestry needle (for sewing parts and weaving in ends)
-
Scissors
-
Stitch markers (optional but helpful for tracking rounds)
Yarn Choosing Tip:
To make your chinchilla irresistibly soft and cuddly, try using plush or velvet yarn. However, if you’re crocheting for younger children, stick with cotton or acrylic to avoid shedding.
4. Step-by-Step Crochet Instructions
Let’s break it down! Below is a full walkthrough for making Riri the Chinchilla, based loosely on the pattern shown in the video tutorial linked above (without copying).
1. Crochet the Head
-
Begin with a magic ring and chain 6 single crochets (sc) into it.
-
Continue working in rounds to create a sphere shape for the chinchilla’s head.
-
Add gentle increases for the top and decreases toward the neck area.
-
Stuff lightly but firmly before closing completely.
-
Insert safety eyes when you’re a few rounds from finishing.
Expert tip: Use a stitch marker to track rounds — especially if you’re new to working in spirals.
2. Form the Body
-
Start with a slightly larger magic ring with 8 sc.
-
Build out the round body with alternating rows of increases and straight sc rounds.
-
Riri’s body is slightly oval, so don’t overstuff too early.
-
Leave a hole for attaching the head.
3. Add the Ears & Limbs
-
Ears: Crochet small semicircles and sew them near the top sides of the head.
-
Arms & Legs: Tiny cylindrical limbs are made in the round and stuffed lightly.
-
Sew on securely using a long-tail thread.
4. Tail Time!
-
Chinchillas have bushy tails, so use a fluffy yarn (or brush out ordinary yarn) to make a chunky, cute tail.
-
Attach to the bottom-back portion of the body.
5. Assembly & Positioning
-
Be sure all parts are clearly stuffed and symmetrical.
-
Use your tapestry needle to position limbs, tail, and ears where they look best.
-
Use pins before sewing parts on if needed.
6. Add Final Touches
-
Embroider a small nose using dark yarn.
-
Add blush or pink embroidery thread in cheeks.
-
If using safety eyes, add felt backings for stability (optional).
5. Customization Ideas
Want to make your Riri truly one-of-a-kind? Try these creative variations:
-
Pastel chinchilla — try baby blue or lavender yarn.
-
Winter version — add a tiny scarf or beanie.
-
Rainbow Riri — change yarn color every few rows.
-
Holiday version — tuck in a mini pumpkin or add antlers!
-
Accessorize — bows, glasses, or even a heart pocket.
6. Advanced Tips & Troubleshooting
Here are some pro techniques to make your chinchilla plush look next level:
-
Invisible decreases help keep circles smooth.
-
Consistent tension ensures clean, even fabric.
-
Use a yarn brush to create fur texture (for acrylic yarn).
-
Count every stitch — especially useful in small limbs!
-
Stuff firmly but not stiffly to avoid distorting shapes.
-
Use long-tail sewing for strong attachments.
-
Weave in yarn ends securely to avoid unraveling.
-
Read abbreviations carefully: sc, inc, dec = single crochet, increase, decrease.
7. Care Instructions
Keep your finished Riri plush looking fresh and cuddly by following these care tips:
-
Hand-wash gently in cool water with very mild detergent.
-
Squeeze out excess water — don’t twist.
-
Reshape while damp and let air dry flat.
-
Avoid machine washing (can distort shape and stitches).
-
Store away from direct sunlight to prevent fading.
8. Display & Gift Ideas
Once your chinchilla is stitched and stuffed, you can:
-
Place it beside indoor plants as cozy decor
-
Gift it to a friend who loves small pets
-
Pop it on your desk as a plushy work buddy
-
Hang it as an ornament for the holidays
-
Make a matching chinchilla family for kids
9. Benefits of Making Riri the Chinchilla
Creating this crochet project is about more than just crafting — it supports your well-being too:
-
Mindfulness and relaxation through repetitive motion
-
Eco-friendly gifting using biodegradable materials
-
Personal expression through custom design choices
-
Emotional connection when gifting something handmade
-
Joy and accomplishment in creating something lovable and lasting
10. Photography & Social Media Tips
Want to show off your creation on Instagram, TikTok, or a blog? Here’s how to make your chinchilla shine:
-
Use natural light near a window
-
Style with props like yarn balls or fairy lights
-
Add a plant or basket for a cozy vibe
-
Zoom in on stitches to show texture
-
Include a short reel or video for movement and engagement!
11. Project Summary Table
| Category | Details |
|---|---|
| Skill Level | Beginner / Intermediate |
| Estimated Time | 6–8 hours (approx.) |
| Finished Size | 10–14 inches tall |
| Estimated Cost | $10–15 (depending on yarn) |
12. Conclusion
In a fast-paced world full of screens and schedules, taking time to crochet something soft and sweet like Riri the Chinchilla is more than a hobby. It’s a tiny act of love, a cozy gift to your future self or someone you care about. As you watch your chinchilla take shape from yarn and imagination, you’ll feel joy in every stitch. And when you finally hold your finished plush, you’ll know that creation, in all its quiet beauty, is worth every second.
So pick a yarn, thread your hook, and turn your heart into handmade magic one chinchilla at a time.