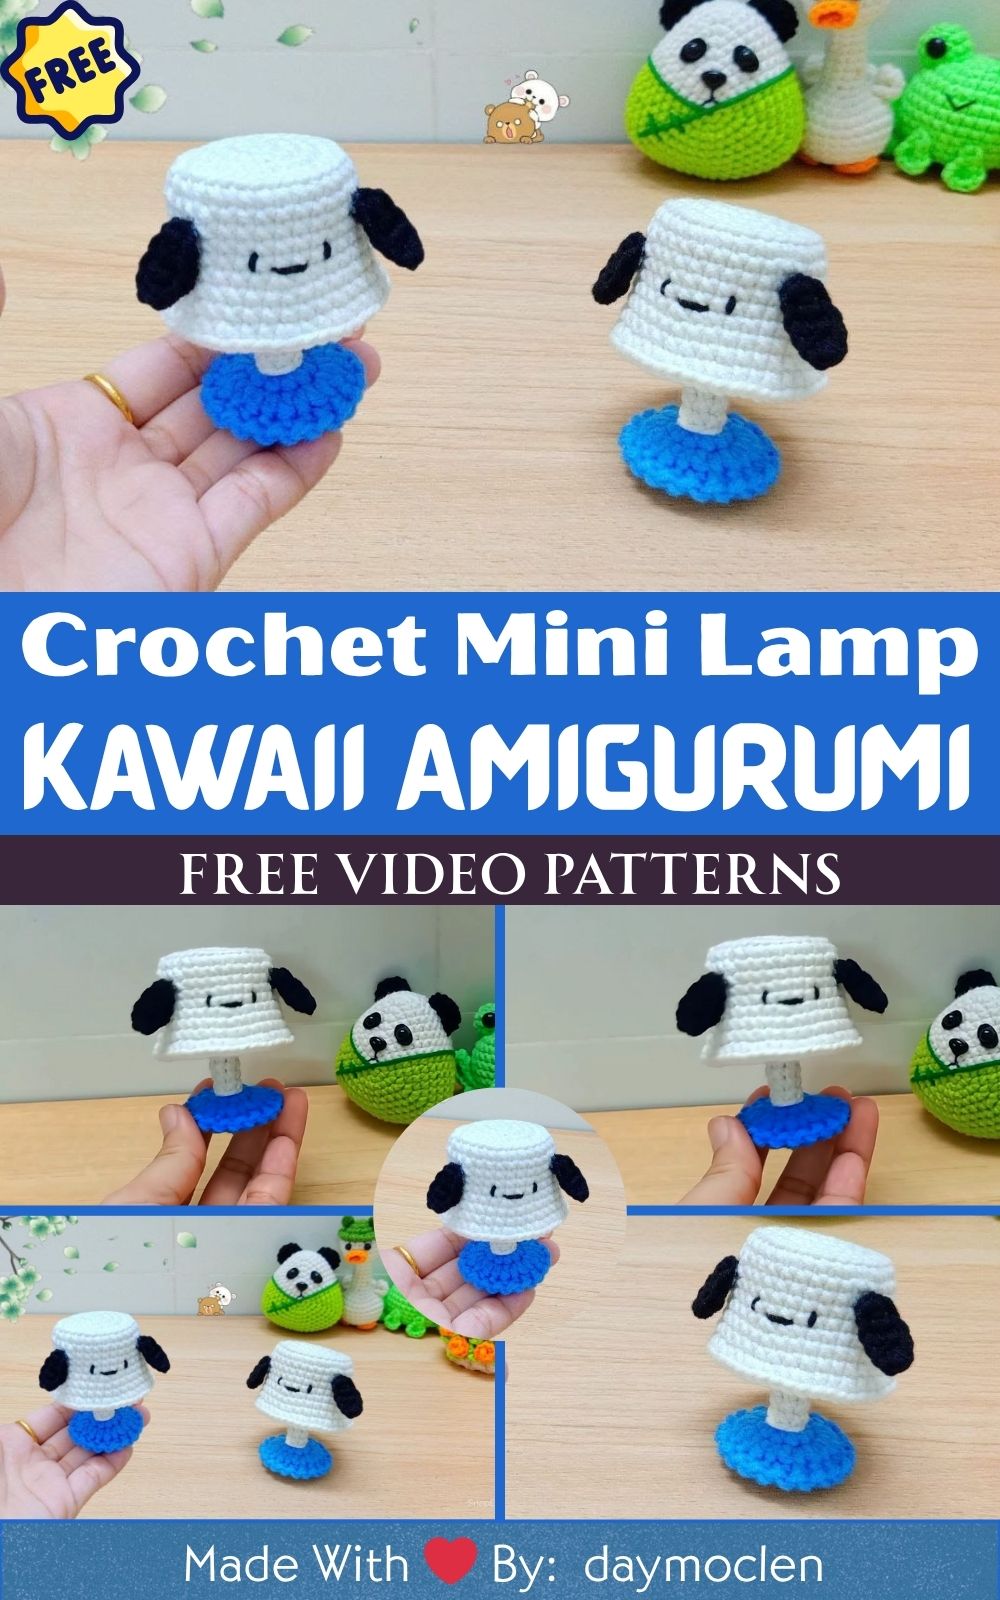
Crochet Mini Lamp Amigurumi – Kawaii & Easy DIY Pattern for Beginners
There’s something magical about bringing tiny, everyday objects to life with yarn and the Crochet Mini Lamp Amigurumi is the perfect example of that charm. Inspired by the cozy glow of a bedside lamp, this cute and creative crochet project is more than just a craft it’s a miniature work of art. Whether you’re new to amigurumi or a seasoned crocheter, this pattern offers a delightful way to turn simple stitches into something truly unique.
Mini crochet home décor projects have quickly become favorites among crochet lovers and handmade-gift enthusiasts alike. They’re small, fast to make, and endlessly customizable plus, they’re perfect for practicing your crochet skills without committing to a big project. And when that tiny creation happens to be a glowing little lamp, it becomes an instant conversation starter and adorable addition to any space.
What makes projects like this so loved is the joy they bring both during the process and after completion. As you work each round, you’ll watch a cute little object take shape in your hands, transforming a skein of yarn into something that looks like it belongs on a dollhouse shelf. And once finished, it’s more than just a plush it’s a small symbol of creativity, coziness, and handmade charm.
Whether you’re gifting it, decorating your craft room, or making a full set of miniature furniture plushies, this kawaii crochet mini lamp amigurumi is sure to bring light and happiness into your crochet journey. Let’s dive into the details and get crafting!
Materials & Tools
Before you start, here’s what you’ll need for your mini lamp crochet project:
-
Yarn – Use medium-weight (worsted, category 4) cotton or acrylic yarn. Choose neutral shades for the base and pastel or bright colors for the lampshade.
-
Crochet Hook – A 2.5 mm to 3.0 mm hook works well for tight, defined stitches.
-
Fiberfill Stuffing – Soft stuffing gives your lamp structure and helps it hold its cute shape.
-
Stitch Markers – Essential for marking the start of each round and keeping track of stitches.
-
Yarn Needle & Scissors – For weaving in ends, assembling parts, and sewing details together.
-
Optional Accessories – Small safety eyes or embroidery thread for facial features, or even a keychain ring if you want to turn your lamp into a portable charm.
Tip: Choose yarn colors that match your décor or season — for example, warm yellow for a glowing lamp or icy blue for a winter vibe.
Step-by-Step Instructions
Follow these beginner-friendly steps to create your crochet mini lamp amigurumi:
1. Create the Lamp Base
-
Start with a magic ring using your chosen base color (e.g., brown or gray).
-
Crochet 6 single crochets (sc) into the ring, then increase each round (12, 18, 24 sts) to form a sturdy circular base.
-
Continue without increases for a few rounds to build height.
2. Shape the Lamp Stand
-
Switch to a contrasting color if desired.
-
Crochet several rounds without increases to form a narrow cylindrical “neck” this will be the stand connecting the base to the shade.
3. Build the Lampshade
-
Using a new color (e.g., soft yellow or pastel pink), begin increasing again to widen the top.
-
Crochet multiple rounds to shape the shade, slightly flaring outward as you go.
-
Finish with a round of slip stitches to give a clean edge.
4. Stuff and Assemble
-
Before finishing the top, lightly stuff the lamp base and stand with fiberfill.
-
Continue crocheting and decreasing if needed to close the top of the shade securely.
5. Add Optional Details
-
Embroider a cute face or attach safety eyes to make it kawaii-style.
-
Add a tiny felt “switch” or a small crochet chain as a decorative cord.
Special Features & Pro Tips
Here’s what makes this mini lamp crochet pattern extra special:
-
Quick & Beginner-Friendly: You can finish this project in just a few hours perfect for a weekend craft.
-
Highly Customizable: Try different color combos, textures, and details to match seasons or themes.
-
Great for Skill-Building: This pattern uses basic stitches like single crochet, increases, and decreases excellent practice for beginners.
-
No-Sew Options: Many parts can be crocheted in one piece, reducing the need for sewing.
-
Pro Tip: Lightly stuff as you go to maintain shape and avoid lumps, especially in the stand and shade.
Uses & Creative Ideas
Once your crochet mini lamp amigurumi is complete, here are some fun ways to use it:
-
Cute Gift: A handmade décor piece perfect for birthdays, housewarmings, or holidays.
-
Mini Home Décor: Add a cozy touch to bookshelves, craft corners, or dollhouses.
-
Keychain or Bag Charm: Add a ring to the top and take your lamp everywhere you go.
-
Collection Piece: Pair it with other amigurumi furniture or objects to build a themed set.
-
Seasonal Variations: Make lamps for different occasions spooky Halloween lamps, Christmas-themed ones, or pastel spring designs.
Conclusion
Crocheting a mini lamp amigurumi is more than just a fun craft it’s a relaxing, creative project that turns simple yarn into a tiny piece of happiness. Whether you’re a beginner exploring the world of amigurumi or a seasoned crocheter looking for a quick and satisfying make, this project is a delightful addition to your collection.
With every stitch, you’re not just making a lamp you’re creating a symbol of warmth, coziness, and creativity. So grab your hook, pick your favorite colors, and light up your crafting journey with this adorable crochet mini lamp!