
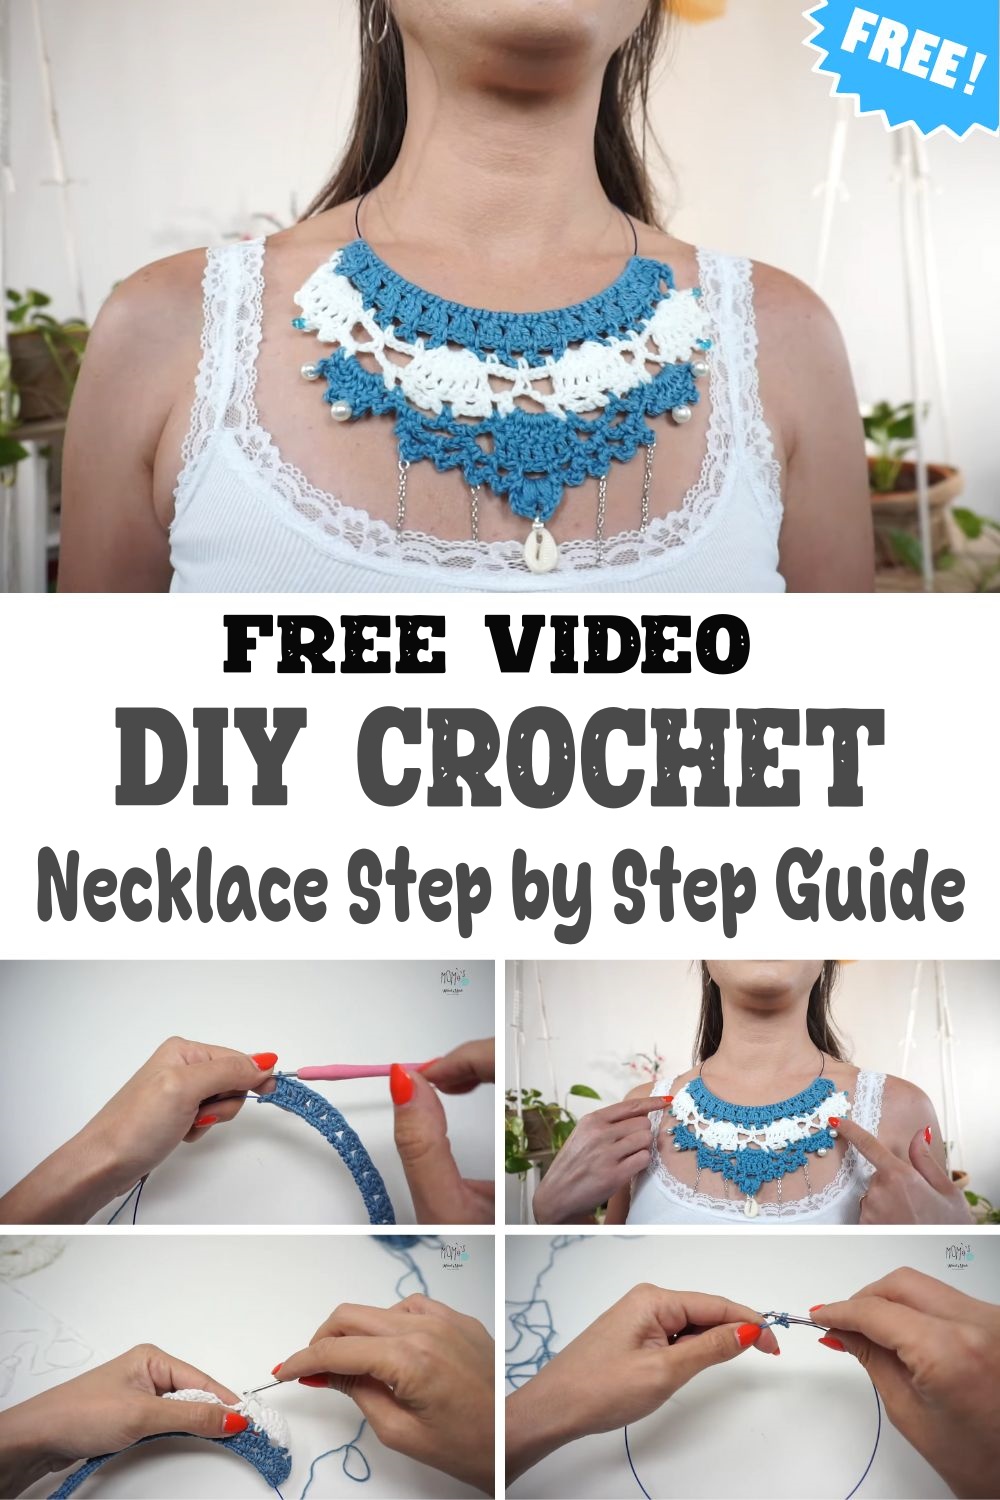
DIY Crochet Girocollo Uncinetto Necklace – Step-by-Step Guide
DIY crochet where fashion meets craft in the creation of a chic girocollo (collar-style) necklace. This handmade crochet necklace serves as both a stylish accessory and a heartfelt DIY Crochet Girocollo Uncinetto Necklace project. Its versatility allows you to wear it as an elegant statement piece or gift it as a meaningful token of affection. Whether you’re dressing up for a special occasion or adding a unique touch to your everyday ensemble, this crochet necklace is sure to turn heads.
Materials & Tools
Before you start crafting your crochet girocollo necklace, gather the following materials and tools:
-
Yarn or Crochet Cotton: Choose fine or thread-weight yarn for a delicate look. Opt for materials that offer good drape, shine, or texture, such as mercerized cotton.
-
Crochet Hook: A suitable hook size for fine yarn is 1.75 mm or 2.5 mm, depending on the thickness of your yarn.
-
Optional Accessories: Beads, jump rings, and a clasp to add embellishments or secure the necklace.
-
Other Tools: Scissors, a tapestry or yarn needle for weaving in ends, and blocking pins to shape your finished piece.
Abbreviations & Stitches Used
As you embark on this crochet journey, familiarize yourself with these common abbreviations and stitches:
-
ch: Chain
-
sl st: Slip Stitch
-
sc: Single Crochet
-
dc: Double Crochet
-
picot: A decorative stitch, often used as an edging
Special Stitches
-
Picot Edging: Adds a delicate touch with small loops along the edge of your crochet piece.
-
Bead Insertion: Incorporate beads into your pattern for a touch of sparkle.
Step-by-Step Instructions
Foundation & Layout
-
Base Chain: Start by creating a base chain that fits comfortably around your neckline. Measure the chain against your neck to ensure a snug yet comfortable fit.
-
Adjust for Fit: Adjust the number of chains based on your desired fit – whether you prefer a snug choker or a slightly looser collar.
Crocheting the Necklace
-
Work Rows or Rounds: Begin crocheting rows or rounds following your chosen pattern. Maintain consistent tension for a uniform appearance.
-
Shape Building: Gradually build the necklace’s shape, incorporating decorative edges like picots or scallops as you go.
-
Add Beads: If using beads, insert them at strategic points to enhance the design. Secure them tightly to prevent slipping.
Adding Finishing Touches
-
Attach Closures: Carefully sew or attach clasps and jump rings to the ends of your necklace. This step ensures both functionality and aesthetic appeal.
-
Inspect for Comfort: Ensure that all components are securely fastened and comfortable to wear.
Customizations & Variations
Personalize your crochet necklace with these creative ideas:
-
Beads and Tassels: Add vibrant beads or playful tassels for added flair.
-
Color Play: Experiment with different colors to create a unique look.
-
Layering Motifs: Combine various crochet motifs for a layered effect.
-
Length Adjustments: Modify the chain length to switch between collar and choker styles.
Finishing & Care Tips
-
Weaving in Ends: Use a tapestry or yarn needle to neatly weave in any loose ends.
-
Blocking: Gently wash your necklace, then pin it to shape on a blocking mat to enhance the drape and set the design.
-
Care Instructions: Hand wash your crochet necklace in cold water and lay it flat to dry to maintain its shape and texture.
By following this guide, you’ll be able to craft an elegant crochet girocollo necklace that stands as a testament to your creativity and style. Embrace the simplicity and elegance of this project, and enjoy the satisfaction of wearing or gifting a piece that reflects your personal touch.


