Crochet Book Sleeve Pattern Made for Your Favorite Paperback
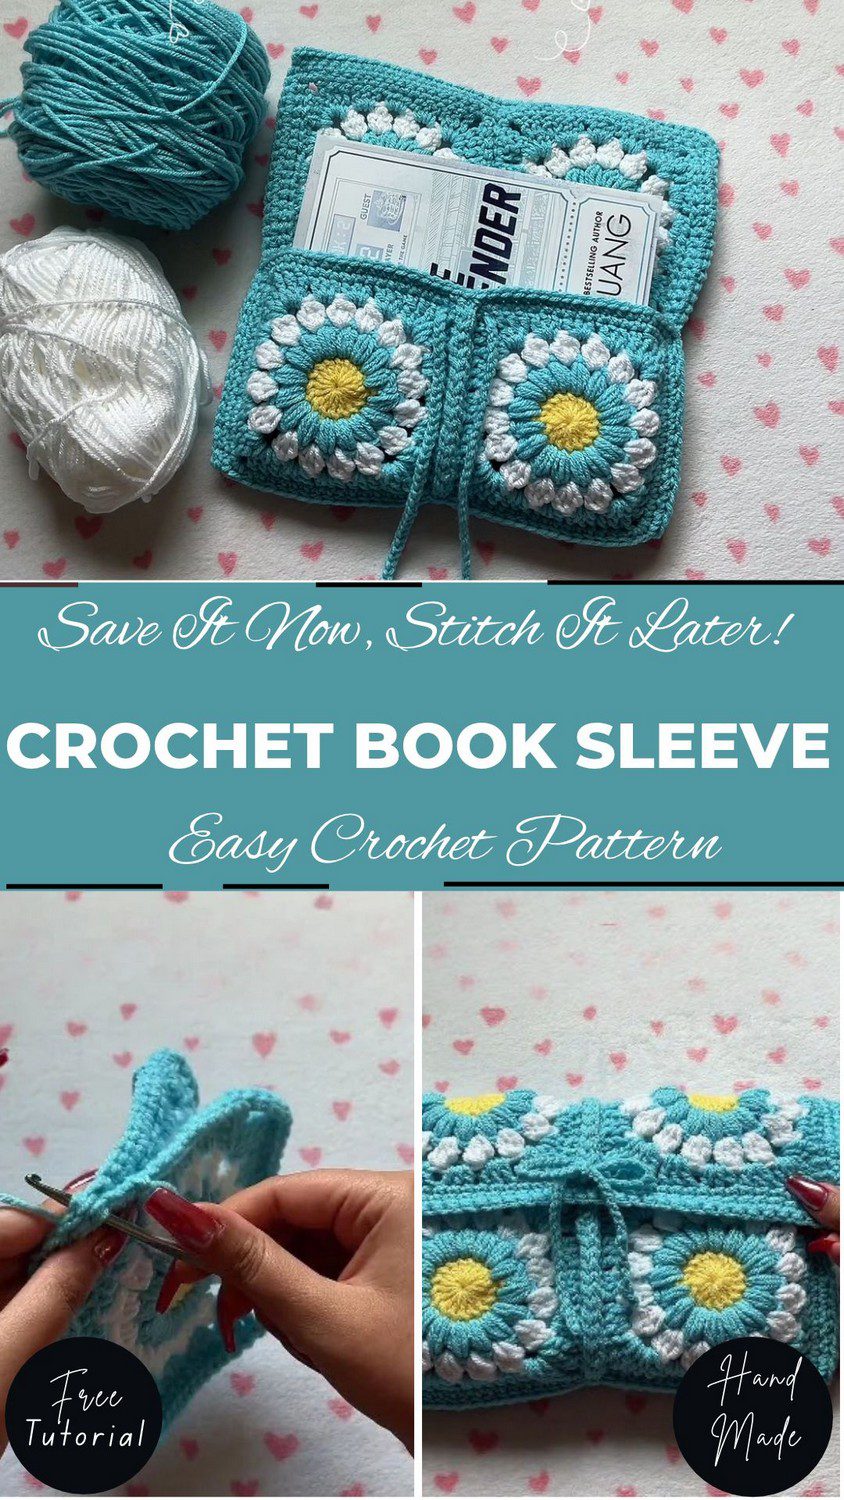
Cozy handmade cover for novels! Daisy squares bloom across its front, showing white petals around golden centres. Teal borders and a tiny bow keep everything neat. Beginners can stitch it. Free instructions are waiting. Bookmark this crochet book sleeve today.
Meet a soft shield guarding paperbacks. Flower motifs decorate the front with snowy petals plus sunny middles. Ocean-teal edging gives neat borders. Tuck novels inside and fasten that cute cord. Pages stay protected from scratches, dust or wear. Cuddly yarn feels amazing. New stitchers will find this project simple. Tutorial included here. It also makes lovely presents for reading friends.
Crochet Book Sleeve Pattern Overview
Skill level: Beginner-friendly
Finished size: About 5 inches per square, so the folded sleeve comes out around 10 x 7.5 inches (estimated)
Terminology: Standard US crochet terms
This crochet book sleeve pattern uses six granny squares, and each one has a puff stitch flower in the centre.
Materials for the Crochet Book Sleeve Pattern
- Yarn: weight 4 (worsted weight)
- Hook: 5mm crochet hook
- Scissors
- Darning/tapestry needle for weaving in ends
Stitch Abbreviations
- Ch = chain
- DC = double crochet
- SC = single crochet
- Sl st = slip stitch
- MC = magic circle
- Puff stitch = yarn over, pull up a loop, repeat 3 times (4 loops on hook), yarn over and pull through all loops
Special Techniques
- Magic circle: the starting ring for working in the round.
- Puff stitch: forms the flower centre of each square.
- Back-loop-only joining: you join the squares through the back loops of the corner stitches.
- SC seam: a single crochet seam joins the squares back to back.
Helpful Notes Before You Start
- Every pattern step below uses US terms, so check that before you begin.
- Also weave in your ends after each colour change, because it keeps the finish tidy and saves you a big pile of ends later.
- Since you will make 6 squares in total, you may want to finish one square completely first. It shows you how the rounds look before you repeat them.
Crochet Book Sleeve Pattern Instructions
Round 1: The Yellow Centre
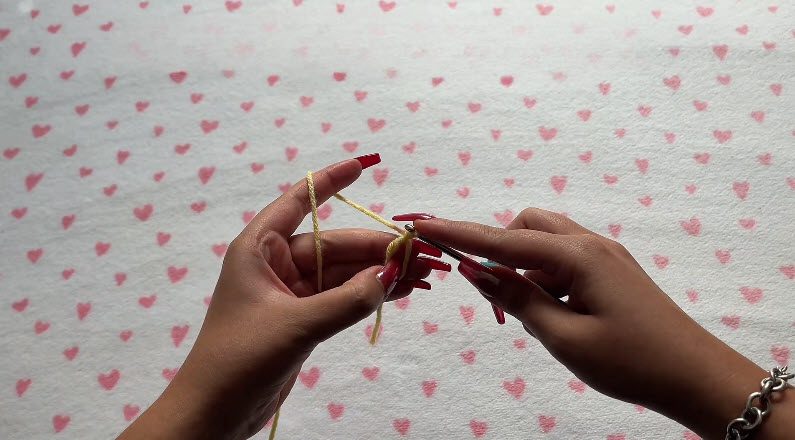
- To begin, start with a magic circle as your foundation.
- Then work 16 double crochet (DC) stitches into the magic circle to form the yellow daisy centre.
Round 2: The Puff Stitch Petals
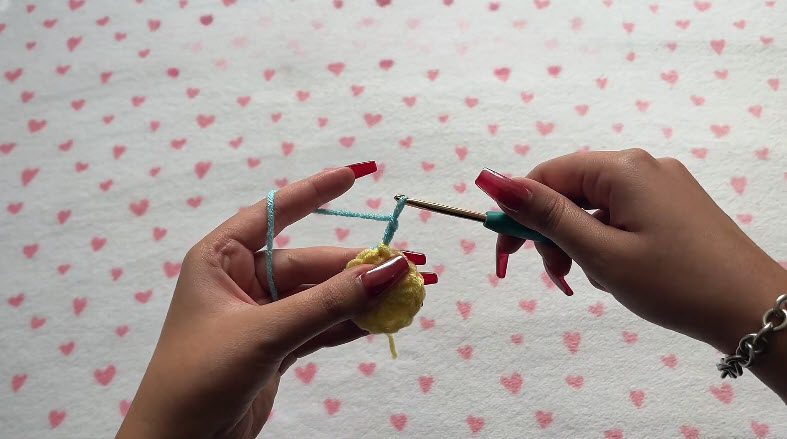
- First, insert your hook into a stitch space and attach your yarn. Pull it tight to secure it.
- Next, chain 2.
- After that, make the puff stitch in the same stitch space:
- Yarn over and pull up a loop.
- Repeat this 3 times in the same space, so you have 4 loops on the hook.
- Finally, yarn over and pull through all the loops on your hook.
- Then chain 2 to complete the petal and move to the next space.
- Repeat the same sequence in every space around the centre.
- In the end, you will have 16 petals in total.
Round 3: Complete the Granny Square Shape
- Work the granny square shape around the daisy until the square is complete.
Round 4: The Border
- To start, attach the yarn and chain 1.
- Then work a single crochet (SC) in every stitch around the whole edge of the square.
- In each of the 4 corner spaces, work 2 SC so the square keeps its shape.
- Finally, join with a slip stitch (sl st) to the first SC and fasten off.
Make 6 squares in total.
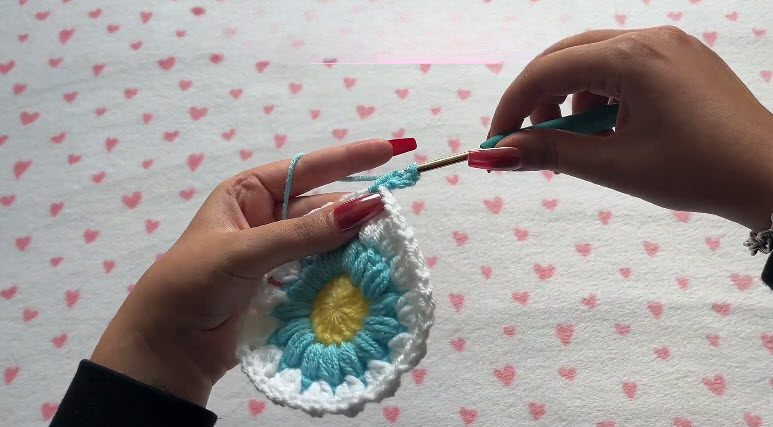
Joining the Squares for the Crochet Book Sleeve Pattern
- First, place two squares back to back with the right sides facing outward.
- Next, insert your hook through the back loops only of the corner stitches of both squares.
- Join with a slip stitch.
- After that, work an SC through the matching stitches of both squares along the whole length of the edge. This connects them securely.
- Finally, repeat until all six squares are joined into one rectangular sheet.
Joining the Middle Gaps
- For the inner middle gaps between the squares, insert your hook into the corner stitch.
- Then make a slip stitch.
- Move on to the next intersection point and repeat, because this keeps the structure secure.
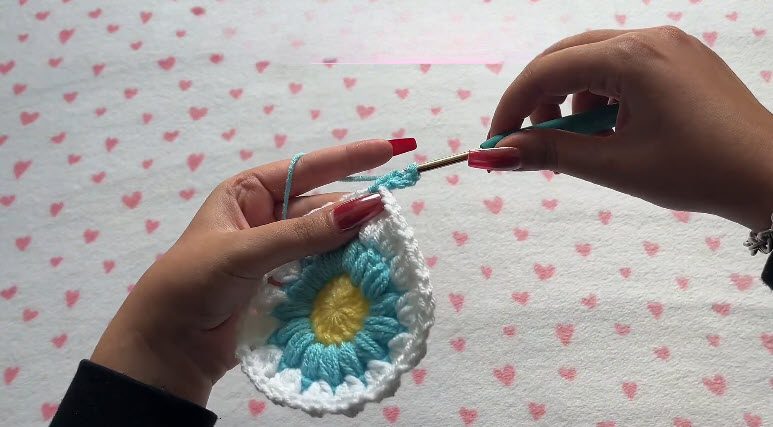
Edging the Rectangle
- Once all six squares are joined into a rectangle, work a final row of SC all around the entire outer edge.
- Work the top edge so the sleeve opening stays clean. Put each SC into the top of an existing stitch, which gives the edge structure and stops it from curling.
- When the whole outer edge is done, fasten off.
- Lastly, weave in the remaining tail for a secure finish.
As a result, this edging gives the sleeve a clean, even border before you fold and seam it.
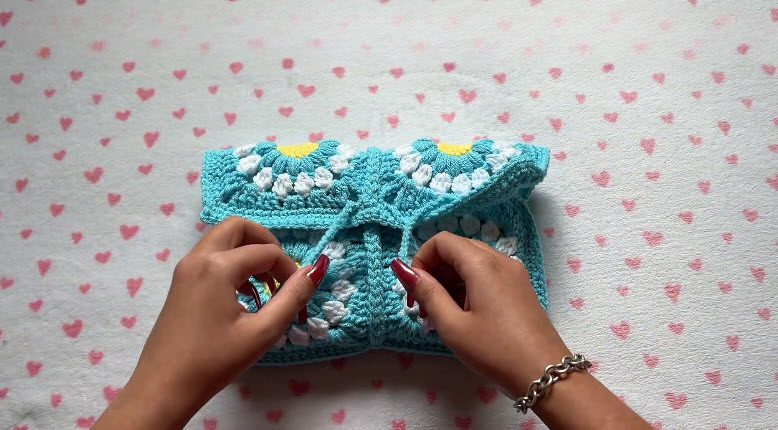
Final Assembly of the Crochet Book Sleeve Pattern
- To begin, fold the edged piece in half.
- Then work SC along the side seams, through both thicknesses, to close the sides.
- At last, the pouch is complete and ready for a book.
Bonus Ideas for Your Crochet Book Sleeve Pattern
Colour Change Tips for Neat Squares
- Pull each new colour tight when you start a round.
- Likewise, weave in ends as you go, after every colour change, so you are not left with a pile of ends at the end.
- Keep the seams on the outside when you fold, so the squares line up evenly.
Colour Mood Ideas for Your Sleeve
The pattern lets you change colours on every round, so the palette is all yours. Here are a few ideas to spark your picking:
- Soft pastels for a sweet, gentle look
- Bold, bright shades for a playful sleeve
- Two or three colours repeated for a calm, matching feel
- Colours that match the cover of the book you plan to carry
Tips for a Tidy Crochet Book Sleeve Pattern
Pro Tips for a Tidy Crochet Book Cozy
- Count your puff stitches in Round 2, because you should have 16 before you join.
- Pull the new colour snug at the start of each round so no gaps show.
- Lay your squares out before joining, so you can see how the colours sit next to each other.
- Finally, weave in ends as you finish each square, since doing six at the end feels much longer.
Common Mistakes in the Crochet Book Sleeve Pattern
- Loose colour changes: a loose start leaves small holes, so pull the yarn tight when you join the new colour.
- Skipping the middle seam: without it, the sleeve loses its shape.
- Folding with the seams inside: keep them on the outside so the squares line up evenly.
- Forgetting the corners: the border needs 2 SC in each of the 4 corner spaces.
Finishing Touches
Once your sleeve is closed up, check both sides for loose ends and weave them in with your darning needle. Next, slide your paperback in to see how it sits. If you made the squares in different colors, turn the sleeve around and enjoy how each side looks.
Uses, Benefits and Gift Ideas for the Crochet Book Sleeve Pattern
Uses and Benefits
- This sleeve protects the cover of your favourite paperback while you carry it around.
- Moreover, your reading corner gets a handmade touch.
- The finished piece also works as a lovely crochet book cover for books you read often.
- In addition, one small project lets you practice puff stitches, corners, and joining.
- Lastly, there is a chance to play with colours round by round.
Gift Ideas
- Give it as a birthday gift for a friend who always has a book in hand.
- It also works as a thank-you for a teacher or a librarian.
- Bring one along as a little something for a book club swap.
- Or keep it for yourself, because you deserve a pretty book cover too.
FAQ About the Crochet Book Sleeve Pattern
Is this crochet book sleeve pattern good for beginners?
Yes, because the pattern is marked beginner level and uses basic stitches like chain, single crochet, double crochet, and a puff stitch.
What yarn and hook do I need?
Use weight 4 (worsted weight) yarn with a 5mm crochet hook. In addition, you will need scissors and a darning needle.
How many squares do I need to make?
You make 6 granny squares in total, then join them into one rectangular sheet.
How do I make the puff stitch?
Yarn over, pull up a loop, and repeat that 3 times so you have 4 loops on the hook. After that, wrap the yarn once more and pull through all the loops.
Can I use a different colour on every round?
Yes. The pattern asks you to join a new colour on the rounds, so changing colours on each round makes every square look a little different.
Do I need to join the middle of the sleeve?
Yes. The inner middle sections need joining too, so the sleeve holds its shape.
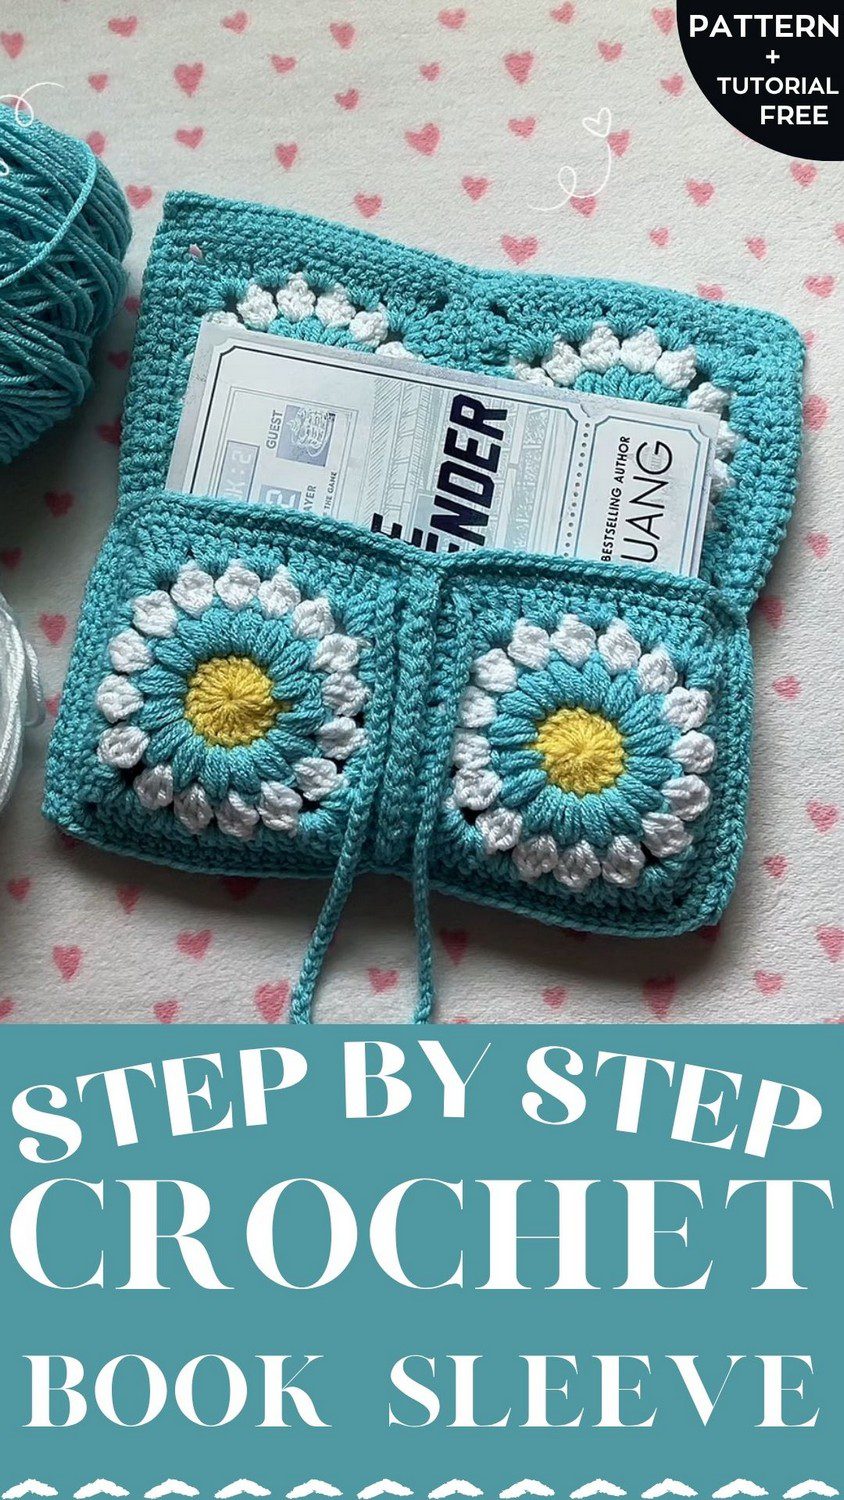
Go Make One for Your Bookshelf
So that’s really it. Make your six squares, stitch them into one sheet, edge it all around, fold it in half, and close up the sides. Then weave in the ends and your book is ready to slide in. Change the colours on each round and every square will look a bit different. Start with one square and you’ll see how quickly it goes. After that, keep going until your paperback has the cutest cover on the shelf.