Crochet Koi Fish Phone Bag Pattern with Crossbody Bag
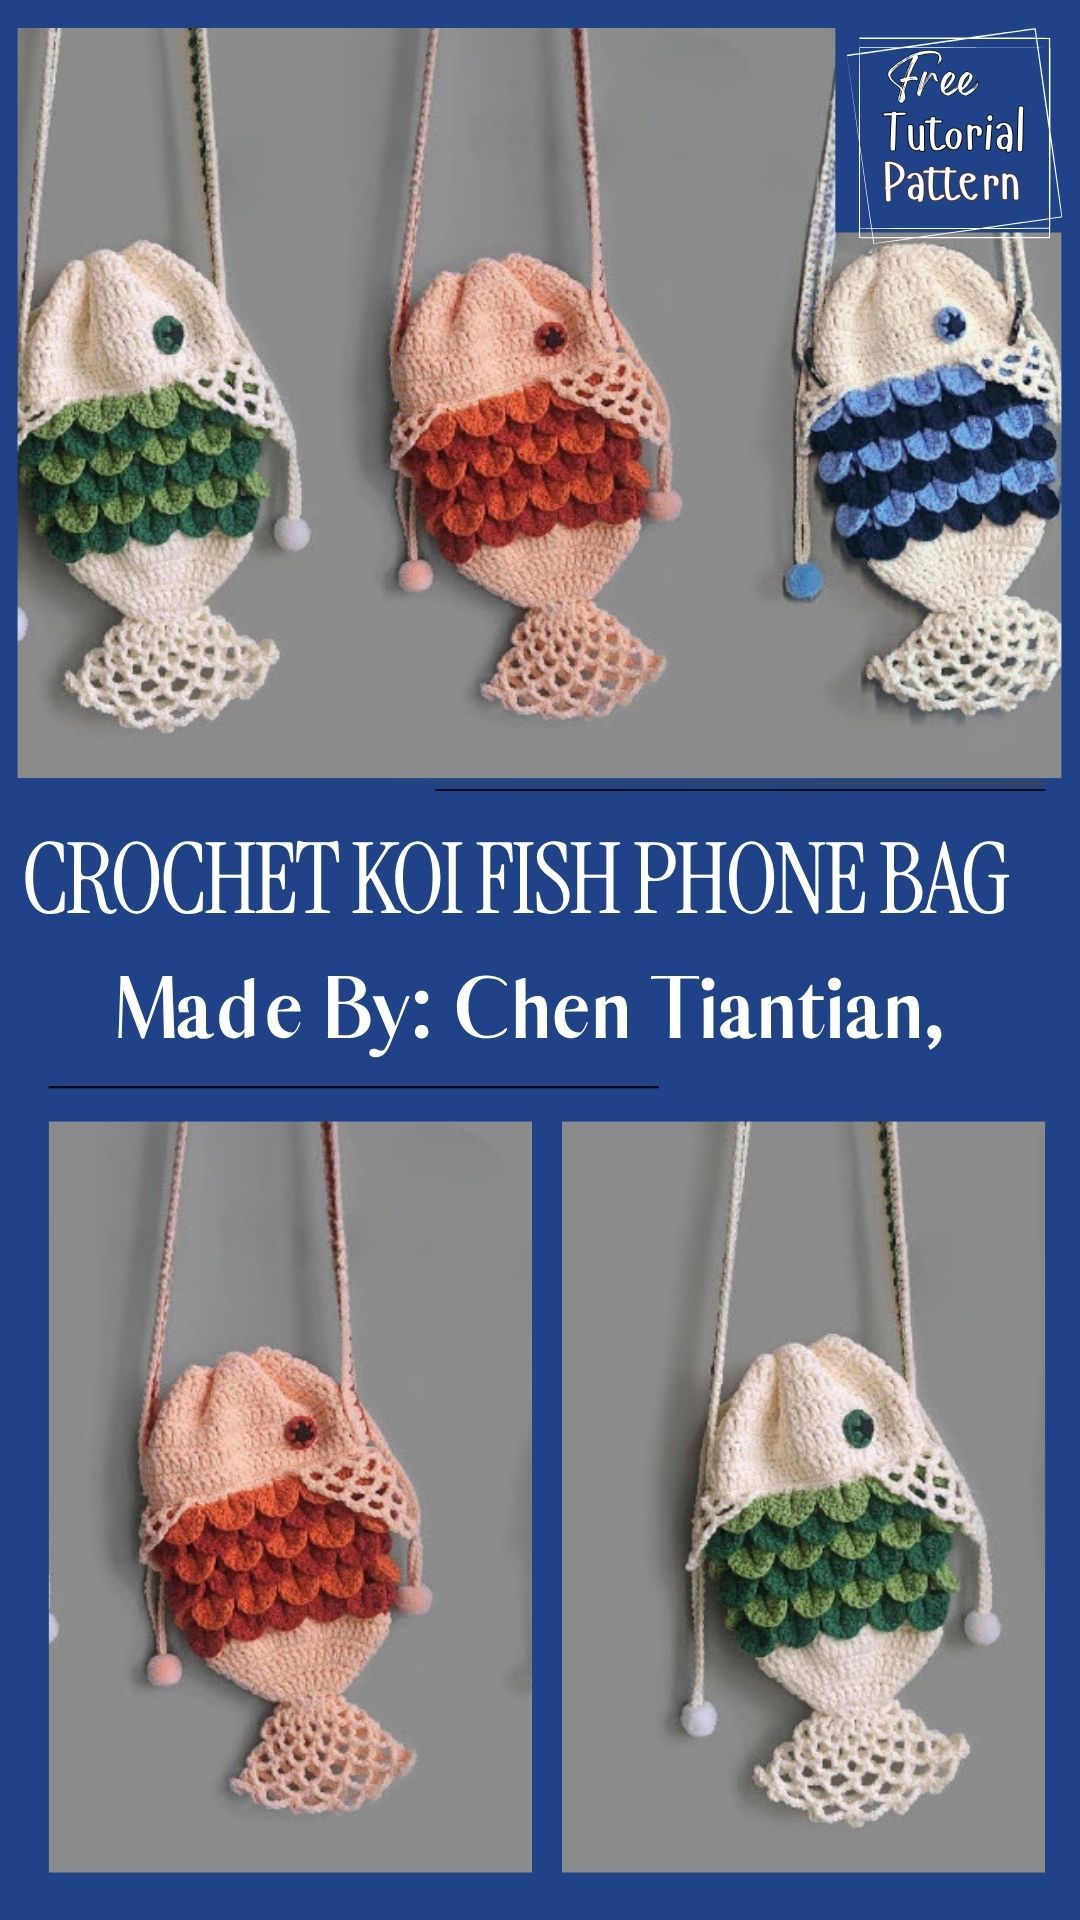
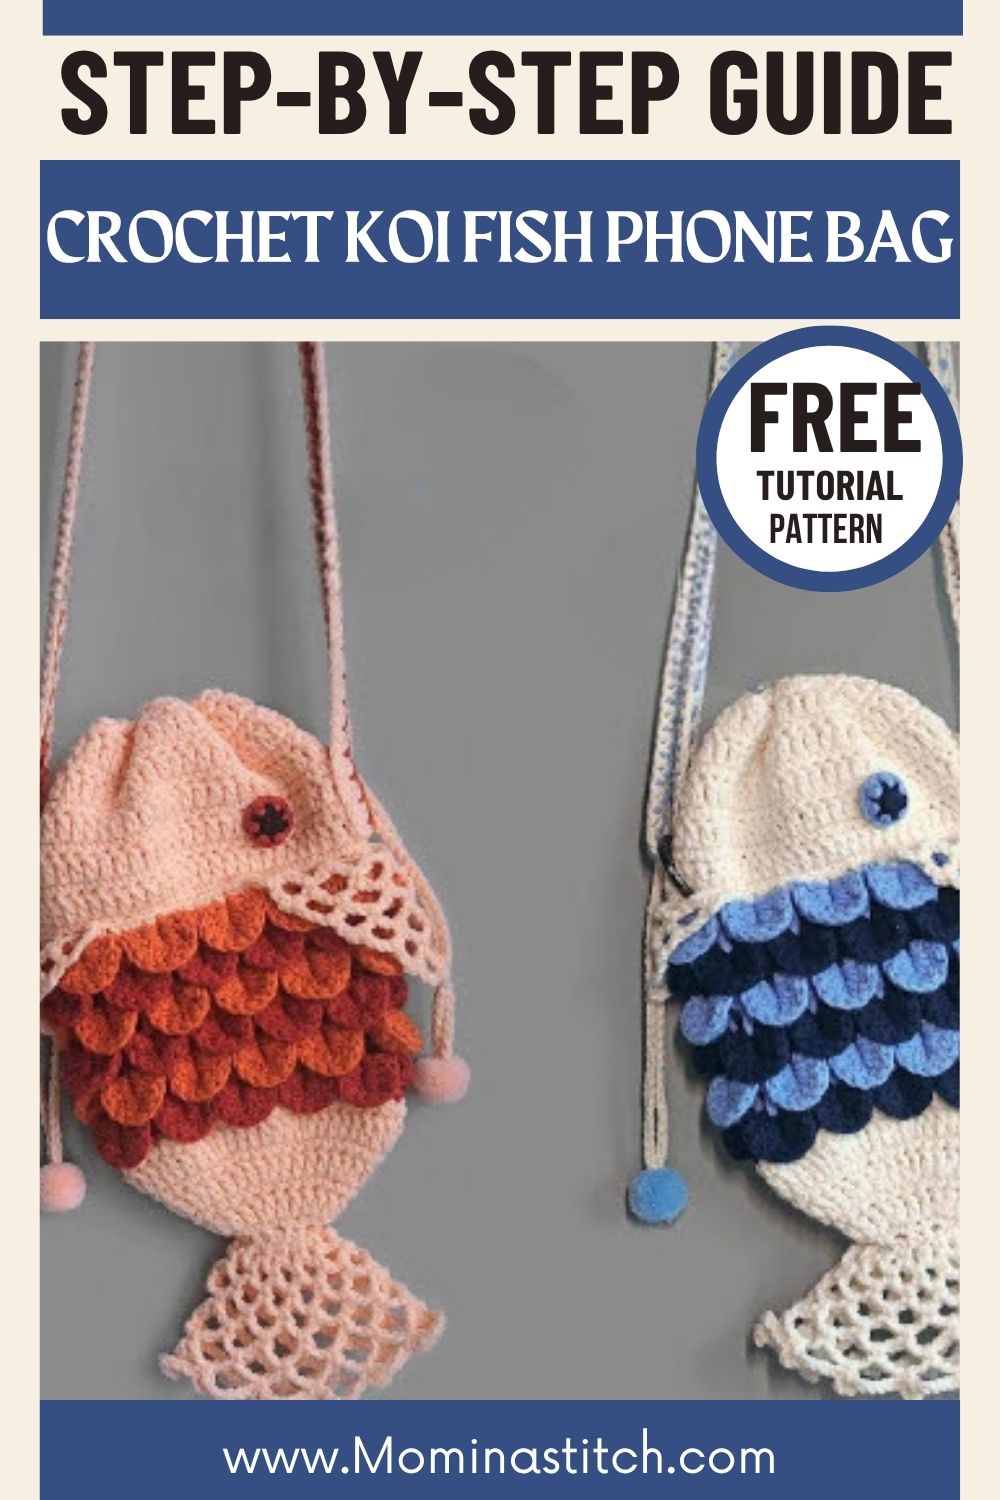
Navy and sky-blue scales curve around a cream pouch in the Crochet Koi Fish Phone Bag Pattern with Crossbody Bag, built with crocodile stitch, safety eyes, and a mesh strap.
Below, the step-by-step tutorial walks through magic ring basics, single crochet shaping, two-color crocodile stitch scales, tail and fin details, facial placement with safety eyes, and a mesh crossbody strap sewn on for wear, plus complete materials, skill level notes, beginner tips, customization ideas, and FAQs for beginner and intermediate crocheters completing the koi phone bag from start to finish.
Skill Level
Beginner to intermediate. Anyone comfortable with single crochet and a magic ring can manage this pattern; the crocodile stitch scales look fancy but repeat the same motion round after round, so confidence builds fast.
Materials and Supplies
Gather these before starting so the color changes don’t interrupt your rhythm:
- Worsted weight cotton or cotton-blend yarn in cream/ivory (main body)
- Worsted weight yarn in navy or dark blue (base scale layer)
- Worsted weight yarn in sky blue or light blue (top scale layer)
- 3.5mm–4.0mm crochet hook (adjust to match your yarn weight and desired gauge)
- Two 8mm–10mm safety eyes (or small star/oval safety eyes for a playful koi look)
- Polyester fiberfill stuffing
- Yarn needle for weaving ends and sewing pieces together
- Sharp fabric scissors
- Stitch markers (locking style recommended)
- Optional: swivel clasp or keychain ring if you want a detachable strap version
Crochet Techniques Used
- Magic ring (adjustable ring) to start the base rounds
- Single crochet (sc) worked in continuous spiral rounds
- Increase (2 sc in one stitch) and decrease (invisible decrease) to shape the pouch
- Crocodile stitch, built from front post double crochet pairs, to form the overlapping scales
- Mesh or filet-style chain-and-space rounds for the airy strap section
- Sewing pieces together with a yarn needle and whip stitch
- Safety eye placement and securing
Step-by-Step Pattern Instructions
1. Starting the Base with a Magic Ring
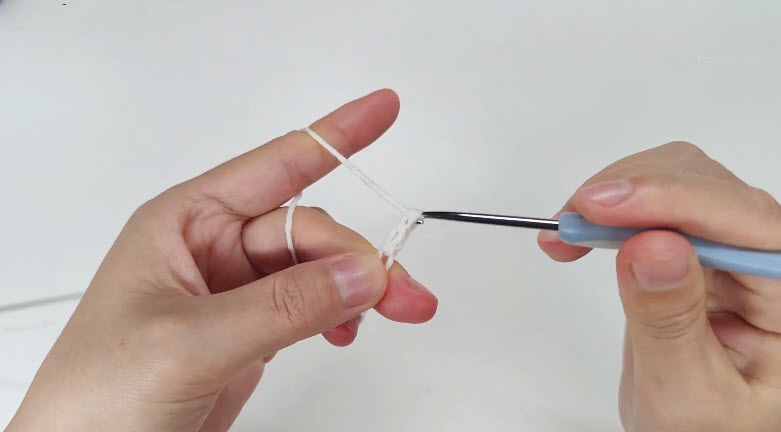
Begin with a magic ring using cream yarn and work 6 single crochets into the ring, then pull the tail to close it. Place a stitch marker in the first stitch of every round from here on with continuous spiral rounds, it’s easy to lose track of where a round begins.
Pro-Tip: Leave a long starting tail instead of a short one. That extra length comes in handy later for closing gaps or attaching the strap without adding a fresh piece of yarn.
2. Building the Rounded Body
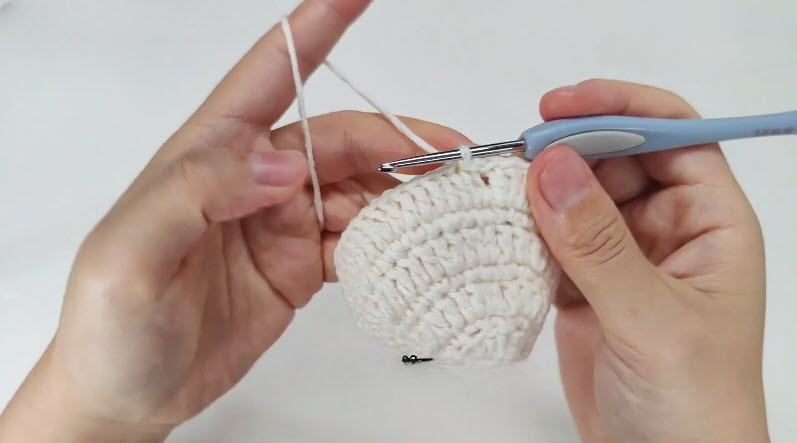
Increase evenly around for several rounds until the circle reaches the width you want for the phone pouch base, then switch to working even rounds (no increases) to build up the height of the pouch walls. Keep tension snug throughout — amigurumi pieces hold their shape and hide stuffing seams best when stitches sit tight against each other rather than loose and gappy.
3. Adding the Crocodile Stitch Scales
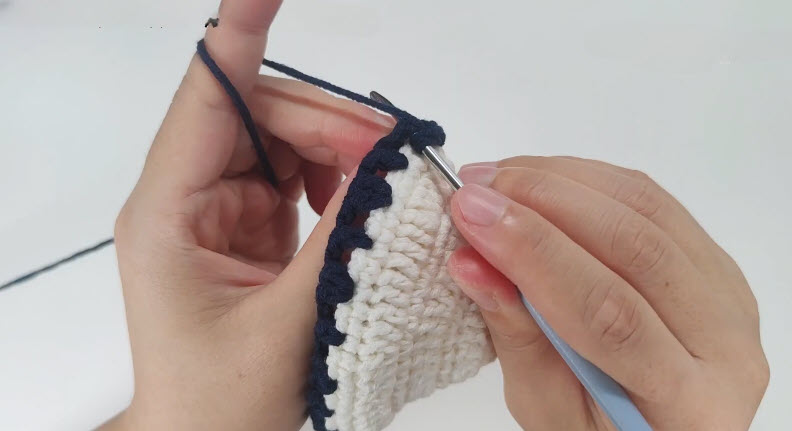
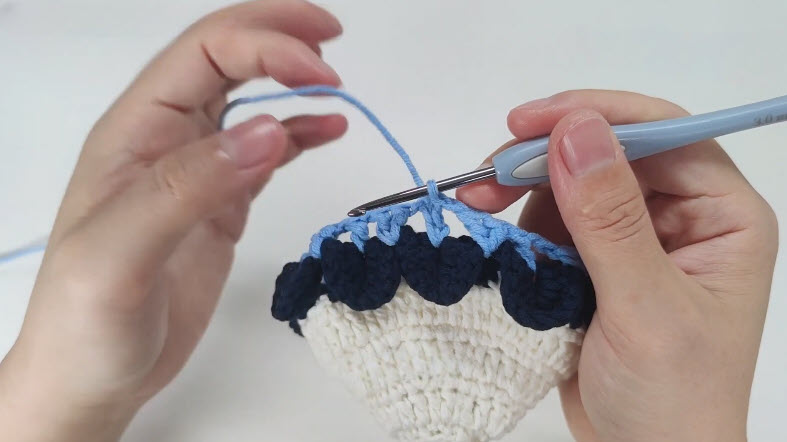
Once the cream base reaches the height where the scales should start, switch to navy yarn and work a foundation round of front post double crochets in pairs — this creates the little “V” pockets that the crocodile stitch scales sit inside. Work the first tier of crocodile stitch scales in navy, working two double crochets down one post and two back up the neighboring post to form each scale.
Switch to sky blue for the second tier, working the new scales into the gaps left between the navy scales below, offsetting them so they overlap like real fish scales. Repeat this two-tone tiering for as many rounds as needed to cover the front pouch section.
Pro-Tip: Crocodile stitch scales look intimidating at first glance, but each scale is only four double crochets. Practice one full round before worrying about how neat it looks the layered effect corrects a lot of small unevenness once the rounds stack up.
4. Shaping the Tail and Fin Details
For a tail flourish, work a small fan-shaped panel in navy and sky blue using the same crocodile stitch technique, then taper the final row with decreases to give it a pointed fin silhouette. Attach the tail piece to the back of the pouch with a whip stitch, tucking the yarn ends inside so nothing shows.
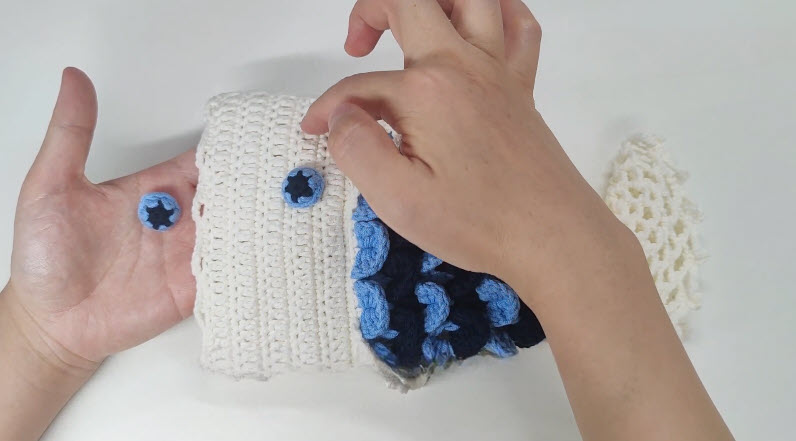
5. Facial Details
Position the safety eyes on the cream section of the body, spacing them evenly and checking placement from a distance before locking the backs in place. Safety eyes cannot be repositioned once secured. Add a few small straight stitches in navy beneath each eye if you’d like subtle koi “whisker” accents, then weave in the loose ends.
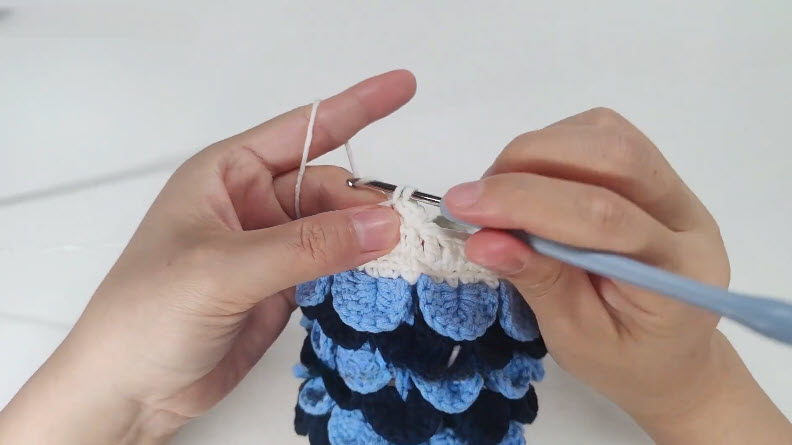
6. Crocheting the Mesh Crossbody Strap
Using cream yarn, chain a length that matches your desired strap size, then work a foundation round of double crochets with evenly spaced chain-1 gaps to create an open mesh texture. Continue working mesh rounds until the strap panel reaches the width you want, then fold it lengthwise and whip stitch the long edge closed to form a flat strap.
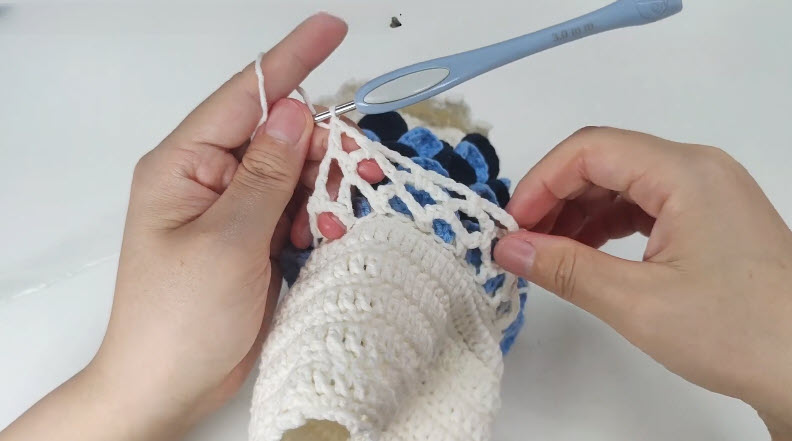
7. Assembly
Sew the mesh strap ends securely to each side of the pouch opening, reinforcing the attachment points with a few extra stitches since this area carries the bag’s full weight. Stuff the body lightly through the opening before closing the top edge, keeping the stuffing loose enough that the pouch still holds a phone comfortably.
8. Finishing Touches
Steam-block the scale sections lightly to help the layered stitches lie flat, trim any stray fibers, and give the whole piece a final check for loose stitches around the eyes and strap joins. If you added a clasp or keychain ring instead of a fixed strap, attach it now so the bag can convert between crossbody and clip-on styles.
Helpful Beginner Tips
- Keep stitches tight. Amigurumi and bag projects both need dense fabric so stuffing and phone contents don’t peek through gaps.
- Use stitch markers generously. Move the marker every round in spiral crochet, and add a second marker at color-change points so you never lose your place mid-scale.
- Stuff gradually, not all at once. Add small amounts of fiberfill as you go rather than cramming it in at the end — this keeps the shape even and avoids lumpy sections.
- Count scales, not just rows. When working the crocodile stitch tiers, count individual scales rather than rounds to keep both color layers symmetrical.
Design Customization Ideas
Try a Different Color Palette
Swap the navy and sky blue for orange and white for a classic koi look, or use pastel pink and lavender scales for a softer, girly variation of the same pattern.
Add Cute Accessories
Clip on a small charm, dangle a tiny crochet bubble or lotus flower from the strap, or attach a beaded tassel near the tail for extra movement.
Make a Mini Size Variation
Scale the whole pattern down using a smaller hook and fewer scale rounds to turn the design into a keychain-sized charm instead of a full phone bag — perfect for gifting or for testing a new color combination before committing to the full-size version.
Frequently Asked Questions
What is the best yarn for amigurumi and scaled bag projects?
Cotton or cotton-blend worsted weight yarn works best because it holds stitch definition well, which matters even more for a textured piece like this scaled koi design.
How do I make a crochet plush or bag firm rather than floppy?
Tight, consistent tension paired with a slightly smaller hook than the yarn label suggests gives the fabric enough density to hold its shape without extra stiffening.
How long does this project take to finish?
Most crocheters finish the pouch and scale layers in a weekend, with the mesh strap and assembly adding another sitting or two depending on experience level.
Closing Thoughts
A scaled koi bag might look like a serious undertaking, but every round breaks down into stitches you already know how to make. Grab a hook, pick your favorite koi color combo, and let this playful little fish swim its way into your everyday carry rotation. If you make one, snap a photo and tag it so other crocheters can see your version swim to life.