Crochet Dishtowel Holder Pattern with Button Closure
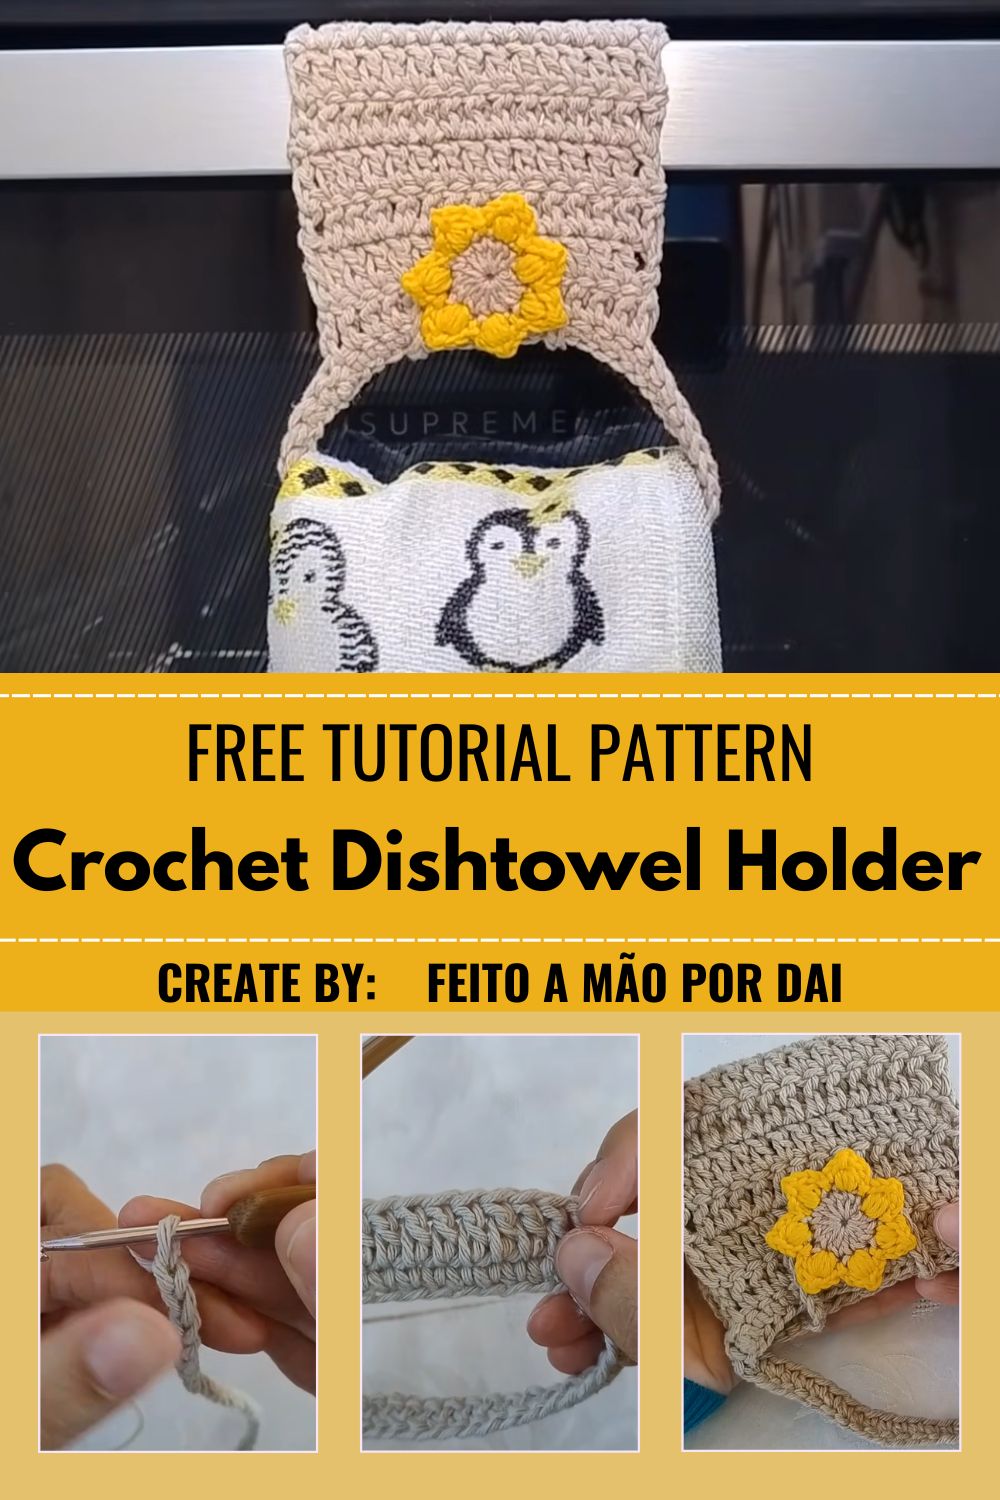
Cool, springy cotton stitches give the Crochet Dishtowel Holder Pattern with Button Closure a sturdy, grippy feel in the hand. Fasten the strap over an oven handle. The oven-handle towel holder then keeps a damp cloth handy and off the floor.
Slippery towels, sagging hooks, and cluttered oven doors all meet their match here. A crochet towel topper with a button strap wraps around handles of different widths, so it adapts where fixed rings cannot. Chunky cotton stitches stay sturdy through daily tugging. Meanwhile, the flower adds a bright focal point. As a kitchen towel hanger, the finished piece works hard yet still looks cheerful.
Who Will Love the Pattern
Home cooks who battle slipping towels will appreciate the quick payoff. Beginners also fit well, since the panel repeats one row again and again. Likewise, market sellers can batch several holders in a single afternoon. For gift givers, a colorful flower makes each one feel personal. In short, anyone craving a practical crochet dishtowel holder will find an easy win here.
Time and Skill Reality Check
Skill level sits at confident beginner. Chains, turning chains, and basic stitches cover nearly every step. Time Box: prep takes about 15 minutes, stitching runs near two hours, and finishing adds roughly 30 minutes. However, a relaxed pace still works well. Once the rows repeat, progress feels steady and predictable.
Bonus: Handle Fit Guide
Before chaining, wrap a paper strip around the oven handle and mark the overlap. Then measure the strip and add a little room for the button. Next, hold the strap against that measurement as it grows. Early checks prevent unnecessary ripping back later.
What You’ll Need
Gather these supplies before the first chain.
- Yarn: Medium-weight (worsted) cotton in oat beige, plus a small ball of sunny yellow for the flower.
- Hook: The size listed on the yarn label. A metal-tipped hook with a bamboo handle glides smoothly.
- Button: One sturdy flat button that slides easily through a stitch gap.
- Tools: A yarn needle, small sharp scissors, and a few bright stitch markers.
Stage 2: Making It Successfully
Follow the five photo stages below to shape a crochet dishtowel holder from first chain to finished flower.
Step-by-Step Process
Step 1: Make the Foundation Chain
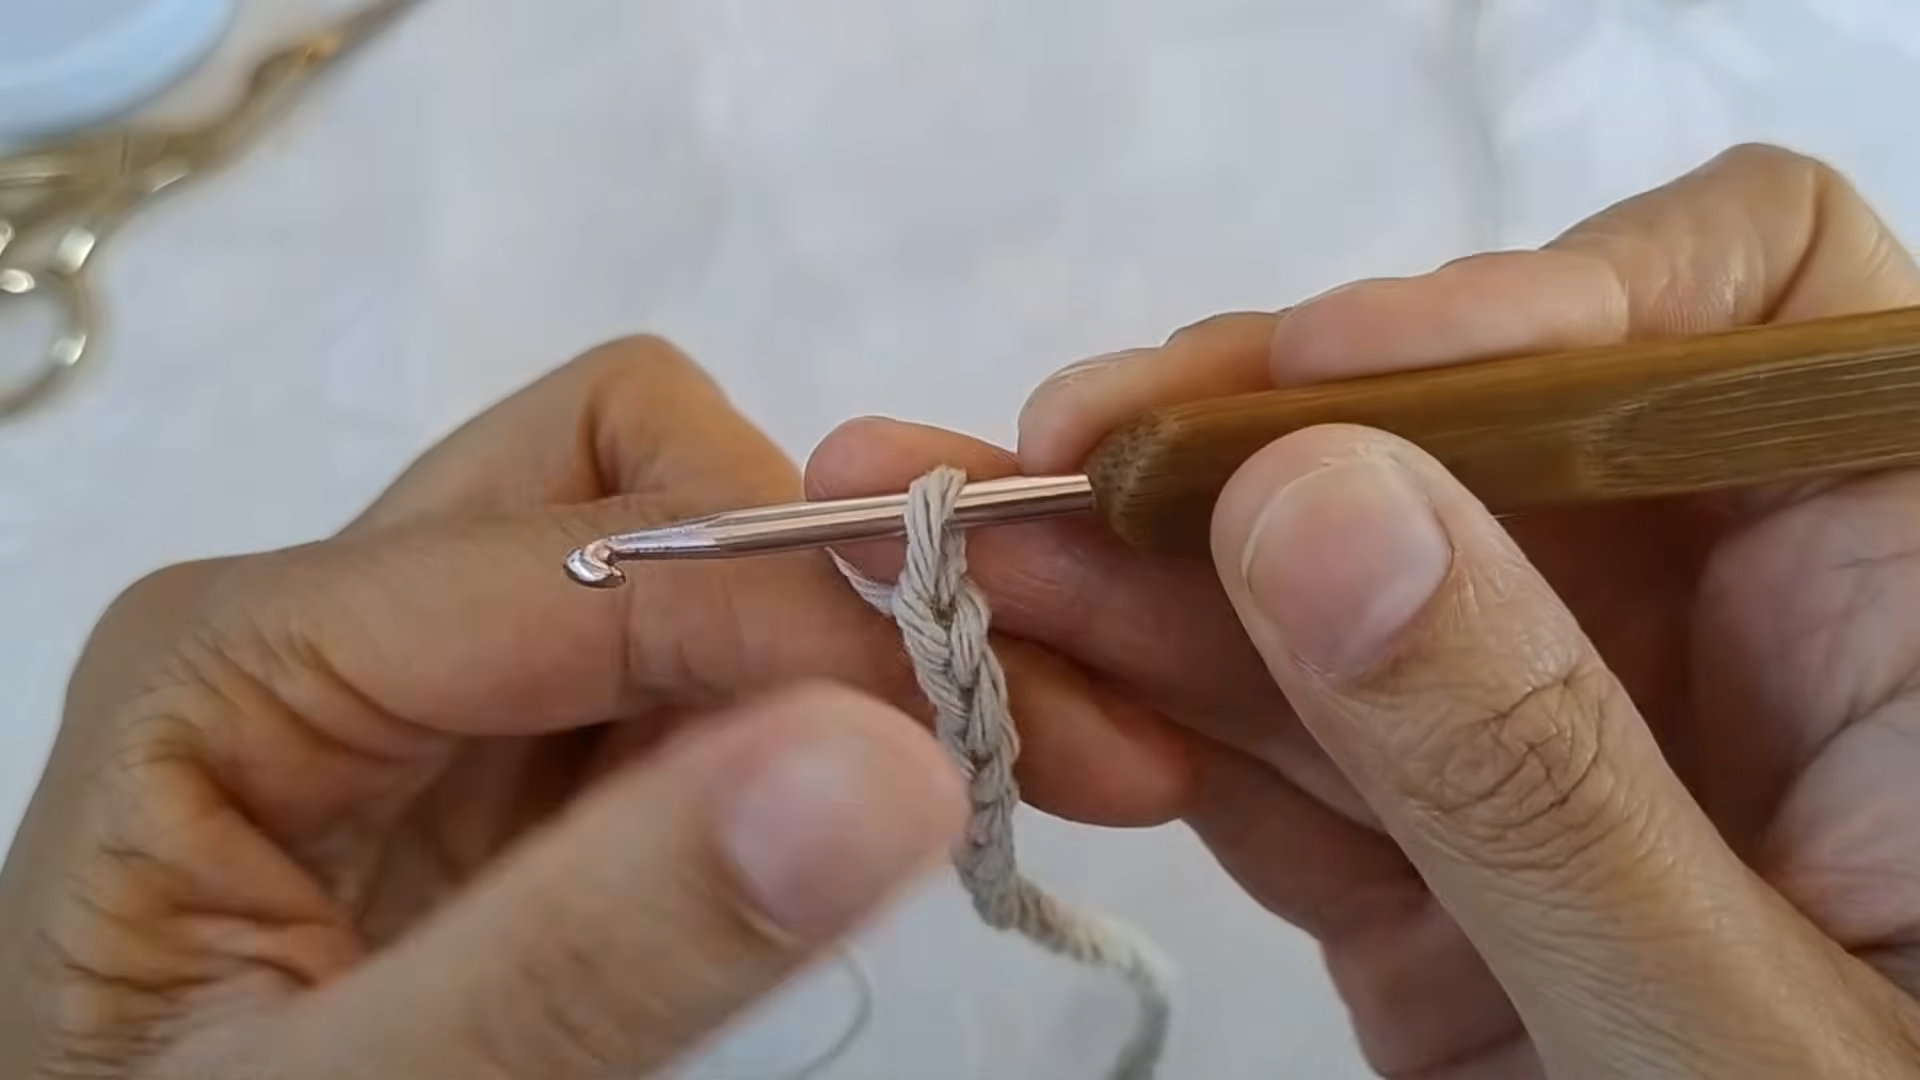
Start with a slip knot and pull it snug on the hook. Next, chain steadily and keep every loop the same size. Pinch the chain just below the hook with the free thumb and finger. That grip stops twists from forming. Expect a generous length, since a long tail of chain trails behind the first stitches in the photos.
Why it matters: an even chain sets the foundation and keeps the first row easy to work.
Step 2: Work the First Row
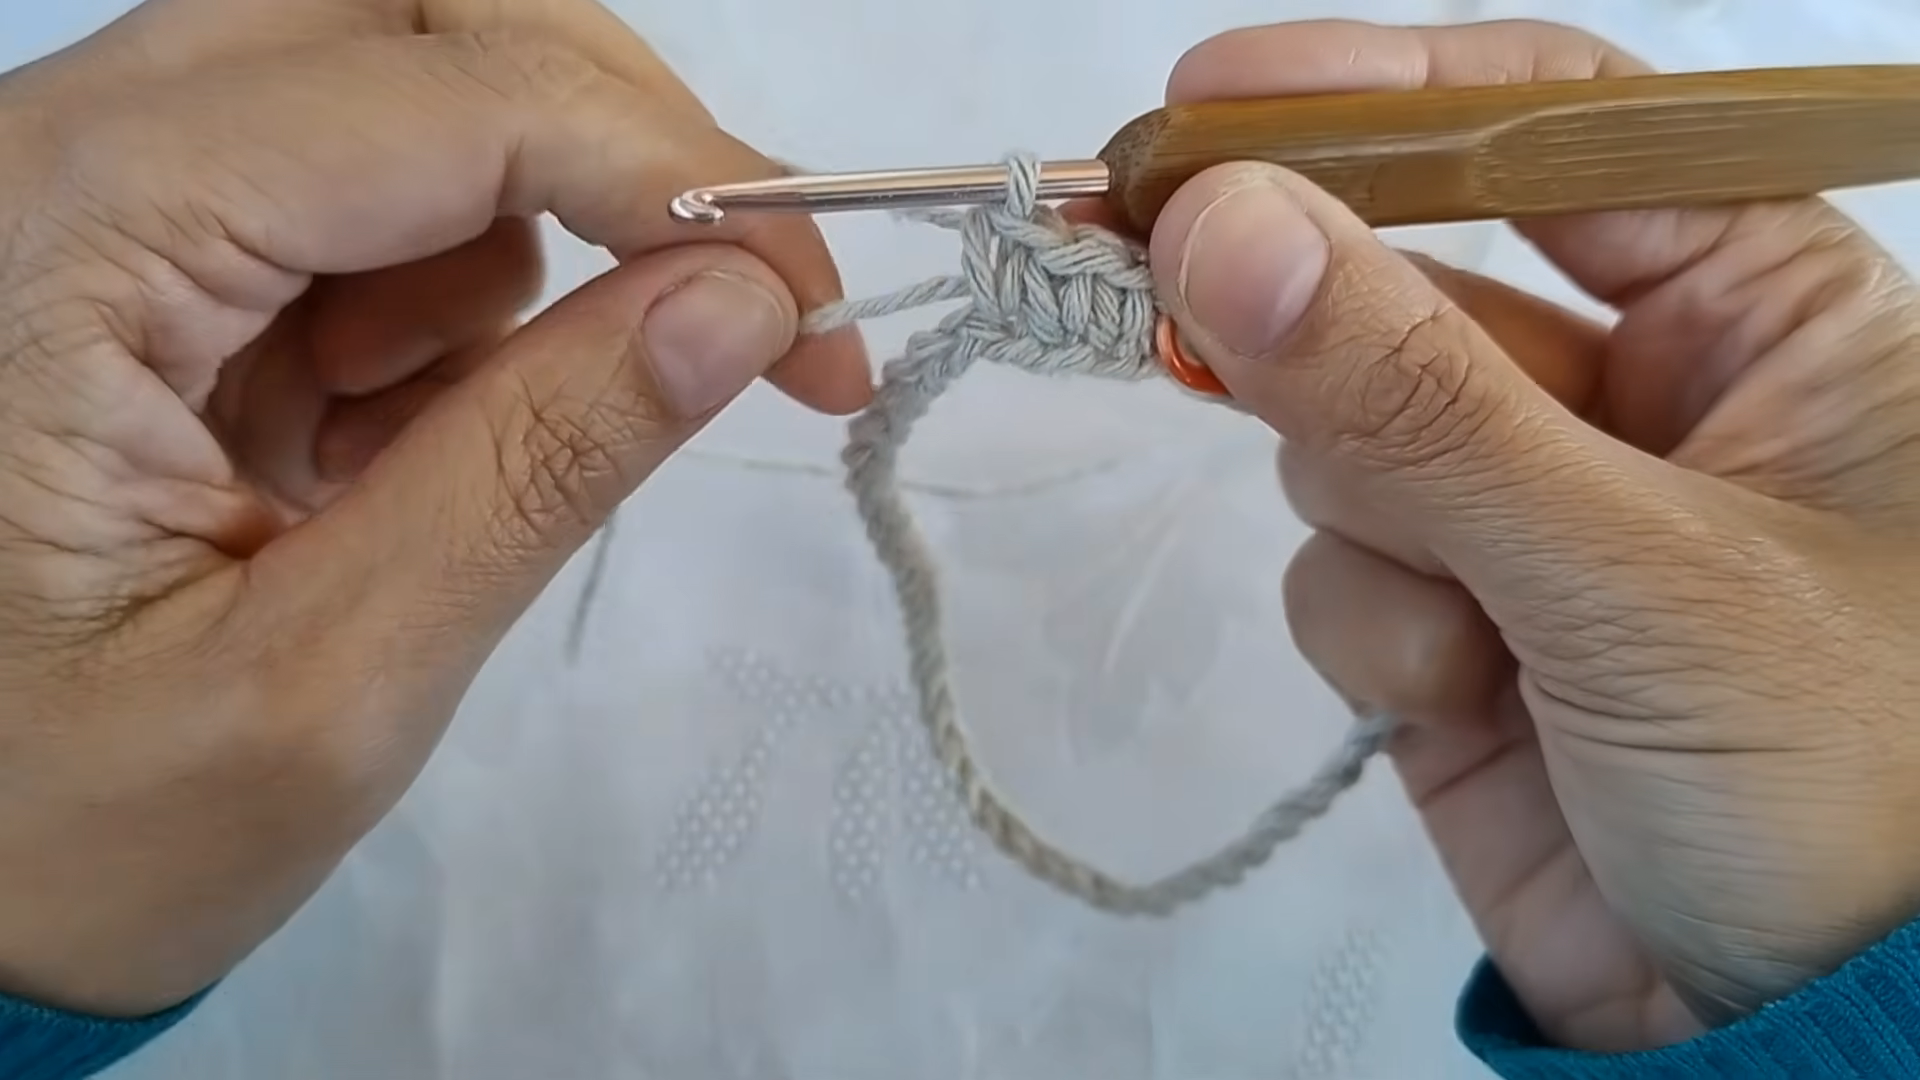
Insert the hook into the chain as the pattern directs, then work the first stitches. Clip a marker into the starting stitch, like the bright marker at the edge in the photo. Meanwhile, let the unworked chain hang loose below. Continue across until the first row reaches the planned width.
Why it matters: a marked first stitch prevents miscounts on the turn back.
Step 3: Build the Rows
Turn the work, chain the turning height, and stitch into every stitch across. Repeat until the band grows into a neat rectangle. Pinch the corner between thumb and finger after each row. Doing so keeps the edge straight and the corner square. Meanwhile, the narrower strap section hangs below the panel, ready to loop around a handle.
Pro-Tip: Compare the top and bottom edges every few rows. Equal width signals steady tension.
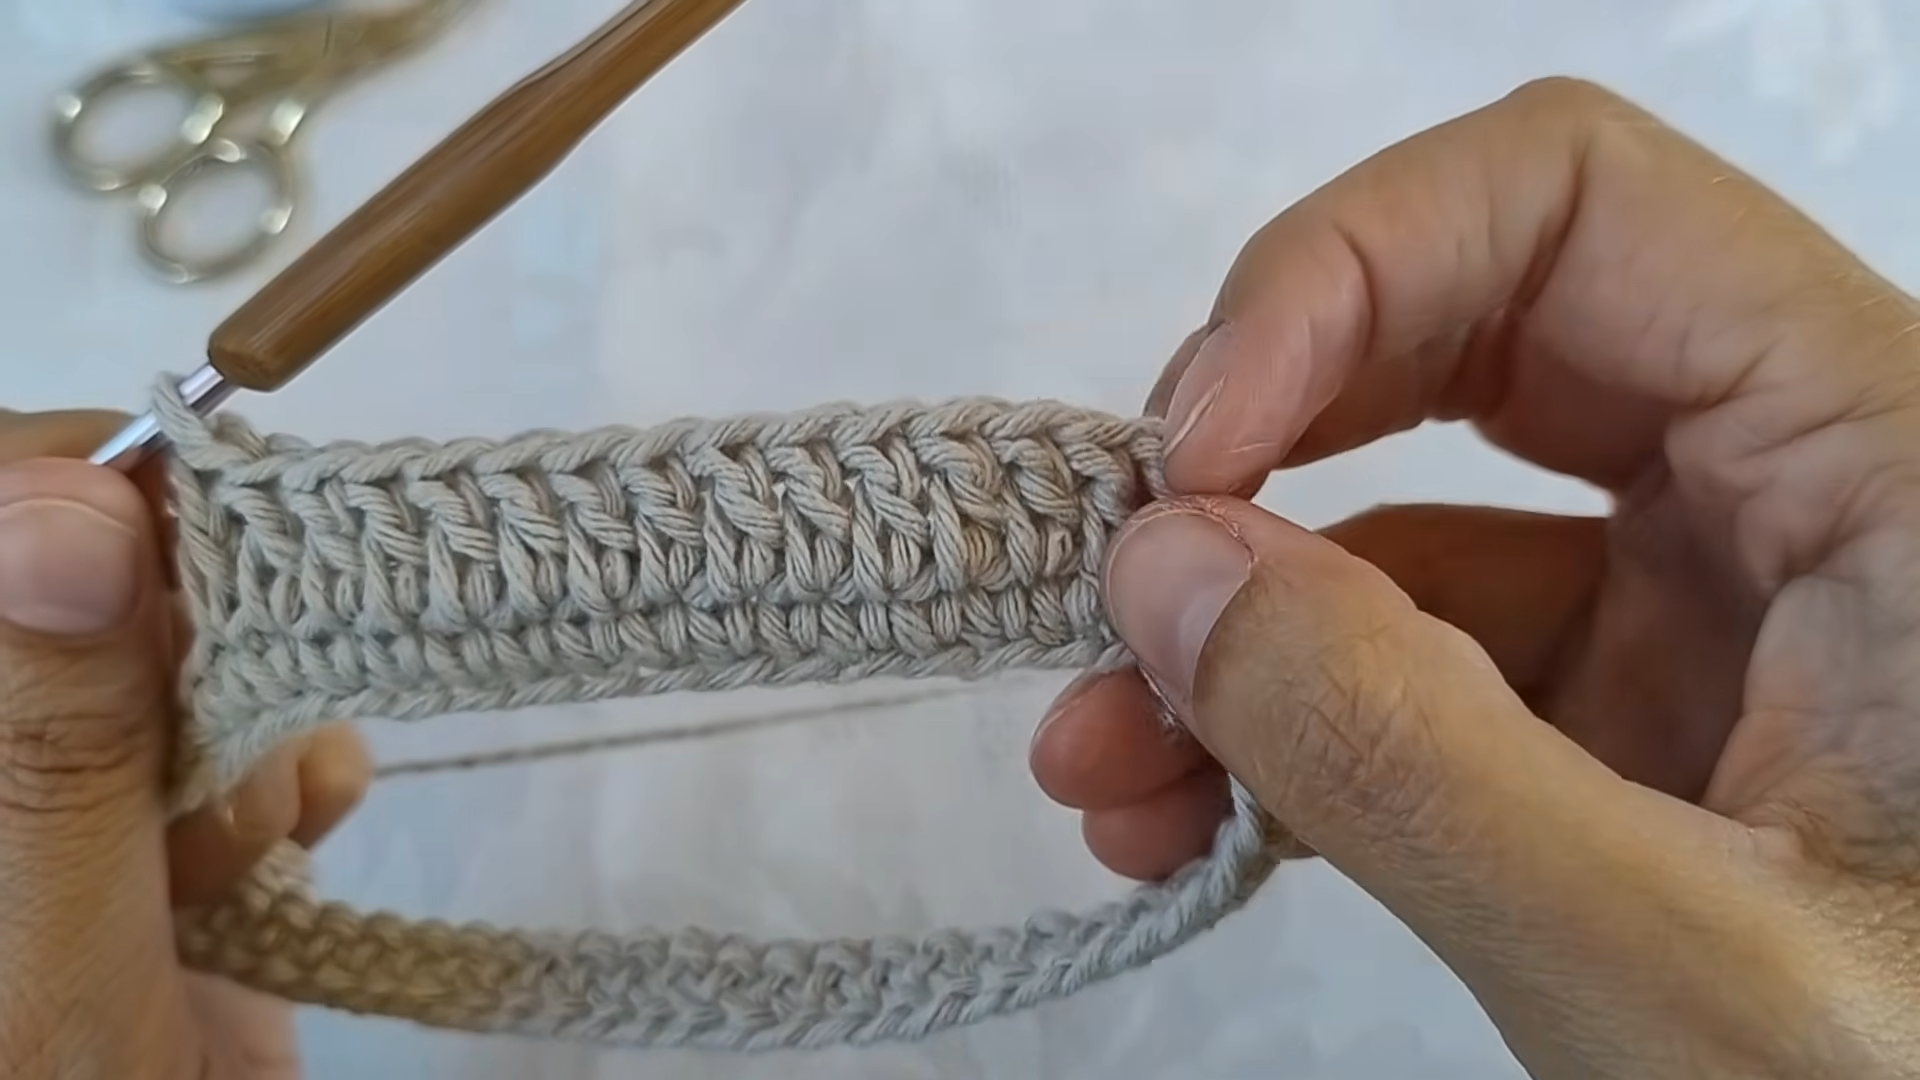
Step 4: Trim and Tidy the Ends
Lay the piece flat on a plain surface. Then cut the working yarn, leaving a short tail, and pull it through the last loop. Afterward, snip any loose fuzz with small, sharp scissors, as the photo shows. Finally, weave the tail through the back of nearby stitches. Set the stitch marker aside for the next piece.
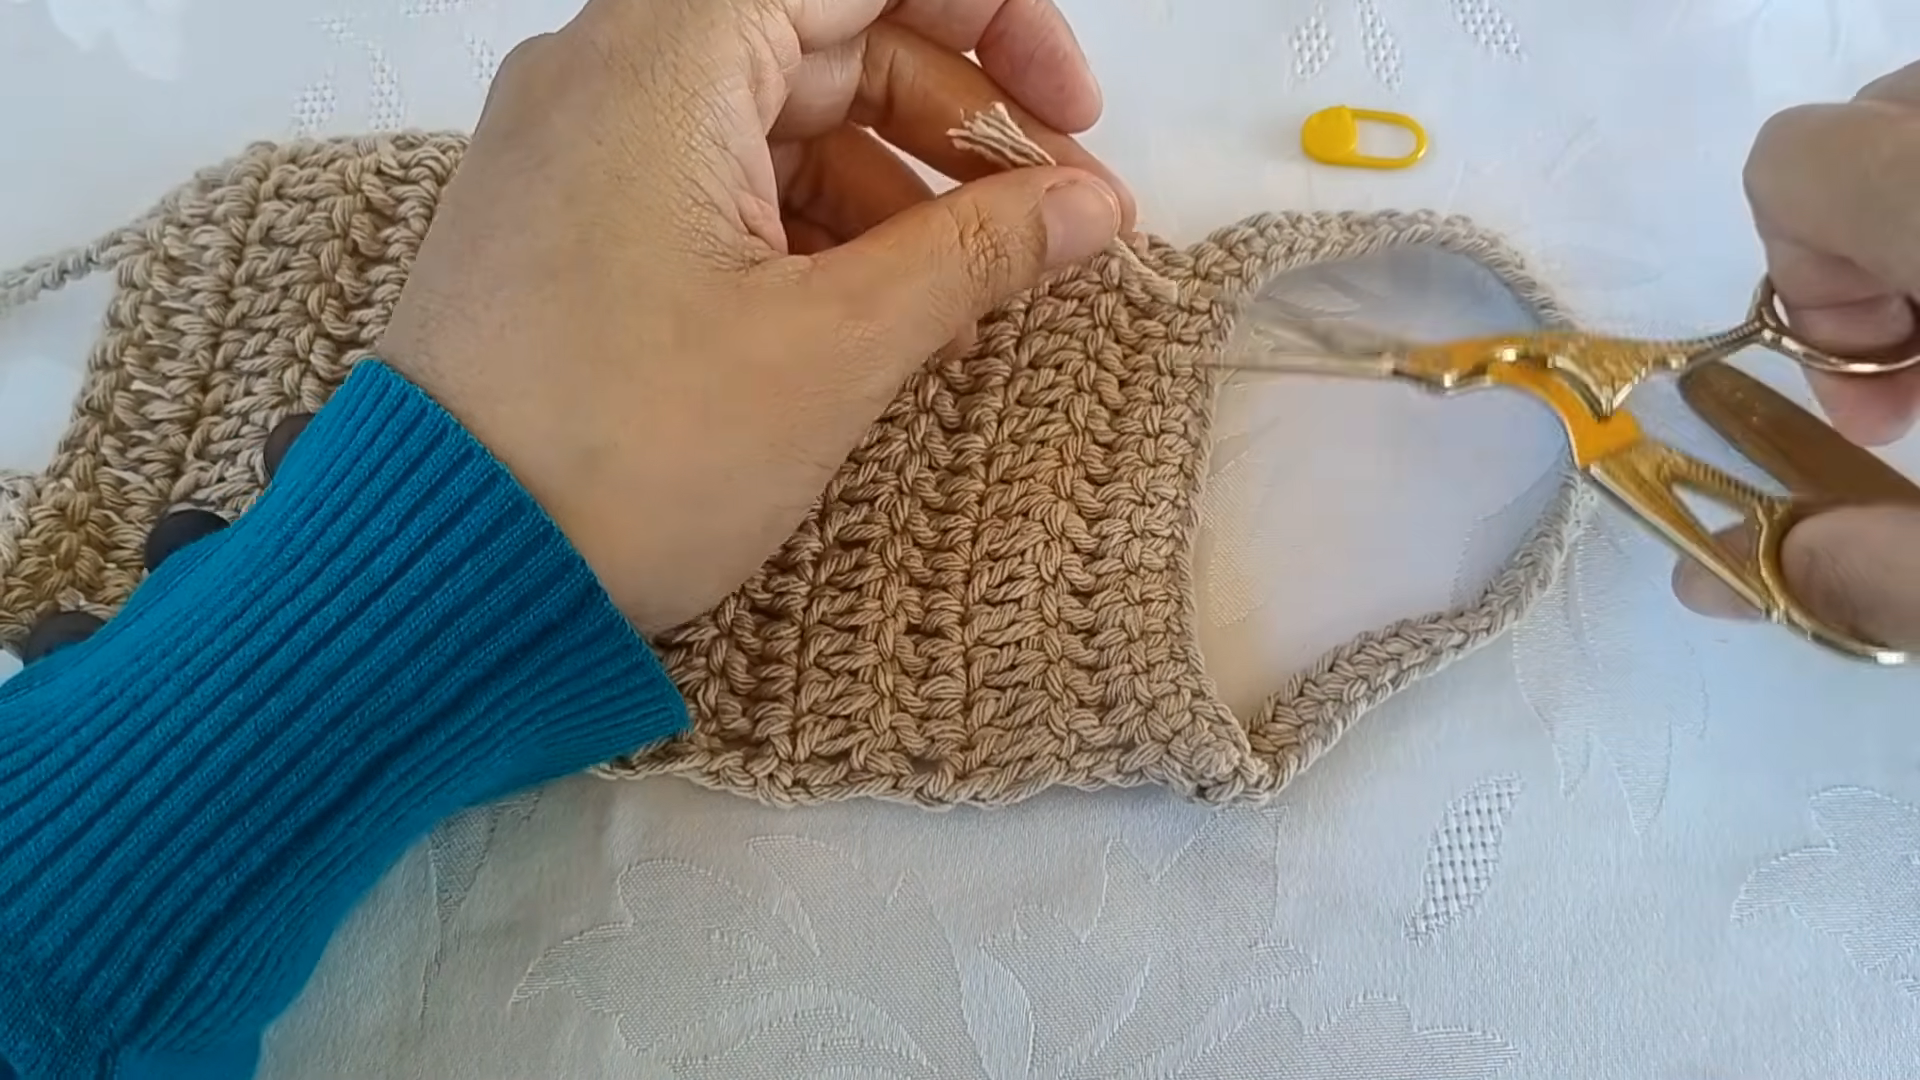
Step 5: Attach the Flower and Check the Loop
Position the yellow flower at the center of the panel. Next, sew around the petals with a yarn needle, catching only the top loops. Afterward, lift the piece and check the strap loop. Finally, fasten the button to confirm the closure sits comfortably.
Why it matters: Even stitching keeps the flower flat and the closure free of strain.
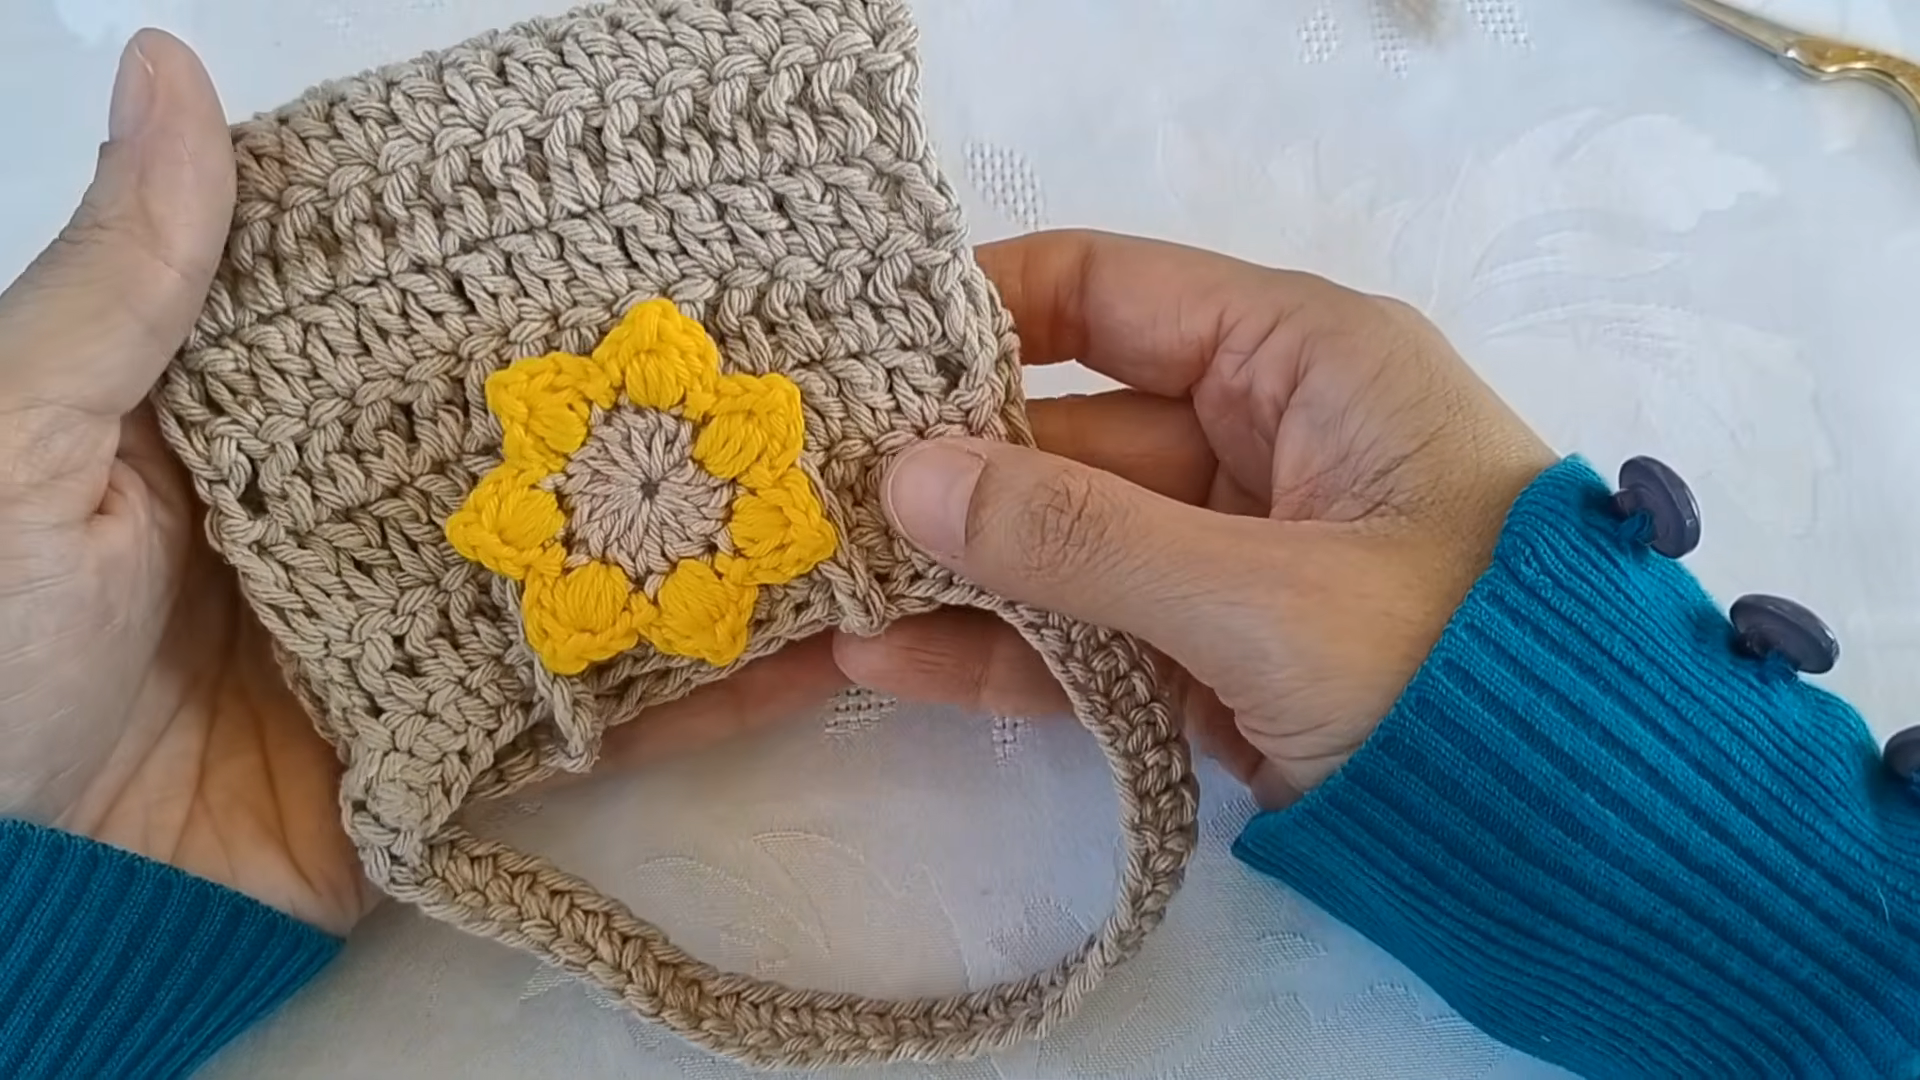
Where Beginners Usually Go Wrong
- Mistake: The foundation chain twists. Fix: Check that the chain faces one direction before starting the first row.
- Mistake: The first row feels tight. Fix: Relax the grip, or chain with a hook one size larger.
- Mistake: The edges creep inward. Fix: Count stitches every few rows and mark the first stitch.
- Mistake: The flower sits off-center. Fix: Pin it in place with markers before sewing.
Troubleshooting Extra
- Problem: The panel curls at the edges. Fix: Dampen it lightly, pat it flat, and let it dry under a light weight.
- Problem: The button slips loose. Fix: Restitch it with doubled yarn, passing through the base several times.
- Problem: The strap sags on a wide handle. Fix: Shift the button outward, or add rows to the strap.
- Problem: The flower droops. Fix: Tack each petal tip with one small stitch.
Signs You Did It Right
- The rows lie flat with straight, even edges.
- The strap loops around a handle without pulling.
- The button fastens easily and stays closed.
- The flower sits flat and centered on the panel.
Stage 3: Keeping It Looking Good
Washing and Care Basics
Cotton handles frequent laundering, yet gentle care prolongs its life. A crochet dishtowel holder meets grease and splashes daily, so wash it every few weeks. Use cool water and mild soap. Press out the moisture with a clean towel, then lay the piece flat. Avoid the dryer, since heat can shrink cotton.
Storage Tips
Spare holders keep their shape when folded flat. Fasten the button first, because an open strap tends to stretch. Next, tuck the piece into a breathable cotton bag. Finally, store it in a dry drawer away from damp.
Creative Projects You Can Make With the Pattern
Once the rhythm feels familiar, the same panel stitches up into other kitchen accents. Consider these ideas, each easy to pair with a matching tutorial:
- Seasonal flower sets in autumn and spring shades (crochet flower appliqué patterns)
- Cabinet handle loops for a coordinated kitchen look (easy crochet kitchen accessories)
- Matching pot holder pairs (beginner crochet pot holder ideas)
- Gift bundles with a dishcloth and holder (handmade kitchen gift sets)
Ways to Style or Display It
Hang the holder from an oven handle with the flower facing outward. Alternatively, wrap it around a cabinet pull near the sink. For a photo-ready look, pair it with a linen towel in a contrasting shade. Meanwhile, a folded striped cloth adds cheerful color.
Why It’s Popular Right Now
Handmade kitchen accessories keep trending because they blend function with warmth. Makers and shoppers both want small projects that finish fast and get used daily. Three reasons stand out:
- Quick finish: One evening yields a gift-ready piece.
- Practical payoff: Towels stay put on oven and cabinet handles.
- Easy personalization: Flower colors change with the seasons.
FAQ
Which yarn works best for the holder?
Medium-weight cotton offers the firmest structure and washes well. Blends work too, although they may stretch more over time.
How can the size be adjusted?
Change the foundation chain and row count in small steps. Afterward, measure the strap against the handle to confirm the fit.
Is machine washing safe?
Hand washing is gentler, especially with a button attached. If machine washing is necessary, use a mesh bag and a cool, delicate cycle.
In Summary
A cheerful crochet dishtowel holder brings order and color to a busy kitchen. Try a flower in a favorite shade, or match the button to the room. Small choices make each piece feel personal. Then hang it up and enjoy the tidy result.