Free Crochet Granny Square Earrings Pattern for Beginners
Small crochet accessories are always quick, enjoyable projects, and Granny Square Earrings fit that description perfectly. This tiny design puts leftover yarn to beautiful use, creating a unique piece of handmade jewelry. Real talk, the simple pattern suits crocheters of every skill level, and once finished, it becomes a lovely addition to boho fashion, a summer wardrobe, a girls’ day out, or everyday styling.
Handmade jewelry has a special charm, and granny square earrings bring that charm right to your ears. Quick to stitch and endlessly customizable, this beginner-friendly project turns scrap yarn into a stylish accessory in under an hour. No fancy tools, no complicated stitches just a fun, satisfying craft that’s perfect for gifting, selling, or simply treating yourself to something handmade.
What Are Granny Square Earrings?
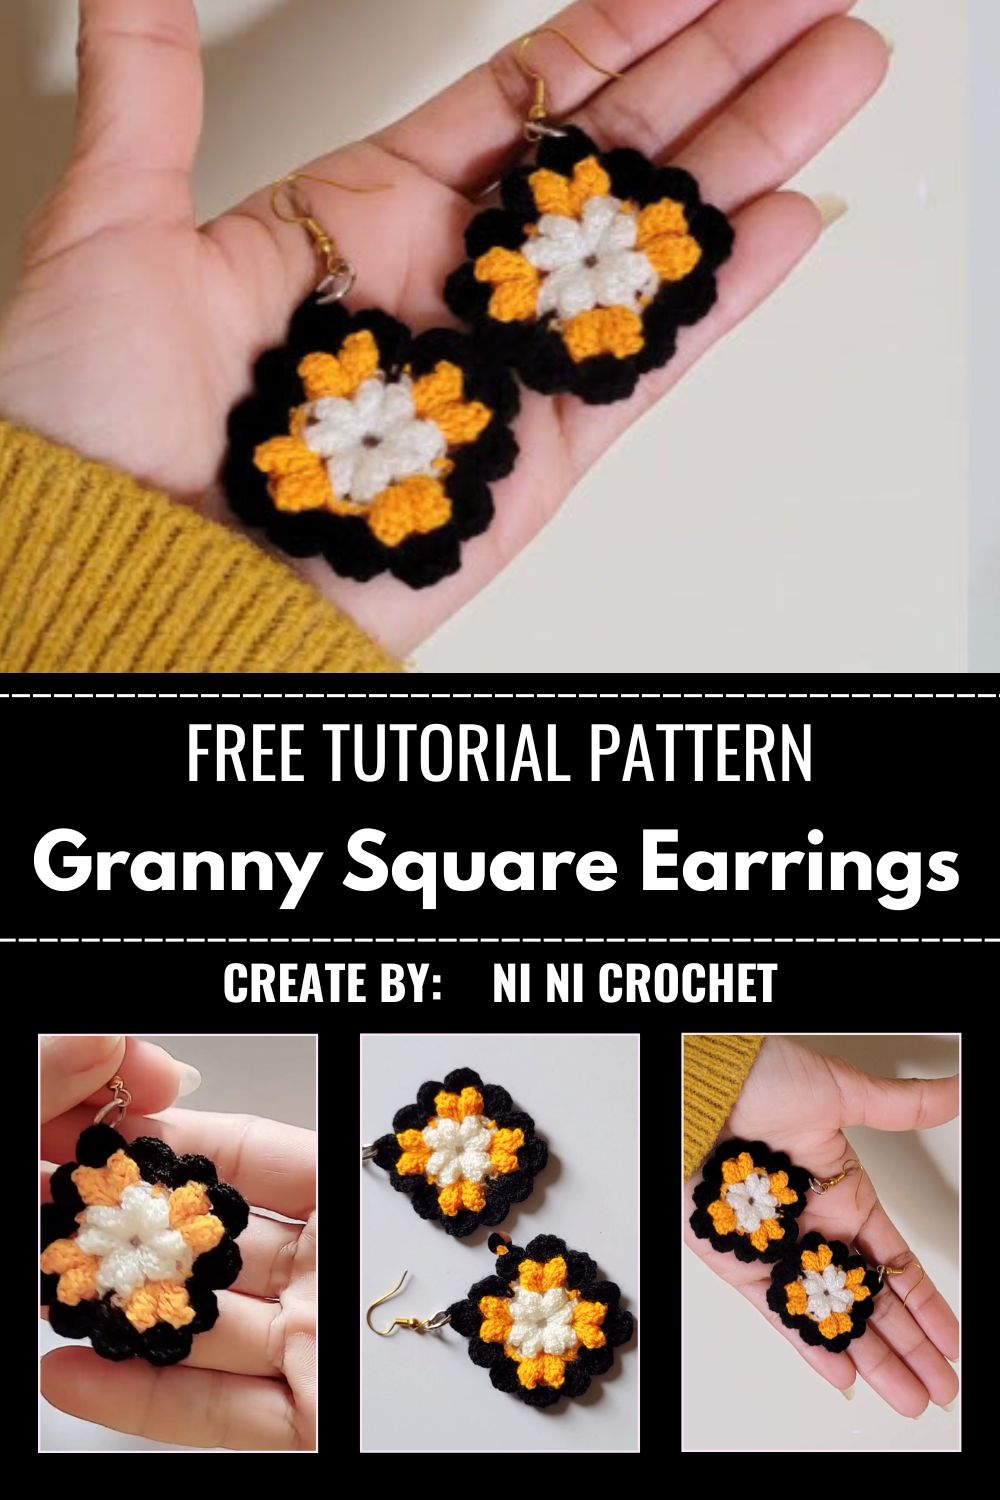
Granny square earrings are miniature versions of the classic granny square motif, crocheted in small rounds and turned into lightweight, colorful jewelry. Instead of joining squares into a blanket, you stop after one or two rounds and attach earring hooks. They’re trendy, handmade, and surprisingly quick to finish.
These earrings work up in under an hour per pair. Trust me, they make a great gift idea and a fun way to practice basic granny square stitches.
Skill Level
This pattern is rated Beginner friendly. If you know how to chain, single crochet, and double crochet, you already have the skills needed. It’s also a great confidence-building project for anyone who has just learned the basic granny square motif.
Materials and Tools Needed
- Small amounts of cotton or acrylic yarn in 2–3 colors
- A crochet hook (size 3.5mm–4mm works well for lightweight earrings)
- Yarn needle for weaving in ends
- A pair of earring hooks (metal jewelry findings)
- Jump rings (optional, for attaching earrings to hooks)
- Small pliers (optional, for opening/closing jump rings)
- Scissors
Key Techniques Used
Granny square earrings rely on a handful of simple stitches and concepts:
- Magic ring or chain start – forms the tiny center of the square
- Chain 3 as first double crochet – standard granny square technique
- Color changes – switching yarn colors between rounds for a classic look
- Joining rounds – using slip stitches to close each round neatly
- Blocking small pieces – lightly steaming or shaping earrings so they lay flat
Step-by-Step Pattern Guide
Step 1: Prepare Your Materials
Gather your yarn scraps, hook, and earring hardware before you start. Since these motifs are tiny, even small leftover yarn balls work perfectly here.
Step 2: Make the Center Ring
Start with a magic ring or chain 4 and join with a slip stitch to form a small loop. This becomes the center of your granny square.
Step 3: Crochet Round One
Chain 3 (counts as first double crochet), then work 2 double crochets, chain 2, into the ring. Repeat this pattern three more times to create four corners. Join with a slip stitch to the top of your starting chain.
Step 4: Crochet Round Two (Optional Second Color)
If you want a two-tone look, switch colors here. Work 3 double crochets into each corner space, chain 2 at each corner, and single crochet along the sides if desired. Join and fasten off.
Step 5: Weave in Ends
Use your yarn needle to weave in all loose ends securely so nothing unravels during wear.
Step 6: Attach Earring Hardware
Using small pliers, open a jump ring, slip it through one corner chain-space of your square, and close it. Attach this jump ring to your earring hook.
Step 7: Make the Matching Pair
Repeat all steps to crochet a second, identical square so you have a matching set.
Step 8: Final Finishing Touches
Lightly steam-block both earrings so they lay flat, then check that hardware is secure before wearing.
Helpful Tips for Beginners
- Use a smaller hook than usual for a tighter, neater stitch definition
- Cotton yarn holds its shape better than fuzzy or textured yarns
- Keep your tension even for a flat, symmetrical square
- Test earring weight before wearing all day lighter yarn is more comfortable
Common Mistakes to Avoid
- Using yarn that’s too thick, which makes earrings heavy and bulky
- Skipping the blocking step, leaving squares curled or uneven
- Attaching jump rings too loosely, risking lost earrings
- Forgetting to weave in ends, causing unraveling over time
Customization Ideas
- Try single-round mini squares for a more delicate, minimalist look
- Add tiny pom-poms or beads to the corners for extra flair
- Use ombre or variegated yarn for a gradient effect
- Make triangle or hexagon shapes instead of traditional squares
- Add tassels hanging from the bottom corner for boho style
Frequently Asked Questions
1. How long does it take to make one pair of granny square earrings?
Most beginners finish a pair in 30–60 minutes, depending on size and number of rounds.
2. What yarn weight works best for earrings?
Lightweight cotton or fingering-weight yarn is ideal since it keeps earrings comfortable and not too heavy.
3. Do I need special tools to attach earring hooks?
Small jewelry pliers help, but you can also thread jump rings by hand carefully if you don’t have pliers.
4. Can I sell handmade granny square earrings?
Yes, many crafters sell these as a small handmade business item, since they’re quick to produce and popular on platforms like Etsy.
5. How do I keep the earrings from feeling too heavy?
Stick to one or two rounds only, use lightweight yarn, and avoid adding too many embellishments.
6. What if I don’t know how to crochet a Crochet Granny Square Earrings yet?
No worries this pattern works great as your very first granny square project since it’s small and low-pressure.
Conclusion
Crochet Granny Square Earrings are a wonderful beginner project that combines classic crochet charm with modern, wearable style. In just an hour or two, you can turn a few yarn scraps into a trendy accessory that makes a great gift or even a small business item. With simple materials, basic stitches, and endless color options, this pattern is perfect for building confidence while creating something genuinely useful. Give it a try this weekend, experiment with different colors, and don’t be afraid to make a few pairs to share with friends and family.