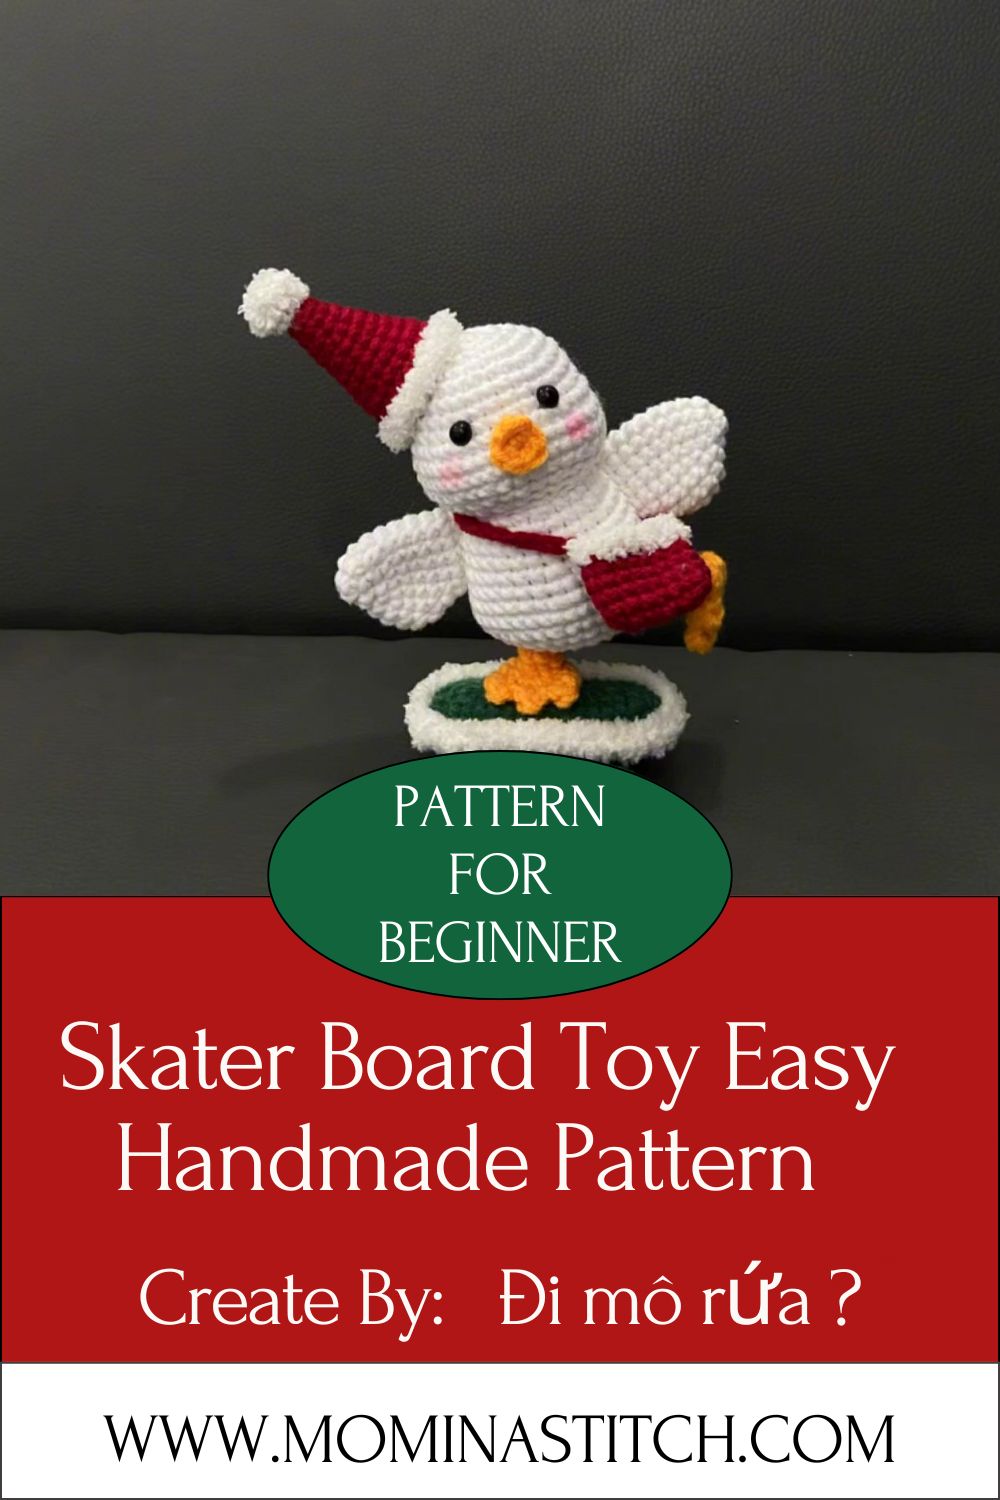
Charming Crochet Skater Board Toy Easy Handmade Pattern
Looking for a fun crochet project with serious character? This Crochet Skater Board Toy is playful, beginner-friendly, and quick to finish. With just a few simple stitches, you can make a tiny toy that’s bursting with personality and charm.
Skater culture is all about freedom, movement, and a carefree attitude. This tiny amigurumi captures that same energy in yarn form. Honestly, something is charming about a soft, round character cruising on its own mini board.
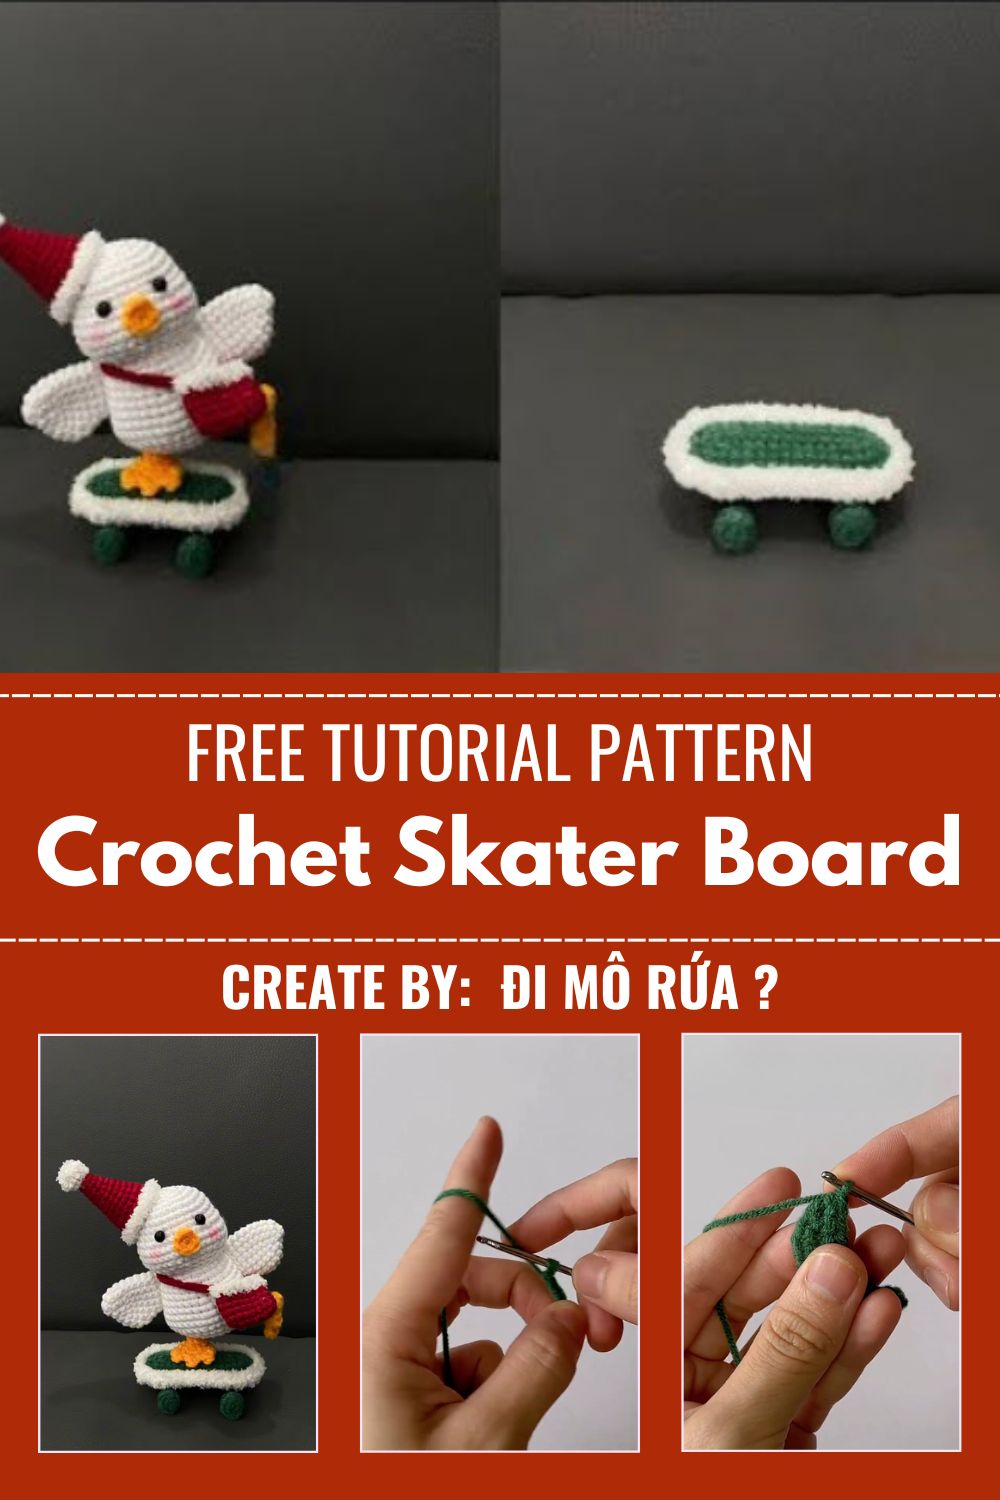
The design pairs a cute, huggable body with a chunky little skateboard. You get the best of both worlds here. The character feels lively, while the board adds a cool, sporty twist that older kids and teens love. This pattern works great as a gift, a desk buddy, or a keychain charm. It also makes a sweet, handmade present for skateboarding fans of any age.
Quick Project Overview
This amigurumi skater toy is small, sturdy, and full of character. You crochet the body, head, and limbs in the round, then stitch everything together. After that, you build a simple skateboard base to complete the look.
The whole project comes together fast. Most crafters finish it in a single afternoon. Because the shapes stay simple, it’s a great confidence booster if you’re newer to amigurumi.
You can keep it as a standalone plush or add a keychain ring for portability. Either way, this little skater brings instant smiles.
Skill Level
This pattern sits comfortably at the beginner to easy intermediate level. You only need a handful of basic stitches, so first-timers can absolutely manage it with patience and a few practice rounds.
Materials and Supplies You’ll Need
Before you start, gather everything in one place. Trust me, it saves time and keeps your flow smooth. Here’s your full supply list.
Yarn Colors
- Main body color (any cheerful shade like mint, peach, or yellow)
- Skin or face tone for the head, if your character has one
- A contrast color for clothing or details
- Brown or black for the skateboard deck
- A bright shade for the wheels
Hooks and Tools
- A 2.5 mm or 3.0 mm crochet hook for tight stitches
- A pair of safety eyes (6 mm to 9 mm works well)
- Polyester fiberfill stuffing
- A yarn needle for sewing parts together
- Sharp scissors
- Stitch markers to track your rounds
Optional Extras
- A keychain ring or lobster clasp
- A tiny pom-pom or bead for decoration
- Embroidery thread for a cute smile or blush
Tip: Cotton yarn gives amigurumi a clean, firm finish. Acrylic yarn feels softer and budget friendly. Both work beautifully here.
Crochet Techniques Used
You don’t need fancy skills for this project. In fact, the magic lies in a few simple, repeated techniques. Here’s what you’ll use throughout.
- Magic ring to start each piece neatly
- Single crochet (sc) for the main fabric
- Increase (inc) to widen each shape
- Decrease (dec) using invisible decreases for a smooth surface
- Sewing parts together with a yarn needle
If any of these feel new, practice them on a small swatch first. A quick warm-up makes the real thing way easier.
Step-by-Step Crochet Pattern Instructions
Now for the fun part. Work each section in a continuous spiral unless noted. Use a stitch marker to mark the start of every round. Ready? Let’s build your little skater.
Making the Head
The head sets the whole vibe, so take your time here.
- Round 1: Make a magic ring with 6 sc.
- Round 2: Increase in each stitch (12 sc).
- Round 3: 1 sc, inc repeat around (18 sc).
- Round 4: 2 sc, inc repeat around (24 sc).
- Round 5: 3 sc, inc repeat around (30 sc).
- Rounds 6 to 10: Single crochet in each stitch (30 sc).
- Round 11: 3 sc, dec repeat around (24 sc).
Now place your safety eyes between rounds 7 and 8. Keep them about six stitches apart for a cute look.
- Round 12: 2 sc, dec repeat around (18 sc).
- Round 13: 1 sc, dec repeat around (12 sc).
Stuff the head firmly before it closes. Then continue.
- Round 14: Decrease around until the hole closes (6 sc). Fasten off and weave in the tail.
Making the Body
The body keeps things short and rounded for that classic amigurumi shape.
- Round 1: Magic ring with 6 sc.
- Round 2: Increase around (12 sc).
- Round 3: 1 sc, inc repeat around (18 sc).
- Rounds 4 to 8: Single crochet in each stitch (18 sc).
- Round 9: 1 sc, dec repeat around (12 sc).
Stuff the body as you go to keep it firm. Then fasten off and leave a long tail for sewing.
Making the Arms and Legs
These small pieces add charm and balance.
Arms (make 2):
- Round 1: Magic ring with 5 sc.
- Rounds 2 to 5: Single crochet in each stitch (5 sc).
- Flatten lightly, no stuffing needed. Fasten off with a sewing tail.
Legs (make 2):
- Round 1: Magic ring with 6 sc.
- Rounds 2 to 6: Single crochet in each stitch (6 sc).
- Stuff lightly. Fasten off and leave a tail.
Building the Skateboard
The board makes this design stand out. Low-key, it’s the coolest part.
- Chain 9 with your deck color.
- Single crochet back along the chain, then around both sides to form an oval deck.
- Continue for two or three rounds to build a flat, sturdy base.
- For wheels, make four tiny magic rings with 6 sc each, then close them into little discs.
- Sew the wheels under the deck in two pairs.
Adding Facial Details
Bring your skater to life with simple stitches.
- Embroider a small smile under the eyes.
- Add two pink cheeks using a few satin stitches.
- Optionally, stitch tiny eyebrows for extra attitude.
Keep the details soft and centered. A little face goes a long way here.
Assembly Process
This is where everything clicks into place.
- Sew the head onto the body using your yarn needle.
- Attach the arms to each side of the body.
- Position the legs at the base so they reach the board.
- Place the skater on the skateboard and stitch the feet down.
- Secure everything with firm, hidden stitches.
Take your time aligning the pieces. Good placement makes the toy look professional.
Finishing Touches
Almost done! Now add the final flair.
- Weave in all loose yarn ends.
- Attach a keychain ring to the top of the head if you want a charm.
- Add a tiny pom-pom or sticker detail on the board.
- Give the whole toy a gentle shape-up with your hands.
And just like that, your charming crochet skater is ready to roll.
Helpful Beginner Tips
A few smart habits make amigurumi so much easier. Keep these in mind as you work.
- Crochet tight stitches. Loose stitches let stuffing peek through. Aim for a dense, firm fabric.
- Use stitch markers. They keep your rounds organized and prevent miscounting.
- Stuff gradually. Add small amounts of fiberfill often, not one big lump at the end.
- Shape as you stuff. Press and mold each piece for a smooth, even finish.
These tiny tricks seriously level up your results.
Design Customization Ideas
Here’s the best part, ngl. You can make this skater totally your own. Mix and match these ideas freely.
- Switch up the colors. Try pastel tones, bright neons, or a cool monochrome theme.
- Add fun accessories. A mini cap, sunglasses, or a tiny scarf adds instant style.
- Try mini sizes. Use thinner yarn and a smaller hook for a keychain-sized version.
- Theme the board. Change wheel colors or add stripes for a custom skateboard look.
Honestly, every variation feels fresh, so don’t be afraid to experiment.
Frequently Asked Questions
What is the best yarn for amigurumi?
Cotton yarn is a favorite for amigurumi. It holds shape well and gives crisp stitch definition. Acrylic yarn also works great and feels softer and lighter.
How do I make my crochet Crochet Skater Board Toy firm?
Use a smaller hook than the yarn label suggests. This tightens your stitches naturally. Then stuff each piece firmly and evenly for a solid, plump finish.
How long does this project take?
Most beginners finish this skater in three to five hours. Experienced crafters often complete it in under two. The simple shapes keep things moving quickly.
Final Thoughts
You did it, or you’re about to! This crochet skater board toy proves that small projects can pack big charm. With basic stitches and a little patience, you create something genuinely special.
So go ahead, pick your favorite colors and start stitching. Share your finished Crochet Skater Board Toy with friends, gift it to a fan, or keep it as your new desk buddy.