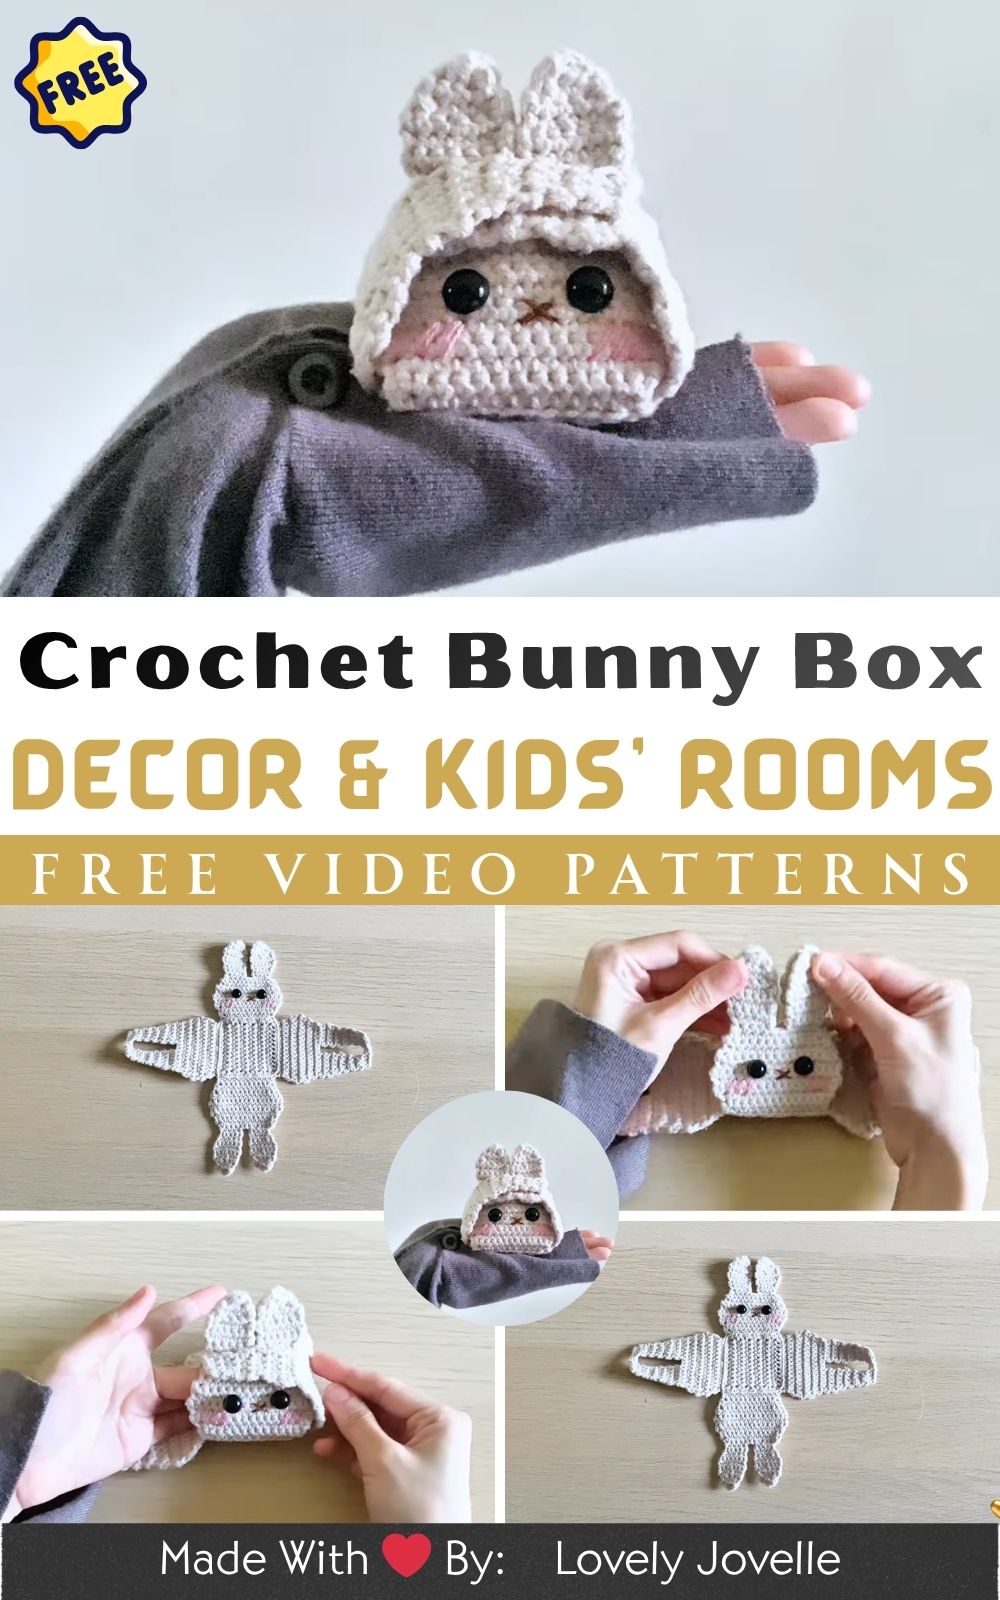
Make a Crochet Bunny Box with Lid Pattern for Gifts, Decor & Kids’ Rooms
There’s something truly magical about crocheting. From a single strand of yarn, you can create soft, adorable, and functional art with your hands and along the way, you get to experience the peaceful rhythm of stitches and the joy of watching something take shape from nothing. Whether you’re crafting for fun, gifting, or simply expressing yourself through yarn, every project is an opportunity to create something heartwarming and unique.
That’s exactly what makes today’s project extra delightful a Crochet Bunny Box with Lid Pattern that’s cute, customizable, and incredibly useful. This little crocheted box resembles a sweet amigurumi bunny, complete with floppy ears, a tail pom-pom, and a removable lid that turns it into a practical container for storing small treasures, treats, or trinkets. And when not in use? It looks like the perfect decoration for a nursery, shelf, or desk!
3. Materials & Tools
To create your crochet bunny storage box, you’ll need:
Yarn
Main color: Bunny body (white, gray, cream, or pastel)
Accent color: Inner ears, nose, or lid rim
DK, light worsted, or cotton yarn works beautifully
Tip: Cotton yarn gives structure and smooth stitches — perfect for box-shaped items. Acrylic is softer but may require tighter stitching.
Hook Size
3.0 mm – 3.5 mm crochet hook
(Use the hook size recommended on your yarn label or go down a size for tighter amigurumi stitches.)
Other Supplies
Polyester stuffing (for ears or optional tail)
6–10 mm safety eyes
Tapestry needle (for sewing and weaving ends)
Scissors
Stitch markers (to keep track of rounds)
Optional: Pom-pom maker (for tail)
Yarn Tips:
Go monochrome for a classic bunny, or mix pastels for a kawaii vibe.
Use self-striping yarn for a playful, textured box body.
4. Step-by-Step Crochet Instructions
This Crochet Bunny Box with Lid Pattern consists of separate parts that you can work in rounds and assemble at the end. The box and lid are worked in closed spirals, like traditional amigurumi.
Make sure to crochet tightly so your box holds its shape!
1. Making the Box Base
Start with a magic ring in the main color.
Work 6 single crochets (sc) into the ring.
Increase evenly each round until your circle reaches your desired diameter (usually around 48–60 stitches).
Continue working in rounds without increasing to build height (3–4 inches).
Fasten off and weave in your ends.
Tip: Use a stitch marker at the beginning of every round to avoid losing count.
2. Crocheting the Lid
Start just like the base, creating a flat circle the same diameter.
Once the width matches the box, switch to working 1–2 rounds without increases, but in the back loop only (BLO).
This creates a clean edge that helps the lid sit snugly over the box.
Build the lid height (about 1–1.5 inches).
Fasten off and weave in.
Pro tip: You can add a small ridge or chain stitch edge to help the lid stay in place.
3. Crocheting the Bunny’s Head
Work in continuous rounds, starting with the magic ring.
Increase evenly to form a spherical shape.
Insert safety eyes halfway up the sphere.
Add nose embroidery or a small triangle of felt.
Lightly stuff and close the shape.
Tip: Leave the bottom of the head slightly flat so it can rest on the lid.
4. Crocheting Bunny Ears
Make 2 long oval (teardrop-shaped) ears.
Use single crochet in rounds, folding and sewing at the base to give them shape.
Ears can be stuffed or left floppy.
5. Assembly & Positioning
Sew the head onto the top of the lid.
Attach ears evenly to the top of the head.
Add an optional pom-pom tail to the back of the box.
Add blush cheeks with pink yarn or felt circles for extra cuteness.
6. Finishing Touches
Add bows or flowers behind the ears.
Embroider a sleepy smile.
Add inner ear color for contrast.
Expert Tips
Use a small amount of stuffing to prevent bulging.
Stitch parts with matching yarn colors to keep joins invisible.
Add a cardboard insert at the box base for extra sturdiness (optional).
5. Customization Ideas
Make your Crochet Bunny Box one-of-a-kind with these ideas:
Rainbow bunny: Use multi-colored yarn for the body, and white for accents.
Holiday version: Add a Santa hat or snowflake embroidery.
Pastel fantasy bunny: Pink, mint green, lavender.
Kawaii bunny: Big cheeks, heart-shaped nose, shy embroidered eyes.
Bonus add-ons:
Tiny carrot
Lace bow
Crochet mini flowers
Name tag for personalized gift
6. Advanced Tips & Troubleshooting
Here’s how to take your bunny box to the next level (and keep your sanity while doing so!):
Use invisible decreases to keep shaping smooth.
Work BLO (back loop only) when making corners sharper.
Stuff lightly — too much stuffing can warp the shape.
Use a smaller hook size for tighter stitches.
Work with a consistent tension, especially in the lid portion.
Check lid fit frequently as you work — you can adjust stitch count if needed.
If the lid is loose, add a chain stitch edge inside.
Read abbreviations and stitch counts before starting each round.
Use stitch markers every round so you never lose your place.
Steam block finished pieces if they curl or buckle.
7. Care Instructions
To keep your bunny box fresh and cute:
Hand wash gently in cold water with mild soap.
Lay flat to air dry — do not wring or flatten.
Keep away from harsh sunlight to prevent fading.
Spot-clean if used for storage (cookies, toys, gifts).
Store in a dust-free shelf or display cabinet.
8. Display & Gift Ideas
This Crochet Bunny Box with Lid Pattern is perfect for so many sweet situations!
Store hair accessories, pins, or toys in kids’ rooms.
Use as an adorable desk organizer for paper clips and washi tape.
Fill with treats on Easter, baby showers, or birthdays.
Add to nursery décor for a soft, cozy aesthetic.
Gift with candies, tea bags, or love notes inside.
9. Benefits Section
Creating a Crochet Bunny Box with Lid Pattern promotes:
Relaxation and mindfulness through repetitive stitching
Stress relief while focusing on small, joyful tasks
Deep satisfaction in seeing a finished piece come to life
Eco-friendly gifting that replaces mass-produced plastics
Emotional connection through something handmade with love
10. Photography & Social Media Tips
Capture your finished bunny box in all its cuteness and share it with the crochet world!
Take photos in natural light near a window works great
Add props like yarn balls, crochet hooks, or flowers
Choose a light and soft background (matte white, pink, or woodgrain)
Feature the bunny in action (with items inside or with lid open)
Get detail shots of the ears, face, and box texture
12. Conclusion
Making something by hand is a slow and beautiful act of love and when it turns out as adorable and useful as this Crochet Bunny Box with Lid, it’s even more rewarding! Whether you’re crocheting for yourself, crafting with a purpose, or working on a heartfelt gift, this project offers playful stitching, stress relief, and an end result full of joy and personality. Don’t just store things store them in a bunny that makes hearts melt!
So grab your hook, turn on your favorite playlist, and stitch up a silly, sweet, and functional friend. You’ll be amazed at how something so simple can bring so much happiness.