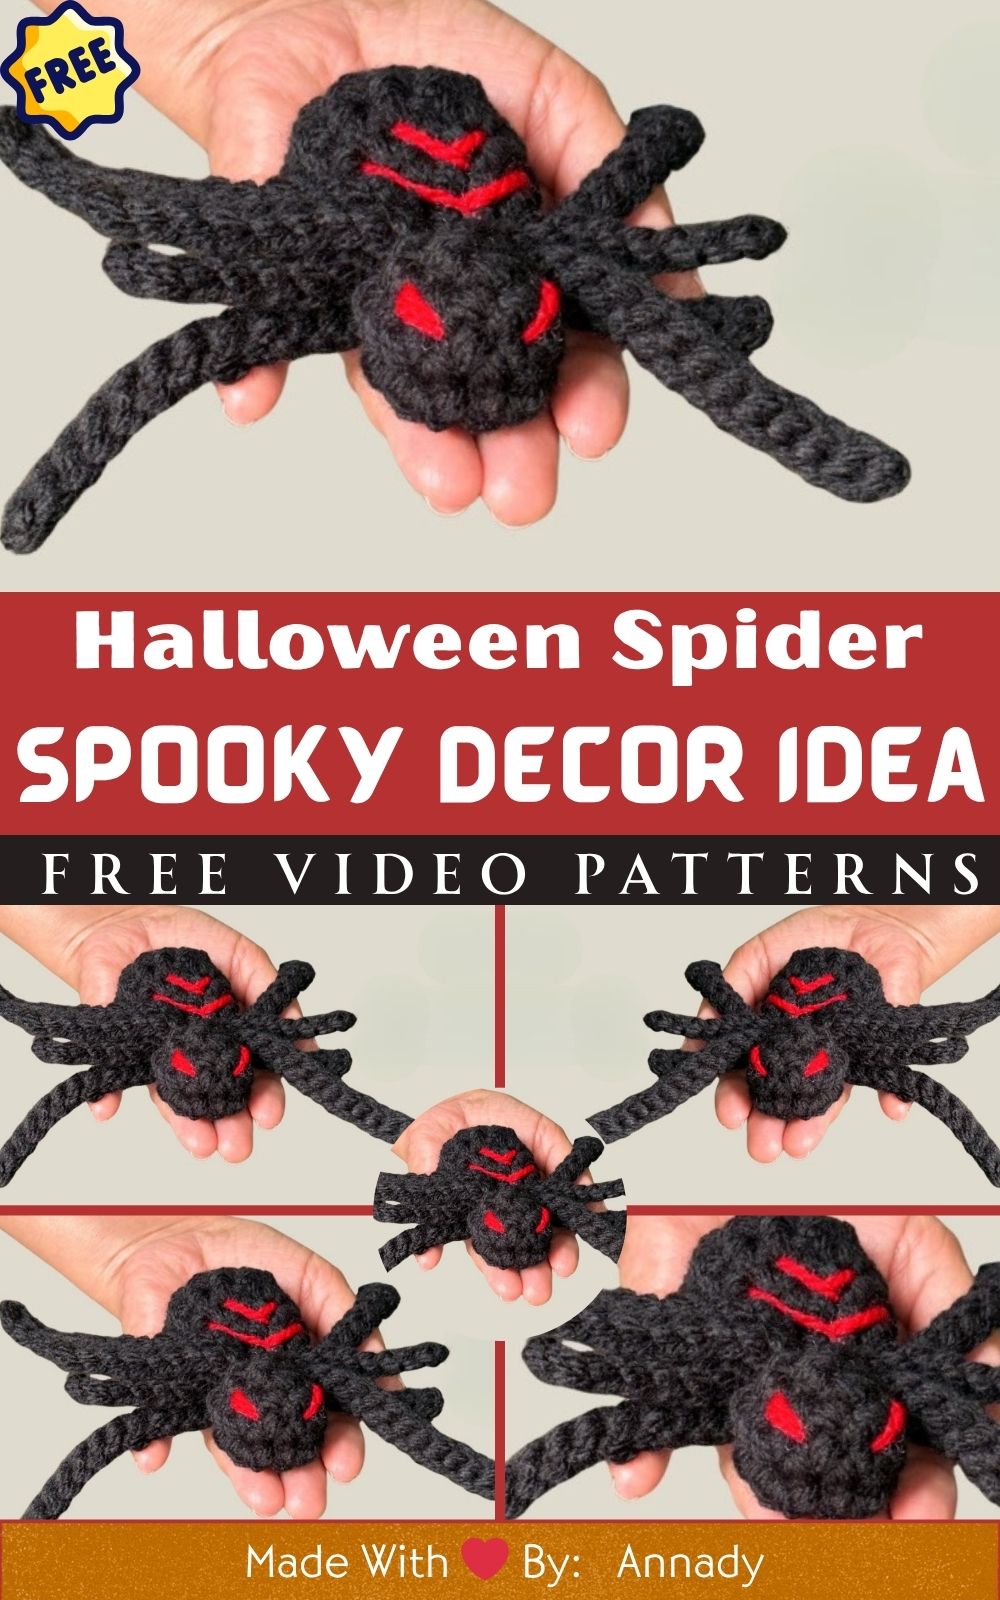
Crochet Halloween Spider Amigurumi Pattern – Easy Spooky Decor Idea
There’s something extra magical about Halloween the season of pumpkins, cobwebs, and all things cute-but-creepy! If you’re searching for a quick and adorable way to decorate your home this spooky season, you’ll love this Crochet Halloween Spider Amigurumi. It’s fun, fast, and oh-so satisfying to make whether you’re crafting it for your desk, your party setup, or as a friendly “spider” to hide in trick-or-treat baskets!
When I first crocheted this little spider, I honestly thought it might look scary. but the result was pure cuteness overload! With its chubby body, dangly legs, and cheerful face, it turned out to be more sweet than spooky. I couldn’t help but smile every time I saw it hanging from my Halloween garland.
The best part? It’s a super beginner-friendly crochet project that takes just a few hours. Perfect for using up leftover yarn and creating handmade decorations that everyone will talk about.
So, grab your hook, put on a cozy Halloween playlist, and let’s make this easy spider amigurumi pattern together one that’s spooky, soft, and 100% adorable!
Why You’ll Love This Pattern
This spider might just become your favorite Halloween craft ever! Here’s why:
Beginner-friendly: Simple stitches, minimal shaping.
Quick to finish: Make it in just 2–3 hours.
Uses scrap yarn: Great stash-buster project.
Perfect Halloween décor: Cute addition to any spooky setup.
Kid-friendly design: Safe, soft, and not scary at all!
Customizable: Try bright colors or glitter yarn for fun variations.
Handmade home accent: Ideal for garlands, shelves, or tables.
Creative gift idea: Great for Halloween goodie bags or classroom treats.
Photo prop perfection: Cute for seasonal Instagram posts.
Guaranteed to make people smile!
Materials & Tools
Here’s what you’ll need to crochet your spooky little spider:
Yarn:
Main color: Black, dark gray, or purple (worsted weight).
Accent color: White or orange (for eyes or accessories).
Hook: 3.0–3.5 mm crochet hook (adjust to your yarn).
Stuffing: Poly-fiberfill or soft toy stuffing.
Safety eyes: 6–8 mm, or embroider eyes for a baby-safe version.
Extras: Yarn needle, scissors, stitch markers, optional pipe cleaners (for bendable legs).
Pro Tip: Cotton yarn keeps the shape crisp and clean, while acrylic gives a softer, fluffier look. Both work great just choose what matches your Halloween vibe!
Crochet Pattern – Step by Step
Let’s dive right into the fun part crocheting your spooky-cute spider!
1. The Body
We’ll make the spider’s round, plump body first.
Round 1: Start with a magic ring, work 6 single crochets (sc) into it.
Round 2: Increase in each stitch (12 sc).
Round 3: 1 sc, inc around (18 sc).
Round 4: 2 sc, inc around (24 sc).
Rounds 5–8: Sc around (no increases) to form height.
Round 9: 2 sc, dec around (18 sc).
Round 10: 1 sc, dec around (12 sc).
Round 11: Decrease until closed.
Stuff before closing completely.
You’ll now have a chubby spider body ready to decorate! I always smile when I reach this point it already looks like a tiny puffball of Halloween joy.
2. The Head
Cap off your spider with a slightly smaller ball for the head.
Magic ring: 6 sc.
Round 2: Inc in each stitch (12 sc).
Round 3: 1 sc, inc around (18 sc).
Rounds 4–6: Sc evenly for shape.
Round 7: 1 sc, dec around (12 sc).
Add safety eyes or embroider them before attaching the head. Stuff lightly, then sew to the body.
Pro Tip: Tilt the head slightly downward when attaching it gives your spider a playful, curious expression instead of a scary one!
3. The Legs (Make 8)
The most fun part — those wiggly spider legs!
Chain 12 (for long legs) or 8 (for short, cute ones).
Sc in 2nd ch from hook and back to start.
Fasten off, leaving a long tail.
Attach 4 legs on each side of the body. You can position them in pairs or fan them out for a dynamic look.
Want your spider’s legs bendable? Slip a thin wire or pipe cleaner inside before stitching them on.
4. Facial Details
Let’s bring your spider to life with a charming face!
Add two safety eyes or embroider ovals with white yarn.
Stitch a tiny smile using pink or red thread.
Optional: Add small white fangs or rosy cheeks for a cute Halloween touch.
I always like to give mine an endearing grin it turns from creepy-crawly to adorable décor instantly!
5. Optional Accessories
If you love adding a creative twist, try these:
Mini witch hat: Crochet a cone and sew it to the head.
Bow tie: Chain 12, sl st to make a loop, cinch center with yarn.
Pumpkin prop: Crochet a mini pumpkin for the spider to “hold.”
Web base: Chain a large circle and attach your spider to it for wall hanging.
These little extras make your Halloween spider the star of your seasonal setup!
Assembly & Finishing Touches
Attach head to body securely with a yarn needle.
Sew legs evenly, four per side. Bend slightly for lifelike pose.
Weave in ends neatly inside the body.
Adjust stuffing to keep it round but soft.
Add embellishments: A bow, ribbon, or sparkly thread for extra charm.
Pro Tip: Use pins before sewing to position everything symmetrically small adjustments make a big difference!
Once assembled, give your spider a gentle fluff and watch it “come alive.” Mine looked so cute hanging from my bathroom shelf that even guests complimented it!
Fun Ways to Use Your Crochet Spider
This versatile little creature fits into so many Halloween setups! Here are my favorite ways to show it off:
1. Halloween Home Decor
Hang it from your curtains, stick it on your wall with invisible thread, or perch it on your table centerpiece. It adds a fun spooky-cute touch to any room.
2. Garland or Bunting
Make a few spiders in different colors (black, orange, purple) and attach them to a string. Drape across your mantel or doorway instant festive vibes!
3. Photo Props
These spiders are perfect for flat lays, social media, or Halloween photo booths. Add mini pumpkins, candles, and fairy lights for a cozy spooky shot.
4. Trick-or-Treat Favors
Attach your spider to a treat bag or gift tag it’s the perfect handmade surprise for kids and friends.
5. Party Decorations
Scatter several spiders across the buffet table or hang them from balloons for a quirky Halloween twist.
Customization Ideas
You can have so much fun making this pattern your own! Here are some creative variations:
Classic Black Spider: Timeless, spooky, and elegant.
Pumpkin Orange Spider: Add small felt leaves to make it festive.
Purple Glitter Spider: Use metallic or sparkly yarn for shimmer.
Ghost Spider: White yarn + glow-in-the-dark eyes = instant hit!
Monster Spider: Use googly eyes or multicolored legs for a silly look.
Cute Pastel Spider: Pink, mint, or lavender yarn for kawaii décor.
Extra Touch: Add a tiny crochet web under it simple chains + slip stitches make the perfect spooky background!
Finishing & Assembly Tips
Want your spider to look polished and professional? Try these finishing tips:
Stuff evenly: Avoid overstuffing or the shape might bulge.
Sew tightly: Make stitches small and invisible for a clean look.
Block gently: Steam lightly if yarn curls.
Symmetry check: Make sure all 8 legs line up evenly.
Add gloss: A touch of fabric spray adds shine and keeps it dust-free.
Pro Tip: Store your amigurumi in a zip bag between seasons they’ll look brand new every Halloween!
Care & Maintenance
Even spooky spiders deserve some TLC!
Hand wash gently in cool water with mild soap.
Do not wring. Squeeze excess water out softly.
Air dry flat on a towel, reshaping while damp.
Keep away from heat (no dryers or irons).
Refresh with fabric spray before displaying again next year.
Final Thoughts
Every handmade spider carries a bit of Halloween spirit fun, creativity, and coziness all rolled into one.
What started as a quick seasonal project became one of my favorite annual traditions. Each year, I make a few new crochet spiders in different colors and scatter them around my home one on the mantel, one by the door, and one sitting proudly on my candy bowl. It’s such a joy watching guests smile when they notice these cute little creatures!
And the best part? They’re not just decorations they’re memories. A few hours of crafting, laughter, and relaxation that turn into something you can use year after year.
So, if you’re looking for a simple and fun DIY Halloween crochet project, this Crochet Spider Amigurumi Pattern is the perfect pick. Whether you hang it, gift it, or keep it as a pet that never bites, it’s guaranteed to make your Halloween feel more handmade and heartwarming.
Happy crocheting and have a fang-tastic Halloween!
FAQ
1. How long does it take to crochet a spider?
About 2–3 hours depending on your speed — perfect for a relaxing weekend project!
2. Can beginners make this pattern?
Yes! It uses only basic stitches like single crochet and increases/decreases.
3. What’s the best yarn for this project?
Medium-weight cotton or acrylic yarn works great — cotton gives more structure, acrylic is softer.
4. How do I make it hang from a web?
Simply attach a string or fishing line through the top and hang it anywhere you like!
5. Can I make different sizes?
Of course! Use a thicker yarn and larger hook for a big spider, or thinner yarn for tiny ones.