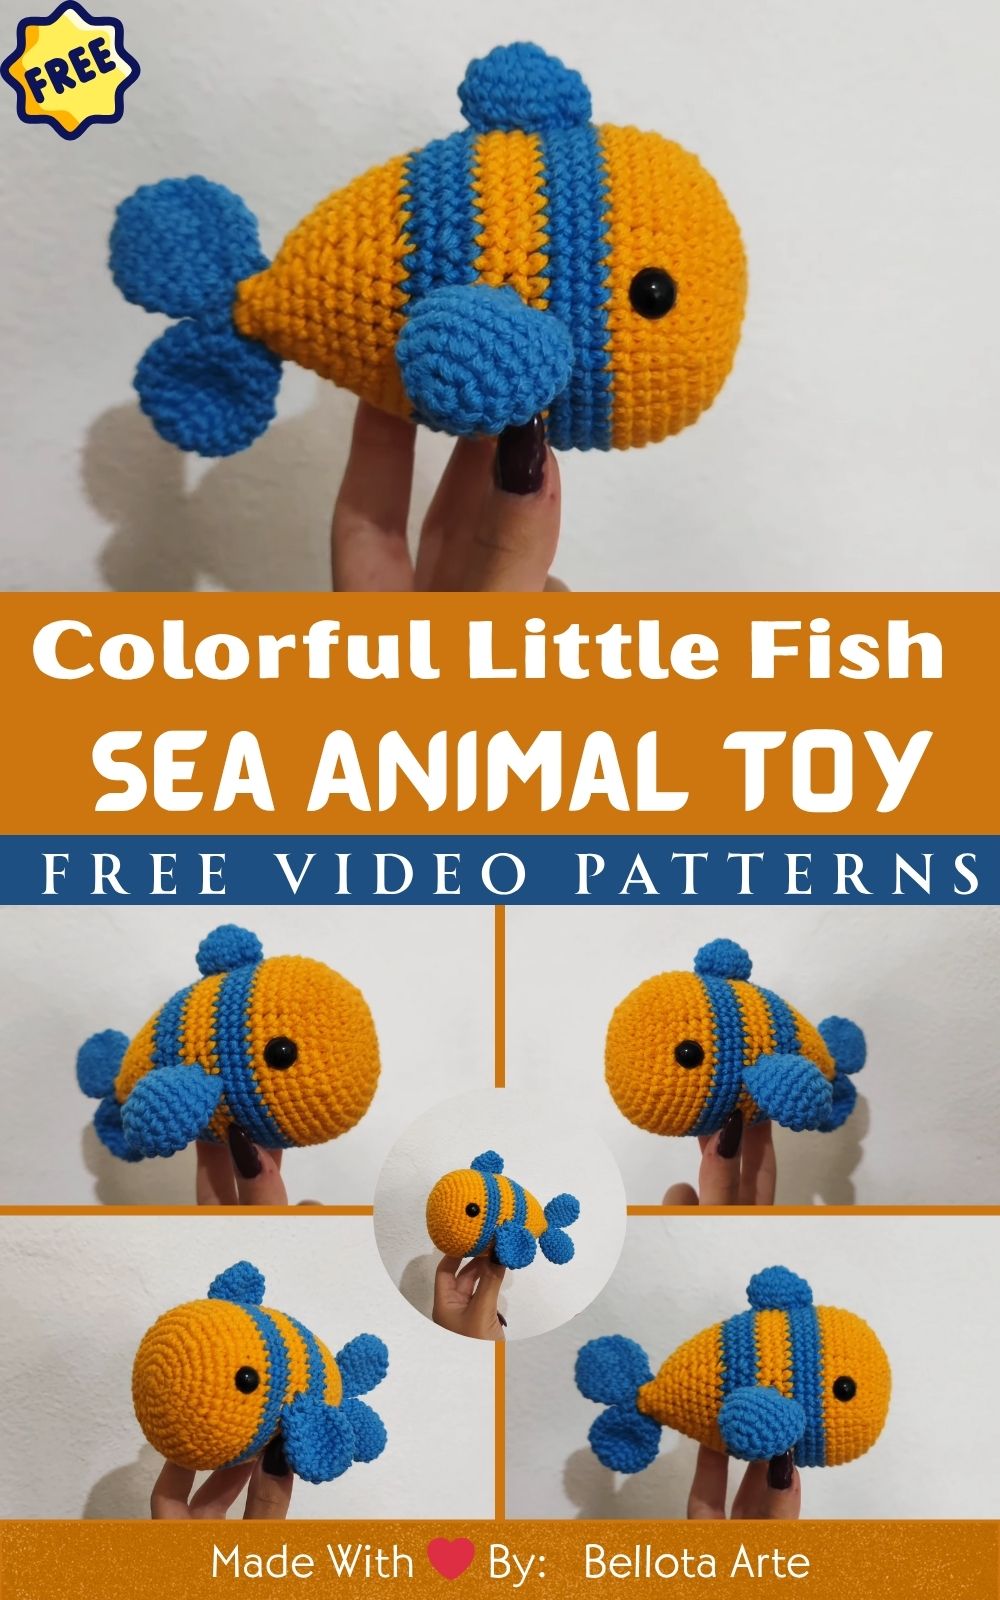
Crochet Colorful Little Fish Amigurumi Pattern – Easy & Cute Sea Animal Toy
There’s something magical about crocheting ocean animals they bring color, playfulness, and life to your handmade creations. This Crochet Colorful Little Fish Amigurumi Pattern is the perfect quick project to add a touch of seaside charm to your craft collection. Whether you’re an experienced crocheter or a beginner holding a hook for the first time, this cheerful fish is sure to brighten your day!
The pattern is beginner-friendly, works up fast, and is incredibly versatile. You can make it as a cute toy, a keychain charm, or even a decoration for a beach-themed nursery. Each fish you crochet can have its own personality bright and bold, soft and pastel, or even rainbow-striped!
What makes this amigurumi fish special is its simplicity. The stitches are basic, the rounds are short, and the shape is easy to form. Yet, when you finish it, the result looks professionally made perfectly stuffed, neatly shaped, and full of joy.
Inspired by the YouTube tutorial linked above, this guide gives you a clear step-by-step pattern, helpful pro tips, and fun creative ideas so you can crochet your own underwater friends in no time. Let’s dive right in!
Materials & Tools You’ll Need
Before you begin, prepare all your supplies. Most of these are items you already have in your crochet kit!
| Item | Description |
|---|---|
| Yarn (3-4 colors) | Lightweight cotton or acrylic yarn (DK or sport weight). Choose vibrant colors — blue, yellow, orange, pink, green — for a tropical feel. |
| Crochet Hook | 2.5 mm or 3.0 mm hook works best for small amigurumi. |
| Polyfill Stuffing | To fill the fish and give it shape. |
| Stitch Marker | Helps mark the start of each round. |
| Scissors | For trimming yarn ends. |
| Yarn Needle | To sew parts together. |
| Safety Eyes (6 mm) | Optional you can also embroider eyes with black thread. |
| Keychain Ring (Optional) | If you want to turn your fish into a keychain or bag charm. |
Pro Tip: Cotton yarn gives your fish a clean, polished look. Acrylic yarn makes it softer and fluffier — perfect for plushies!
Abbreviations (US Crochet Terms)
MR – Magic Ring
sc – Single Crochet
inc – Increase (2 sc in the same stitch)
dec – Decrease (single crochet 2 stitches together)
ch – Chain
sl st – Slip Stitch
st(s) – Stitch(es)
Rnd – Round
Step-by-Step Crochet Instructions
Step 1: Crochet the Fish Body
Rnd 1: With your main color (e.g., blue), make a Magic Ring and work 6 sc inside. (6)
Rnd 2: Inc in each st. (12)
Rnd 3: (1 sc, inc) repeat 6 times. (18)
Rnd 4: (2 sc, inc) repeat 6 times. (24)
Rnd 5–8: 1 sc in each st around. (24)
Rnd 9: (2 sc, dec) repeat 6 times. (18)
Rnd 10: (1 sc, dec) repeat 6 times. (12)
Stuff the body firmly with fiberfill.
Rnd 11: Dec around to close. (6)
Fasten off and close the hole with a yarn needle.
Tip: Keep your stitches tight so the stuffing doesn’t peek through.
Step 2: Crochet the Tail Fin
With a contrasting color (like yellow), ch 6.
Row 1: Starting from the 2nd ch from hook, work 1 sc, 1 hdc, 2 dc, 1 tr (treble crochet).
Turn and work on the opposite side of the chain: 1 tr, 2 dc, 1 hdc, 1 sc.
Slip stitch to join and fasten off.
Leave a long tail for sewing.
Sew the tail firmly to the back of the fish’s body. The tail should fan out slightly giving your fish that classic wavy look!
Step 3: Crochet the Side Fins (Make 2)
Using a different color (for contrast), ch 4.
Row 1: Work 1 sc, 1 hdc, 1 dc into the chain.
Turn and work 1 sl st back to the beginning.
Fasten off and leave a small tail for sewing.
Attach each fin to the sides of the fish’s body — one on each side, just behind where the eyes will go.
Step 4: Crochet the Top Fin
With another bright color, ch 6.
Row 1: Starting in 2nd ch from hook, 1 sc, 1 hdc, 2 dc, 1 tr.
Turn, ch 1, and slip stitch along the edge to create a curved finish.
Fasten off.
Sew the fin to the top of the fish’s body, slightly off-center for a playful look.
Step 5: Crochet the Bottom Fin (Optional)
If you want extra detail, you can add a small fin underneath.
Ch 4, work 1 sc, 1 hdc, 1 dc.
Fasten off and sew to the bottom of the fish.
This gives your amigurumi a full, 3D effect — perfect for display!
Step 6: Add the Eyes and Embroidery
Place safety eyes between rounds 5 and 6, leaving about 6 stitches between them.
If you prefer embroidered eyes, use black thread and make small round stitches.
You can also add a tiny smile or blush cheeks using a bit of pink yarn.
Pro Tip: Use pastel yarn for a cute, baby-fish vibe — or go bold with neon for tropical energy!
Step 7: Final Assembly
Check the placement of all fins — adjust before sewing permanently.
Secure each fin with tight stitches so they stay in place.
Hide all yarn ends inside the fish’s body.
Shape it gently by pressing and rolling it in your hands.
Your adorable Colorful Little Fish Amigurumi is now complete!
Turning It Into a Keychain or Toy
Want to make it extra functional? Here’s how!
For a Keychain: Attach a jump ring or small yarn loop on top of the head. Add a keyring or lobster clasp.
For a Baby Mobile: Make 4–5 fish in different colors and hang them with transparent thread from a circular frame.
For Kids’ Toys: Skip safety eyes and embroider them instead for safety.
Pro Tips for Beginners
Keep your stitches tight so stuffing doesn’t show.
Use stitch markers to track rounds.
Don’t overstuff — the fish should remain soft and slightly flexible.
Try gradient yarn for a natural, oceanic look.
Add glitter thread or shiny yarn for a “sparkling scale” effect.
Creative Variations
Rainbow Fish: Use leftover yarn scraps — change color every few rows.
Pastel Baby Fish: Perfect for nurseries or baby gifts.
Ocean Set: Make a whale, starfish, and seahorse to match your little fish.
Keychain Bundle: Create a mini ocean family — perfect for Etsy or craft fairs.
About This Pattern
Crochet patterns like this Little Fish Amigurumi are loved for their simplicity and charm. They take less than an hour to make and use very little yarn making them ideal for quick gifts or market-friendly products.
This design encourages creativity you can choose colors inspired by real fish (clownfish, betta, or goldfish) or create your own imaginative version. The mix of bright hues and soft curves makes it appealing to kids and adults alike.
Moreover, this project helps beginners practice basic amigurumi shaping: forming a sphere, attaching fins, and assembling parts. It’s a wonderful confidence booster and a stepping-stone to more complex crochet toys.
The finished size (using DK yarn and a 3 mm hook) is about 7–8 cm long small enough for keychains yet big enough to stand alone as a decorative piece. Lightweight, portable, and irresistibly cute!
Uses & Gift Ideas
Your handmade fish can be used in so many adorable ways!
Home Décor: Add it to a glass jar, beach-themed shelf, or children’s room.
Keychain Charm: Turn it into a daily companion that reminds you of your creativity.
Baby Mobile or Nursery Toy: Make a few in pastel shades for a soothing, ocean-themed mobile.
Party Favors: Perfect handmade giveaways for ocean-themed birthdays or baby showers.
Stress Reliever: Keep one on your desk — it’s small, squishy, and great for fidgeting!
Gift Idea: Pair it with a handwritten tag — “You’re o-fish-ally awesome!
No matter how you use it, this little fish will always carry a bit of handmade love and positivity.
Final Thoughts
Crocheting this Colorful Little Fish Amigurumi is pure joy — simple stitches, bright colors, and endless creativity. It’s one of those projects that reminds you why you love crochet: it’s relaxing, artistic, and incredibly rewarding.
Each tiny fish you create tells its own story — from the swirl of colors to the sparkle in its eyes. Whether you keep it for yourself or gift it to someone special, your handmade sea creature will always bring smiles.
So, cast your crochet hook into the ocean of creativity and start stitching your little fish today!