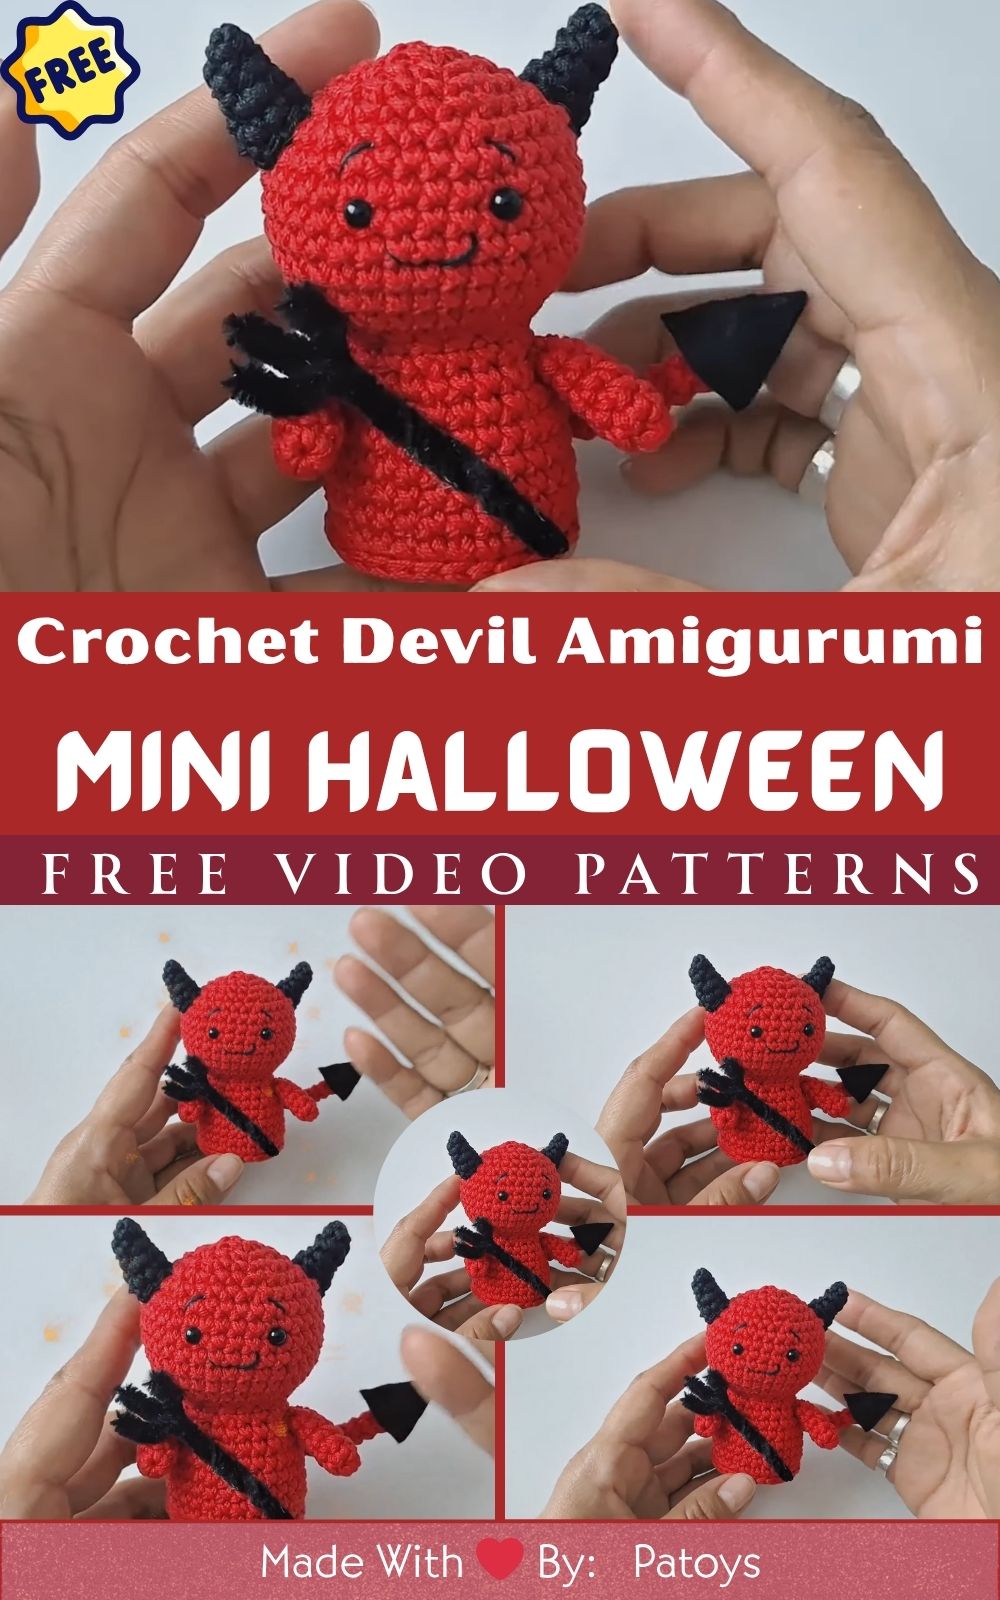
Crochet Devil Amigurumi Pattern – Cute Mini Halloween for Spooky Season
Halloween season is all about creativity, handmade charm, and a little bit of spooky fun! And what could be more delightful than making your own Mini Crochet Devil Amigurumi a cute, tiny red creature with tiny horns and a cheeky grin?
This project is perfect for both beginners and intermediate crocheters who want to add something unique to their Halloween decorations or handmade gift collections. Unlike store-bought plushies, your handmade devil has personality you decide how mischievous or adorable it looks!
Crocheting seasonal amigurumi toys has become one of the most loved crafts for DIY enthusiasts worldwide. The joy of creating something spooky yet cute, like this devil plushie, brings the magic of the Halloween spirit right into your hands. You can use it as a keychain, desk ornament, party favor, or even part of a Halloween wreath.
So, grab your yarn and hook it’s time to create your own devilishly adorable friend!
Materials & Tools You’ll Need
Before we start, make sure you have everything ready. Here’s your complete list of materials and tools for this Crochet Devil Amigurumi Pattern:
| Item | Description & Notes |
|---|---|
| Yarn | Red yarn for the body (DK or sport weight recommended), black yarn for horns & tail, white or beige for tiny details |
| Embroidery Thread | Black for mouth and details, white for eyes (optional) |
| Crochet Hook | 2.5 mm or 3.0 mm hook works best for amigurumi |
| Stitch Marker | To mark the start of each round |
| Scissors | For cutting yarn cleanly |
| Yarn Needle | For sewing parts together |
| Stuffing (Polyfill) | To make your devil plush soft and firm |
| Safety Eyes (6mm or 8mm) | Optional — or embroider eyes for a handmade look |
| Keychain Ring or Small Loop | If you plan to make it a keychain |
Tip: You can experiment with yarn textures — cotton gives a neat finish, while acrylic makes your plush slightly fluffier and more playful!
Abbreviations (US Terms)
Before you dive in, here are the crochet abbreviations used in this pattern:
MR = Magic Ring
sc = Single Crochet
inc = Increase (2 sc in same stitch)
dec = Decrease (single crochet 2 stitches together)
sl st = Slip Stitch
ch = Chain
st = Stitch
Rnd = Round
Step-by-Step Crochet Instructions
Step 1: Make the Devil’s Head
Rnd 1: Start with red yarn, make a Magic Ring and work 6 sc inside. (6)
Rnd 2: Inc in each stitch around. (12)
Rnd 3: (1 sc, inc) repeat 6 times. (18)
Rnd 4: (2 sc, inc) repeat 6 times. (24)
Rnd 5-8: Work 1 sc in each st around. (24)
Rnd 9: (2 sc, dec) repeat 6 times. (18)
Rnd 10: (1 sc, dec) repeat 6 times. (12)
Stuff the head firmly with fiberfill.
Rnd 11: Dec around to close. (6)
Tie off and weave in the end.
Pro Tip: Adjust the amount of stuffing to keep the shape round — not too tight or your stitches will stretch.
Step 2: Crochet the Devil’s Body
Rnd 1: With red yarn, MR, 6 sc. (6)
Rnd 2: Inc in each st. (12)
Rnd 3: (1 sc, inc) repeat 6 times. (18)
Rnd 4-8: 1 sc in each st around. (18)
Rnd 9: (1 sc, dec) repeat 6 times. (12)
Stuff the body with fiberfill.
Rnd 10: Dec around to close. (6)
Tie off, leaving a long tail for sewing.
Step 3: Crochet the Arms (Make 2)
Rnd 1: With red yarn, MR, 5 sc. (5)
Rnd 2-5: 1 sc in each st around. (5)
Do not stuff — leave them soft and flexible.
Fasten off and leave a long tail for sewing.
Step 4: Crochet the Legs (Make 2)
Rnd 1: MR, 6 sc. (6)
Rnd 2-4: 1 sc in each st around. (6)
Stuff lightly.
Fasten off with a long tail for sewing.
With black yarn, MR, 4 sc. (4)
Rnd 2: 1 sc in each st around. (4)
Rnd 3: (1 sc, inc) repeat twice. (6)
Rnd 4: 1 sc in each st. (6)
Fasten off and stuff slightly.
Sew both horns symmetrically on top of the head.
Step 6: Crochet the Tail
With black yarn, ch 15.
Work 1 sl st in each chain back to the beginning.
Add a tiny triangle tip by making 3 sc into one st, then slip stitch to finish.
Sew the tail to the back center of the body.
Step 7: Assemble the Devil
Sew the head to the body using a yarn needle and red yarn tail.
Attach arms and legs symmetrically.
Fix the horns on top of the head.
Sew or attach the tail at the back.
Insert safety eyes or embroider your own expressive eyes.
Use black thread to stitch a mischievous smirk or grin!
Customization Tip: You can add small wings, a pitchfork accessory, or glitter yarn to give your devil more Halloween flair.
Step 8: Turn It Into a Keychain (Optional)
To transform your devil plush into a keychain:
Sew a metal ring or small loop of yarn at the top of the head.
Add a split keyring or clip chain.
You can even make a set of these in different colors — red, black, purple — for spooky Halloween gifts!
Creative Ideas & Uses
Once your cute Crochet Devil Amigurumi is done, here are some creative ways to use it:
Halloween Decoration: Hang it on your Halloween tree or candy bowl.
Party Favor: A fun handmade gift for friends during spooky season.
Keychain: Add it to your keys or backpack for a unique, handmade charm.
Gift Topper: Tie it to a wrapped Halloween present for an adorable touch.
Desk Buddy: Keep it near your workspace for a fun and quirky vibe.
Mini Collection: Create a whole Halloween Amigurumi Series — ghost, pumpkin, bat, and devil!
Pro Tips for Beginners
Always keep your tension tight when making amigurumi — it prevents stuffing from showing.
Use a stitch marker to track rounds (especially for small shapes).
Don’t overstuff tiny parts like arms or horns — they should be slightly flexible.
Use cotton yarn for a crisp shape, or acrylic for a softer feel.
If you’re new to sewing parts, use pins first to position everything evenly.
Pattern Variation Ideas
Cute Couple: Make a red devil and a white angel version.
Tiny Accessories: Add a little heart, pitchfork, or mini hat.
Different Sizes: Use thicker yarn and bigger hooks for a plush-toy version.
Glow Yarn: Try glow-in-the-dark yarn for a true Halloween effect!
Why You’ll Love This Project
Fast and beginner-friendly
Uses minimal yarn — perfect scrap-buster project
Makes great seasonal gifts
Customizable and super fun to crochet
Adds handmade charm to Halloween décor
Final Thoughts
This Crochet Devil Amigurumi Pattern is the perfect blend of cute and spooky — ideal for beginners who want to enjoy Halloween crafting. With just a few materials and a bit of imagination, you can create an adorable handmade devil that spreads smiles (not scares!).
Whether you make it for decoration, gifts, or personal joy, this little devil is sure to charm everyone who sees it. So put on your favorite playlist, grab your hook, and let your creativity shine this spooky season!