Easy Crochet Twisted Garland Pattern for Christmas decor
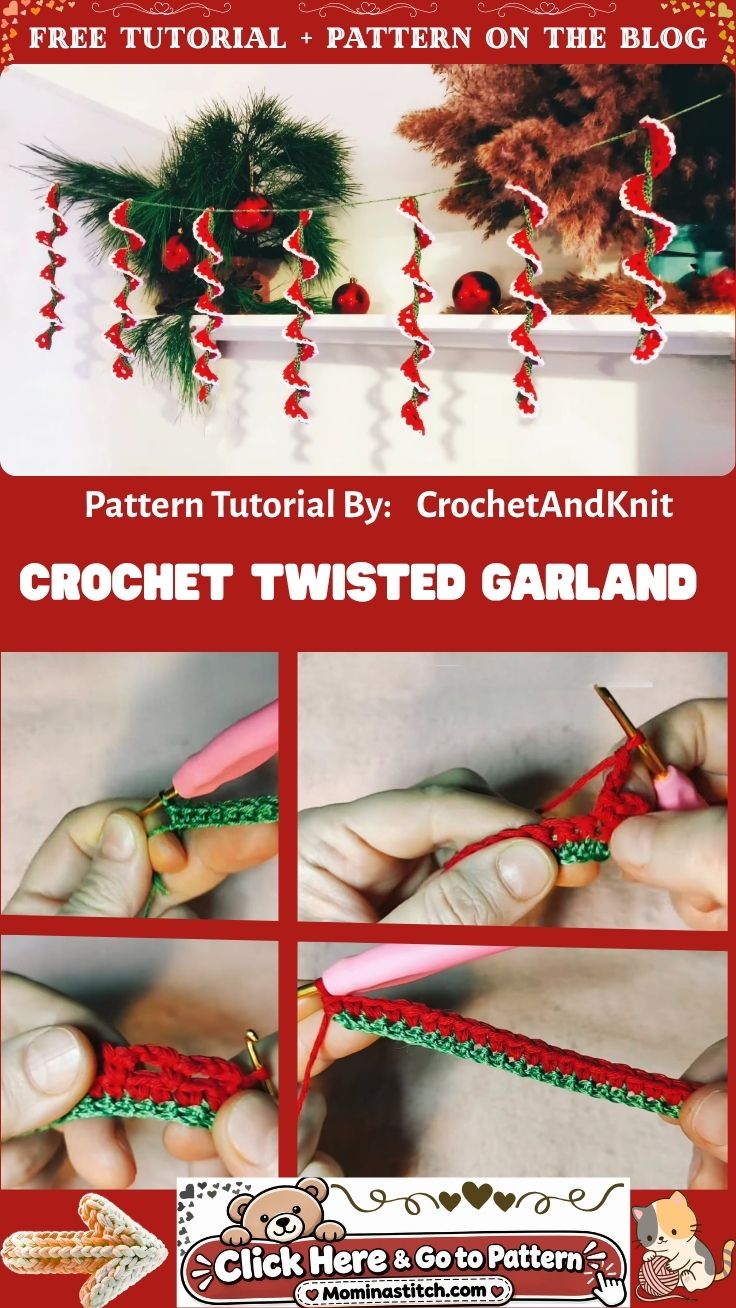
Two contrasting yarn colors twist into a single candy-striped cord in this design. The Easy Crochet Twisted Garland Pattern for Christmas Decor turns that simple trick into a finished holiday accent. Crafters use this crochet twisted garland to dress up a mantel, staircase, or doorway in a single evening. It comes together fast once the overlay stitch feels familiar.
Readers will find a full materials list, the specific stitches used to build the cord and layer the contrast color, and step-by-step instructions for anchoring the yarn, working the overlay, and finishing the ends. Later sections cover common mistakes, simple fixes, styling ideas for mantels and staircases, and a few smart variations worth trying before starting a new holiday garland.
What You’ll Need
Building a crochet twisted garland takes only a few basic supplies. Most of them are probably already sitting in a craft bin.
- Worsted weight yarn in red and green, or any two contrasting colors
- A 4.5mm or 5mm crochet hook, adjusted to personal tension
- A yarn needle for weaving in loose ends
- Small, sharp scissors
- Stitch markers, useful for tracking segment lengths on longer garlands
- A measuring tape, since garlands are usually sized to a specific space
Skills You’ll Use
- Foundation chain and single crochet, which build the flat cord base
- Surface crochet, also called overlay stitching, which lays the second color across the finished base
- Color changes, since red and green strands get joined and dropped repeatedly
- Tension control, which keeps the twisted stripe looking even from end to end
What You’ll Learn
- Two-Tone Overlay Technique — layering a contrasting yarn strand directly onto a finished cord
- Cord Base Construction — building a flat, sturdy strip that keeps its shape once hung
- Color-Change Management — joining and carrying a second color without leaving stray tails
Time Needed
- Prep: 5–10 minutes for winding yarn and testing hook size
- Stitching: 45–90 minutes per finished yard, depending on hook speed
- Finishing: 10–15 minutes for weaving in ends and steaming the twist flat
Step-by-Step Process
Turning yarn into a finished crochet twisted garland feels simple in stages. Each step below matches an exact photo of the work in progress.
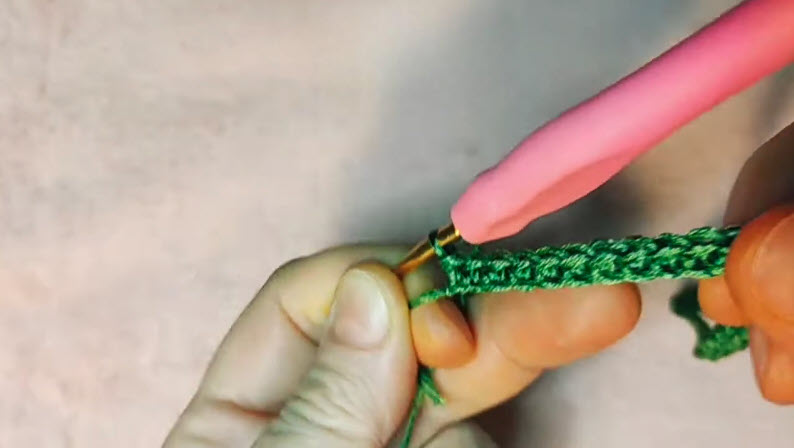
Step 1: Anchor the Contrast Color
Insert the hook into the end stitch of the finished green cord. Draw a loop of red yarn through to mark the color change. Leave a short tail hanging free instead of trimming it close. Weave it in later, once the overlay is finished.
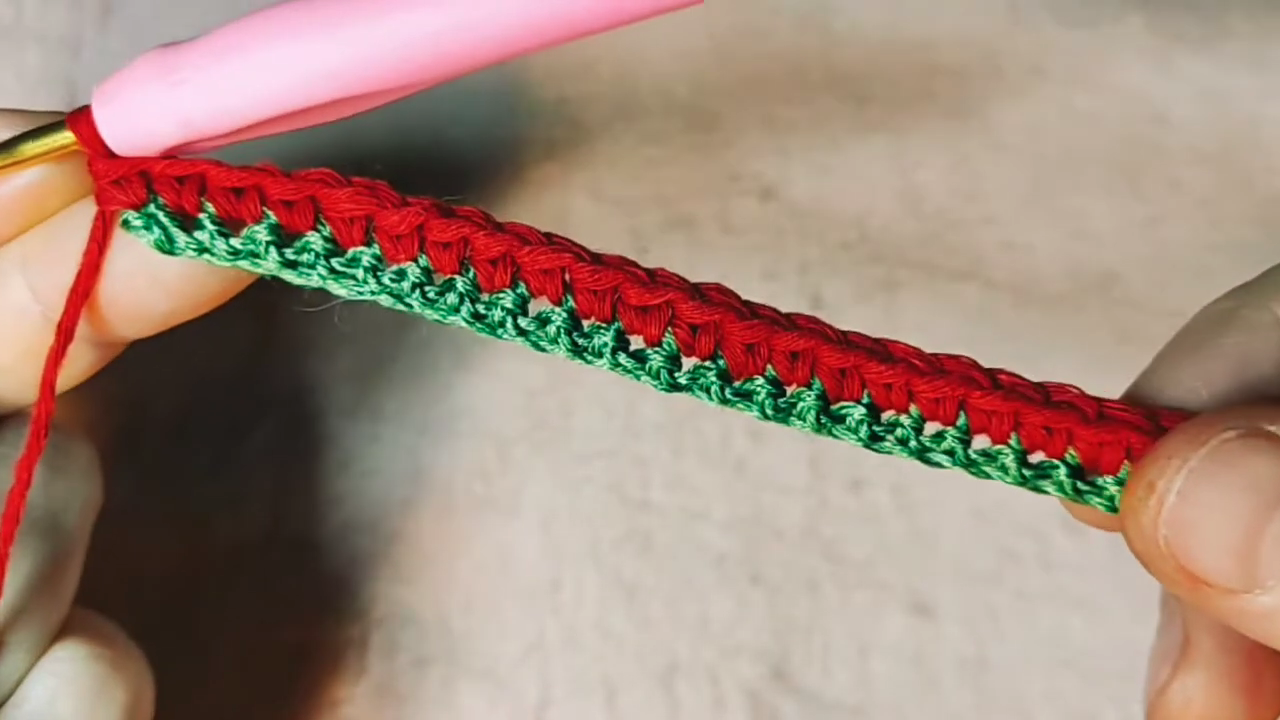
Step 2: Work the Overlay Across the Length
Draw the red strand across the full length of the green base. Keep each stitch snug so the color layers neatly on top. That tension keeps the strand from sinking between the green stitches underneath. Consequently, the twisted stripe stays crisp and visible from every angle.
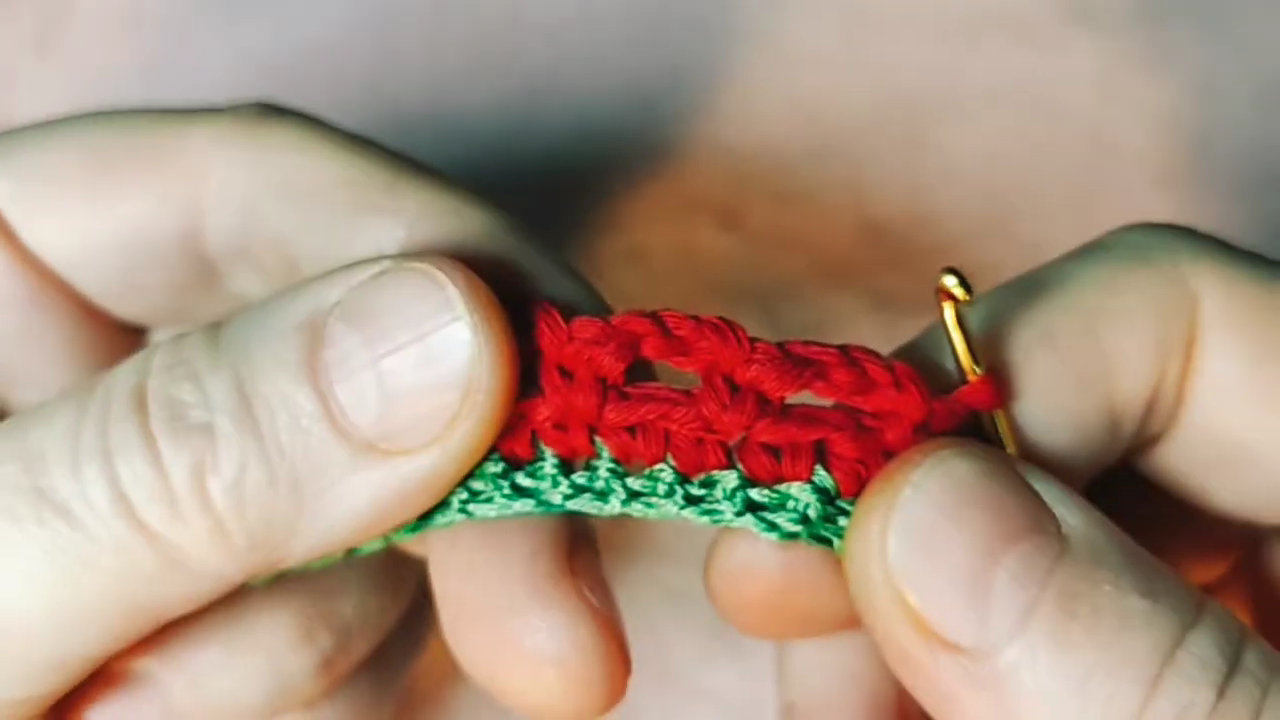
Step 3: Continue the Pattern to the End
Keep working red stitches toward the opposite end of the cord. Space each one evenly so the loops sit close together. Tight spacing closes off any visible gaps. The stitches interlock as the row builds, so the surface stays flat even after the garland gets coiled or draped.
Where People Go Wrong
Uneven tension causes most of the trouble with this pattern. A loose overlay stitch lets the green base peek through in patches. Skipping a length check partway through is another common misstep, since red and green rows often work up at slightly different speeds. Rushing the color join creates a third issue. A rushed join tends to slip loose after a few days of handling.
How to Fix Common Issues
A patchy overlay usually responds well to frogging back a few stitches. Rework them with slightly tighter tension the second time. When the garland ends up shorter than planned, add an extra chain segment. That extends the length without a visible seam, as long as the join lands at a color change. Loose color joins benefit from a quick whip stitch with the yarn needle. That small step secures the strand far better than a simple knot.
Finishing and Assembly Tips
Once the last stitch is set, weave every loose tail through several stitches on the wrong side. Skip the knots, since they tend to work loose over time. Steam the finished rope lightly with a handheld steamer to relax any curling. Let it rest flat until fully dry. Longer garlands assemble well from two or three shorter segments joined with a slip stitch. That approach keeps tension consistent across the whole piece, and it also avoids the sagging a single overlong strand can develop.
Creative Projects You Can Make With This Pattern
The same crochet twisted garland technique extends well beyond a single holiday strand. A shorter length can trim the brim of a crochet hat. It adds a candy-striped border without switching the whole project to two colors. A narrower version works nicely as a strap accent on a crochet bag, or as a wrapped handle for a market tote. Small offcuts shape into a bow-topped hair clip. Longer offcuts coil down into a mini wreath ornament for the tree. The cord stays flat and durable, so it tucks neatly along a stocking cuff or an advent calendar pocket.
Ways to Style or Display It
A finished garland drapes beautifully along a mantel. It also wraps around a stair rail or frames a doorway for a festive first impression. Shorter lengths loop around mason jars or wine bottles for a quick table centerpiece. Longer ones weave through a tree’s branches for texture that store-bought tinsel rarely matches. Pinning the twist along a window frame catches the light nicely once evening lamps come on.
Who This Pattern Is Great For
Confident beginners who already know single crochet tend to enjoy this project. The overlay stitch repeats often, so it becomes easy to memorize after a few rows. Crafters who sell handmade holiday goods often favor it too, because the finished garland photographs well and ships flat without much padding. Anyone decorating on a budget will also appreciate how little yarn a single length requires.
Smart Variations to Try
- Swap standard worsted yarn for bulky weight to create a chunkier mantel garland that fills space with fewer stitches
- Trade red and green for gold and cream to shift the look toward a neutral or winter-wedding palette
- Shorten the segments and loop the ends together for a wreath-sized accent instead of a full-length garland
Why It’s Popular Right Now
Handmade holiday decor has surged in popularity lately. More shoppers search for alternatives to mass-produced plastic garlands, and this Crochet Twisted Garland Pattern fits that shift neatly. It photographs well for social media. It also requires minimal yarn compared to larger projects, and it finishes quickly enough to fit into a busy December schedule.
- Sustainable appeal, since scrap yarn from other projects works perfectly for shorter lengths
- Strong gift potential, as a finished garland packs flat and ships easily
- Broad color flexibility, which lets crafters match existing holiday decor instead of settling for a fixed palette
Storage and Care Tip
Between seasons, coil the finished garland loosely rather than folding it. Sharp folds can crease the overlay stitches permanently. A breathable cotton bag or pillowcase keeps it dust-free. Unlike a sealed plastic bin, it will not trap moisture against the yarn.
FAQ
How long does a crochet twisted garland take to finish?
A single yard typically takes 45 to 90 minutes. A six-foot mantel length usually finishes within a few evenings of casual stitching.
Can beginners make this Crochet Twisted Garland Pattern?
Yes, as long as the crafter already knows how to single crochet. The overlay stitch simply repeats that same motion in a second color.
What yarn works best for the twisted effect?
Worsted-weight cotton or acrylic yarn holds its shape best. Bulky yarn also works well for a chunkier, more dramatic twist.
How should the garland be stored between seasons?
Coil it loosely and store it in a breathable bag. Tight folds or sealed plastic bins can flatten or crease the overlay stitches.
Conclusion
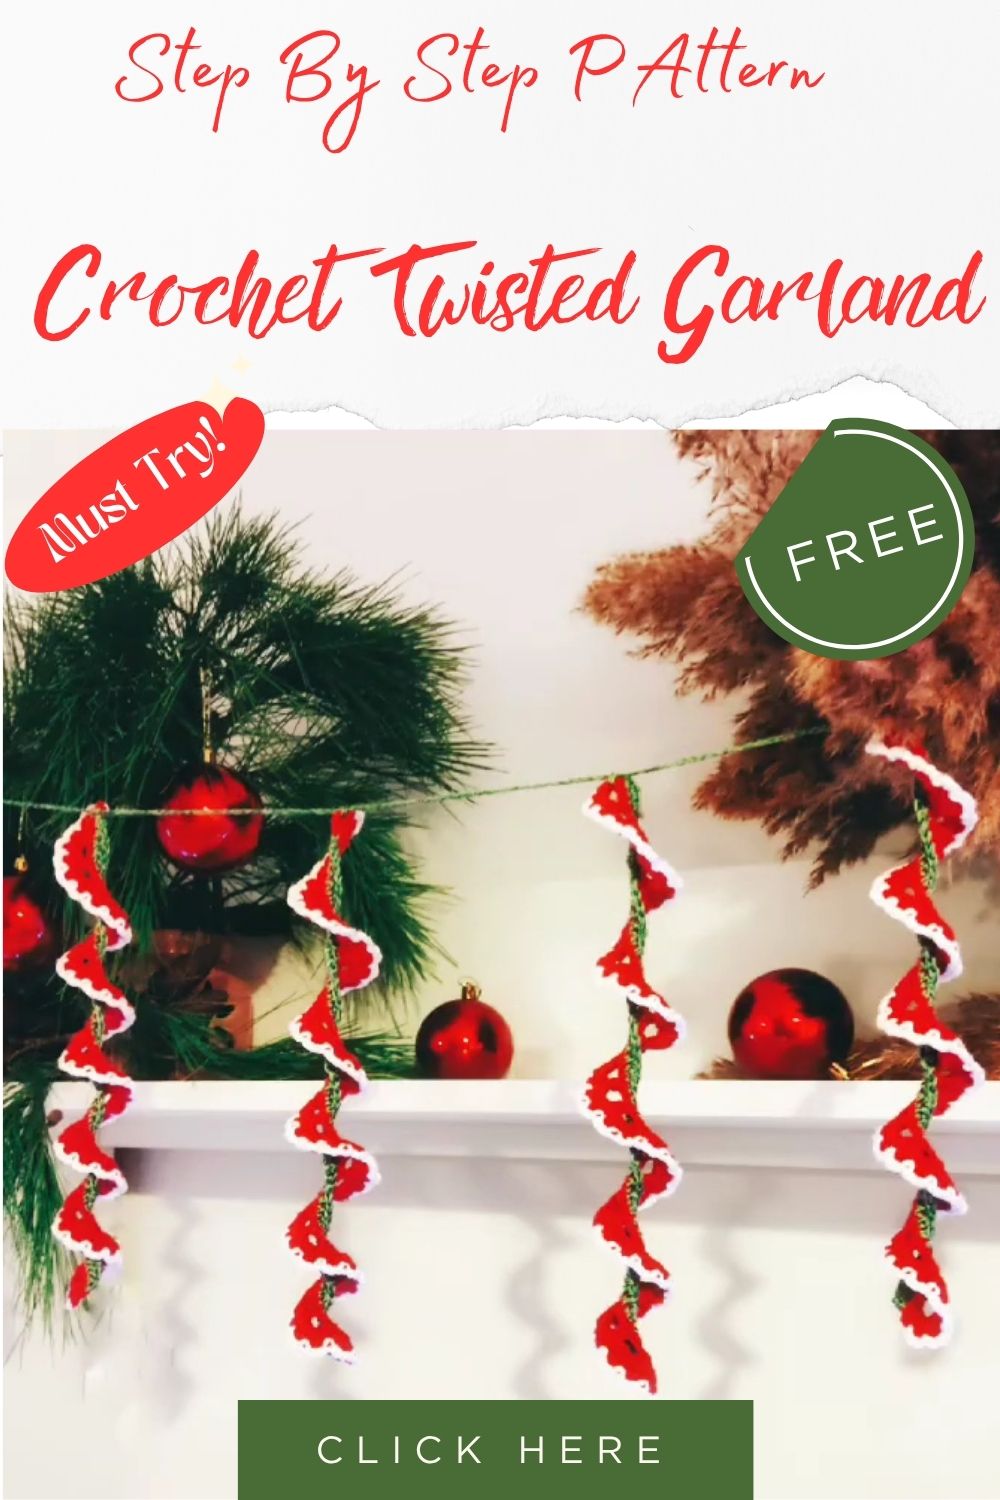
A finished Crochet Twisted Garland Pattern brings a handmade warmth that store displays rarely capture. The overlay technique behind it opens the door to plenty of other festive projects. Once the color-change rhythm feels natural, scaling the pattern up or down becomes simple. Few holiday projects deliver this much visual impact for such a modest yarn investment.