Crochet Envelope Clutch Bag Pattern With a Cute Star Closure For Rookies
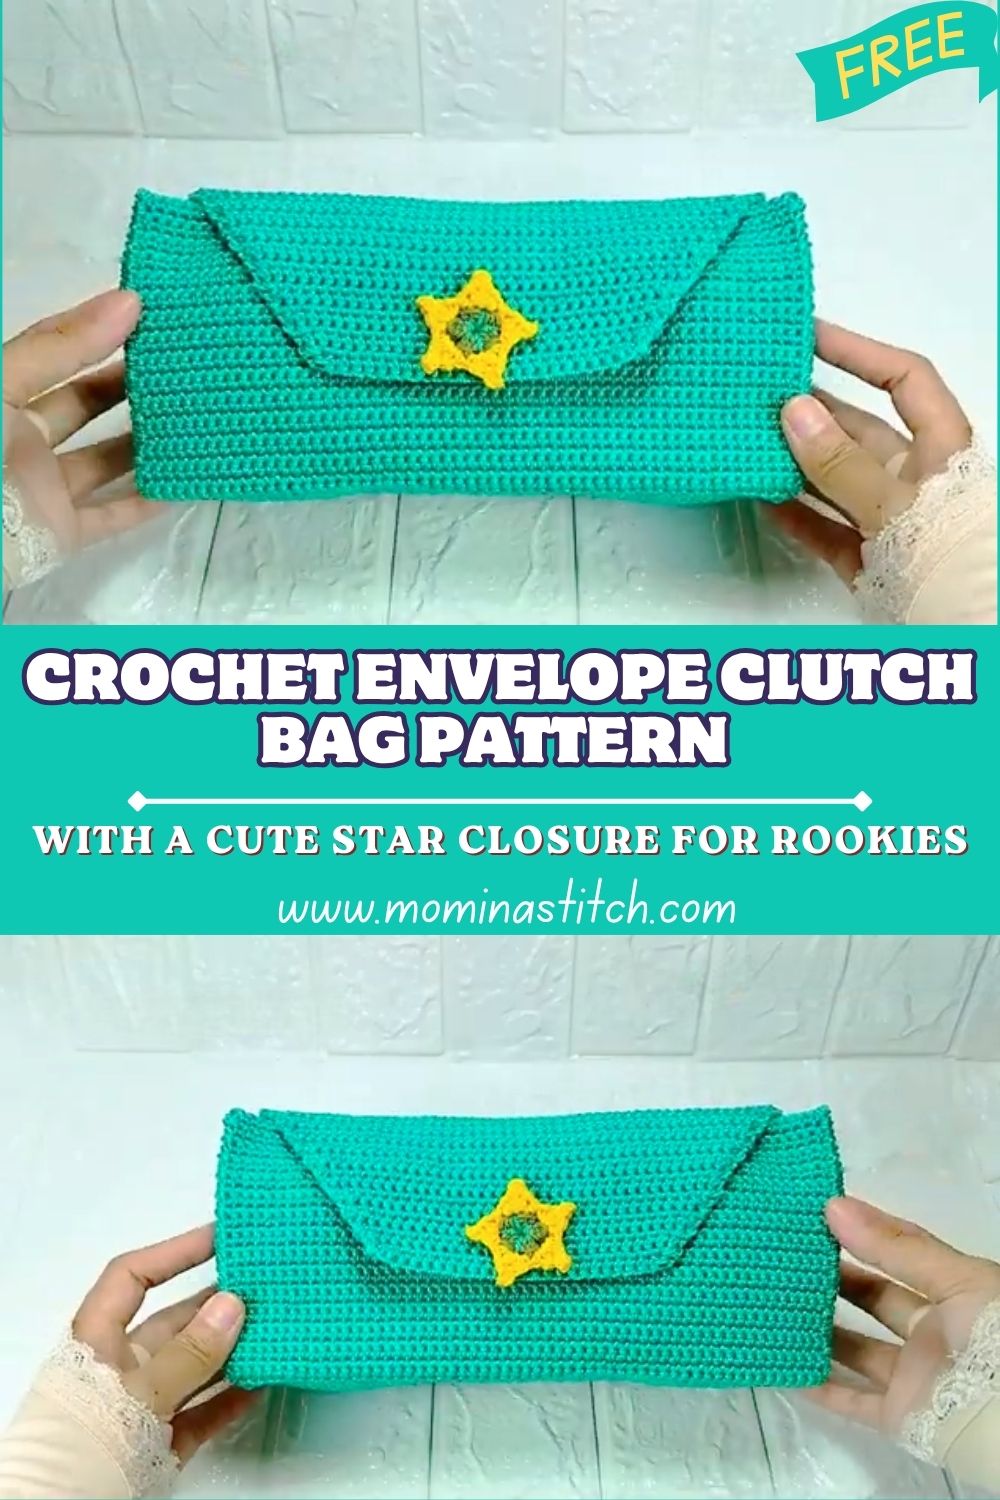
A stylish Crochet Envelope Clutch Bag brings that polished “put-together” look without feeling too fancy. The neat rectangle shape, fold-over flap, and pretty star closure make a simple design feel special for everyday errands, dinner plans, or celebrations.
This crochet clutch purse also makes a thoughtful handmade gift. The pattern uses simple stitches, clean edges, and a practical envelope fold perfect for anyone looking for a modern crochet bag with a soft, handmade touch.
A Crochet Envelope Clutch Bag is the kind of project that feels satisfying from the very start because the shape forms quickly. One flat rectangle becomes something useful with just a few folds and tidy seams. The style stays minimal and modern, so the finished clutch looks great in solid colors, soft neutrals, or bold statement shades.
Practical details make it even better. The envelope flap helps keep items from slipping out, and the size is easy to customize for a phone, cards, lip balm, and keys. Simple stitches like single crochet or half double crochet build a sturdy fabric, and the construction stays beginner-friendly because it is mostly straight rows with easy finishing steps.
Materials Needed (Exact Measurements)
- Yarn: Cotton yarn or acrylic yarn, 150 to 220 g total
- For DK weight: about 300 to 450 m
- For worsted weight: about 180 to 250 m
- Crochet hook: 3mm to 5mm (match yarn label, choose a smaller hook for firmer fabric)
- Button or decorative piece (optional): 1 button, 18 to 25 mm wide, or a small star appliqué
- Tapestry needle: 1
- Scissors: 1 pair
- Stitch marker: 1 (or a scrap of yarn)
Abbreviations (US Terms)
MR = magic ring
sc = single crochet
hdc = half double crochet
inc = increase
dec = decrease
sl st = slip stitch
ch = chain
rep = repeat
FO = fasten off
Skill Level
Beginner-friendly. This bag uses basic stitches, simple rows, and easy folding. Perfect for practicing even tension and neat edges without complicated shaping.
Finished Size
Approximate finished clutch size: 9 in wide x 6 in tall (23 cm x 15 cm) with flap folded down.
Size can vary depending on yarn weight, hook size, and personal tension. A thicker yarn makes a slightly larger and sturdier clutch.
Time Planning
Total estimated time: 2.5 to 4 hours
- Main panel: 1.5 to 2.5 hours
- Flap shaping: 20 to 40 minutes
- Assembly: 30 to 45 minutes
Important Notes Before Starting
- Keep stitches consistent. The cleaner the rows, the sharper the envelope looks.
- Use a slightly smaller hook than usual for a firm fabric that holds its shape.
- Count stitches at the end of each row to prevent the rectangle from drifting wider or narrower.
- Measure during the project. The best fit comes from checking the panel against the items meant to be carried.
- Place a stitch marker in the first stitch of each row, especially when working in sc, to keep edges straight.
Step-by-Step Pattern
This clutch is built from a single rectangle. Choose sc for a dense, structured fabric, or choose hdc for a slightly softer drape with faster progress. The steps below explain both options, so only one stitch style is needed.
Start by deciding the width of the clutch. A great beginner size is about 9 inches wide, worked with DK or worsted-weight yarn, and usually starts with ch 31-36. The exact number depends on the yarn and hook, so the best method is to chain until the piece measures the desired width, then add 1 turning chain for sc or 2 turning chains for hdc.
Next, work back along the chain. For the sc version, place 1 sc in the second ch from the hook and continue 1 sc in each ch across. For the hdc version, place 1 hdc in the third ch from the hook and continue 1 hdc in each ch across. Turn your work at the end of the row.
Then, keep building the rectangle in steady rows, for sc, ch 1, turn, sc across. For hdc, ch 2, turn, hdc across. Try not to pull the turning chain too tight, because tight edges can make the panel curl. Continue until the rectangle height measures about 18 to 20 inches (46 to 51 cm). This length allows the fabric to fold into an envelope shape with a front pocket, a back section, and a flap.
After that, check the fold before committing to flap shaping. Lay the rectangle flat and imagine it split into three parts: the bottom section becomes the pouch front, the middle becomes the pouch back, and the top becomes the flap. A simple guide is:
- Bottom section: about 6 to 7 inches (15 to 18 cm)
- Middle section: about 6 inches (15 cm)
- Top flap: about 6 to 7 inches (15 to 18 cm)
Adjust as needed based on what the clutch needs to hold.
To create the flap, keep the top part neat and slightly tapered. This step is optional, because a straight flap still looks great. For a gentle envelope point, start decreasing after the rectangle is long enough.
For a softly shaped flap, follow this simple decrease idea:
- Turn, work across until 2 stitches remain, then dec over the last two stitches.
- On the next row, dec at the start and dec at the end.
- Repeat these decreased rows until the flap narrows slightly, creating a tidy envelope feel.
Keep decreases subtly. A small taper looks clean and modern.
Then, finish the flap edge with a simple border. A quick border gives the clutch a crisp outline. Work 1 round of sc evenly around the flap and the rectangle’s outer edges. Place 3 sc in each corner to keep the edge flat. This border is especially helpful for beginners because it hides little uneven spots and makes the final piece look more professional.
Finally, FO leaving a long tail for sewing if that feels easiest. The main crochet portion is complete, and the fun transformation step begins.
Assembly
Lay the rectangle with the “right side” facing down. Fold the bottom section upward to create the pouch pocket, leaving the flap section free at the top. After that, fold the top section down to check how the envelope looks and confirm the flap hits the front where a closure will sit.
Next, seam the sides. Two beginner-friendly options work well:
- Slip-stitch seam: Hold the edges together and use the hook to sl st through both layers from the bottom up, creating a tidy braided seam.
- Sewn seam: Thread the tapestry needle and whip stitch the sides together for a flatter, cleaner edge.
Then, stop sewing where the flap begins, because only the pouch portion gets closed. Turn the clutch right side out and gently push corners into shape with a finger, not scissors, to avoid stretching yarn.
After that, attach the closure. A simple button looks classic. Sew the button to the front center of the pouch, about 1 to 1.5 inches (2.5 to 4 cm) below the flap edge. Create a small loop on the flap using chains, or sew a short yarn loop that slips over the button. A decorative piece, like a small star, can be stitched onto the flap for a cute finish while keeping the style minimal.
Finally, check alignment. Close the flap and confirm that the sides match, the button lines up, and the flap sits flat. Small tweaks are easier now than after all ends are woven in.
Finishing Touches
Weave in all ends using the tapestry needle, running yarn tails through several stitches in different directions for a secure hold. Smooth the clutch with your hands and gently shape the flap so it lies neatly.
Optionally block for an extra clean finish. Light steam blocking works beautifully for acrylic, and damp blocking works well for cotton. Keep blocking gently, because a clutch looks best when it stays firm and structured.
Beginner Tips
- Turn the work in the same direction in every row to keep the edges consistent.
- Count stitches every few rows so the rectangle stays truly rectangular.
- Use sc for a sturdier clutch, and hdc for a slightly softer, faster fabric.
- Add a simple border at the end to make edges look straight and intentional.
- Test the fold with a phone or wallet inside before seaming so the depth feels right.
Common Mistakes to Avoid
- Uneven edges: Often caused by missing the first or last stitch. A stitch marker helps.
- Loose stitches: A clutch needs structure, so slightly increase the tension or drop the hook size.
- Wrong measurements: Measure the panel length before shaping the flap and before seaming.
- Poor folding alignment: Always fold and pin or clip before joining sides to keep the pouch symmetrical.
Variations
- Different colors: Try a single neutral shade for a sleek look, or use color blocks for a playful clutch.
- Add a strap or handle: Attach a wrist strap with a short crocheted chain strap and strong stitching at the side seam.
- Use textured stitches: Moss stitch, waistcoat stitch, or simple ribbing adds texture while keeping the envelope style.
- Turn into a wallet or makeup pouch: Shorten the rectangle for a card wallet, or widen it slightly for a makeup bag.
Conclusion
A Crochet Envelope Clutch Bag is one of those satisfying projects that turns simple rows into something stylish and useful. The clean shape, easy folding, and beginner-friendly stitches make it a comforting make, and the size can be adjusted for everyday essentials in a snap. Pick a favorite yarn, take time with neat edges, and enjoy that moment when a flat panel becomes a polished little clutch ready to carry anywhere.