Crochet Bunny Amigurumi Pattern Idea With Long Ears for Absolute Beginners
Cozy stitches and a sweet little face come together in this Crochet Bunny Amigurumi that feels like a warm hug in handmade form. Soft texture, floppy ears, and a mini carrot make the whole project extra charming.
A simple crochet bunny pattern like this is a dreamy choice for anyone craving an amigurumi rabbit that works up small, neat, and giftable. The result is a cute crochet toy that also fits the vibe of a beginner crochet animal, especially with basic shaping.
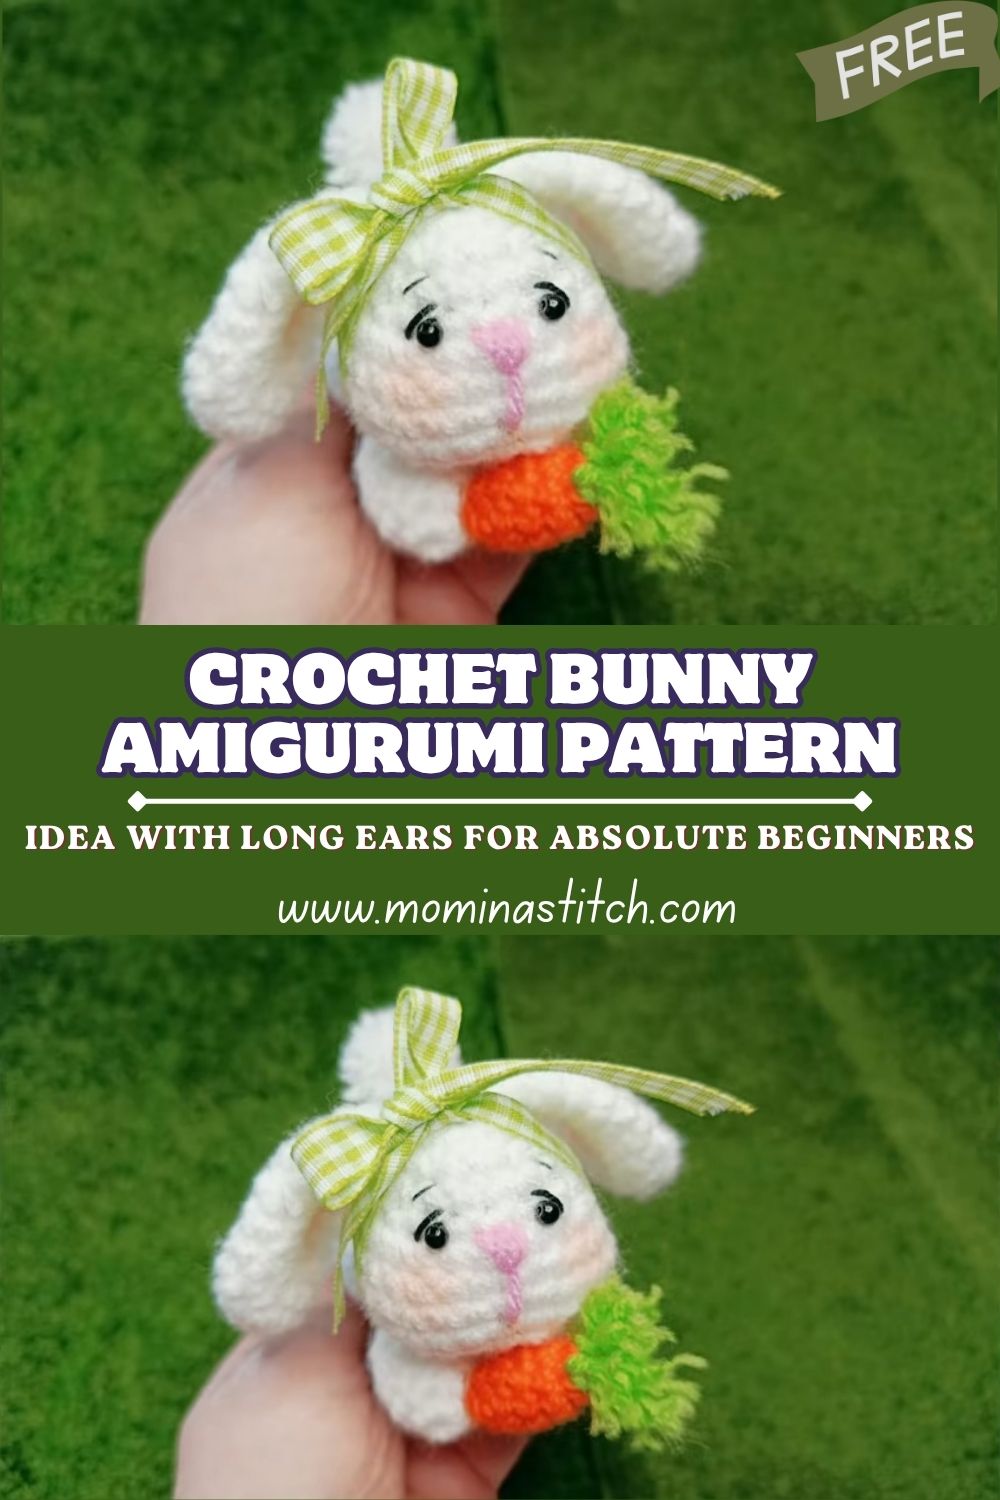
Soft and round with long, gentle ears, this bunny has that classic plush look that makes amigurumi so lovable. The body is compact and palm-sized, so progress feels quick, and the shaping stays simple. The face is kept minimal with subtle embroidery, which conveys a calm, sweet expression without the need for complicated details.
The little carrot accessory is the finishing touch that makes the bunny feel like a character. That pop of orange and green stands out against white or cream yarn, and it is perfect for spring baskets, Easter decor, or a small handmade gift. Amigurumi projects like this are popular because simple stitches create a cute result without feeling overwhelming, especially for beginners.
Materials Needed (Exact Measurements)
- Soft yarn (white or cream): 50–80 g (about 90–150 m, depending on plushness)
- Pink yarn (nose detail): 1–2 g (about 2–5 m)
- Orange yarn (carrot): 5–10 g (about 10–20 m)
- Green yarn (carrot leaves): 2–5 g (about 5–10 m)
- Crochet hook: 2.5mm–4mm (choose smaller for tighter stitches)
- Safety eyes (6–8 mm) or black yarn for embroidered eyes
- Stuffing (polyfill): about 20–30 g
- Stitch marker: 1
- Tapestry needle: 1
- Scissors: 1
Abbreviations (US Terms)
MR = magic ring
sc = single crochet
inc = increase
dec = decrease
sl st = slip stitch
ch = chain
rep = repeat
FO = fasten off
Skill Level
Beginner-friendly and easy to stitch, with lots of repeated rounds that help build confidence. The shaping relies on simple stitch patterns and basic counting.
This Crochet Bunny Amigurumi uses basic stitches like single crochet, increases, and decreases, making it a comfortable beginner project.
Finished Size
Small palm-size plush, great for holding in one hand or adding to a gift basket. Size changes depending on yarn thickness, hook size, and how tightly stitches are made.
Time Planning
Total estimated time: 2 to 4 hours (depending on speed and experience)
- Head and body: 60–120 minutes
- Ears: 30–45 minutes
- Carrot: 15–25 minutes
- Assembly: 20–40 minutes
Important Notes Before Starting
- Count stitches at the end of each row to keep the shapessmooth and even.
- Keep tension tight, especially with fluffy yarn, to prevent stuffing from showing through.
- Use a stitch marker in the first stitch of each round to avoid losing the round start.
- Make both ears the same length by counting rounds carefully and stopping at the same point.
- Stuff slowly and evenly, adding small pieces of polyfill to avoid lumps.
Step-by-Step Pattern (Smooth Flow)
This pattern is written in a beginner-friendly style and focuses on creating the same look: a round plush bunny body, long, floppy ears, a simple face, and a tiny carrot. Use continuous spiral rounds for the smoothest finish unless stated otherwise.
Start with the head using an MR. Work a small foundation of single crochets into the ring and tighten it firmly. Then begin increasing gradually over the next rounds to form a neat sphere. The goal is a round, full head with no corners, so spread the increases evenly across the round. Keep moving in spiral rounds and place a stitch marker to track the start.
Continue working even rounds for a short stretch once the head is wide enough. This “no increasing” section is what gives the head height. After that, begin decreasing gradually in a balanced way to close the head. Before the opening gets too small, add safety eyes or plan embroidered eyes. A sweet look usually comes from placing the eyes around the middle of the head with a few stitches between them. Then add a small amount of stuffing, packing it just enough to keep its shape but not so much that the stitches stretch.
Finish the head by continuing to decrease until the opening closes. FO and weave in the end neatly. A nice trick is to run the yarn tail through the front loops of the last few stitches, then pull tight for a clean closing.
After that, create the body either as a continuation from the head or as a separate piece. For a beginner-friendly approach, making it as a separate piece can feel easier because each part stays manageable in the hand. Start again with an MR, build up with increases to form a rounded base, then work a few even rounds to give it height. Begin decreasing slowly to shape a small plush body that matches the head in proportion. Stuff the body as the opening narrows, keeping the bottom slightly flatter so the bunny sits nicely. Close the body neatly and leave a tail for sewing.
Small legs help the bunny look extra cuddly without adding too much complexity. Create two front legs with a small round start, then work a few even rounds to make short tubes. Lightly stuff so the legs stay soft. Close and leave a yarn tail for sewing. For the hind legs, make two slightly different shapes that feel more “paw-like” by keeping them a little wider at one end and then tapering. Stuff lightly and close.
Then make two long bunny ears. Start each ear with an MR, and shape the base with gentle increases until it is slightly wider. Work several rounds evenly to create length. The ears should feel soft and a bit floppy, so avoid overstuffing. Many crocheters skip stuffing ears entirely, which keeps them flexible and sweet. Toward the top, decrease gradually to taper and close. Leave a long tail for sewing, since ears need a secure attachment.
No w create the tiny carrot using orange yarn. Beginwith ana MR and form asmallml rounded tip. Work in rounds and shape it slightly tapered, like a real carrot, by keeping the start narrower and then adding a little width. Add just a pinch of stuffin g so it holds its shape but stays small and cute. Close the top. For the leaves, attach green yarn at the top and create a few chain “sprigs”, then slip stitch back down for a simple leafy loo—FOO and weave in ends.
After that, add facial details with embroidery. Use pink yarn to stitch a tiny nose, usually a small triangle or a simple horizontal stitch. For the mouth, a small “Y” shape or two short lines looks gentle and baby-like. When using black yarn instead of safety eyes, stitch two small dots or tiny vertical stitches for a soft expression. Take time here because the face is what brings the bunny to life.
Assembly
Place the head on top of the body and pin it in place before sewing. Stitch around the neckline securely, pulling snug but not so tight that the head tilts forward. Attach the ears evenly on top of the head, checking symmetry from the front and the side. A helpful method is to line them up with the eyes so both ears look balanced.
Sew the front legs onto the body slightly forward, so the bunny looks like it can hug the carrot. Attach the hind legs lower and slightly to the sides to help the bunny sit. Finally, attach the carrot to the bunny’s hands or the front of the body. Take a moment to check all parts are symmetrical and secure, then knot and hide yarn tails inside the body.
Finishing Touches
Adjust the stuffing by gently pressing and shaping the head and body until the bunny looks round and smooth. Tug the ears a little to help them curve naturally. Hide all yarn ends neatly using a tapestry needle, weaving through several stitches so nothing pops out later.
Beginner Tips
- Use a smaller hook than the yarn label suggests to make tight amigurumi fabric.
- Move the stitch marker every round so the spiral does not drift unnoticed.
- Stuff with small bits of polyfill and spread it evenly to avoid bumps.
- Pin pieces before sewing so the placement looks right from every angle.
- Embroider the face slowly, testing placement with a strand of yarn before final stitching.
Common Mistakes to Avoid
- Loose stitches that show stuffing through the gaps
- Uneven stuffing that causes lumpy cheeks or a bumpy body
- Incorrect eye placement that makes the face look too wide, too high, or uneven
- Uneven ears from mismatched round counts or different tension
- Rushing assembly and sewing pieces without pinning first
Variations
- Try different colors: pastel bunny (mint, blush, lavender) or a classic brown bunny.
- Add a small bow or ribbon around the neck for an extra gift-like finish
- Turn it into a keychain by stitching a small loop on top of the head
- Make a mini version with thinner yarn and a smaller hook
- Make a larger version with plus,h bulky yarn for an extra squishy bunny
Conclusion
A soft Crochet Bunny Amigurumi like this always feels special because it turns a few basic stitches into something full of personality. The floppy ears, simple face, and tiny carrot make it look sweet from every angle, and the small size makes it perfect for quick gifting. Take time, count stitches gently, and enjoy the cozy rhythm of amigurumi, because every round brings the bunny closer to life.