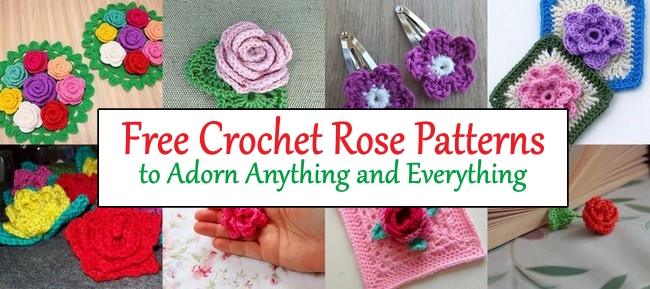
Crochet Rose Tote Bag in Cream & Burgundy Pattern + Cross-Stitch Rose Motif
Dreaming of a cosy, cottagecore-style crochet bag in cream with a deep burgundy border—and a cute rose on the front?
This beginner-friendly guide will show you how to crochet the bag with simple stitches, then decorate it with a rose using cross-stitch on crochet.
This handmade crochet shoulder bag / tote-style bag is the perfect project if you love simple stitches but want a “wow” result. We’ll crochet the bag body in a soft cream/off-white shade for that clean, cosy look, then add a deep red/burgundy border and strap to create a rich contrast that feels feminine and polished.

What makes this bag truly unique is the front design: a red rose with a green stem and leaves, stitched onto the crochet fabric using cross-stitch. The dense single crochet fabric works like a neat grid, so your rose motif looks like clean embroidery—beautiful, detailed, and very Pinterest-worthy.
The best part? This project is beginner-friendly because the bag is made mostly with single crochet and finished with slip stitches. It’s practical for daily use, stylish as a handmade accessory, and also a lovely gift for someone special.
What Makes This Crochet Rose Shoulder Bag Special
This bag stands out because it combines three beautiful elements:
- Cream/off-white crochet body for a soft, cosy, cottagecore base
- Deep burgundy border and strap for a rich, elegant contrast
- Cross-stitched rose motif on the front for a neat embroidered statement
You get a strong, practical bag made with simple crochet—and then you elevate it with floral cross-stitch that looks detailed but is still beginner-friendly.
Why Beginners Will Love This Project
- The bag is built from simple rectangles—no complicated shaping.
- The main stitch is single crochet, which is easy to learn and repeat.
- Dense stitches hide small beginner imperfections.
- The cross-stitch rose is added last, so you can finish the bag first and decorate when you feel ready.
Finished Look & Style Description
The final bag looks cute, feminine, cosy, and handmade—the kind of piece that instantly upgrades a simple outfit. The cream background makes the rose pop, and the burgundy strap gives the bag a boutique-style finish.
Shape, Texture, Size, Feel & Floral Motif
- Shape: tote/shoulder bag style with a clean rectangular body
- Texture: dense and structured (great for everyday use)
- Size feel: adjustable—fits phone, wallet, keys, small notebook, and more
- Motif: centred rose with green stem and leaves for a balanced, charming front design
Who This Bag Is Perfect For
- Beginners who want a wearable crochet project
- Crochet lovers who enjoy cute cottagecore aesthetics
- DIY fashion readers and Pinterest audiences
- Anyone looking to make a thoughtful, handmade gift
Best Occasions to Use This Bag
- Brunch, cafés, casual meetups
- Spring and summer outings
- Picnics and weekend markets
- Everyday errands (light essentials)
Why Cross-Stitch on Crochet Looks Beautiful on Bags
Single crochet fabric creates a subtle grid, so cross-stitch sits neatly on top. The result looks like clean embroidery, adding detail without changing the bag’s structure.
Crochet Construction vs Cross-Stitch Decoration
- Crochet = structure: panels, seams, border, strap strength
- Cross-stitch = decoration: rose, leaves, stem (surface design)
7) Materials Needed
Yarn Colors
- Main body: Cream/off-white
- Border + strap: Deep red / burgundy
- Rose: Red (bright red or burgundy)
- Leaves + stem: Green
Suggested Yarn Type
- Cotton or cotton-blend (recommended): stronger, less stretchy, perfect for bags
- Acrylic works too, but the strap may stretch more.
Hook Size
- Worsted/Aran weight (#4): 4.0 mm–5.0 mm
- For a dense fabric, 4.0 mm often works best (adjust for your tension).
Tools
- Yarn needle/tapestry needle
- Scissors
- Stitch markers
- Measuring tape
Optional (Recommended for a professional finish)
- Fabric lining (cotton)
- Magnetic snap or zipper
- Strap hardware (D-rings, sliders) or extra strap length for adjustability
8) Pattern Overview (Project Roadmap)
- Crochet the front panel
- Crochet the back panel
- Create side/bottom construction
- Join the panels into a bag shape
- Crochet the border in a contrasting colour
- Make the shoulder strap
- Cross-stitch the rose motif on the front
- Finish edges, weave ends, and add optional lining/closure
9) Step-by-Step Tutorial (Beginner Detailed)
Note: Stitch counts below are sample guidance. You can resize by adding/removing chains and rows. Just keep both panels identical.
Step 1: Choose Your Bag Size
Typical beginner sizes:
- Small shoulder bag: 24–28 cm wide, 22–26 cm tall
- Tote size: 30–34 cm wide, 28–32 cm tall
Step 2: Foundation Chain (Starting Cleanly)
- Make a slip knot with cream yarn.
- Chain to your desired width (sample): 41 chains.
- Add 1 turning chain (it does not count as a stitch in single crochet).
Tip: Keep your chain relaxed and untwisted. Count every 10 chains.
Step 3: Crochet the Front Panel (Dense Fabric)
Row 1:
- Single crochet in the 2nd chain from the hook.
- 1 single crochet in each chain across. Turn.
Row 2 and onward:
- Chain 1, single crochet across. Turn.
How to Maintain Neat Edges
- Mark the first and last stitch of each row.
- Don’t pull your turning chain too tight.
- Always check you’re working into the last stitch at the row end.
How to Make the Fabric Dense (Bag-Friendly)
- Use a slightly smaller hook (like a 4.0 mm hook) with worsted-weight cotton.
- Keep steady tension.
- If holes appear, go down one hook size.
Repeat rows until your panel reaches your desired height (sample: 45–55 rows, adjustable).
Step 4: Crochet the Back Panel (Make It Identical)
Use the same chain count and row count as the front panel.
Measure the finished front panel and match it exactly.
Step 5: Join Panels (Create the Bag Body)
Place panels together and align edges.
Strong Join (Single Crochet Seam)
- Use stitch markers to hold corners in place.
- Start at the bottom corner.
- Single crochet through both layers along one side, across the bottom, and up the other side.
- Leave the top open.
Corner tip: If it feels tight, add 1 extra stitch at the corner—do the same on both sides.
Step 6: Crochet the Border (Burgundy)
Attach the burgundy yarn to the top opening.
- Round 1: single crochet evenly around the opening.
- Round 2 (optional): slip stitch around for a clean, polished edge.
If the border waves, you have too many stitches. If it pulls tight, add a few.
Step 7: Make the Shoulder Strap (Comfortable + Strong)
Simple Strap (Single Crochet)
- Decide width: 6–10 stitches.
- Chain (sample): 8 chains, sc across.
- Repeat rows until length:
- Shoulder strap: 90–110 cm
- Crossbody: 110–130 cm
Attach Strap Securely
Sew strap ends to the bag sides using a box-shape + X stitch for strength.
Fold the strap end slightly before sewing for extra durability.
Step 8: Shape / Block If Needed
If edges curl, lightly steam (from a distance) or dampen and lay flat to shape.
Step 9: Finishing
Weave in all ends neatly. Add optional lining or closure if desired.
How to Cross-Stitch on Crochet (Beginner Guide)
Best Crochet Fabric for Cross-Stitch
Use tight single crochet. It creates an even surface and a grid-like structure that holds X stitches cleanly.
Why Even Crochet Stitches Matter
Cross-stitch depends on consistent spacing. Uneven tension makes the motif look crooked or stretched—especially with a flower shape.
How Rows Become a “Grid”
Single crochet stitches form small, repeated spaces. You can treat them like squares and place one X stitch per “grid space.”
How to Place the Rose on the Bag Front
- Lay the front panel flat.
- Find the centre point (width-wise and height-wise).
- Mark the centre with a stitch marker.
- Place the rose slightly above the middle for a balanced look.
Should You Start From the Centre or From a Graph?
For beginners, start from the centre of the rose:
- Make a small centre cluster
- Build petals around it
- Add stem and leaves last
Managing Red and Green Yarn Neatly
- Use shorter yarn lengths to avoid tangles.
- Finish the red rose head first, then start the green stem/leaves.
- Keep the back tidy by weaving ends as you go.
Don’t Pull Too Tight
Cross-stitches should sit smoothly on top of the fabric. If you pull too tight, the crochet panel will pucker and distort the rose.
Keeping the Rose Shape Clear
- Dense centre = flower depth
- Petals spread slightly outward
- Use the cream background as negative space to define the silhouette
Securing Ends Invisibly
Weave yarn ends through the back of nearby stitches in 2–3 directions. Avoid bulky knots if possible (or make tiny knots and weave more).
Common Beginner Mistakes (Cross-Stitch on Crochet)
- X stitches are facing different directions
- Pulling yarn too tight
- Motif placed off-centre
- Very long yarn tails (tangles + uneven tension)
- Bulky backside
Practical Tips for a Neat Floral Finish
- Finish one section at a time (ccentre→ petals → stem → leaves).
- Step back and look at the rose every few minutes.
- Keep X stitches consistent in direction and size.
How the Rose Motif Should Look (Easy Visual Guide)
Placement: Centred on the front panel with comfortable space around it.
A) Rose Head (Red Cluster)
- Start with a tight cluster: about 6–10 X stitches in a rounded shape.
- Add petals around the centre:
- Top: 2–3 stitches
- Left: 2–4 stitches
- Right: 2–4 stitches
- Bottom: 2–3 stitches
Total rose head: roughly 12–25 X stitches, depending on how bold you want it.
B) Shading / Depth (Optional)
With a darker red/burgundy, add 2–4 X stitches slightly off-centre in the rose head to give dimension.
C) Stem (Green)
From the bottom of the rose head, stitch a slim vertical line downward:
- 1 X per row (or every other row)
- About 10–18 X stitches long
D) Leaves (Green)
Add two small leaf clusters on the sides of the stem:
- Left leaf: 3–6 X stitches
- Right leaf: 3–6 X stitches
Make the middle slightly fuller than the ends to create a leaf shape.
Pattern Customisation Ideas
- Swap rose colours: pink, peach, lavender, or even white with outline
- Make a mini bouquet (2–3 small roses)
- Convert to a larger tote bag (wider panels)
- Make a shorter strap (classic shoulder style)
- Add fabric lining for strength and a clean interior
- Add a zipper or magnetic snap
- Add pearl beads centred on the rose or along the border.
- Add more floral motifs (tiny daisies, vines)
- Use pastel shades for a softer aesthetic
- Turn it into a gift bag or a light book bag
Styling Ideas (How to Wear It)
- Cottagecore: floral dress, soft cardigan, ribbon hair accessories
- Soft neutrals: cream/beige outfits, linen sets, simple tops
- Denim days: jeans + plain tee + rose bag as the statement
- Spring/summer: flowy dresses, light colours, picnic outfits
This bag instantly adds a cosy, handmade charm to any look.
Beginner Tips (Quick & Practical)
- Count stitches regularly (especially row ends)
- Keep tension even for a professional finish
- Test cross-stitch placement on a swatch first
- Weave ends securely—bags face more friction
- Reinforce strap joins (box + X stitch)
- Add lining if you plan to carry heavier items
Common Mistakes to Avoid (Troubleshooting)
Panels becoming uneven
Fix: Use stitch markers on the first/last stitch. Count rows and stitches.
Fabric too loose or holey
Fix: Use a smaller hook and tighter single crochet.
Strap stretching
Fix: Cotton yarn, wider strap, reinforce with surface slip stitch, add lining.
Cross-stitch looks crooked
Fix: Keep all X stitches in the same direction and don’t pull them tight.
Rose motif off-centre
Fix: Mark the centre of the panel before stitching.
Edges curling
Fix: Light blocking, adjust border stitch count, avoid overly tight tension.
Messy yarn ends
Fix: Weave in neatly; use shorter thread lengths; lining can hide the back.
Care Instructions
- Hand wash gently in cool/lukewarm water
- Use mild detergent
- Do not wring or pull harshly
- Reshape while damp and dry flat
- Store flat or hang carefully (avoid heavy stretching)
Conclusion
This cute rose shoulder bag proves that you don’t need complicated stitches to create something truly beautiful. With simple single crochet, you’ll build a strong, usable bag—and with cross-stitch on crochet, you’ll add a floral design that looks like delicate embroidery. Take your time, enjoy the process, and let your handmade rose bag become your new favourite everyday accessory.