Crochet Penguin Wearing a Funny Monster Hat Beginner Amigurumi Pattern
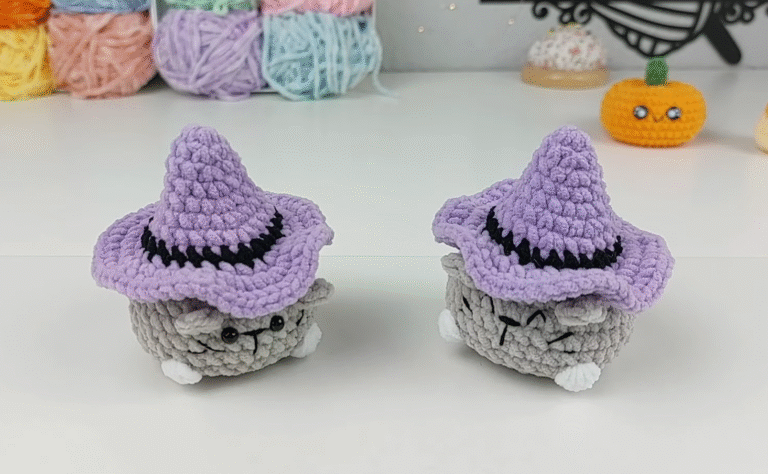
This Crochet Penguin Wearing a Funny Monster Hat amigurumi is a tiny, round plush with a white belly, orange beak and feet, and the silliest black monster hat with green eyes and goofy teeth. If you love beginner amigurumi patterns, crochet penguin toys, and quick handmade gifts, this project is a fun, approachable make that turns out incredibly cute.

Amigurumi crochet is the Japanese-inspired technique of crocheting small stuffed toys using tight single crochet stitches in the round. Penguins are a favorite amigurumi animal because their shape is naturally simple: a round body, a belly patch, tiny wings, and a little beak, perfect for beginners and fast makes. What makes this design extra special is the funny monster hat, which adds personality with bright green eyes and a row of imperfect “missing teeth.” This crochet penguin is ideal for winter crafts, holiday gifting, nursery decor, and handmade toys. It’s small, portable, and satisfying,g great for practicing shaping and cute facial details.
Materials Needed
- Grey yarn (penguin body)
- White yarn (belly patch + hat teeth)
- Black yarn (monster hat)
- Green yarn (monster eyes)
- Orange yarn (beak + feet)
- Crochet hook size: 2.5 mm–3.5 mm (use a smaller hook than yarn label for tight stitches)
- Safety eyes: 6–8 mm black
- Fiberfill stuffing
- Yarn needle
- Stitch marker
- Scissors
Optional: pink blush, black embroidery floss (for tighter nose/mouth lines), and white felt (if you prefer felt teeth).
Skill Level
Beginner to intermediate
- Beginner-friendly shapes (body, wings, feet)
- Intermediate touches: sewing parts neatly, hat details (eyes + teeth placement)
Crochet Abbreviations
- MR – Magic Ring
- sc – single crochet
- inc – increase (2 sc in the same stitch)
- dec – decrease (best: invisible decrease)
- sl st – slip stitch
- ch – chain
- hdc – half double crochet
Pattern notes:
- Work in continuous rounds unless noted.
- Use a stitch marker in the first stitch of each round.
- Stitch counts at the end of rounds are in ( ).
Step-by-Step Crochet Pattern
Penguin Body (grey)
This is a classic “round plush” shape.
- R1: 6 sc in MR (6)
- R2: inc x6 (12)
- R3: (sc, inc) x6 (18)
- R4: (2 sc, inc) x6 (24)
- R5: (3 sc, inc) x6 (30)
- R6: (4 sc, inc) x6 (36)
- R7–R11: sc around (36)
Insert safety eyes:
- Place eyes between R9 and R10, about 7 stitches apart.
- Make sure they sit above where the belly patch will go (center front).
- R12: (4 sc, dec) x6 (30)
- R13: (3 sc, dec) x6 (24)
- R14: (2 sc, dec) x6 (18)
- R15: (sc, dec) x6 (12)
- Stuff firmly and shape into a smooth ball.
- R16: dec x6 (6)
Fasten off, close the hole, weave in ends.
White Belly Patch (white)
This oval patch gives the penguin its classic look.
Option 1: Simple oval (beginner-friendly)
- Ch 7
- In 2nd ch from hook: sc, next 4 ch: sc, last ch: 3 sc (turn corner)
- Work on the other side of the chain: sc 4, last stitch: inc (or 2 sc) (approx. 14–16 sts total)
- Round 2: inc, sc 4, inc x3 around the curved end, sc 4, inc x2 around the other curved end
Fasten off with a long sewing tail.
Attach belly patch:
- Pin the patch centered on the front of the body.
- Sew around the edge with small whip stitches.
- Add a tiny bit of stuffing behind the patch if you want a “puffy belly” look.
Wings / Flippers (make 2, grey)
Small wings keep the penguin extra cute and simple.
- R1: 6 sc in MR (6)
- R2: (sc, inc) x3 (9)
- R3–R4: sc around (9)
Flatten the piece. - R5: sc 4 across to close (or sl st across), fasten off leaving a tail.
Placement: sew to the sides of the body, slightly below eye level (around mid-body).
Feet (make 2, orange)
Tiny flat feet help it sit and add character.
- R1: 6 sc in MR (6)
- R2: inc x6 (12)
- R3: (sc, inc) x6 (18)
- R4: sc around (18)
Flatten (no stuffing). Fasten off, leaving a long tail.
Attach feet:
- Sew to the bottom front, spaced evenly so the penguin can stand/sit.
- Tip: Stitch more securely at the back edge so the feet tilt slightly forward.
Beak (orange) – small triangle
- Ch 3
- In 2nd ch from hook: sc
- Next ch: sc (2 sc total)
- Ch 1, turn: sc 2 (optional, for a thicker beak)
Fasten off, leaving a tail.
Attach beak: centered between the eyes, slightly lower than the eye line, overlapping the top of the belly patch area.
Monster Hat (black)
Black Hat Base (black)
This fits like a snug beanie for the penguin head.
- R1: 6 sc in MR (6)
- R2: inc x6 (12)
- R3: (sc, inc) x6 (18)
- R4: (2 sc, inc) x6 (24)
- R5: (3 sc, inc) x6 (30)
- R6: (4 sc, inc) x6 (36)
- R7–R9: sc around (36)
Check fit:
- The hat should cover the top half of the penguin and sit above the eyes.
- If it’s too tight, add one more increase round to 42.
- If too loose, stop at 30 and work fewer rounds.
- R10 (edge): sl st around (optional neat edge).
Fasten off, leaving a long tail for sewing (or leave removable).
Monster Eyes (make 2, green + black/white details)
Green eye circles (make 2, green):
- R1: 6 sc in MR (6)
- R2: inc x6 (12)
Fasten off,f leaving a tail.
Pupils (optional):
- Embroider a small black dot in the center, or sew a tiny black circular French knot.
- Add a tiny white highlight stitch for a “sparkly” look.
Attach eyes to the hat:
- Sew eyes on the front of the hat, spaced slightly unevenly for a goofy monster charm.
- Place them above where the teeth will sit.
Funny Missing Teeth (white)
You can do this as a crocheted strip with “teeth bumps.”
Teeth strip (white):
- Ch 10 (adjust length to fit the hat front)
- Starting in 2nd ch from hook: sl st, sc, hdc, sc, sl st, hdc, sc, sl st, sc
- The mixed heights create uneven “missing teeth.”
- Fasten off, leaving a tail.
Attach teeth:
- Sew the strip on the front lower edge of the hat so it looks like a monster mouth.
- Don’t worry about perfect symmetry—wonky teeth are the whole joke.
Finishing Hat Shape (optional “monster top”)
If you want a slightly pointy/monster-y crown:
- With black yarn, stitch a few tightening stitches at the top center (like gathering) to make a little bump.
- Or sew a tiny nub:
- MR 6 sc, R2 sc around, fasten off,f and sew on top.
Assembly Instructions (step-by-step)
- Eyes first: Insert and secure the penguin’s safety eyes between R9–R10 before the body is fully closed (already done in body steps).
- Sew on belly patch: Center it on the front; stitch all around neatly.
- Attach beak: Sethe w beak between the eyes, slightly above the belly patch.
- Sew wings: Attach one wing to each side at mid-body.
- Sew feet: Attach to the lower front so the penguin can sit.
- Hat details: Sew green eyes and white teeth onto the black hat.
- Attach the hat:
- For a permanent hat: sew the hat onto the penguin head with a few hidden stitches around the edge.
- For a removable hat: weave in ends and simply place it on top (best if the fit is snug).
Finishing Touches
- Shape the penguin: roll it gently between your palms to smooth the stuffing.
- Add extra cuteness: lightly dab blush under the eyes or stitch two tiny pink lines on the cheeks.
- Check balance: if it tips backward, move feet slightly forward or add a bit more stuffing near the belly.
Beginner Tips
- Use a smaller hook than recommended to keep stitches tight (prevents stuffing from showing).
- Count stitches every round—amigurumi success is mostly counting.
- Invisible dec keeps the surface smooth and professional-looking.
- Pin parts before sewing (especially the belly patch and hat) so the face sits centered.
- Stuff gradually in small pieces for a clean, round shape.
Customization Ideas
- Different hat styles: swap the monster hat for a beanie, aviator hat, Santa hat, or a tiny pumpkin cap.
- Christmas penguin: make the hat red/white, add a scarf, and embroider snowflakes.
- Keychain penguin: use sport weight yarn, a 2.0–2.5 mm hook, and add a loop on top of the hat.
- Bigger plush version: use chunky yarn and a larger hook (4–6 mm). Keep stitches tight and scale eyes up to 10–12 mm.
- Color swaps: navy body, pastel belly, or even a rainbow monster hat for extra fun.
Conclusion
This Crochet Penguin Wearing a Funny Monster Hat is the perfect mix of cute and silly—simple amigurumi shapes with a hilarious hat that gives tons of personality. Give it a try as a winter gift, a playful desk buddy, or a quick crochet toy project, and don’t forget to make the teeth extra wonky for maximum monster charm.