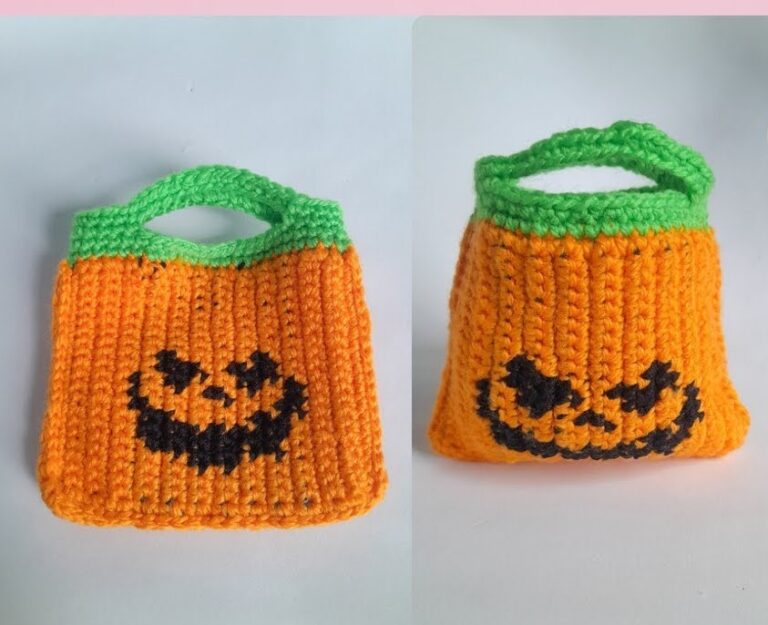
Kawaii Crochet Cat School Bag Free Pattern Beginner-Friendly
Crochet the cutest cat school bag with this easy step-by-step tutorial! This adorable DIY crochet bag features cat ears and sweet face details, making it perfect for kids, gifts, or kawaii crochet projects. A fun and beginner-friendly crochet pattern to try. If you love crochet projects that make people smile, a crochet cat school bag is hard to beat. It’s cute, practical, and full of personality, especially once you add little ears and a sweet cat face on the front.
The YouTube video “Pair it with a Hat ♪ How to Crochet a Cat School Bag” is a cozy, kawaii-style make that’s perfect for:
- Kids (a lightweight school or activity bag)
- Handmade gifts (birthdays, holidays, “just because”)
- Kawaii crochet lovers who want an adorable accessory
- Pairing with matching accessories, such as a hat, for a full set

One quick note: the scrape you provided doesn’t include clear step details (it’s mostly repeated audio text), so I’ll write this as a beginner-friendly pattern guide inspired by the project concept (cat-themed school bag with a strap and cute face). You can watch the video alongside this post to match the exact sizing and placement used by the creator.
Materials Needed
Choose yarn that feels comfortable and not too scratchy—this is a bag you’ll touch a lot.
- Soft cotton or acrylic yarn (worsted/medium weight is beginner-friendly)
- Cotton holds its shape well
- Acrylic is soft and budget-friendly
- Crochet hook: 4.0–5.0 mm (use what your yarn label recommends; 4.5 mm is a great middle choice)
- Yarn needle (for sewing ears and face details)
- Scissors
- Stitch markers (super helpful for working in rounds and marking ear placement)
- Buttons or safety eyes (or black yarn to embroider eyes)
- Strap yarn or cord for the shoulder strap
- You can crochet the strap, use a sturdy cord, or even a ribbon/webbing strap
- Optional but helpful:
- Small piece of felt for the inside or for the eye backing
- Lining fabric (if you want a cleaner inside)
- Magnetic snap/button for closure
Crochet Abbreviations
Here are the crochet terms we’ll use, explained simply:
- ch – chain
- sl st – slip stitch
- sc – single crochet
- hdc – half double crochet
- dc – double crochet
- inc – increase (work 2 stitches in the same stitch)
Step-by-Step Crochet Pattern (Cat School Bag)
This pattern is written in a flexible way so you can size it for a child or teen. The shape is a classic: oval base + straight body + shaped opening + ears + face + strap.
Step 1 – Create the Bag Base
The base is usually an oval made by crocheting around a starting chain.
- Chain your desired base length.
- For a small kid-sized bag, start with ch 21–25.
- For a larger bag, try ch 27–31.
- Starting in the 2nd chain from the hook, work sc (or hdc if you want a slightly taller, softer fabric) across the chain.
- In the last chain, work 3 sc to curve around the end.
- Continue along the other side of the chain, crocheting into the unused loops.
- In the last stitch (the other end), work 3 sc again.
- Join with sl st (or keep working in a spiral—either method works, just be consistent).
To grow the oval base (important part):
- In the next rounds, you’ll crochet around again, and increase at both curved ends (the places where you did the “3 sc”).
- Keep increasing only in those rounded areas so the base stays flat.
How to know the base is big enough:
Place it on a table and imagine it holding notebooks/snacks. A cute “school bag” size is often around 8–10 inches (20–25 cm) tall when finished.
Step 2 – Crochet the Body of the Bag
Once the base is the size you want, it’s time to build the walls.
- Crochet 1 round in the back loops only (BLO) using sc.
- This creates a crisp “corner” and helps the bag stand up.
- Then crochet even rounds (no increases) in sc or hdc.
- Continue until the body is the height you want.
- For a kid-sized bag: around 6–8 inches of body height often looks great.
Tip: If you want the bag to feel sturdy, use single crochet and keep your tension slightly firm.
Step 3 – Shape the Bag Opening
A cat bag looks especially cute when the top is slightly shaped—almost like a soft backpack flap or a gentle curve.
Here are two beginner-friendly ways to shape it:
Option A: Simple straight opening
- Crochet 1–2 rounds of sc evenly.
- Finish with a neat edge (see finishing step).
Option B: Slightly shaped “front opening.”
- Lay the bag flat and find the center front.
- Mark the front section with stitch markers (for example, mark the middle third).
- Work short rows back and forth on that front section to create a gentle dip/curve.
- Edge the top with sc all around to clean it up.
If the video shows a particular shape, match it visually—this is one of those parts where “crochet-by-look” works beautifully.
Step 4 – Make the Cute Cat Ears
Cat ears are small triangles, crocheted separately and sewn on.
Simple triangle ear (make 4 pieces if you want double-layer ears, or 2 if single-layer):
- Ch 2
- Work 3 sc into the 2nd chain from the hook.
- Turn, ch 1, inc in each stitch (2 sc in each stitch) across.
- Turn, ch 1, sc across.
- Repeat rows, increasing at the edges every other row, until the ear is the size you like.
Assembly:
- If you made two pieces per ear, place them together and sc around the edges to make them thicker.
- Sew ears to the top of the bag, spaced evenly.
Placement tip: Put stitch markers where you want each ear first, then pin or clip them before sewing. This helps them look symmetrical.
Step 5 – Add the Cat Face Details
This is the part everyone falls in love with.
You can keep it super simple:
- Eyes: safety eyes, buttons, or embroidered dots
- Nose: a tiny triangle (pink yarn is adorable)
- Mouth: a small “Y” or two curved lines
- Whiskers: 3 short lines on each cheek
Beginner-friendly face layout:
- Decide where the “face panel” is (usually centered on the front).
- Attach eyes first, then nose, then whiskers.
- Step back and check the expression before tightening everything permanently.
Important safety note: If the bag is for a small child, embroidered eyes are safer than buttons or safety eyes (choking risk).
Step 6 – Crochet and Attach the Shoulder Strap
A comfy strap makes the bag actually wearable.
Crochet strap (sturdy option)
- Ch to your strap length (try 80–110 chains depending on child vs. teen).
- Work sc back along the chain.
- For extra strength, crochet 2–3 rows total (turning each row).
- Sew the strap ends securely onto each side of the bag.
Cord strap (fast option)
- Cut a thick cord or braided yarn strap.
- Thread it through, knot securely, and sew down the ends inside.
Pro tip: Reinforce the strap area by sewing through multiple stitches and weaving the yarn tail in several directions.
Step 7 – Finish and Weave In All Yarn Ends
This step makes your bag look clean and “store-bought.”
- Crochet a final round of sc around the top opening for a neat edge.
- Optionally add a sl st round as a decorative border.
- Fasten off and weave in all ends using a yarn needle.
- Tug gently on seams (ears, strap) to check they’re secure.
Optional finishing upgrade:
Add a simple closure:
- Button + loop
- Magnetic snap
- Tie strings or a small drawstring channel
Customization Ideas (Make It Your Own!)
This is where the fun really begins. Here are easy ways to personalize your crochet cat school bag:
- Use pastel yarn colors (pink, lilac, mint, baby blue) for a kawaii vibe
- Add a bow or ribbon between the ears or on one ear
- Embroider whiskers with metallic thread for a cute sparkle
- Make a striped cat by changing yarn colors every few rounds
- Add a small heart nose or blush cheeks
- Make matching accessories like a hat (as the video suggests), a headband, or a mini pouch
If you want it to feel extra “school bag,” add a small name tag or crochet a tiny pocket on the front.
Tips for Beginners (Avoid These Common Mistakes)
A few friendly reminders that make a big difference:
- Count your stitches on the base rounds. A neat oval depends on consistent increases.
- If your base is wavy, you’re increasing too much.
If it’s curling up, add a few increases at the rounded ends. - Use stitch markers at the start of rounds and where you place ears.
- Choose a smaller hook if your fabric feels floppy—bags look better with tighter stitches.
- Weave in ends securely, especially around the strap and ears (these get tugged a lot).
- If you use safety eyes or buttons, attach them firmly and consider who will use the bag.
Conclusion
A crochet cat school bag is one of those projects that’s cute, useful, and genuinely fun to make. You’re basically building a simple bag, then turning it into a character with ears and a face, which is the best kind of crochet magic.
If you try this pattern, play with colors, expressions, and little extras like bows or matching hats. The more you personalize it, the sweeter it becomes,s and it’s such a lovely gift for kids or any kawaii crochet fan.