Playful Crochet Christmas Body Amigurumi Pattern
Playful Crochet Christmas Body amigurumi pattern for beginners. Stitch a charming handmade figure body, perfect for festive decor and a sweet, gift-worthy holiday keepsake.
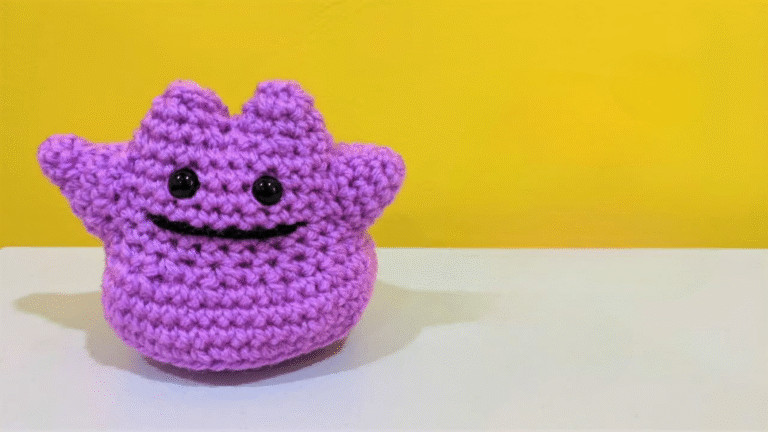
The Playful Crochet Christmas Body Amigurumi Pattern is a sweet, festive project that turns basic stitches into a charming holiday doll base with loads of personality. It’s cute and enjoyable to make because the shaping stays simple, the rounds are easy to count, and the body works up quickly, even for beginners.

Best of all, it’s a flexible foundation for adding a Santa hat, scarf, pajamas, or any Christmas character details later. Use the finished piece as a handmade tree ornament, a reusable gift topper, or cozy shelf décor for a mantel or desk. Perfect for last-minute gifting.
Playful Crochet Christmas Body Amigurumi Pattern
A festive amigurumi always feels extra special during the holidays, and this Playful Crochet Christmas Body Amigurumi Pattern is a perfect place to start. First, it creates an adorable “base body” that can become almost any Christmas character. Next, it stays beginner-friendly with simple shaping, steady increases, and clean decreases. Meanwhile, the finished body looks polished and gift-ready, even when made with basic supplies. Later, add a hat, scarf, mittens, or tiny boots to match any holiday theme. Finally, enjoy a small handmade piece that works as décor, a keepsake, or a sweet add-on to presents.
What You’ll Need
- Yarn (Type & Weight)
- Worsted weight (Category 4) acrylic or cotton yarn
- Main body color: 40–60 g (about 80–120 m)
- Accent color (optional for trim/neckline/boots): 10–20 g (about 20–40 m)
Tip: Cotton gives crisp stitches, while acrylic feels extra soft and squishy.
- Hook Size
- 3.25 mm or 3.5 mm crochet hook (choose the smaller one if stitches look loose)
- Notions
- Safety eyes: 8 mm (optional if adding a face to the body later)
- Fiberfill stuffing: about 15–25 g
- Stitch marker: 1 (or a scrap of yarn)
- Tapestry needle: 1
- Scissors
- Optional Accessories
- Keychain ring: 1 (25–30 mm) + small jump ring
- Blush/embroidery floss for cheeks and mouth
- Buttons or mini bow for decoration (use securely, especially if gifting to children)
Skill Level
Beginner / Easy
First, the project uses basic amigurumi techniques: magic ring (or adjustable loop), single crochet, increases, and decreases. Next, the shaping stays smooth and forgiving. Finally, assembly is minimal because the main goal is a clean, sturdy body base.
Making Time (Overview)
Total time: about 2.5–4 hours, depending on speed and experience.
- Body (legs + torso): 1.5–2.5 hours
- Arms (optional): 30–45 minutes
- Neck trim/details (optional): 15–30 minutes
- Face & assembly: 30–45 minutes
Step-by-Step Instructions
Abbreviations
- MR: magic ring
- sc: single crochet
- inc: increase (2 sc in same stitch)
- dec: decrease (single crochet 2 together; invisible decrease recommended)
- sl st: slip stitch
- ch: chain
- st(s): stitch(es)
Notes Before Starting
- First, work in continuous rounds unless stated otherwise.
- Next, place a stitch marker in the first stitch of each round.
- Meanwhile, stuff gradually for smoother shaping.
- Finally, keep tension tight so stuffing won’t show through.
Part 1: Leg 1 (Making time: 20–30 minutes)
Round 1: MR, 6 sc (6)
Round 2: inc around (12)
Round 3: (sc, inc) around (18)
Round 4: (2 sc, inc) around (24)
Rounds 5–8: sc around (24)
Round 9: (2 sc, dec) around (18)
Round 10: (sc, dec) around (12)
Round 11: sc around (12)
Rounds 12–16: sc around (12)
Fasten off only if making the second leg separately. Otherwise, keep the yarn attached and set aside.
Beginner-friendly tip: If the foot looks slightly pointy, add 1 extra plain round before decreases. As a result, the shape rounds out nicely.
Part 2: Leg 2 (Making time: 20–30 minutes)
Repeat Leg 1 exactly.
This time, do not fasten off. Instead, keep the yarn attached because the legs will join to the torso.
Part 3: Join Legs + Start Torso (Making time: 35–55 minutes)
First, make sure both legs face the same direction. Next, flatten the opening of Leg 1 and Leg 2 so the stitch marker areas sit toward the inside.
Join Round: From Leg 2, ch 3, then join to Leg 1 with sc.
Now work around:
- sc around Leg 1 (12 sc)
- sc into each of the 3 chains (3 sc)
- sc around Leg 2 (12 sc)
- sc into the other side of the 3 chains (3 sc)
Total: 30 sts
Torso Rounds
- Round 1: sc around (30)
- Round 2: (4 sc, inc) around (36)
- Rounds 3–7: sc around (36)
- Round 8: (4 sc, dec) around (30)
- Round 9: sc around (30)
- Round 10: (3 sc, dec) around (24)
- Rounds 11–12: sc around (24)
- Round 13: (2 sc, dec) around (18)
- Round 14: sc around (18)
At this point, start stuffing firmly, especially around the hips and belly. Meanwhile, keep the legs evenly filled so the body stands nicely.
Part 4: Shape the Upper Body (Making time: 25–40 minutes)
This section creates a cute, slightly rounded chest area—perfect for a “Christmas body” base.
- Round 15: (sc, dec) around (12)
- Round 16: sc around (12)
- Round 17: sc around (12)
Add more stuffing, then smooth the shape with your fingertips. After that, continue to the neck.
Part 5: Neck Opening (Making time: 10–15 minutes)
- Round 18: (2 sc, dec) around (9)
- Round 19: sc around (9)
Now either:
- Option A (Closed top): dec around until closed, fasten off, weave in.
- Option B (Open neck for attaching a head later): keep the opening at 9 sts, fasten off, leaving a long tail for sewing to a head.
Practical use: An open neck is ideal if planning a full doll later. On the other hand, a closed top works well for ornaments and keychains.
Accessories / Details (if applicable)
Accessory 1: Simple Arms (Making time: 30–45 minutes total)
Make 2.
Round 1: MR, 6 sc (6)
Round 2: (sc, inc) around (9)
Rounds 3–7: sc around (9)
Round 8: (sc, dec) around (6)
Rounds 9–10: sc around (6)
Lightly stuff only the “hand” area. Next, flatten the top and crochet it closed with 3 sc across. Leave a long tail for sewing.
Tip: Light stuffing prevents stiff arms and keeps the look soft and playful.
Accessory 2: Collar Trim (Making time: 15–25 minutes)
This adds a festive finish, especially if the body will be displayed without a head.
Attach accent yarn around the neck opening.
- First, insertthe hook into any neck stitch and pull up a loop.
- Next, ch 1, then sc in each neck stitch around.
- Meanwhile, for a cute ruffle look: (sc, ch 1, sc in next stitch) repeated around.
- Finally, sl st to join and fasten off.
Accessory 3: Tiny Keychain Loop (Making time: 5–10 minutes)
If turning it into a keychain or bag charm:
- First, insert the hook at the top center.
- Next, ch 12–15, then sl st back into the same spot to form a loop.
- After that, weave in the tail securely.
- Finally, attach the keychain ring through the loop.
Face & Assembly
Even though this pattern focuses on the Christmas body base, a simple face can turn it into a complete mini character.
1) Eye Placement (Making time: 5–10 minutes)
If adding safety eyes directly onto the body (cute for tiny “gingerbread” or “snow-buddy” styles), place 8 mm eyes between torso rounds 6 and 7, about 6–7 stitches apart.
Beginner tip: Pin the eyes first and check the expression before locking the backs.
2) Embroidered Details (Making time: 10–15 minutes)
- Mouth: embroider a small line or gentle smile using black thread.
- Cheeks: add blush lightly with makeup or stitch tiny pink lines.
3) Sewing Arms (Making time: 15–25 minutes)
- First, pin arms at the sides between torso rounds 9–11.
- Next, sew with small whip stitches.
- Meanwhile, stitch through both the arm and body fabric to keep it secure.
- Finally, weave in tails inside the body.
4) Final Shaping (Making time: 5 minutes)
Roll the body gently between your hands to redistribute stuffing. As a result, the silhouette looks smoother and more even.
Special Features
- Perfect “base body” design: This body works for Santa, an elf, a reindeer, a snowman, a gingerbread, or even a tiny Christmas bear outfit.
- Stable, squat shape: The wider hips help the doll sit nicely on a shelf or tray.
- Clean stitch texture: With tight tension, the fabric looks neat and professional, even for beginners.
- Quick gratification: The body forms fast, so the project feels fun rather than overwhelming.
Sizing Tips
Final size depends on yarn and hook choice:
- Worsted + 3.25–3.5 mm hook: about 10–13 cm (4–5 in) tall for the body alone
- Thicker yarn + larger hook: taller and chunkier body, but looser stitches may show stuffing
- DK yarn + smaller hook (2.75–3.0 mm): smaller, tighter, “mini” body
First, choose the look you want. Next, match the hook so stitches stay tight. Finally, adjust the stuffing amount to keep the shape firm without stretching the fabric.
Common Mistakes to Avoid
- Loose tension (stuffing shows through)
First, try a smaller hook. Next, keep your hands relaxed but firm. Meanwhile, avoid pulling too hard on yarn, which can make stitches uneven. - Skipping the stitch marker
Without a marker, rounds drift quickly. Therefore, place it in the first stitch every time, then move it right away. - Overstuffing the neck area
Too much stuffing near the top makes the opening flare and look bulky. Instead, keep the upper rounds moderately stuffed and focus on firmness in the belly and hips. - Uneven legs after joining
Before joining, check that both legs have the same stitch count and length. After that, align them so the “front” faces forward. - Arms sewn too low or too far forward.
Pin first, then view from the front and side. Next, adjustthe position before sewing. As a result, the body looks balanced and character-ready.
Variations & Customization Ideas
- Classic Santa Body
- Red body + white collar trim
- Add a black stitched “belt” line around the waist
- Later, attach a Santa head and hat
- Elf Helper Body
- Green body + red collar
- Add tiny pointed shoes (surface crochet in black)
- Next, stitch on two small buttons
- Snowy Friend Body
- White body + light blue scarf
- Embroider snowflakes or add speckled yarn accents
- Finally, add a carrot-nose head later
- Gingerbread Style
- Tan body + white “icing” lines using surface slip stitches
- Add rosy cheeks
- Meanwhile, use embroidery instead of safety eyes for a softer look
- Mini Ornament Version
- Use DK yarn and a 2.75–3.0 mm hook
- Keep arms off for a simple silhouette
- Then add a hanging loop at the top
- Chunky Plush Version
- Use bulky yarn and a 5 mm hook
- However, focus on tight stitching to avoid gaps
- Finally, make it a cozy shelf plush
Finishing Tips
- Use invisible decreases: They keep the surface smooth and reduce “holes.”
- Stuff in stages: First fill the feet lightly, then add more as the torso grows. Meanwhile, press stuffing into corners with the back of a crochet hook.
- Close neatly: When finishing, thread the yarn tail through the front loops of the final round and pull tight for a clean closure.
- Weave ends inside: Next, run the yarn tail through several stitches, change direction once, then trim. As a result, ends stay hidden and secure.
- Check symmetry: Finally, set the body down and make sure the legs sit evenly before declaring it finished.
Tutor Suggestions FOR (Crochet Christmas Body Amigurumi)
- Count stitches every few rounds
First, count after increasing rounds. Next, count again after decreasing rounds. Meanwhile, fix mistakes early rather than later, because amigurumi grows fast. - Practice an invisible decrease on a small swatch.
A quick practice round builds confidence. After that, the entire body looks cleaner and more professional. - Use pins like a roadma.p
Before sewing arms or adding features, pin pieces in place. Then step back and check the “personality” of the shape. Finally, stitch only when it looks right. - Choose simple details for the first t.ry
A plain body with a collar trim already looks adorable. Later, add more accessories once the basic shape feels comfortable. - Keep a calm pace
If stitch counting starts to feel confusing, pause and place a second marker every 10 stitches. As a result, rounds become much easier to track.
This Playful Crochet Christmas Body Amigurumi Pattern is a cozy little foundation that invites creativity from the very first round. First, the shape comes together quickly. Next, the smooth torso makes a perfect canvas for holiday colors and tiny outfits. Meanwhile, the sturdy base helps it sit nicely as décor. Later, it can become an ornament, a gift topper, a keychain charm, or the starting point for a full Christmas doll. Finally, the best part is the handmade character that shows in every stitch, simple, playful, and ready for the season.