Elegant Crochet Ladybug Foldover Clutch Skirt Amigurumi Pattern
Firstly, welcome to your new favorite make this Crochet Ladybug Foldover Clutch Skirt Amigurumi Pattern blends chic textures, bold spots, and beginner-friendly steps for a fashionably cute make.
Meet the Elegant Crochet Ladybug Foldover Clutch Skirt Amigurumi Pattern, a charming blend of chic accessory and whimsical amigurumi flair. Featuring a foldover envelope silhouette, dotted ladybug panels, and a flirty skirt-inspired ruffle, this quick make shines in solids or speckled yarns.
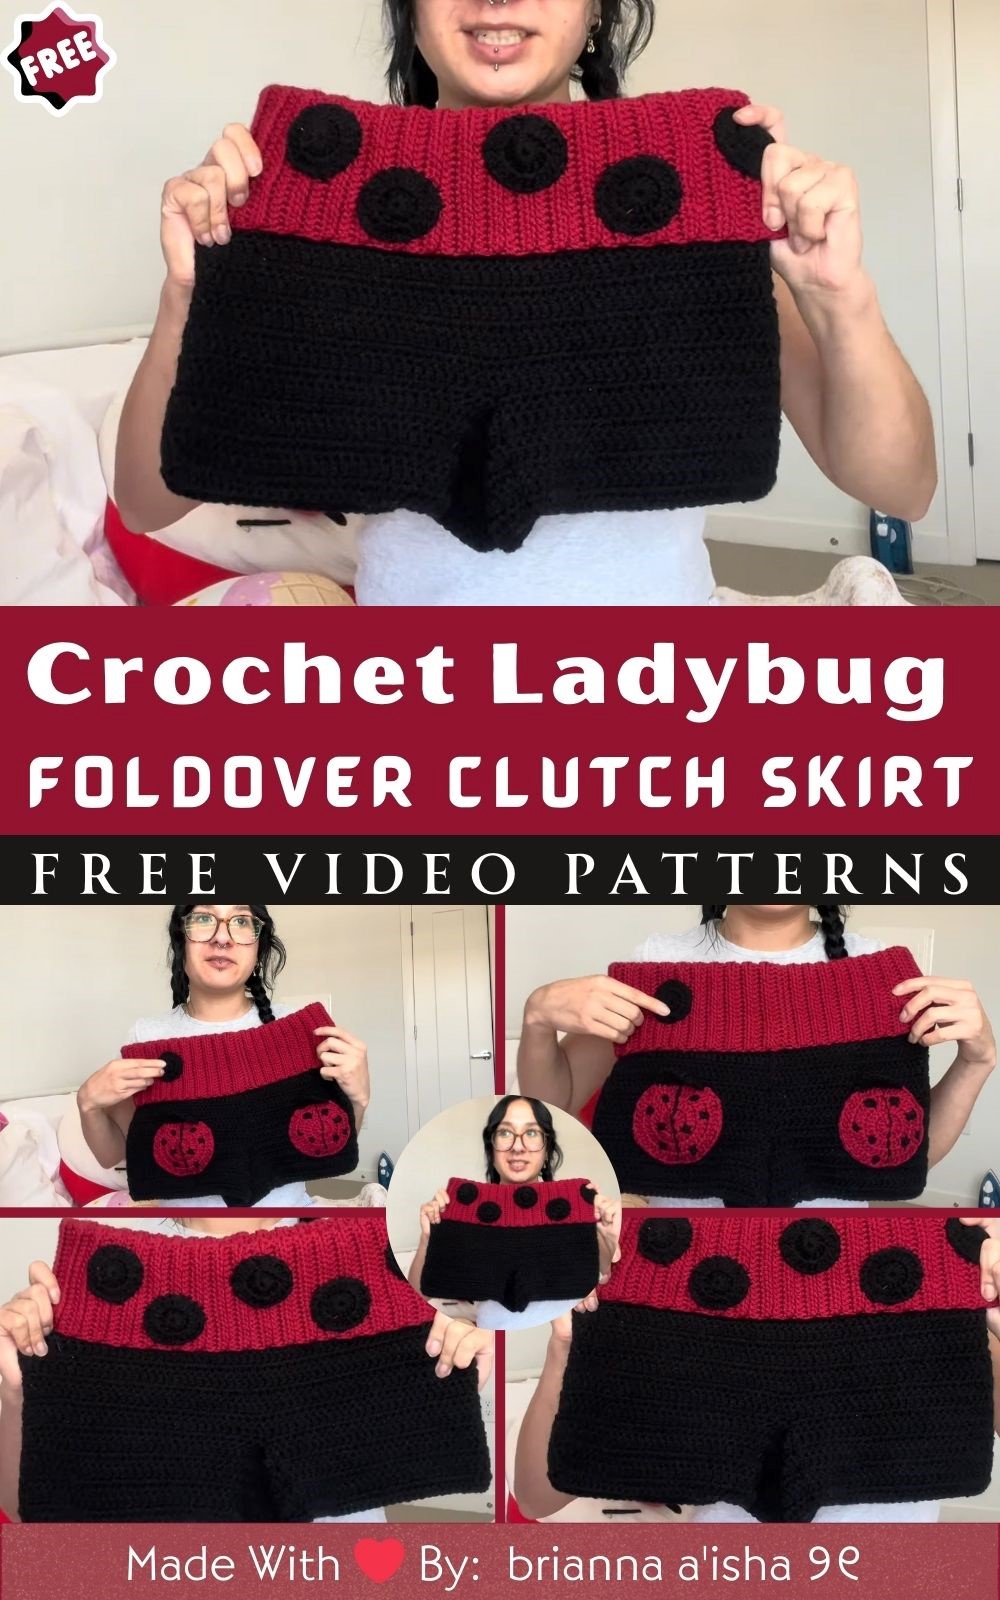
Written for confident beginners with step-by-step notes and easy size tweaks, it’s a stash-friendly, weekend project. Personalize your spots, add a wristlet, or keep it minimal for a sleek finish.
Uses:
- Everyday statement clutch or coin pouch for bug lovers.
- Photo prop or sweet gift for kids and fashion-forward friends.
- Craft-fair seller or themed party accessory.
Elegant Crochet Ladybug Foldover Clutch Skirt Amigurumi Pattern
Firstly, welcome to a quick, stylish make that blends function and whimsy. Secondly, this Elegant Crochet Ladybug Foldover Clutch features a sleek envelope fold, a skirt-inspired ruffle, and cute amigurumi ladybug appliqués. Thirdly, the shaping is simple, the structure is sturdy, and the result looks boutique-level.
Moreover, the increased system, stitch counts, and “divide-by-four” method are adapted from the ladybug shorts workflow you shared, so the shaping stays balanced and beginner-friendly. Finally, below you’ll find materials, exact measurements, timed steps, pro tips, fixes, and fun variations.
Skill Level, Sizing, and Gauge
- Firstly, Skill Level: Confident Beginner (ch, sl st, sc, hdc, dc, increases, decreases).
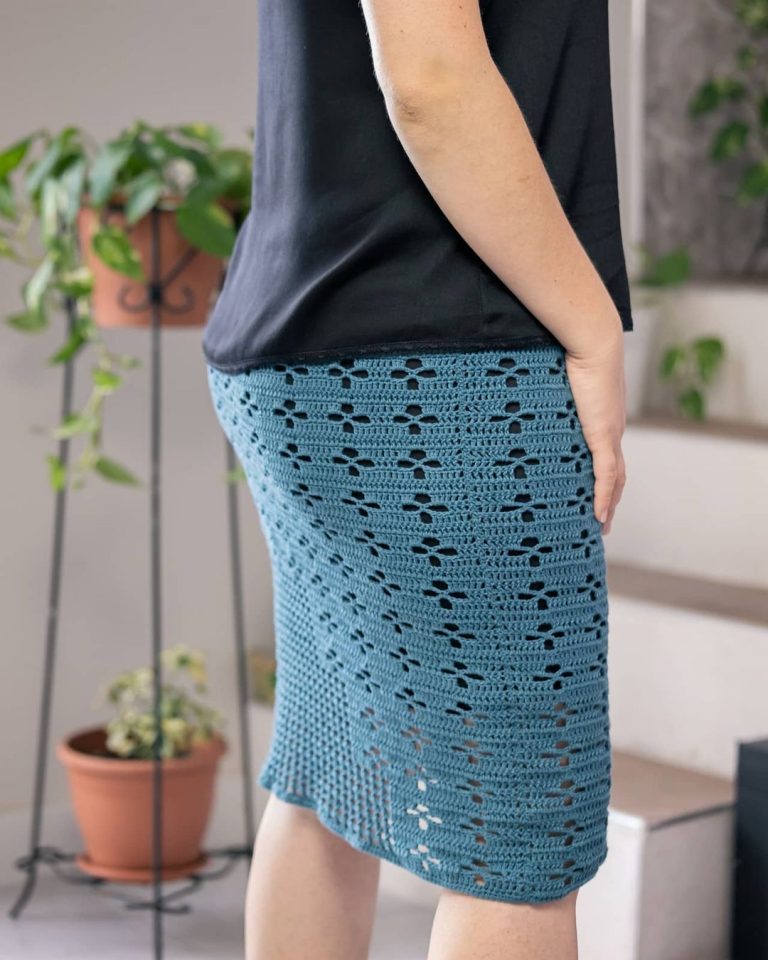
- Secondly, Finished Size (folded): about 10.5 in (27 cm) wide x 6.5 in (16.5 cm) tall; unfolded height about 8.5 in (21.5 cm); depth about 1.5–2 in (4–5 cm).
- Thirdly, Gauge (body in hdc): about 14 sts x 10 rows = 4 in x 4 in (10 x 10 cm) with a 4.0 mm hook.
- Moreover, Fabric Note: tighter tension improves structure, supports hardware, and keeps edges crisp.
SEO-Friendly Overview
- Firstly, a modern crochet ladybug clutch with foldover closure, skirt-like ruffle, and amigurumi appliqués.
- Secondly, step-by-step shaping uses an even pickup, “divide-by-four” markers, and every-other-round increases.
- Thirdly, beginner-friendly assembly includes exact counts, timed steps, and clear finishing.
- Moreover, appliqué instructions create quick circles, a neat head, and tiny spots for a playful look.
Materials and Exact Measurements
- Firstly, Yarn (Worsted/Category 4, cotton or cotton-blend):
- Main Color (Red): 150–180 yd (137–165 m).
- Contrast Color 1 (Black): 60–80 yd (55–73 m).
- Contrast Color 2 (White, optional): 15 yd (14 m).
- Secondly, Hook: 4.0 mm (G-6); alternatively, 4.5 mm if your tension is tight.
- Thirdly, Notions:
- Stitch markers (6+), tapestry needle, scissors.
- Magnetic snap (14–18 mm) or zipper (8 in / 20 cm).
- Two D-rings (12–20 mm) and wristlet/strap (optional).
- Matching sewing thread and needle.
- Lining fabric 9 x 18 in (23 x 46 cm) and medium fusible interfacing, same size.
- Moreover, Embellishments (optional): 8–10 small black buttons or crochet dots; 6–8 mm safety eyes; felt squares for reinforcement.
Abbreviations (US Terms)
- Firstly, ch, sl st, sc, hdc, dc, inc (2 sts in 1 st), dec (2 sts together), st(s), rep, RS/WS.
- Secondly, Row, Rnd, PM (place marker), FLO/BLO.
- Thirdly, Note: increases match the specified stitch type; markers guide shaping.
Construction Roadmap
- Firstly, crochet the flap sideways in hdc for a clean fold.
- Secondly, seam the flap into a loop and pick up sc evenly around one long edge.
- Thirdly, work dc in the round with four markers and increase every other round for a gentle “skirt” flare.
- Moreover, add an optional ruffle, seam the base, and install hardware and lining.
- Additionally, finish with amigurumi ladybugs and spots for cheerful detail.
1: Foldover Flap Panel (Sideways HDC Rib) — 50–70 minutes
- Firstly, Foundation: ch 31 (30 + 1 turning chain) for about 6.5 in (16.5 cm) flap depth; adjust by ±2 chains as desired.
- Secondly, Row 1: hdc in 2nd ch from hook and in each ch; turn.
- Thirdly, Row 2: ch 1, hdc across through both loops (or BLO for subtle rib); turn.
- Moreover, Rows 3–82: rep Row 2 until the strip measures 21–22 in (53–56 cm) slightly stretched, echoing the 82-row waistband guidance from the shorts method for a snug, fold-friendly fit.
- Additionally, check: the loop should wrap to create about 10.5 in (27 cm) finished width when folded.
2: Join the Flap into a Loop — 8–12 minutes
- Firstly, align Row 1 with Row 82, RS facing.
- Secondly, seam the short edges with sl st (or whipstitch for a flatter join).
- Thirdly, mark the seam as your round start.
- Moreover, keep the joint neat because it aligns with the clutch side.
3: Establish an Even Round of SC (Pickup) — 12–18 minutes
- Firstly, rotate the loop so a long edge faces you.
- Secondly, Round A: sc evenly around, targeting about 128 sc (divisible by 4), matching the 128 pickup used in the shorts tutorial.
- Thirdly, PM at the start and at four equal intervals (for 128 sts, every 32nd st).
- Moreover, sl st to join and switch to dc for the body.
- Additionally, recount once to confirm your math and avoid puckering.
4: Body in DC with Gentle A-Line Shaping — 60–90 minutes
- Firstly, Round 1: ch 2 (does not count), dc in each st; sl st to join (128 dc).
- Secondly, Round 2: dc evenly to set drape.
- Thirdly, Round 3: at each marker, work 2 dc in the marked st (+4 total); move the marker to the second dc of the increase, mirroring the shorts method.
- Moreover, Round 4: dc evenly (no increases).
- Additionally, Rounds 5–10: alternate increase and plain rounds until the tube measures 5.5–6 in (14–15 cm) from the pickup edge.
- Furthermore, Size Adjust: continue alternating to Round 12–14 for extra depth if desired.
Shaping Notes for Step 4
- Firstly, divide your stitch count by four to spread increases evenly (e.g., 128 → markers every 32).
- Secondly, increase every other round for a smooth, ruffle-free A-line flare.
- Thirdly, end on a plain round before the base so seaming lies flat and tidy.
- Moreover, if your count is odd, adjust by ±1 at a marker as advised in the shorts tutorial.
5: Optional Skirt-Ruffle Hem — 12–20 minutes
- Firstly, Decorative Ruffle: work (dc, dc, inc) around for a soft flare; alternatively, place 2 dc in each st for a fuller ruffle.
- Secondly, stabilize: add 1 plain sc round after a very full ruffle to firm the edge.
- Thirdly, Style Note: a modest ruffle reads “skirt” without adding bulk.
Step 6: Close the Base Cleanly — 10–15 minutes
- Firstly, after a plain round, fasten off with a long tail (for sewing) or keep working yarn attached (for crochet seaming).
- Secondly, Seam Method A: sl st through both layers across the bottom edge; fasten off.
- Thirdly, Seam Method B: whipstitch the bottom edge with a tapestry needle for an invisible finish.
- Moreover, Corner Tip: dc2tog at each end before seaming to reduce corner bulges, echoing the shorts trick of tightening stress points.
Step 7: Add the Foldover and Hardware — 20–35 minutes
- Firstly, test a 3 in (7.5 cm) fold to confirm drape.
- Secondly, Magnetic Snap: mark center points on the body and flap, reinforce with felt, and attach.
- Thirdly, Zipper: pin along the inner top edge, then hand-baste and sew with neat backstitches.
- Moreover, D-Rings: crochet tabs (ch 10, 1 row sc), fold over D-rings, and stitch to side seams near the top.
- Additionally, Smooth Test: open/close several times to ensure snag-free operation.
8: Lining and Interfacing — 25–35 minutes
- Firstly, fuse interfacing to a 9 x 18 in (23 x 46 cm) fabric piece.
- Secondly, fold right sides together to about 9 x 8.5–9 in; sew sides with a 3/8 in (1 cm) seam allowance.
- Thirdly, insert lining, turn under 3/8 in (1 cm), and hand-stitch just below the fold line.
- Moreover, if zipped, stitch the lining to the zipper tape for a professional finish.
- Additionally, smooth bulk at the fold hinge to maintain a crisp crease.
9: Amigurumi Ladybug Appliqués — 25–40 minutes
- Firstly, Body (Red):
- Rnd 1: magic ring, 6 sc.
- Rnd 2: inc around (12).
- Rnd 3: (sc 1, inc) around (18).
- Rnd 4: (sc 2, inc) around (24).
- Rnd 5: (sc 3, inc) around (30).
- Fasten off with a long tail; make 1–3.
- Secondly, Head (Black):
- Option A: attach to the top of the red circle; Row 1: sl st, ch 1, sc 10; Row 2: sc2tog, sc 6, sc2tog (8); fasten off.
- Option B: Crochet a separate half-circle over a 10-st base and sew on.
- Thirdly, Spots (Black) and Eyes (White):
- Spots: magic ring, 6 sc; sl st to first; fasten off.
- Eyes: embroider French knots or sew micro white dots; optionally use 6–8 mm safety eyes.
- Moreover, Assembly: pin, sew securely, and weave ends on WS.
10: Final Finishing and Block — 8–12 minutes
- Firstly, weave in all ends inside the clutch.
- Secondly, steam-block lightly through a pressing cloth, avoiding direct heat on hardware.
- Thirdly, confirm snap/zip alignment, ruffle symmetry, and strap tabs.
- Moreover, add an inner tag or key pocket if desired, then test load and drape.
Total Project Time
- Firstly, most makers finish in about 3–5 hours.
- Secondly, ruffles, lining, and zippers add time; snaps and minimal embellishments reduce time.
- Thirdly, a confident beginner can complete the basic body in one relaxed session.
Basic Tips for Success
- Firstly, measure or size down the hook for the structure.
- Secondly, place four markers to divide the round evenly.
- Thirdly, increase every other round and recount after each increase round.
- Moreover, end shaping on a plain round before seaming.
- Additionally, choose firm yarns for crisp edges and better hardware support.
- Furthermore, baste zippers before final stitching to avoid ripples.
- Also, secure appliqués with short stitches and tight knots on the WS.
Common Mistakes and Fixes
- Firstly, Twisted Join: unseam and rejoin the flap loop without twist.
- Secondly, Early Ruffling: revert to every-other-round increases and block lightly.
- Thirdly, Tight Pickup: add a few stitches or use a larger hook for the pickup round.
- Moreover, Depth Off: add/remove one or two plain DC rounds before closing the base.
- Additionally, Flap Fit: adjust the starting chain by 2–4 sts and remake only the flap.
- Furthermore, Corner Gaps: dc2tog at edges before seaming or whipstitch with slight compression.
- Also, Wavy Appliqués: remove one increase round or block circles flat.
- Finally, Lining Fit: trim seams if baggy or let out seams if tight, then refit.
Variations and Customizations
- Firstly, Size Shifts: change flap chain by ±2 for height; add/subtract body rounds for depth.
- Secondly, Slim Pouch: skip increases and crochet straight dc rounds.
- Thirdly, Bold Ruffle: work two ruffle rounds such as [dc, inc] around twice.
- Moreover, Crossbody: add D-rings and a 40 in (100 cm) chain or crochet strap.
- Additionally, Color-Block: red upper, black lower, plus white embroidery accents.
- Furthermore, Spot Mix: use buttons, embroidered satin stitches, or varied crochet dot sizes.
- Also, Texture Swap: substitute dc with hdc or lemon peel stitch for a subtle texture.
- Finally, Secure Zip: choose a zipper over a snap for travel-ready closure.
Why This Pattern Works (Technique Insights from the Shared Video)
- Firstly, a sideways flap (like a waistband) adds gentle stretch and a crisp fold.
- Secondly, the divide-by-four marker system balances increases, as shown in the shorts workflow.
- Thirdly, every other round increases the build to create a graceful flare without ripples.
- Moreover, ending on a plain round yields a cleaner base seam.
- Additionally, strategic decreases at stress points prevent gaps and keep edges neat.
- Finally, simple circular appliqués ensure a beginner-friendly, polished finish.
Care Instructions For (Crochet Ladybug Clutch Amigurumi)
- Firstly, hand-wash in cool water with mild detergent; towel-roll to remove excess.
- Secondly, reshape and lay flat to dry; avoid high heat on hardware and lining.
- Thirdly, store folded with tissue to preserve the ruffle and fold.
- Moreover, spot-clean the lining promptly and avoid overloading the clutch.
- Additionally, refresh the shape with light steam through a pressing cloth.
Quick Reference (Counts at a Glance)
- Firstly, Flap Chain: 31 ch for ~6.5 in depth.
- Secondly, Flap Rows: ~82 rows for a 21–22 in loop.
- Thirdly, Pickup Round: ~128 sc (divisible by 4).
- Moreover, Increases: four markers; increase every other round (+4 sts per increase round).
- Additionally, Depth: ~5.5–6 in before base; optional ruffle.
- Finally, finish: seam base, add hardware and lining, then appliqués.
Final Words
- Firstly, you’re ready to stitch an elegant, sturdy, and adorable ladybug clutch that reads designer and wears beautifully.
- Moreover, customize colors, ruffles, and straps to match your style.
- Finally, enjoy your make and share it with keywords like “crochet ladybug clutch pattern” and “foldover clutch crochet tutorial” so others can find it.