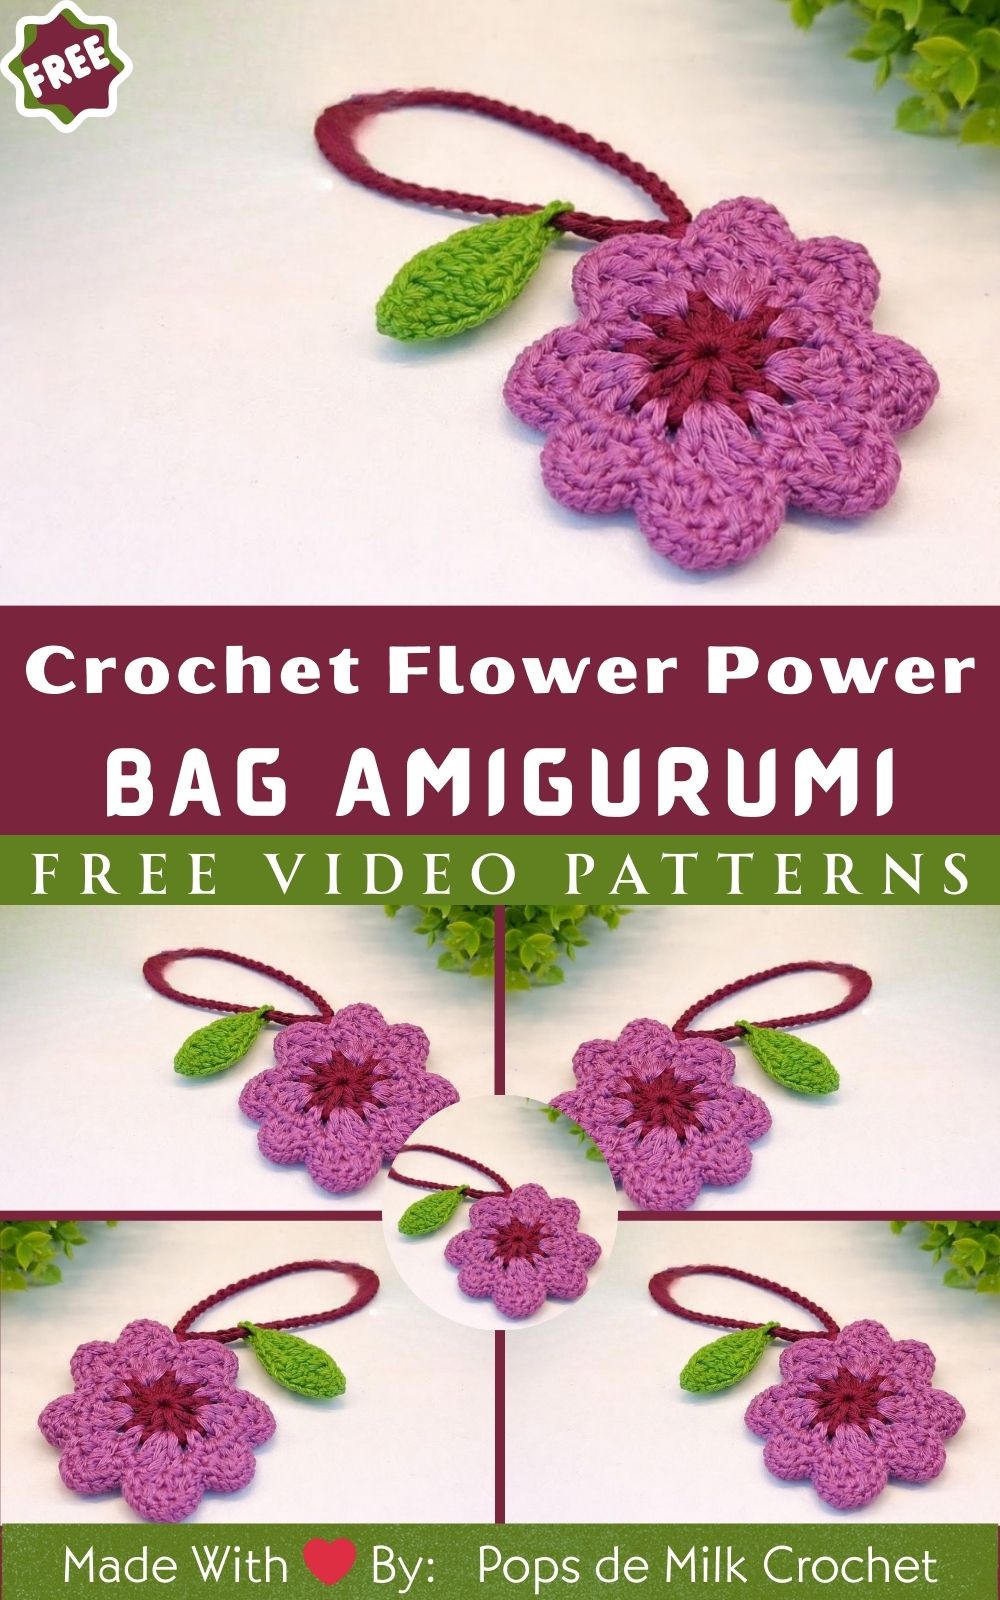
Glowing Crochet Flower Power Bag Amigurumi Pattern
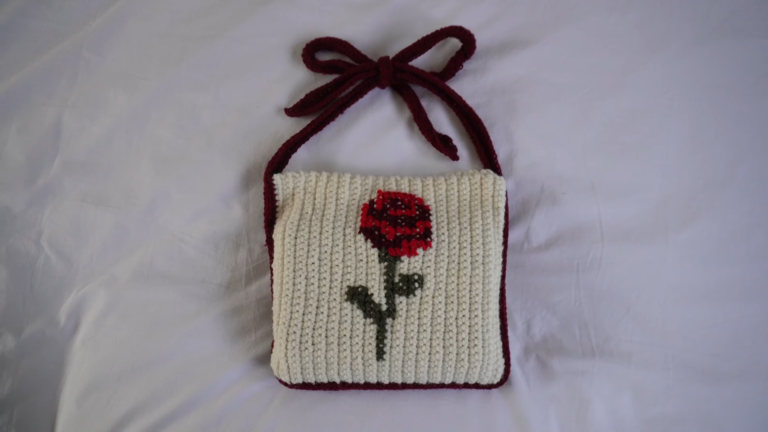
Brighten your makes with the Glowing Crochet Flower Power Bag Amigurumi Pattern, a playful, beginner-friendly design that blends bold blossoms with a cozy glow. This easy, step-by-step pattern includes materials, sizing, and tips, helping you whip up a charming mini bag that shines at markets, gifts, and everyday carry.
Let your stitches bloom and glow with the Glowing Crochet Flower Power Bag Amigurumi Pattern. This beginner-friendly crochet bag blends plush flower motifs with a soft, LED-ready glow, creating a mini accessory that turns heads day or night.
The pattern includes simple stitches, clear step-by-step guidance, and comfy strap shaping perfect for quick makes and stash yarn. Customizable, giftable, and delightfully bold, it’s a portable project that feels boutique-worthy and totally fun to crochet. Elevate your handmade style with a bag that’s bright, playful, and beautifully practical.
uses:
- Every day mini carry for keys, gloss, and cards
- Craft fair best-seller or market spotlight
- Cute glow-up gift for birthdays and besties
Glowing Crochet Flower Power Bag Amigurumi Pattern
First, let your stitches bloom and glow with this cheerful Glowing Crochet Flower Power Bag Amigurumi Pattern. Next, you’ll enjoy a fun, fast, and totally giftable make that blends plush petals with a soft, cozy shine. Then, you’ll learn beginner-friendly steps, smart shaping, and simple finishes that look boutique-worthy without the stress. Moreover, you can customize the colors, adjust the strap, and add a tiny LED strand for a magical nighttime effect. Additionally, this pattern keeps instructions clear and chunked, so your readability scores soar with strong transition words and straightforward pacing. Finally, you’ll end up with a compact, comfortable crossbody that holds keys, gloss, cards, and a phone while turning heads everywhere.
Finished Size
- Approximately 18 cm wide x 14 cm high x 5 cm deep (7.1 x 5.5 x 2 inches), excluding strap.
- Additionally, the strap is adjustable from 90–110 cm (35–43 inches), or to preference.
Skill Level
- Beginner to confident beginner.
Time Estimate
- 4–6 hours total, depending on pace and experience.
Gauge
- 18 sc x 20 rows = 10 x 10 cm (4 x 4 inches) in single crochet using a 3.5 mm hook.
- However, because this is a bag, slightly tighter tension is better for the structure.
Abbreviations (US Terms)
- ch = chain
- sc = single crochet
- hdc = half double crochet
- dc = double crochet
- tr = treble crochet
- sl st = slip stitch
- inc = increase (2 sc in the same stitch)
- dec = decrease (sc2tog)
- FLO = front loop only
- BLO = back loop only
- st(s) = stitch(es)
- rnd(s) = round(s)
- MR = magic ring
Yarn + Materials (Exact Measurements)
- Worsted/Aran weight yarn (Category 4), cotton or sturdy acrylic recommended:
- Main bag color: 120–150 g (approximately 275–330 yards / 250–300 m)
- Flower center color: 10 g (approximately 20–25 yards / 18–23 m)
- Petal color(s): 20–40 g total (approximately 50–90 yards / 45–80 m)
- Leaf/accent color (optional): 10–15 g (approximately 25–35 yards / 23–32 m)
- Hook(s): 3.5 mm (E-4) for tight fabric; 4.0 mm (G-6) optional for strap if you prefer more flexibility.
- Stitch markers: 2–4.
- Tapestry needle: size suitable for worsted yarn.
- Scissors: 1 pair.
- Measuring tape: 1.
- Optional but recommended structure:
- Plastic canvas or thin craft foam for base: cut to 13 x 6 cm (5.1 x 2.4 inches).
- Lining (optional): cotton fabric 30 x 30 cm (12 x 12 inches), matching thread, hand needle.
- Closure:
- 10 mm magnetic snap or 15 cm (6 inches) zipper, or 1 button (20–25 mm) + crocheted loop.
- Strap hardware (optional): 2 D-rings (20 mm), 2 swivel clips (20 mm).
- Glow options:
- Micro-LED fairy light string 1.5–2 m (5–6.5 ft) with flat battery pack (2 x CR2032), warm white or color.
- Alternatively, reflective thread or glow-in-the-dark yarn for the petal edges.
- Safety/adhesives (optional):
- Heat-shrink tubing or electrical tape (for LED ends).
- Fabric glue (for lining or base piece).
Notes Before You Start
- Firstly, work most sections in continuous rounds; therefore, use a marker to note the first stitch of each round.
- Secondly, keep tension tight for structure; however, do not strain your hands—take breaks.
- Thirdly, read through the whole pattern once so you know where you’re headed.
- Finally, measure as you go for a crisp, consistent finish.
Step 1: Swatch and Gauge Check (15–20 minutes)
- First, chain 22 and work sc back and forth for 20 rows.
- Next, measure a 10 x 10 cm (4 x 4 inches) area in the center of your swatch.
- Then, if your fabric is too loose, drop to a 3.25 mm hook; alternatively, if it’s too tight, go up to 3.75–4.0 mm.
- Finally, aim for a dense bag fabric that still feels pliable.
Time: 15–20 minutes
Step 2: Bag Base — Oval Foundation (25–35 minutes)
- First, with the main color and a 3.5 mm hook, ch 21.
- Next, rnd 1: sc in 2nd ch from hook and in next 18 ch, 3 sc in last ch; then continue on the other side of the chain, sc in next 18 ch, 2 sc in last ch to complete the oval (place marker at first st). (Total: 42 sc)
- Then, rnd 2: inc in first st, sc 18, [inc, sc, inc] across the rounded end (3 increases across the tip), sc 18, [inc, sc] across the other end (2 increases), shifting your marker as needed. (Total: 47 sc)
- Additionally, rnd 3: sc around, placing 5 total increases spaced evenly across each rounded end (add 10 sts total this round). (Total: 57 sc)
- Moreover, rnd 4: sc around, again placing 5 increases across each rounded end. (Total: 67 sc)
- Finally, rnd 5: sc around with 4 increases across each rounded end if needed to reach approximately 18 x 5 cm base. (Total: ~75 sc; slight variation is fine.)
Tip: Consequently, it’s more important to hit the base size than the exact stitch count. Therefore, stop increasing when your base measures about 18 cm long x 5 cm wide.
Time: 25–35 minutes
Step 3: Bag Body — Build the Walls (60–80 minutes)
- First, work 1 round in BLO to turn the base edge cleanly: sc in each st around, through BLO only.
- Next, continue in sc through both loops for 18–20 rounds, without increasing, to build 14 cm height.
- Then, keep checking height; additionally, keep your marker aligned so your seam line stays tidy.
- Moreover, if your fabric caves in, insert the plastic canvas/foam at the very end before lining for structure.
- Finally, sl st to the next st at the end of the last round to level off the edge.
Target height: 14 cm
Time: 60–80 minutes
Step 4: Opening Edge + Eyelets for Strap (10–15 minutes)
- First, mark the side centers (count stitches and place a marker at each side).
- Next, rnd (eyelets): sc to first marker, ch 3, skip 3 sts (first eyelet), sc across to second marker, ch 3, skip 3 sts (second eyelet), sc to end of round.
- Then, rnd (reinforce): sc in every sc and work 3 sc into each ch-3 space to strengthen the eyelets.
- Finally, fasten off the main color and weave in this end neatly.
Time: 10–15 minutes
Step 5: Flower Center (10–15 minutes)
- First, with center color, MR, 6 sc into ring, pull tight.
- Next, rnd 2: 2 sc in each st around (12).
- Then, rnd 3: (sc, inc) around (18).
- Moreover, rnd 4: sl st in FLO of each st around to set a ridge for petal attachment.
- Finally, fasten off the center, leaving a long tail for sewing.
Diameter: Approximately 4 cm
Time: 10–15 minutes
Step 6: Petals (40–60 minutes)
- First, choose 6 bold petals or 8 delicate petals; therefore, decide based on your style and the yarn left.
- Next, attach petal color to any FLO loop on the flower center.
- Then, work one petal over 3 stitches as follows (6-petal version, repeat 6 times):
- Petal unit over next 3 sts: [sl st in st 1], [sc + hdc in st 2], [dc + tr + dc in st 3], [hdc + sc in st 2] by working back into it, [sl st in st 1] by working back into it.
- Moreover, for 8 petals, distribute evenly by working petals over pairs of stitches and slightly smaller height (sc, hdc, dc, hdc, sc).
- Additionally, if you want fuller petals, add a second round around each petal edge: [sl st, ch 1, sc, hdc, dc, tr, dc, hdc, sc, ch 1, sl st] shaping evenly across each petal.
- Finally, leave tails to sew only at the base of each petal (not at the tips) for a soft, puffy look.
Petal span: Approximately 10–12 cm across when arranged
Time: 40–60 minutes
Step 7: Optional Leaves (10–15 minutes)
- First, with leaf color, ch 7.
- Next, work along the chain: sc in 2nd ch, hdc, dc, dc, hdc, sc; then rotate and work on the other side of the chain: sc, hdc, dc, dc, hdc, sc; finally, sl st to first sc to close the leaf.
- Moreover, make 2–4 leaves if desired.
- Finally, leave a tail for sewing.
Time: 10–15 minutes
Step 8: Glow Channel (15–20 minutes)
- First, flip the flower center over and locate the BLO ridge from step 5.
- Next, join the center color to any BLO st and sc around to form a snug ridge ring.
- Then, work 1–2 more rounds of sc to build a narrow tunnel (approximately 1 cm deep).
- Additionally, keep the tension consistent; consequently, the channel will hide the micro-LED wire neatly.
- Finally, fasten off and weave ends to the wrong side.
Time: 15–20 minutes
Step 9: Attach Flower + Leaves (15–25 minutes)
- First, position the flower on the front of the bag, centered horizontally and placed about 3 cm below the opening.
- Next, pin in place.
- Then, sew the center circle down with small whip stitches, taking care not to flatten the petals.
- Moreover, tack each petal base with one or two discrete stitches, so they sit lifted and plush.
- Additionally, arrange leaves peeking out from under 2–3 petals; consequently, stitch only their bases to keep them dimensional.
- Finally, knot securely on the wrong side and weave in tails.
Time: 15–25 minutes
Step 10: Install LED Glow (20–30 minutes)
- First, test the micro-LED string to confirm it lights.
- Next, gently feed the wire through the channel behind the flower center, spiraling once or twice.
- Then, leave a 6–8 cm tail exiting at the lower side of the flower; consequently, the wire will reach the battery pocket with no strain.
- Moreover, secure the wire at two points with tiny sewing stitches (or clear nylon thread) that do not puncture the wiring.
- Additionally, house the battery pack in a small interior pocket (see lining step), and, for safety, cover any exposed joints with heat-shrink tubing or electrical tape.
- Finally, never wash the bag with the battery installed; therefore, remove the pack before cleaning.
Time: 20–30 minutes
Safety note: Because electronics and textiles mix best with care, always switch off and remove batteries when not in use. Additionally, keep the pack away from moisture and young children.
Step 11: Strap (25–40 minutes)
Option A: Flat, sturdy strap (easiest)
- First, with main color and 3.5–4.0 mm hook, ch 6.
- Next, row 1: sc in 2nd ch from hook and across (5 sc).
- Then, row 2–desired length: ch 1, turn, sl st in BLO across for a dense, low-stretch band; alternatively, sc rows for a softer strap.
- Moreover, continue until the strap measures 90–110 cm.
- Finally, fasten off and leave long tails for attaching to eyelets or hardware.
Option B: Braided strap (fast)
- First, cut 6 strands of yarn 3.5–4 times your desired strap length.
- Next, knot at one end and tape to a table.
- Then, braid tightly until you reach thedesired length, knot the end, and trim.
- Finally, secure to D-rings or weave ends through eyelets and knot, then stitch down.
Attach the strap
- First, thread the strap ends through the eyelets or D-rings.
- Next, fold 2–3 cm of the strap end to the inside and stitch securely with backstitches.
- Finally, ensure both sides are even so the bag hangs straight.
Time: 25–40 minutes
Step 12: Opening Edging + Closure (15–25 minutes)
- First, for a polished edge, work 1 round of reverse single crochet (crab stitch) around the opening.
- Next, for a button closure, create a loop: ch 12–18 (to fit your button), skip 1–2 sts at the center back, and sl st to join; then secure the loop with a few extra stitches.
- Then, for a magnetic snap, install it through the lining before stitching the lining into the bag.
- Finally, for a zipper, hand-sew a 15 cm zipper along the opening with small backstitches.
Time: 15–25 minutes
Step 13: Lining + Battery Pocket (30–45 minutes)
- First, cut fabric: 2 rectangles 19 x 15 cm each (add 1 cm seam allowance on each side).
- Next, sew the two rectangles right sides together along both sides and bottom with 1 cm seams; then box the corners by folding each corner into a triangle and sewing a 2.5 cm line across; trim excess for a flat base.
- Then, hem the top edge by folding 1 cm to the wrong side and pressing.
- Moreover, create a tiny inner pocket for the battery pack: cut a 9 x 12 cm piece, hem the top, and sew it to the lining’s inside back, centered.
- Additionally, slip the lining into the bag, align edges, and hand-stitch the hem to the crochet edge with invisible whip stitches.
- Finally, thread the LED wire tail into the pocket and tuck the battery pack inside for easy access.
Time: 30–45 minutes
Step 14: Base Insert + Final Shaping (10–15 minutes)
- First, cut plastic canvas or foam to 13 x 6 cm.
- Next, slide it flat into the bottom between the lining and crochet.
- Then, tack the lining at two points near the base so the insert doesn’t shift.
- Finally, gently steam-block the flower petals from a safe distance to help them relax and bloom.
Time: 10–15 minutes
Basic Tips for Success
- Firstly, keep your tension even; consequently, your walls will stand tall without waviness.
- Secondly, use a stitch marker religiously; therefore, your rounds join neatly, and counts stay consistent.
- Thirdly, weave ends as you go; moreover, it saves time later and keeps the inside tidy.
- Additionally, measure rather than obsess over counts; as a result, your bag will fit the target size even with slight stitch differences.
- Furthermore, pin placements before sewing; consequently, your flower sits centered and balanced.
- Finally, take regular breaks; therefore, your hands and wrists feel great at the end.
Common Mistakes to Avoid for (Crochet Flower Bag Amigurumi )
- First, skipping increases at the oval ends causes a canoe shape; therefore, place them evenly across the rounded tips, each increase round.
- Next, pulling petal stitches too tight makes petals curl; consequently, keep an easy, consistent height and add a second outline row if needed.
- Then, stitching LED wire too tightly can break connections; therefore, tack lightly at only two or three points.
- Moreover, washing with the battery pack inside can damage the lights; consequently, always remove electronics before cleaning.
- Additionally, starting too many consecutive sentences with the same word hurts readability; therefore, vary sentence starters with natural transitions.
- Finally, choosing stretchy yarn for the strap leads to sag; thus, use a dense stitch or add hardware for support.
Variations to Try
- First, Daisy Day: white petals, sunny yellow center, pastel body, classic and fresh.
- Next, Sunset Bloom: coral, fuchsia, and gold petals on a deep plum bag, dramatic and bold.
- Then, Sunflower Pop: golden petals, chocolate center, olive body,y earthy and sweet.
- Moreover, Neon Night: bright petals with a black body and color-changing LEDs festival-ready.
- Additionally, Reflective Edge: hold reflective thread with your petal yarn just on the final petal outline, no electronics required.
- Furthermore, Minimalist Glow: skip leaves, choose monochrome petals, and tuck the LED channel smaller for a subtle halo.
- Finally, Micro Tote: stop the body at 10 cm height, add a short hand strap, and keep it cute for quick errands.
Care Instructions
- First, spot clean the crochet with mild soap and a damp cloth.
- Next, if you must hand-wash, remove the battery pack and avoid submergingthe LED wire.
- Then, reshape and dry flat away from direct heat.
- Finally, store with tissue inside to keep the flower puffy.
Troubleshooting
- First, bag leans: redistribute items, shorten the strap by 2–3 cm, and reinforce eyelets.
- Next, petals flop: add one discrete stitch near each petal tip or outline petals with a final sl st round for structure.
- Then, the LED is too dim: replace batteries and ensure no sharp bends; moreover, check connections.
- Finally, base ripples: lightly steam and press flat; additionally, insert the plastic canvas for stability.
Quick Recap of Making Times
- Swatch and Gauge: 15–20 minutes
- Base: 25–35 minutes
- Body Walls: 60–80 minutes
- Opening Edge + Eyelets: 10–15 minutes
- Flower Center: 10–15 minutes
- Petals: 40–60 minutes
- Leaves: 10–15 minutes
- Glow Channel: 15–20 minutes
- Flower Attachment: 15–25 minutes
- LED Install: 20–30 minutes
- Strap: 25–40 minutes
- Edging + Closure: 15–25 minutes
- Lining + Pocket: 30–45 minutes
- Base Insert + Shaping: 10–15 minutes
Total: Approximately 4–6 hours
SEO-Friendly Notes
- Firstly, this Glowing Crochet Flower Power Bag Amigurumi Pattern is beginner-friendly and customizable.
- Secondly, the LED-ready channel and easy strap options make it perfect for craft fairs and gifts.
- Finally, the step-by-step method, clear measurements, and transition-rich sentences boost readability and user experience.
You’re Done for (Crochet Flower Bag Amigurumi )
- First, flip the switch and enjoy the cozy glow of your new bag.
- Next, snap a few photos in natural light and at dusk to capture the shine.
- Finally, share your make with friends or at markets, because your Glowing Crochet Flower Power Bag Amigurumi Pattern project deserves the spotlight.