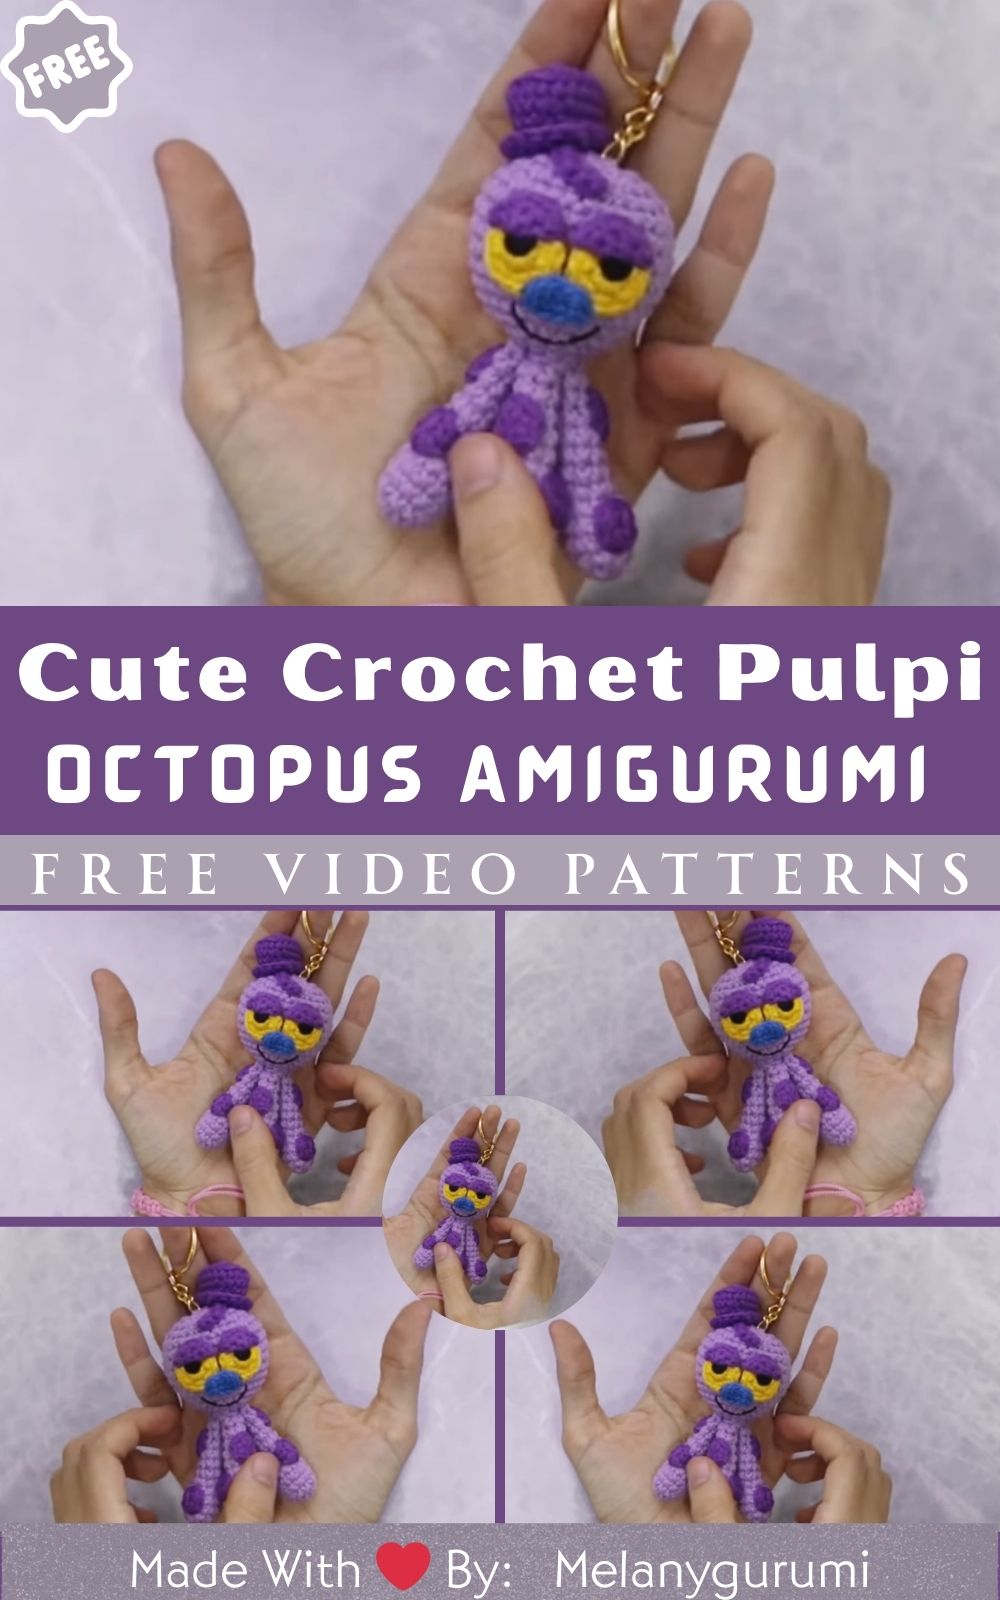
Mini Cute Crochet Pulpi Octopus Amigurumi Pattern
Make a mini Pulpi octopus amigurumi keychain, adorable, beginner-friendly, and fast. Shaped tentacles, chubby head, playful accessories, and bold eyes create irresistible charm for bags, gifts, and collections.
Mini Cute Crochet Pulpi Octopus Amigurumi Pattern introduces a pocket-size octopus with a chubby head, neat tentacles, and playful extras like a jaunty hat, big eye, and tiny freckles. Stitched in simple rounds with straightforward increases and decreases, it suits beginners and anyone craving a quick, satisfying make. Customize colors, add felt details, or embroider a smile to match any style. Finished Pulpi is perfect as a keychain, bag charm, or desk buddy, and it also makes delightful party favors or small gifts for friends who love adorable accessories.
Use it as a tiny toy, a cute decor accent, a desk buddy, or a gift for someone who appreciates handmade treasures. It makes wonderful party favors, stocking stuffers, and a fun addition to crochet collections.
Materials Needed
You’ll only need a few basics to make your Pulpi.
- Yarn: Lightweight cotton or smooth acrylic, DK or worsted weight. Approximately 20–40 yards of
- main color plus a few yards for accents.
- Crochet hook: Size 2.75–3.5 mm (C–E), matched to your yarn and tension.
- Stuffing: Polyester fiberfill for a firm, round shape.
- Safety eyes: 6–8 mm, or embroidery thread to stitch the eyes.
- Tapestry/yarn needle: For sewing parts and weaving in ends.
- Scissors: Small, sharp pair for clean snips.
- Stitch markers: To mark the first stitch of each round.
- Optional: Keyring and jump ring or lobster clasp, felt circles for blush, embroidery thread for the mouth, small ribbon or bow, tiny hat or accessory.
For a neat, defined look, choose a smooth yarn with minimal halo. Cotton works beautifully for amigurumi because it holds stitches crisply and shows shaping well. If you prefer a softer, plush finish, use velvet or chenille yarn with a smaller hook for tighter stitches—but keep in mind the piece will be slightly larger and may need embroidered eyes, since safety eyes can slip between plush fibers.
Color-wise, pastels and brights both shine on this project. Try coral, mint, lavender, sunflower yellow, ocean blue, or a classic lilac. For a themed set, go for ombré shades of the same color, or make a rainbow lineup to gift as a bundle.
Level of Difficulty
This pattern is beginner-friendly. The Pulpi is made mostly in continuous rounds with simple increases and decreases. There’s minimal sewing, and the small size makes it a fast, confidence-boosting project.
You’ll use: magic ring (or chain loop), single crochet, increases, decreases (invisible decrease recommended), slip stitch, working in the round, and basic sewing for attaching tentacles and details. If any of those are new to you, take them step by step. This is a great place to learn. The small scale means you’ll see progress quickly and can easily remake any part without using much yarn.
Step-by-Step Overview
1. Starting the Base or Body
Begin with a magic ring and single crochet a small set of stitches into it, then close the ring tightly. Work in a spiral, increasing each round evenly to form a smooth, flat circle that will become the top of the head/body. Use a stitch marker to mark the first stitch of each round. Keep your tension snug; amigurumi looks best with firm stitches that don’t show stuffing through the gaps.
Tip: If your circle starts to wave or ruffle, you may be increasing too quickly. If it cups too much, you might need one more increase round. A gentle flatten and check after each round helps keep the shape on track.
2. Shaping the Main Piece
Once you’ve reached your target circumference (think palm-sized for a keychain, slightly bigger if you want a handheld toy), work several rounds straight without increasing. This creates the sides of the head and gives Pulpi that cute, rounded silhouette. At this stage, it helps to pause and check that both sides look even.
Place safety eyes on the face before decreasing to close, spacing them evenly and testing positions for personality close together reads extra cute; slightly wider gives a calmer look. Embroider a tiny smile if you like. Add a small amount of stuffing as you go, gently shaping with your fingers so it stays round and firm but not overstuffed.
3. Making the Tentacles
There are a few easy ways to make Pulpi’s tentacles:
- Curly method: Make a short chain (for example, ch 12–16), then work multiple stitches into each
- chain (like 2 sc or 3 sc per chain) so the strip curls naturally. Repeat for eight tentacles.
- Short nubs: Crochet tiny ovals or small tubes worked in the round. These give a stubby, super-cute look with a little bounce.
- Loop fringe: Create a ring of chain loops around the bottom edge and secure them in place. This is the fastest approach and keeps sewing minimal.
Aim for eight tentacles and keep them roughly the same length. If one turns out longer or tighter than the others, adjust stitch counts or try a different hook size until they match. Laying them out before attaching helps you spot symmetry issues early.
4. Assembling and Joining
Attach the tentacles evenly around the underside of the head. Divide the circle into eight sections and pin or lightly baste each tentacle in place so the spacing is consistent. Sew with small, secure stitches and weave in ends neatly to keep the underside clean. If your piece curves slightly, that is normal; you can adjust the shaping with gentle stretching and stuffing.
Before fully closing the bottom, add more stuffing or shift it around to keep the head round and balanced. Finish with a round or two of decreases until the opening is closed, pulling the last threads tight and hiding the knot inside.
5. Adding Details and Finishing Touches
Embroider a smile, add freckles or blush dots with a few stitches or tiny felt circles, and consider a small accessory—like a bow on one side, a jaunty mini hat, or a collar line around the neck area. If you’re making a keychain, attach a jump ring to the top with strong thread, or stitch a small loop onto the crown and slide a keyring through.
Steam blocking is optional, but a quick waft of steam (not direct contact) can help the fabric settle and smooth out tiny bumps. Trim any stray fibers and check that all ends are woven in securely.
6. Optional Mini Accessories
This design looks adorable with small add-ons:
- Sailor hat or beret: Crochet a flat circle and a small ridge, then stitch it to the head.
- Tiny heart: Make a tiny heart and sew it to the body for a Valentine’s theme.
- Detachable collar: A row of chains around the neck adds contrast and helps define the head.
These extras help you personalize your Crochet Pulpi Octopus Amigurumi without complicating the build.
Tips for Best Results
A few small habits make a big difference when working on tiny amigurumi.
- Keep tension firm and consistent so stuffing won’t peek through.
- Use a stitch marker to track the start of each round; move it up every round.
- Stuff gradually in small tufts and shape with your fingers as you go to avoid lumps.
- Place safety eyes before closing the head; test positions for the expression you want.
- If stitches look loose or gappy, switch to a smaller hook. If the fabric feels too stiff, go one size up.
- For curly tentacles, avoid over-twisting the yarn while you work; let the curl form naturally with your stitch increases.
- Sew parts on with matching yarn and small, invisible stitches; check placement before tightening.
- Take short breaks to relax your hands—tight amigurumi stitches can be demanding.
- Weave in ends securely and hide knots inside the body for a clean underside.
- If using plush yarn, consider embroidering eyes for safety and better grip.
Customization Ideas
Color is where this little Pulpi shines. Go classic oceanic with teal, seafoam, and indigo, or try cheerful sorbet shades like peach, lemon, and strawberry. For seasonal themes, make a pumpkin-orange Pulpi with a green bow, a wintery icy-blue one with silver embroidery, or a Valentine’s version with a tiny heart held in its tentacles.
Yarn choice changes the look dramatically. Cotton delivers crisp stitches and defined tentacles, great for clean lines and a modern finish. Acrylic gives a bit more bounce and is budget-friendly and easy to wash. Velvet or chenille makes an extra-cuddly Pulpi with plush texture—just keep the hook slightly smaller than usual and consider embroidered eyes.
Adjust size by switching yarn weights and hook sizes. Use fingering or sport yarn with a 2.25–2.75 mm hook for a super mini keychain. Choose worsted weight with a 3.5–4 mm hook for a hand-sized toy. The shaping steps stay the same; you’ll just work fewer or more rounds depending on your gauge and the look you want.
Add personality with small details: a bow tie, flower appliqué, collar stripe, or embroidered freckles. Stitch initials on the underside, add a mini star or shell, or use a contrasting color for the last round of the head to create a “cap” effect. Attach a keyring or lobster clasp at the top if you want it functional; leave it plain for a cute shelf sitter.
Conclusion
This Easy Mini Cute Crochet Pulpi Octopus Amigurumi Pattern Toy is the kind of project that reminds you why picking up a hook feels so good. It’s quick to make, gentle on your yarn stash, and full of personality; even small changes in eye placement or color make a big difference in the final expression.